
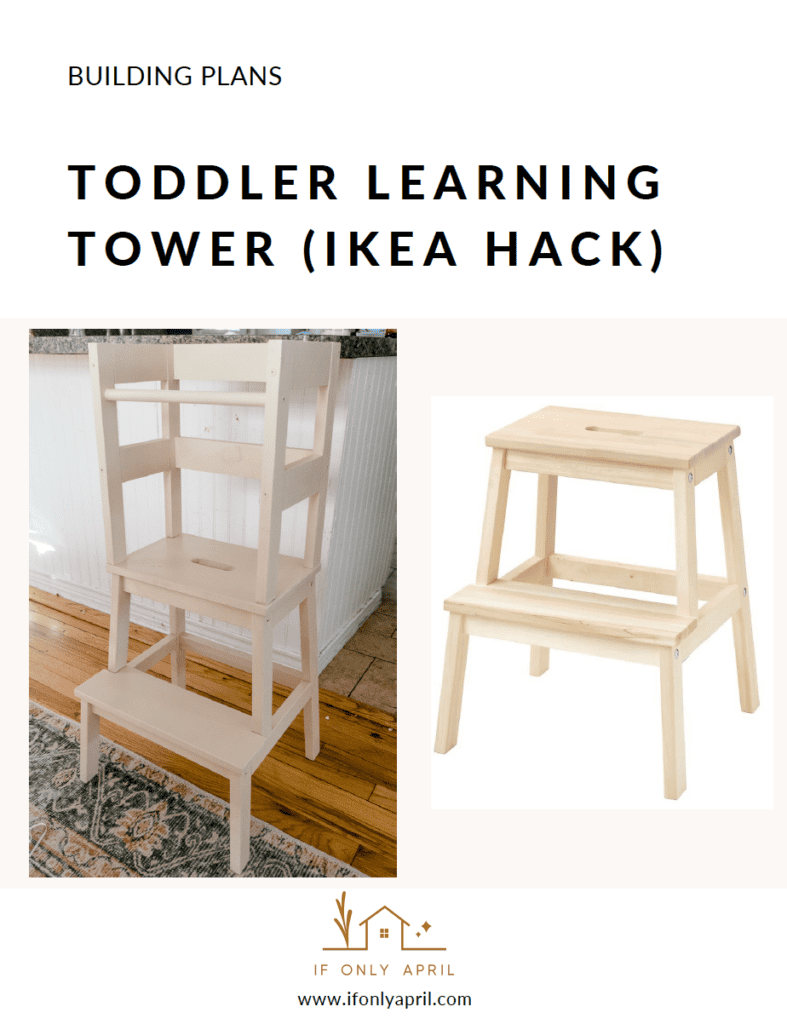
I wanted to make a toddler learning tower for my kids. I wanted to do it twice. When my kids were the age to fall off the chairs like there was no tomorrow. I got carried away with different projects and never made one. A friend of mine asked me to make a toddler learning tower for her daughter.
And I said, absolutely yes!
So here is an IKEA hack that anyone can do! I was thinking of using a Kreg jig for this project but realized that not all of you have it. So I went a different route and made this toddler learning tower with fewer tools possible.
You pretty much only need a drill and a saw. Any kind of saw that makes straight cuts.
Or you can always ask Home Depot to cut it for you. There are not that many cuts, and I'm sure they'd do it for free. They usually charge 50 cents after the first two cuts, but even back in the days when I didn't have a saw at home, no one charged me. So put a big smile on your face, be nice, and I'm sure kind guys at Home Depot won't say no to you.
So this is a very beginner-friendly project, and I'll walk you step by step on how to make this toddler learning tower with an IKEA step stool.
You can purchase the step-by-step 3-D plan in a PDF file for a small fee here.
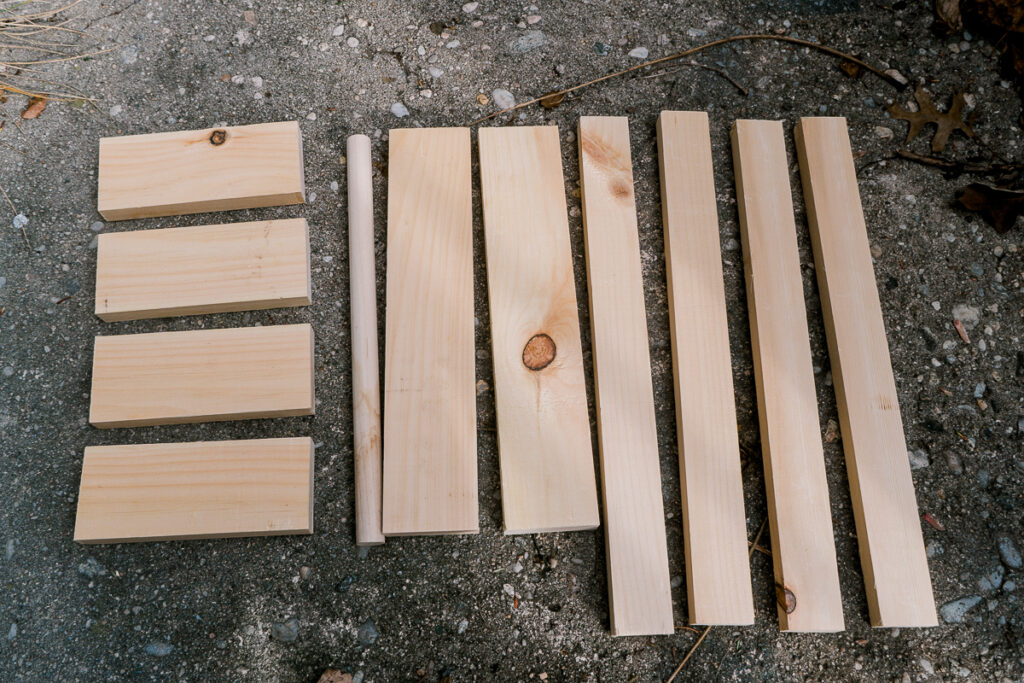
Materials
- 1x2"x6'
- 1x3"x6'
- ¾" dowel (pick the shortest you can find)
- 2 ½" screws
- Paint
- IKEA step stool (found it also on Amazon)
Tools
- Power drill
- Countersink bit
- Miter saw (or any saw that makes straight cuts)
- Sander (or a sander block, no need to go fancy here)
Instructions
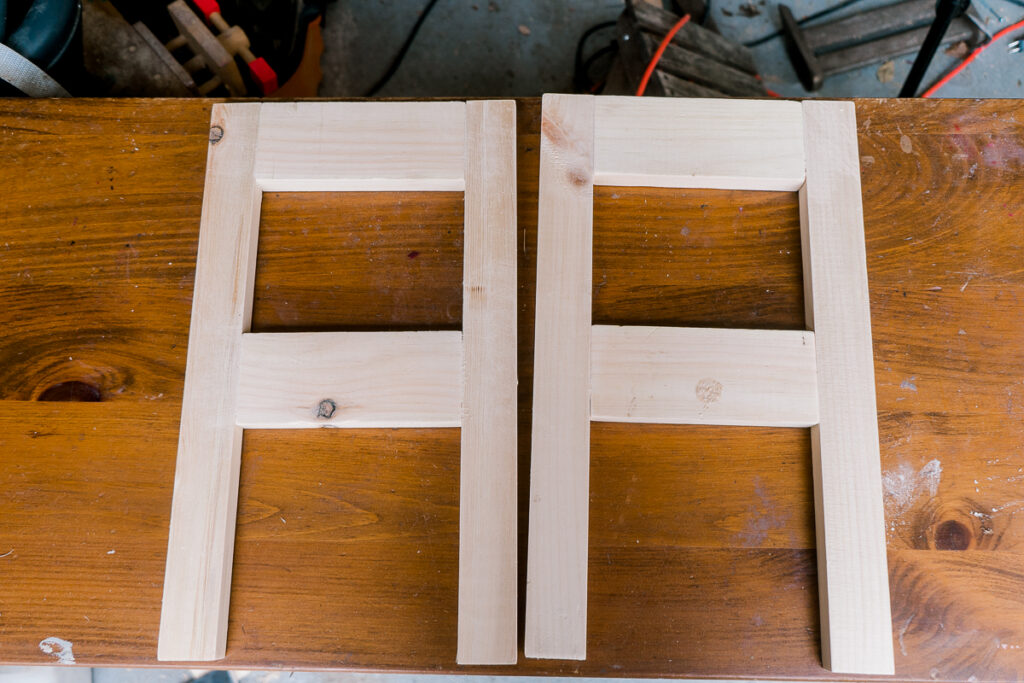
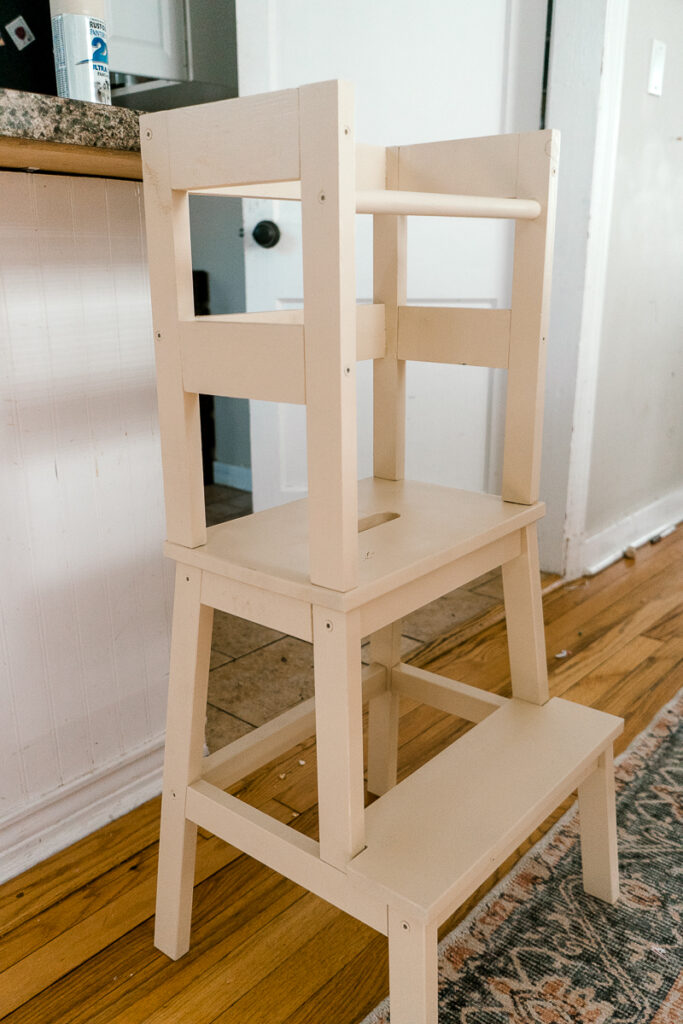
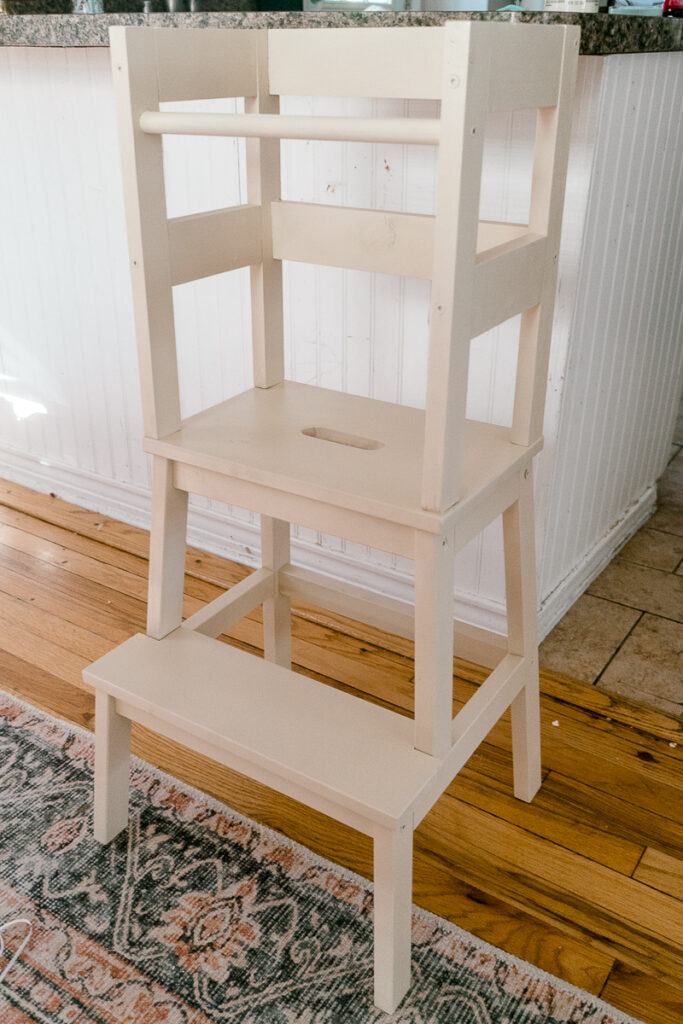
Step 1. Assemble the sides
After you make the cuts on the wood. Either with your miter saw or help from Home Depot guys 😉, assemble the sides first.
To assemble one side, take two 1x2x15" and connect them with two 1x3x6" boards. Use a right clamp (the corner clamp would work best, but I didn't have it, so I used my long one) and wood glue.
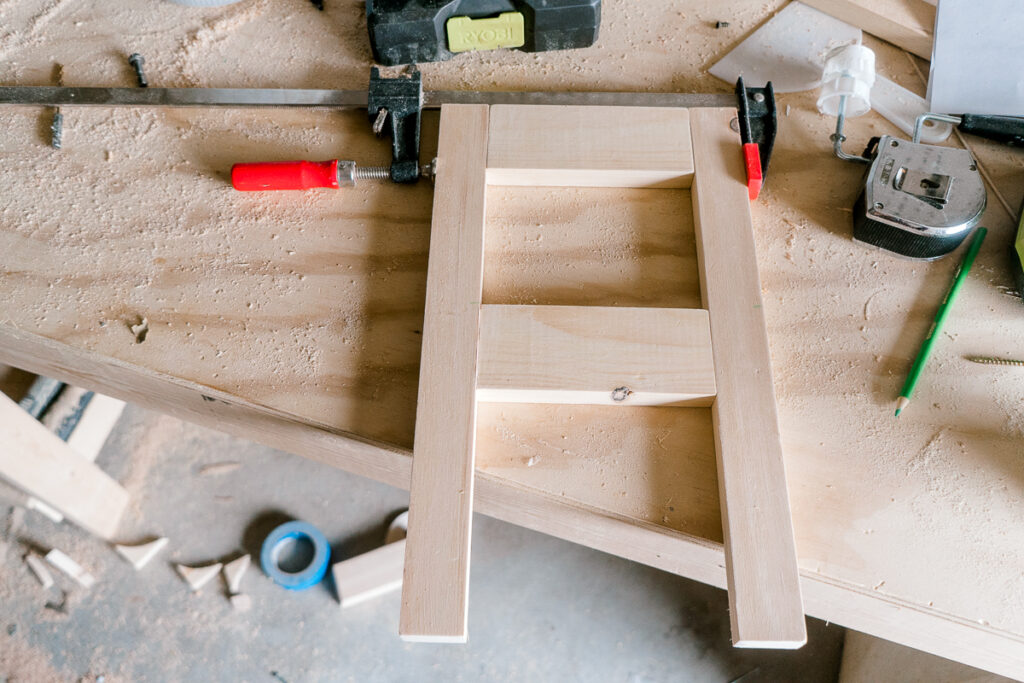
Make pilot holes first. They'll prevent the wood from chipping, and a countersink bit that would make a nice placement for screws to go to. Then drive a 2 ½" screw in.
I already told you on my YouTube channel that I love these star head screws. They are so much more durable and have less chance of going off-grid.
Make another side with the same method.
PIN IT FOR LATER

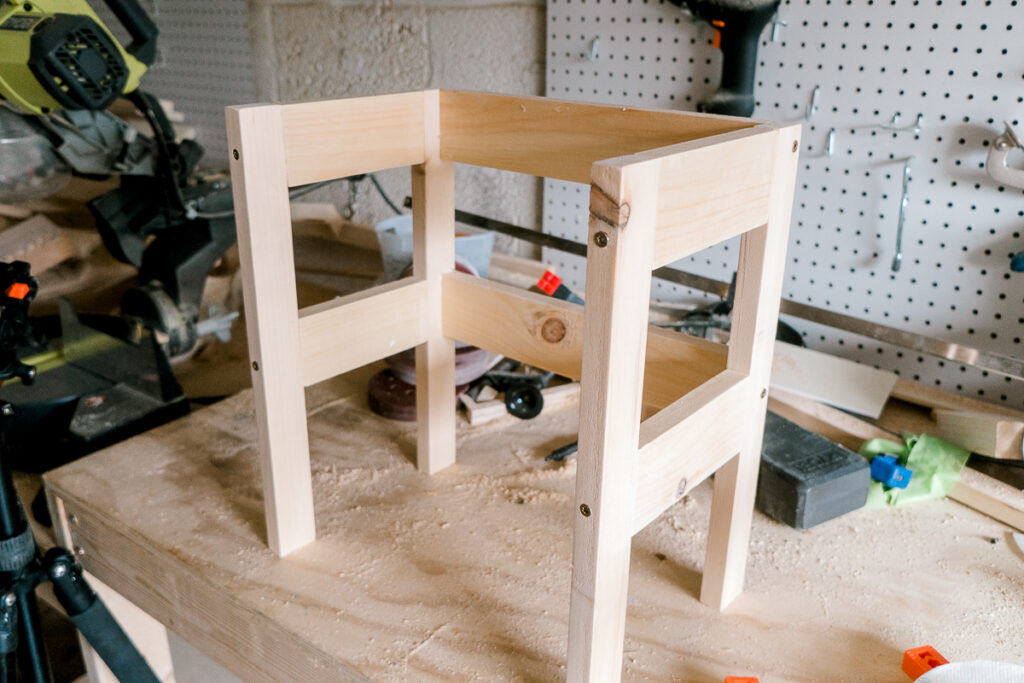
Step 2. Connect the sides
Use a 12 ½" board to connect the sides. Make the same steps as you did to assemble the sides - use wood glue, screws, countersink bit and check for square.
When one side is assembled, attach a dowel on the front.
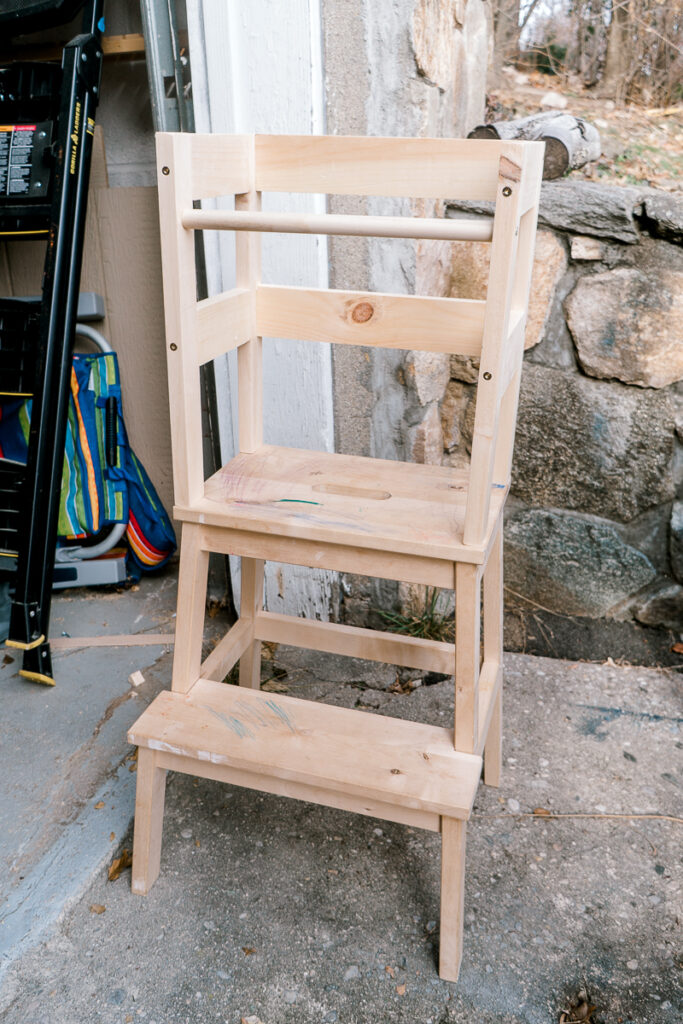
Step 3. Connect the tower to the IKEA stool
I already had a chair assembled, so I had to turn the top part off. If you are using a brand new IKEA stool, assemble it till the last step.
Take the top of the stool and attach the tower to it. Then flip it over, and attach the top of the stool to the tower using 2" screws.
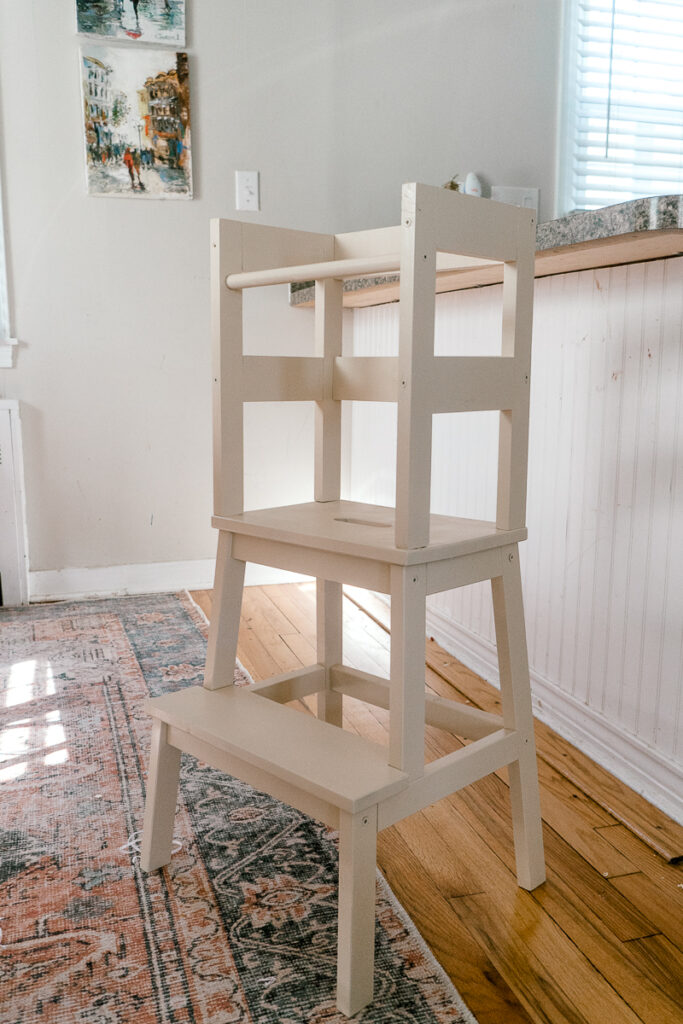
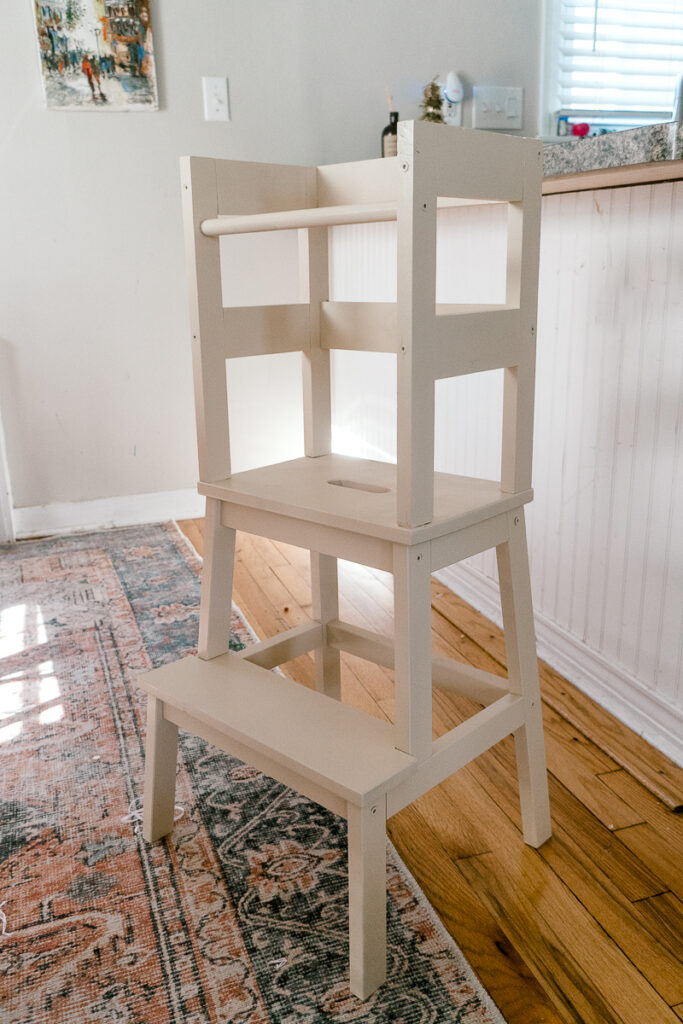
Step 4. Finish as desired
I decided to paint it with this Ivory silk color by Rustoleum. I didn't want to waste time painting by hand, so I used spray paint.
The first layer I applied was a primer. When it dried, I used one can of colored paint, and the toddler learning tower was ready!

Didn't I tell you it was easy?
And doesn't it look fabulous? I'm sure there is one little girl (and her mom) who are so happy right now!
I plan to add a PDF for this step stool to my building plans shop. Subscribe to the newsletter to get notifications when it's live!
xoxo,
April


Jo says
Hi, is a PDF available for this yet??
April says
Hi! Here is a link Ekaterina shared Montessori toddler learning tower plan (IKEA hack) with you https://if-only-april.myshopify.com/products/montessori-toddler-learning-tower-plan-ikea-hack
Deedee says
The materials listed don't seem to be correct, am I missing something?
April says
Hi! Thanks for stopping by on my blog - what doesn't seem correct?
Mama says
I mean this coming from a good place. It looks nice and I think it would help kids from falling off the way they would a chair. But is the base sturdy enough that they wouldn’t topple over if they leaned on/over the side?
April says
It's very sturdy