
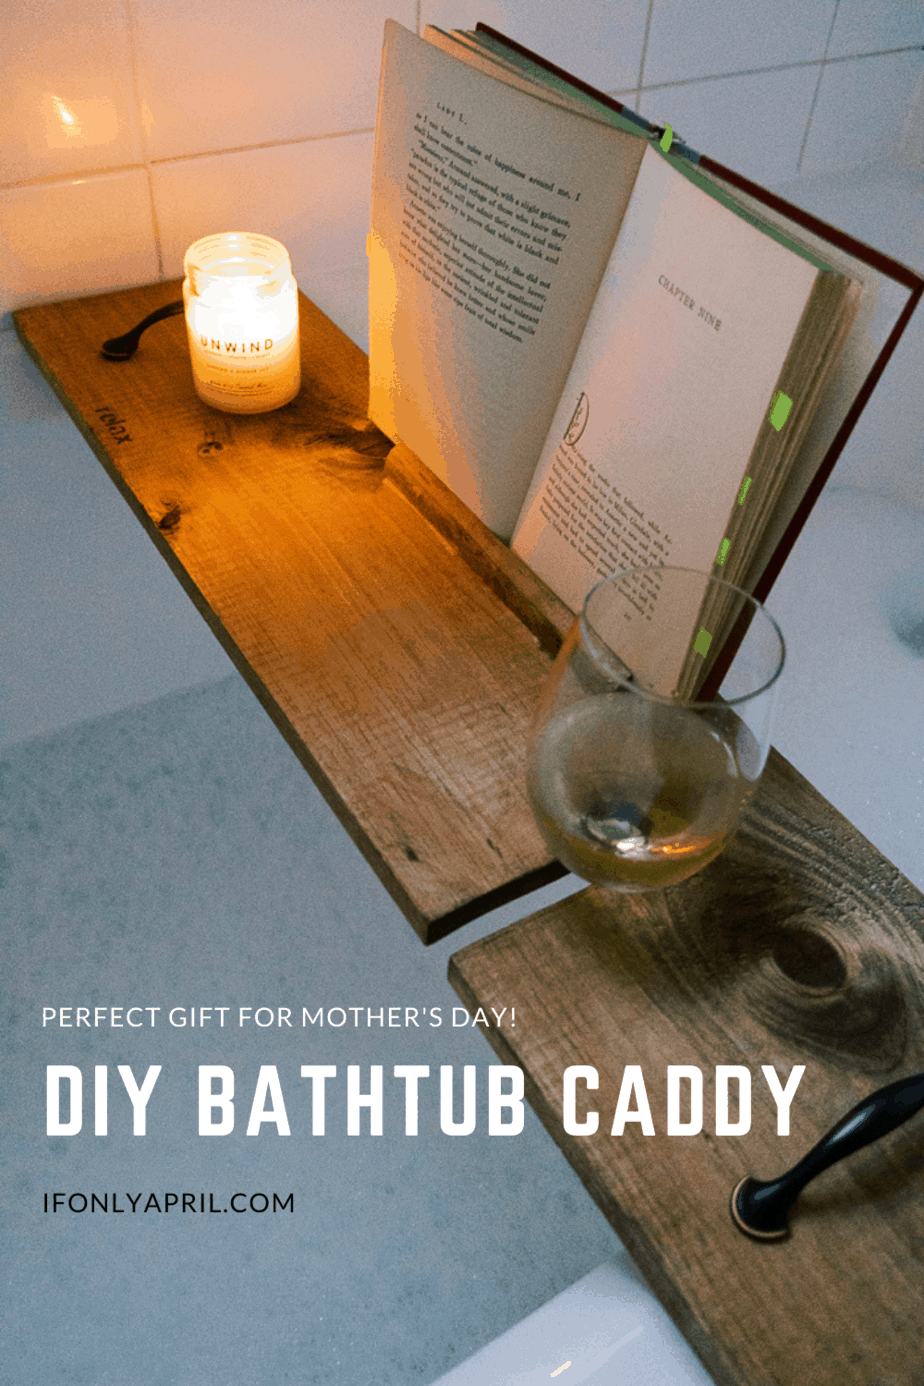
Since having kids, one of my favorite things to do is to soak in the bathtub...in silence haha Can you blame me? 😀 That being said, last Christmas I wanted to bring my bathtub experience to a whole new level so while I was making handmade gifts for my friends and family, I made for myself a simple DIY bathtub caddy. We all need to take care of ourselves, right?
It could be a great present for any mom out there and not only suitable for Christmas but also could be a great handmade gift for Mother’s Day.

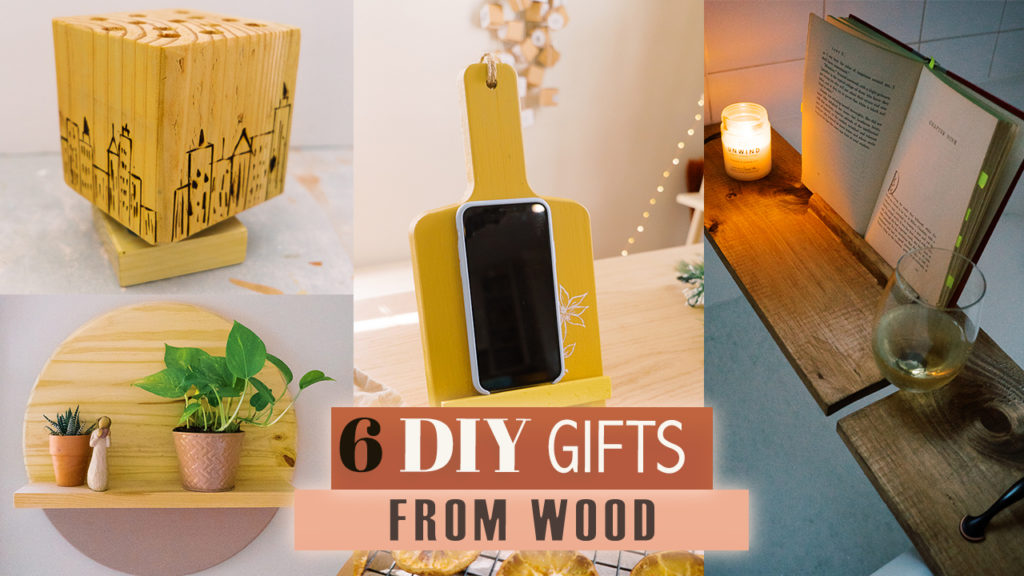
Watch a video version of how to make this bathtub tray, along with other 6 fun gift ideas from wood.
Materials
- 1x8” (length will depend on the width of your bathtub)
- Scrap wood 1x2"
- Scrap piece of molding
- 2 galvanized handles
Tools
- Jigsaw
- Any type of saw to make straight cuts (miter saw or circular saw)
- Drill
- 1" drill bit
- Wood glue
How to make a bathtub caddy :
Measuring the right dimensions
First of all, you need to measure the width of your bathtub, basically how wide you want the tray to be. All the tubs are different and the length will vary case by case.
Then measure the length from one side of the bathtub to another determining where the "stoppers" will go.

Making the base
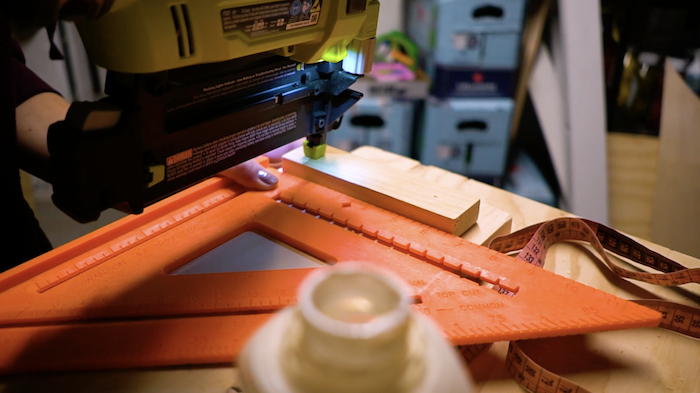
[1.] When you know all the dimensions and the rights length for the DIY bathtub caddy, cut your 1x8" to length.
You can use a miter or circular saw for it or even use one of those boxes that allow you to cut wood by hand! This DIY bathtub tray could be done with very limited tools.
[2.] Using 1x2s, make two boards, approximately 7" each. They will act as stoppers on the bottom of the caddy.
Unless you have a freestanding bathtub, if you don't have these "stoppers" the caddy will fall down. The "stoppers" will ensure that caddy won't slip off the narrow edge of the bathtub from the wall side.
[3.] Measure the distance between sides of the bathtub from inside. It could be easier to take your project there and mark exactly where you'd need stoppers to go.
[4.] Use wood glue and screws and attach the stoppers from the bottom.
[5.] Attach the handles, make sure they are not interfering with the stoppers on the bottom.
Save it to make later...
Adding functionality to your bathtub caddy

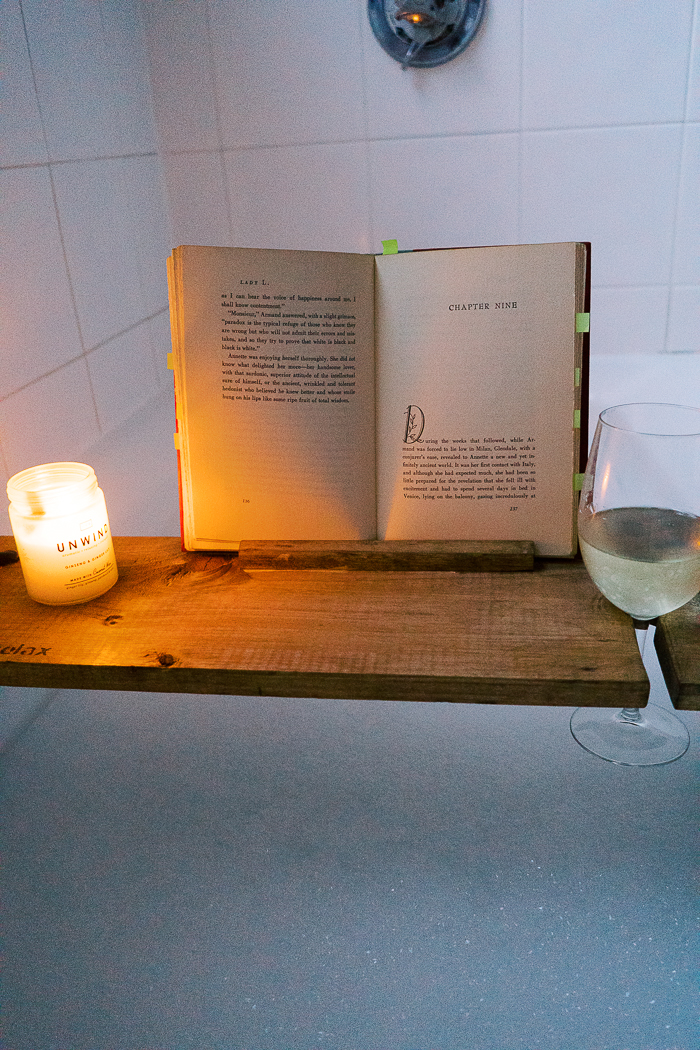
 Wine glass holder.
 Wine glass holder.
To make a place for a wine glass, start with marking the perfect placing. Make sure to keep in mind where the book stand will be and other things. It's best to lay it all out before cutting.
Take 1" drill bit and drill a hole for the wine glass. Use a sacrificial board to prevent the wood from chipping. You can also use masking tape to prevent the wood from splitting.
Using a jigsaw, cut out the path for the wine glass.
Book holder/ iPad holder

This is so easy to make and will elevate your DIY bathtub caddy to a whole new level!
To make a book holder, you'll need a 1x2" and a piece of molding. Cut it to the right size, add wood glue and screw it from the bottom to the main board. That's simple as that. You are good to go.
Decorating your bathtub cabby
The potential for decorating is endless. You could do so many things with it.
I chose to play with pyrography and added a cute wood-burning element to it.
Do you see that cute little arrow there? 😁 and the word "relax"😁 I felt it's widely appropriate for the bathtub caddy.
You can also stain it with the desired color, just make sure to apply a few coats of Poly for protection since it will be used in close contact with water.
I put at least 4-5 coats to protect the wood from rotting.
Didn't I tell you that this project is soooo easy! Pick up some simple tools and surprise a lady in your life with some well-deserved spa experience ☺️

If you'd rather buy:
I get it, not always have enough time to make something. If you'd prefer to buy, I found you similar options here.
xoxo,
April


Leave a Reply