
I've been looking at the mess in our utensils drawer for over a month, and till today, I decided to give it a quick update. It's such an easy DIY project and making a custom DIY utensils drawer organizer wouldn't take you more than a few hours. I promise!
Mine didn't come out perfectly, and there is plenty of more step-by-step tutorials on how to make one, but I LOVE this transformation. It's so simple yet so impactful.
And it only cost me about $15 in materials (that's counting crazy prices on wood that we've got recently).
It also requires very limited tools, which is perfect for a beginner or someone who doesn't have a professional workshop.
Related small kitchen DIYs:
- Anthropologie inspired charcuterie board
- DIY wooden produce storage rack
- Foldable cookbook stand (great gift and also an IKEA hack)
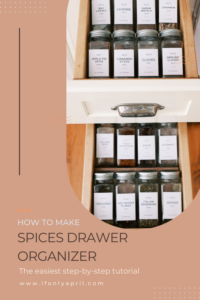
- Spices drawer organizer
BEFORE

AFTER

So let's start from the beginning. What will you need to make this easy kitchen utensils drawer?
Materials
- (2) - ½x3x48" poplar boards (they are also called hobby boards, if I'm not mistaken)
- (1) - ½x2x48"poplar board
- Wood glue
- 1 ½" Screws
- Cutting board oil
Tools:
How to make a DIY utensils drawer organizer
Step 1 -measure your drawer and cut the outer boards
The size of my drawer probably won't matter to you since that's the whole point of customizing your utensils drawer - it's different in each household. But for the sake of example, I'll explain how I measured and what I did.
My drawer measures 13x19". Which means I cut two ½" boards at 13" and two boards at 18". (Since we will be attaching them to the shorter sides)

Since it's such a tight space, use this ruler trick - place your ruler inside, and instead of folding the ruler all the way, use the measurements on the ruler's case to determine the correct length.
Step 2 - assemble borders (outer box)
I used glue and screws to assemble the outer box, but you could also use a nail gun or just a hammer and nails.
The main point here is to make sure the outer box is square. To get that, I clamped the longer side to the shorter one in a square position.
Here is an example.

When you have done, make sure to dry fit to ensure the perfect fit inside the drawer.
PIN FOR LATER

Step 3 - determine the placement of utensils for better organization
While the drawer was inside, I played around with the placement of our utensils.
I'm not gonna lie; during the process, I realized that I don't even need most of them regularly, like a baking brush. I also discovered that I have 3 (!!!) ice cream scoops, and I never used even one. What's that about?
So I cleaned the drawer, kept only the ones that we use all the time, and put the rest in a different "not so much used" drawer.
This is a great step to determine the best placement of your utensils to maximize the space. And this is why DIYing this organizer is so great.
So do what would work for you!

Step 4 - cut and assemble dividers.

After I decided what would go, what would stay, and where it would stay, I took my narrower boards and cut them to length.
After that was done, it was time to assemble. I've seen a lot of different ways to do it, but I decided to go the easy route and just glue them together.
So I used wood glue, speed square, and clamps to hold it all together and just attached them this way.
Let it dry for at least 12 hours.

Step 5 - finish DIY wood utensils drawer organizer as desired.
I thought about painting them at first but had my reservations.
First, it will be close to what I put in my mouth basically, and second, I'm not sure if the paint would hold up with constant banging against it.
Let's call it "wear and tear," lol
So I lightly sanded this DIY wood utensils drawer organizer with 220 grit paper and applied cutting board oil that I had leftover from previous projects like this gorgeous Antrhopologie-inspired charcuterie board I made a few years ago.


What do you think? Are you inspired to tackle your disorganized utensils drawer?
Watch me make this utensils organizer along with spices organizer on my Channel

If you'd rather buy, there are a lot of options on Amazon, like this cool one, but would it give you as much satisfaction?;)
xoxo,
April


Leave a Reply