
 HOW TO MAKE A CHARCUTERIE BOARD
 HOW TO MAKE A CHARCUTERIE BOARD
If you are comfortable with using some tools, the DIY charcuterie board makes a great gift, especially for someone who loves to entertain.
It was a regular Sunday when I was scrolling through new arrivals of the Anthropologie store. So many gorgeous things and inspiration! So costly at the same time!! I saw one charcuterie board and fell in love! That's when I knew that I'm going to make a DIY version of Anthropologie fancy cutting board!
And hey, it only cost me $5 so I can't complain.
A lot of things went wrong during this project, and if you want to see the process of me making it, you can watch this video on my YouTube channel, where I take on a challenge to make 4 DIY projects inspired by Anthropologie.
Few words about wood that you can use for cutting boards. After my research, I've learned that the best wood for the boards is maple and dark walnut because they are the least porous ones. Pine is the worst and poplar is acceptable. I had a poplar board sitting in my garage, so I thought it would be perfect. Although, if I was to choose, I'd choose dark walnut. Maybe that's what I'll use for my next board.
As of tools, the best one for this project would be a jigsaw, which I didn't have, so I had to experiment.
I first tried with the scroll saw. A much as I love the scroll saw that I have and have done a few projects already, but I didn't excel it yet. (I need so much more practice!) Plus, the board was too long to make it on the scroll saw.
I tried a circular saw but with no luck.
My last resort was the new router that I didn't use before and I decided to give it a try.
It turned out, well, more rustic than I thought it would (that's the nice way to put it haha). I didn't get a hang of my router yet, that's for sure!
So if you have a jigsaw, I'd use that!

Cost: $5
Time spent: 1 hour (could be done in so much less time)
Level: Intermediate (only because it requires some skill to cut curves)

If you'd like to see a video tutorial, WATCH IT HERE
Materials:
- poplar board (or any other wood)
- Cutting board oil, I like this one
Instructions

STEP 1:
Prep your wood. Cut the board to length and draw on it an outline of how you want your board to look like.
STEP 2.
Using your router, cut an outline, halfway deep into the wood. Then go again at it and cut it through.
STEP 3.
For the handles, drill a few holes and cut it out.
STEP 4.
Sand it, in the grain direction from all the sides till it smooth.
STEP 5.
Finish it with special food-grade oil. I used this one.
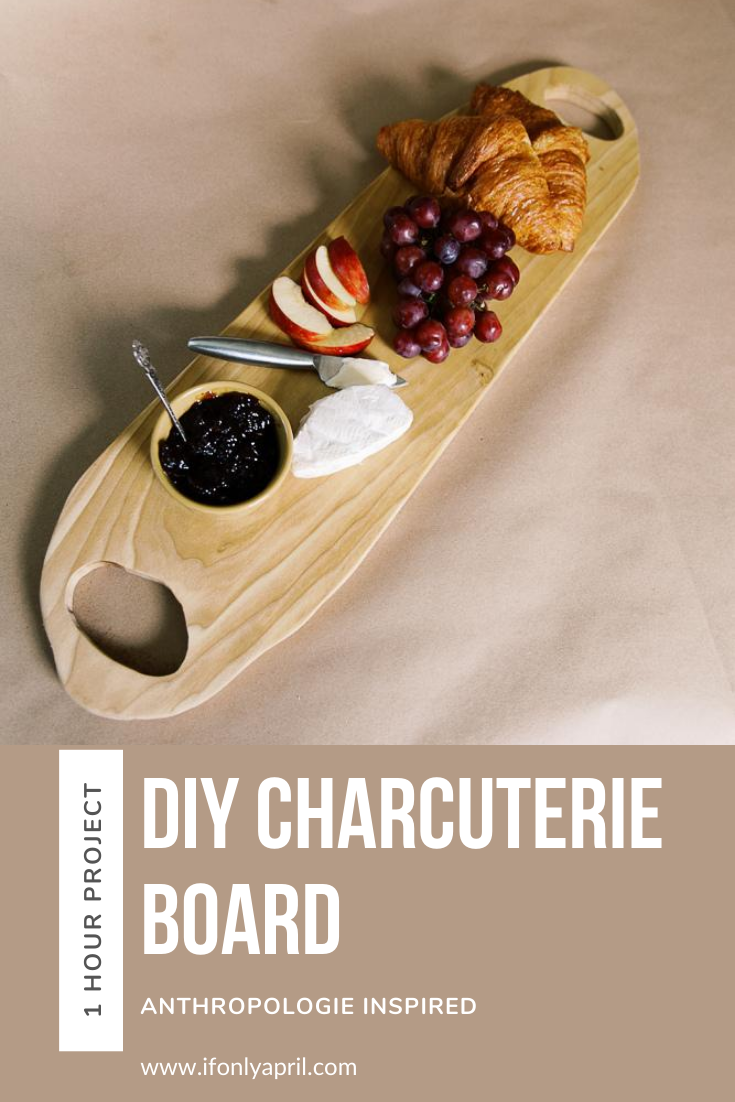
You know, maybe it's not perfect on the edges, but I love it!! This is not the look I was going for but oh well, you don't have to tell ;D
I'd say it makes one perfect rustic DIY charcuterie board!
DON'T FORGET TO PIN FOR LATER>>>>>>>>

IF YOU LIKE THIS PROJECT, YOU ALSO MIGHT LIKE:
This unique macrame wall hanging tutorial

DIY key/letters organizer from scraps
Or quick easy project - these boho clay coasters

Don't be a stranger! Comment below or email me, I'd love to chat!
Follow me on Instagram @ifonlyapril. I try to post in stories my progress with all the projects.
Here is the link to my YouTube Channel where I post videos about simple DIY projects, mom hacks, thoughtful presents ideas and activities for kids.
xoxo,
April


Leave a Reply