• Skip to primary navigation
  • Skip to main content
  • Skip to primary sidebar
If Only April
  • MEET APRIL
  • DIY PROJECTS
    • Kids projects
    • DIY furniture
    • Design plans
    • DIY holiday projects
    • Macrame
    • Transformations
    • Woodworking
  • VIDEOS
  • CONTACT
  • SHOP
    • Facebook
    • Instagram
    • Pinterest
    • YouTube
menu icon
go to homepage
search icon
Homepage link
  • MEET APRIL
  • DIY PROJECTS
    • Kids projects
    • DIY furniture
    • Design plans
    • DIY holiday projects
    • Macrame
    • Transformations
    • Woodworking
  • VIDEOS
  • CONTACT
  • SHOP
ร—

DIY Entryway Organizer - The Only Catch-it-all You Need

Please note, that some of the links below are affiliate links and I will earn a commission if you purchase through those links (at no additional cost to you). Thanks for your support this way.

FacebookPinPrintEmail

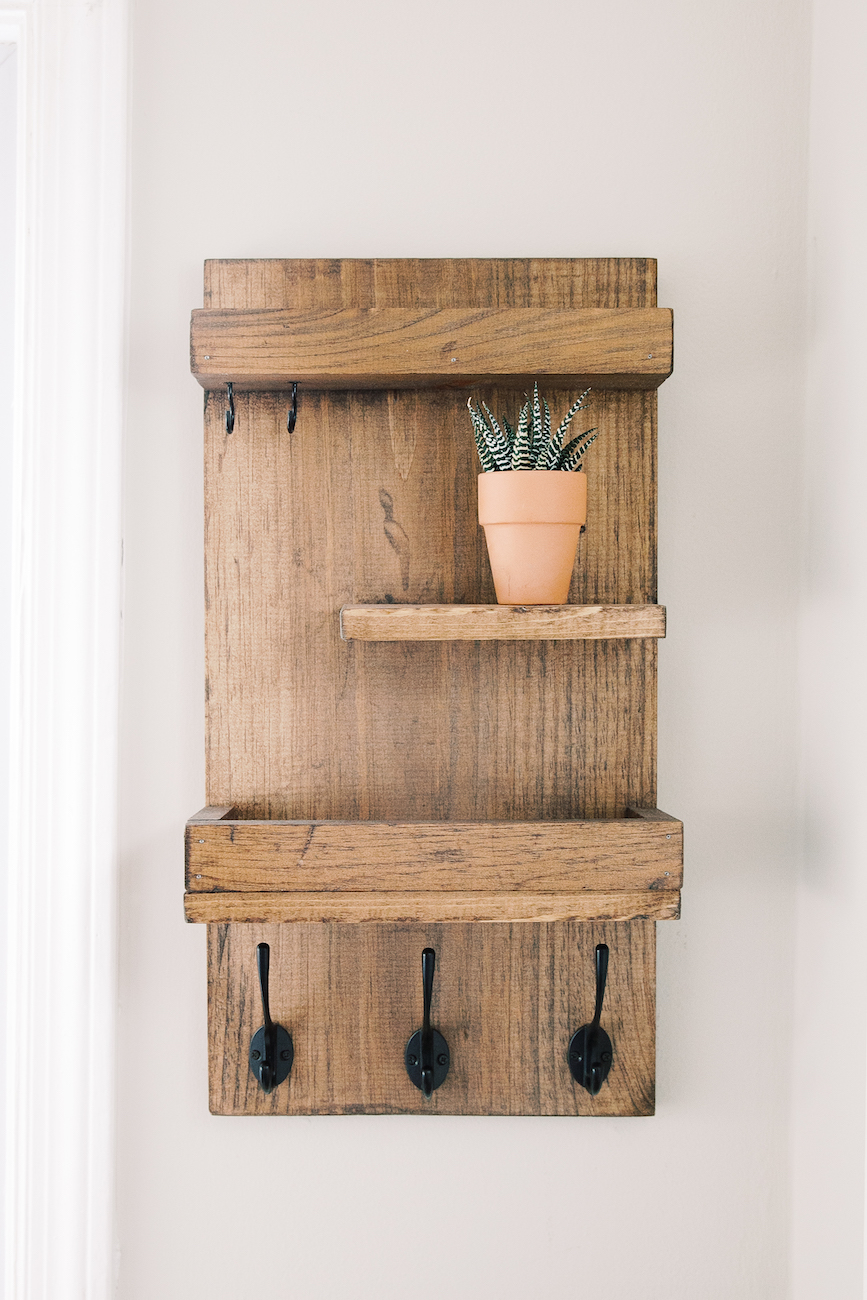
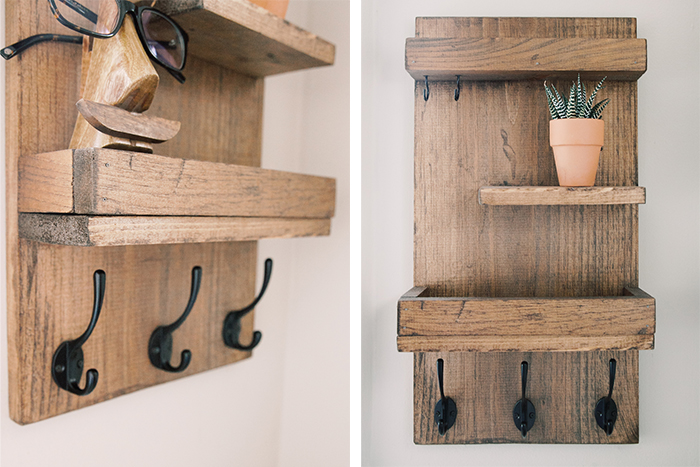
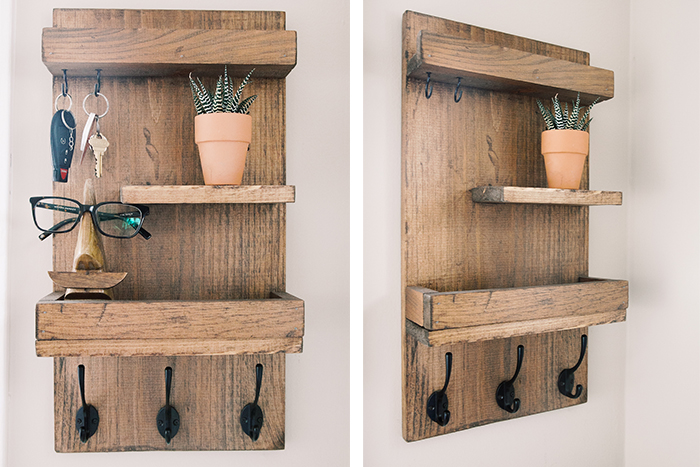
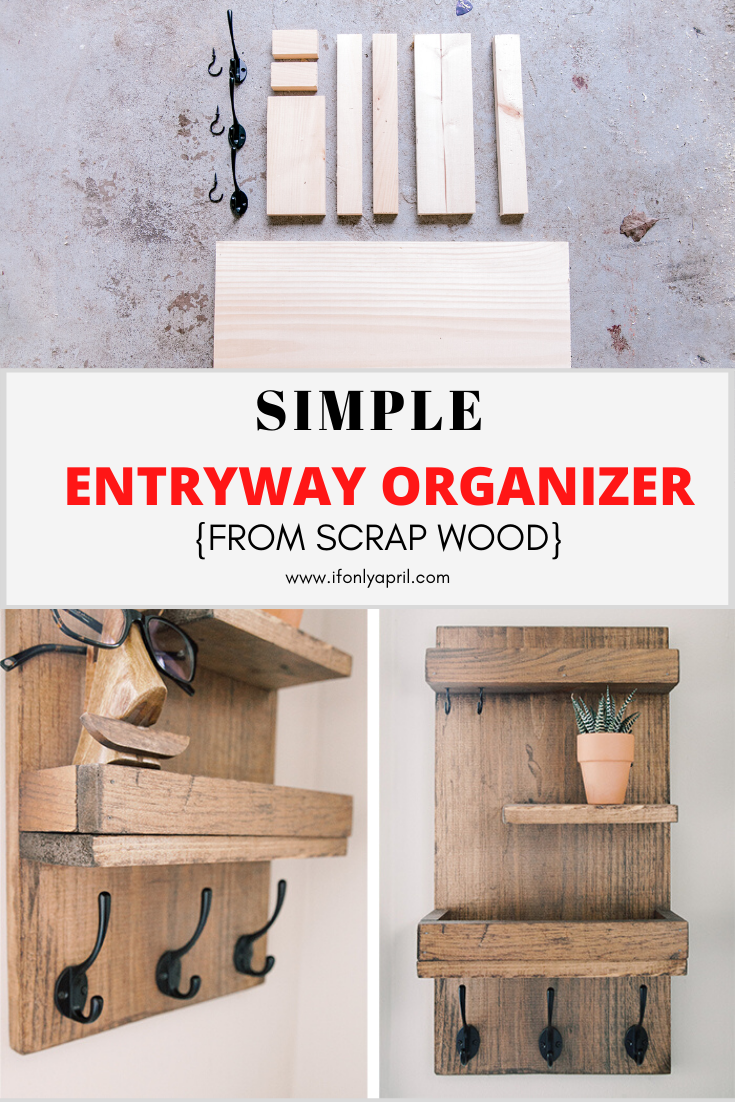
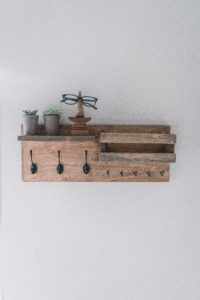
In our last house, I created this Rustic Entryway Organizer. It's been doing an amazing job and after almost a year using it, we can't imagine not having it or something like that by our entrance door. I took inspiration from beautiful organizers that I found on Etsy.ย  When we moved to a new house, the wall by the door had very limited space and our horizontal organizer couldn't fit. Not a big deal I thought and designed a vertical version of our popular Rustic Entryway Organizer. DIY Entryway Organizer turned out spectacular! And I've got my friends fighting over who will take the horizontal one that we no longer need ๐Ÿ˜‰ I guess that means success! To make this second version I used only scrap wood and hooks that I already had from the previous one.

Cost: $10-15

Time spent: 1 hour

Level: beginner

Materials

  • Common board (in my case it's 1x12x21)
  • Scrap planks
  • Ceiling hooks
  • Wall hooks
  • Minwax stain (as usual, I mixed Provincial and Weathered Oak in 70/30 proportion)
  • Screws and nails
  • Sanding block

PIN IT TO MAKE LATER>>>>>>>>>>

ENTRYWAY ORGANIZER WOOD

Instructions:

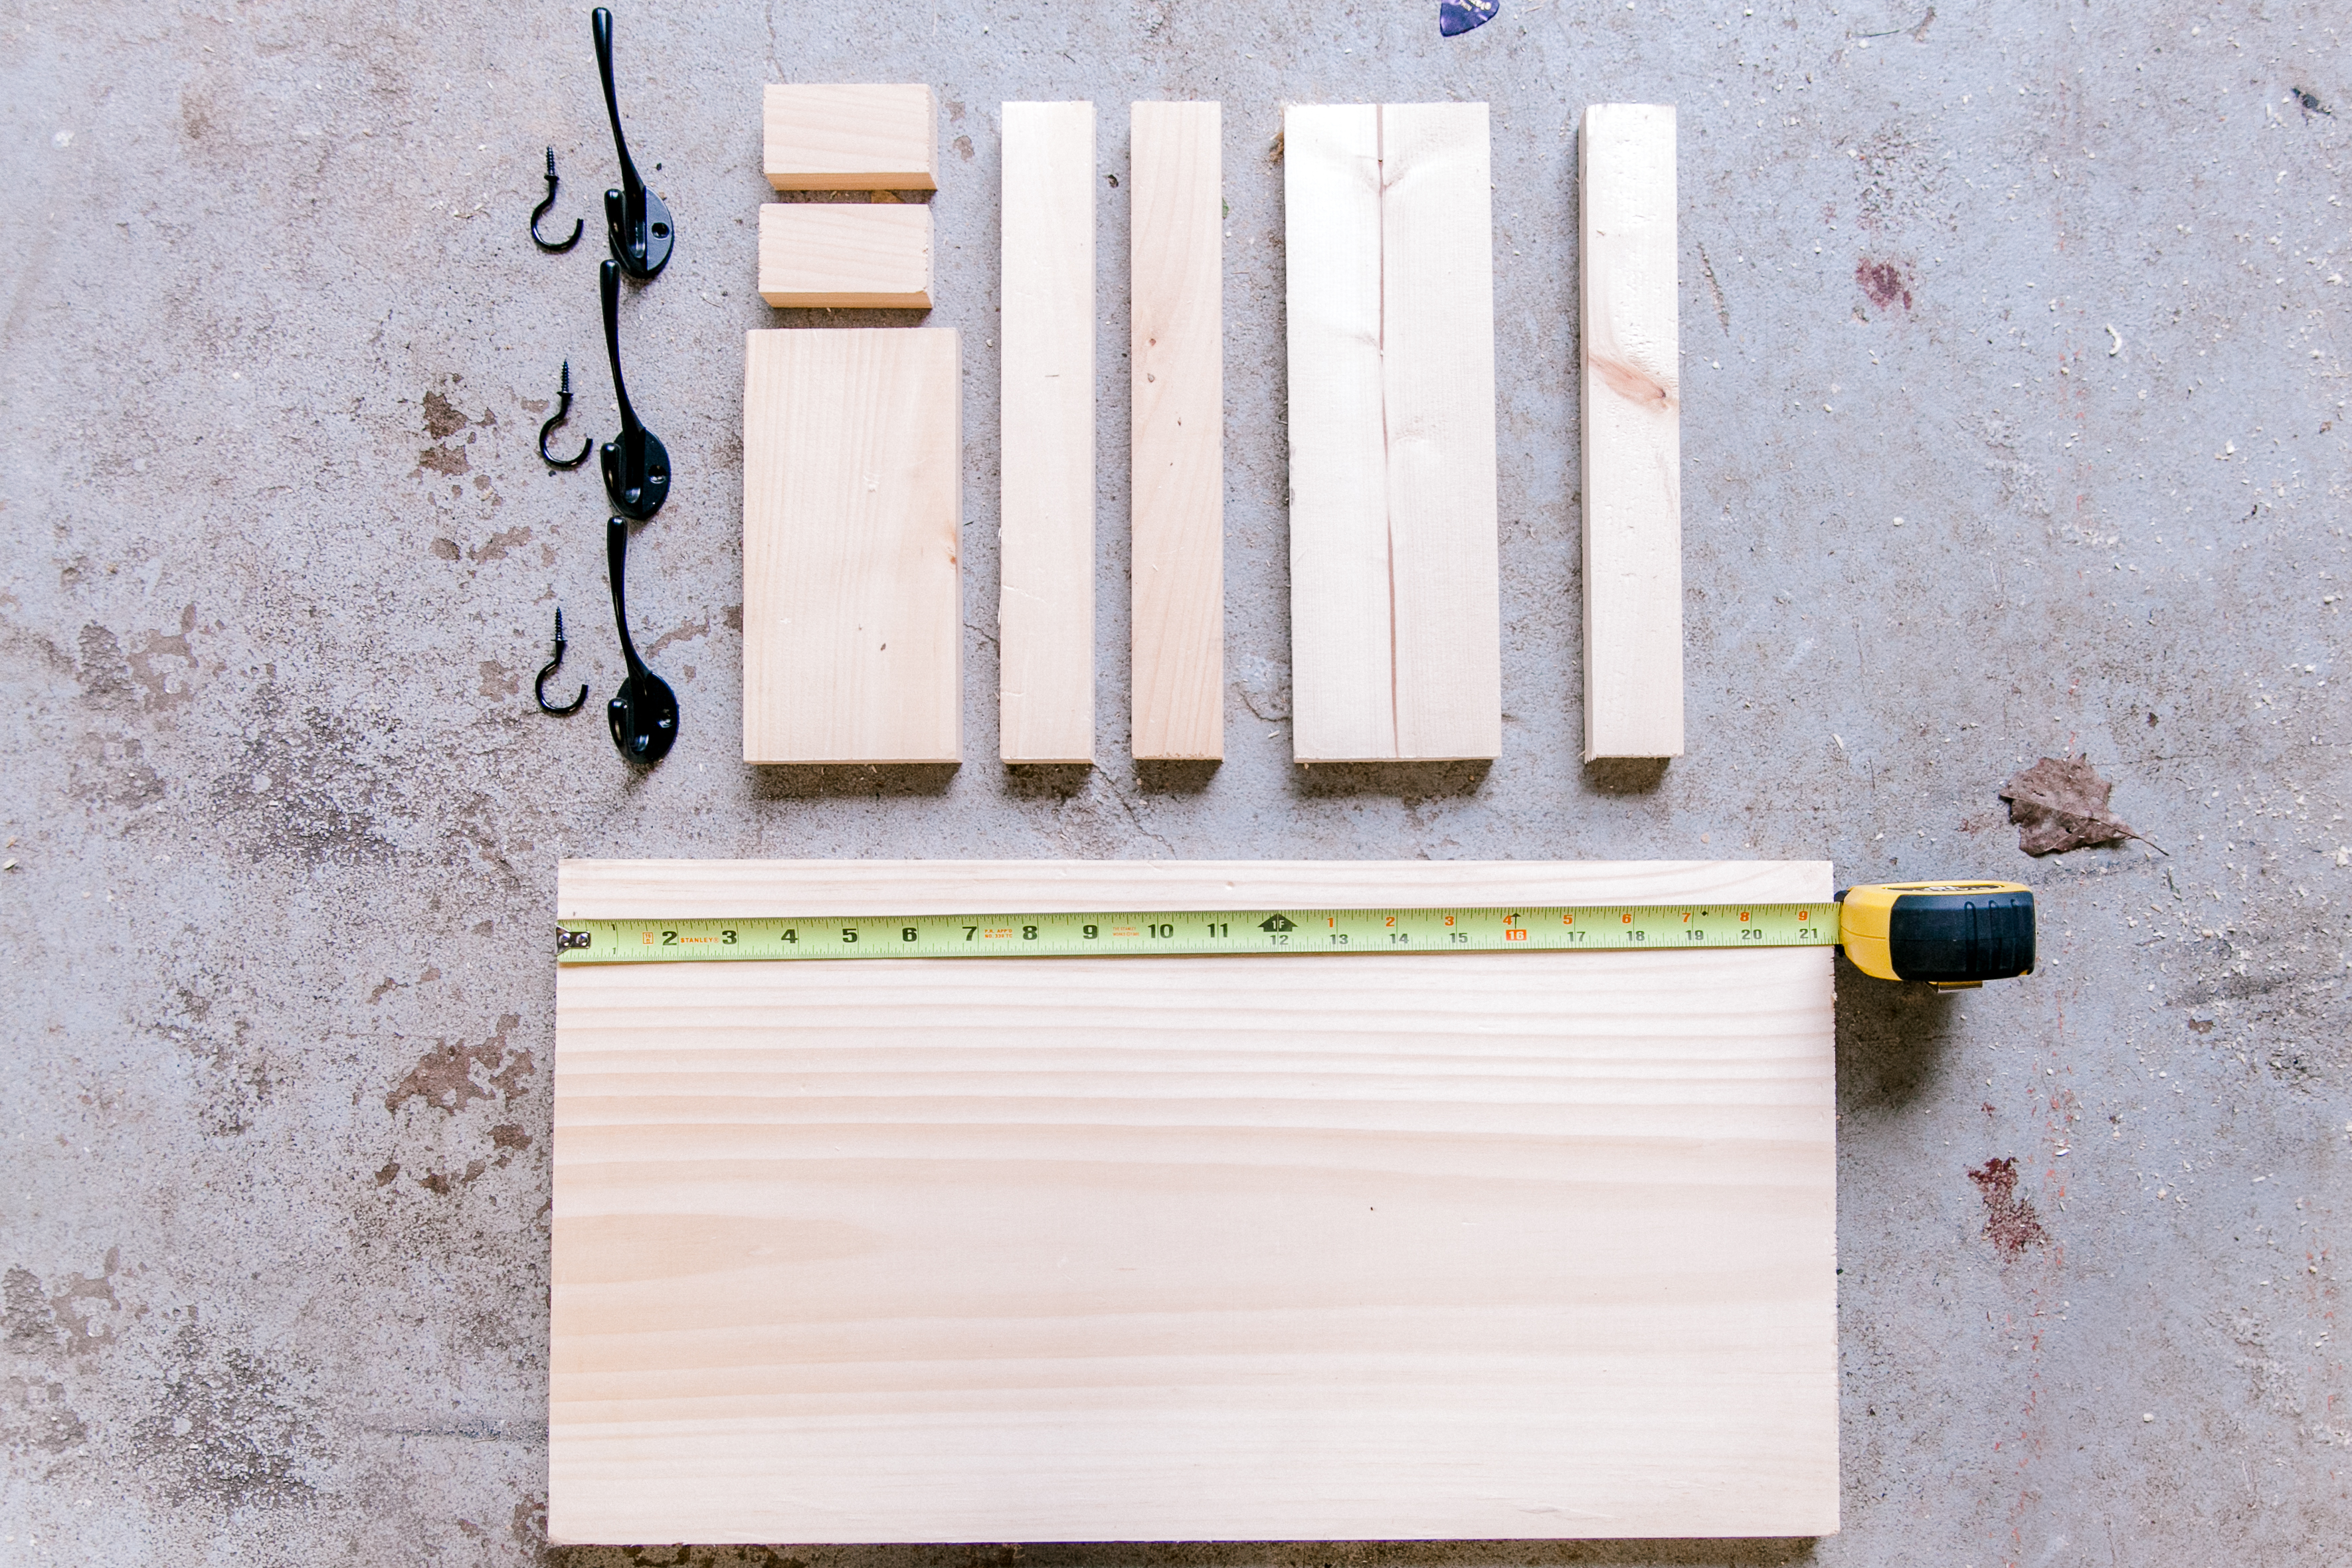
  1. Measure the scraps. You'd want to measure your wall first to make sure it fits and you make it the right size.DIY ENTRYWAY ORGANIZER VERTICAL
  2. Align the scraps, play with a layout and choose best for youDIY ENTRYWAY ORGANIZER VERTICAL
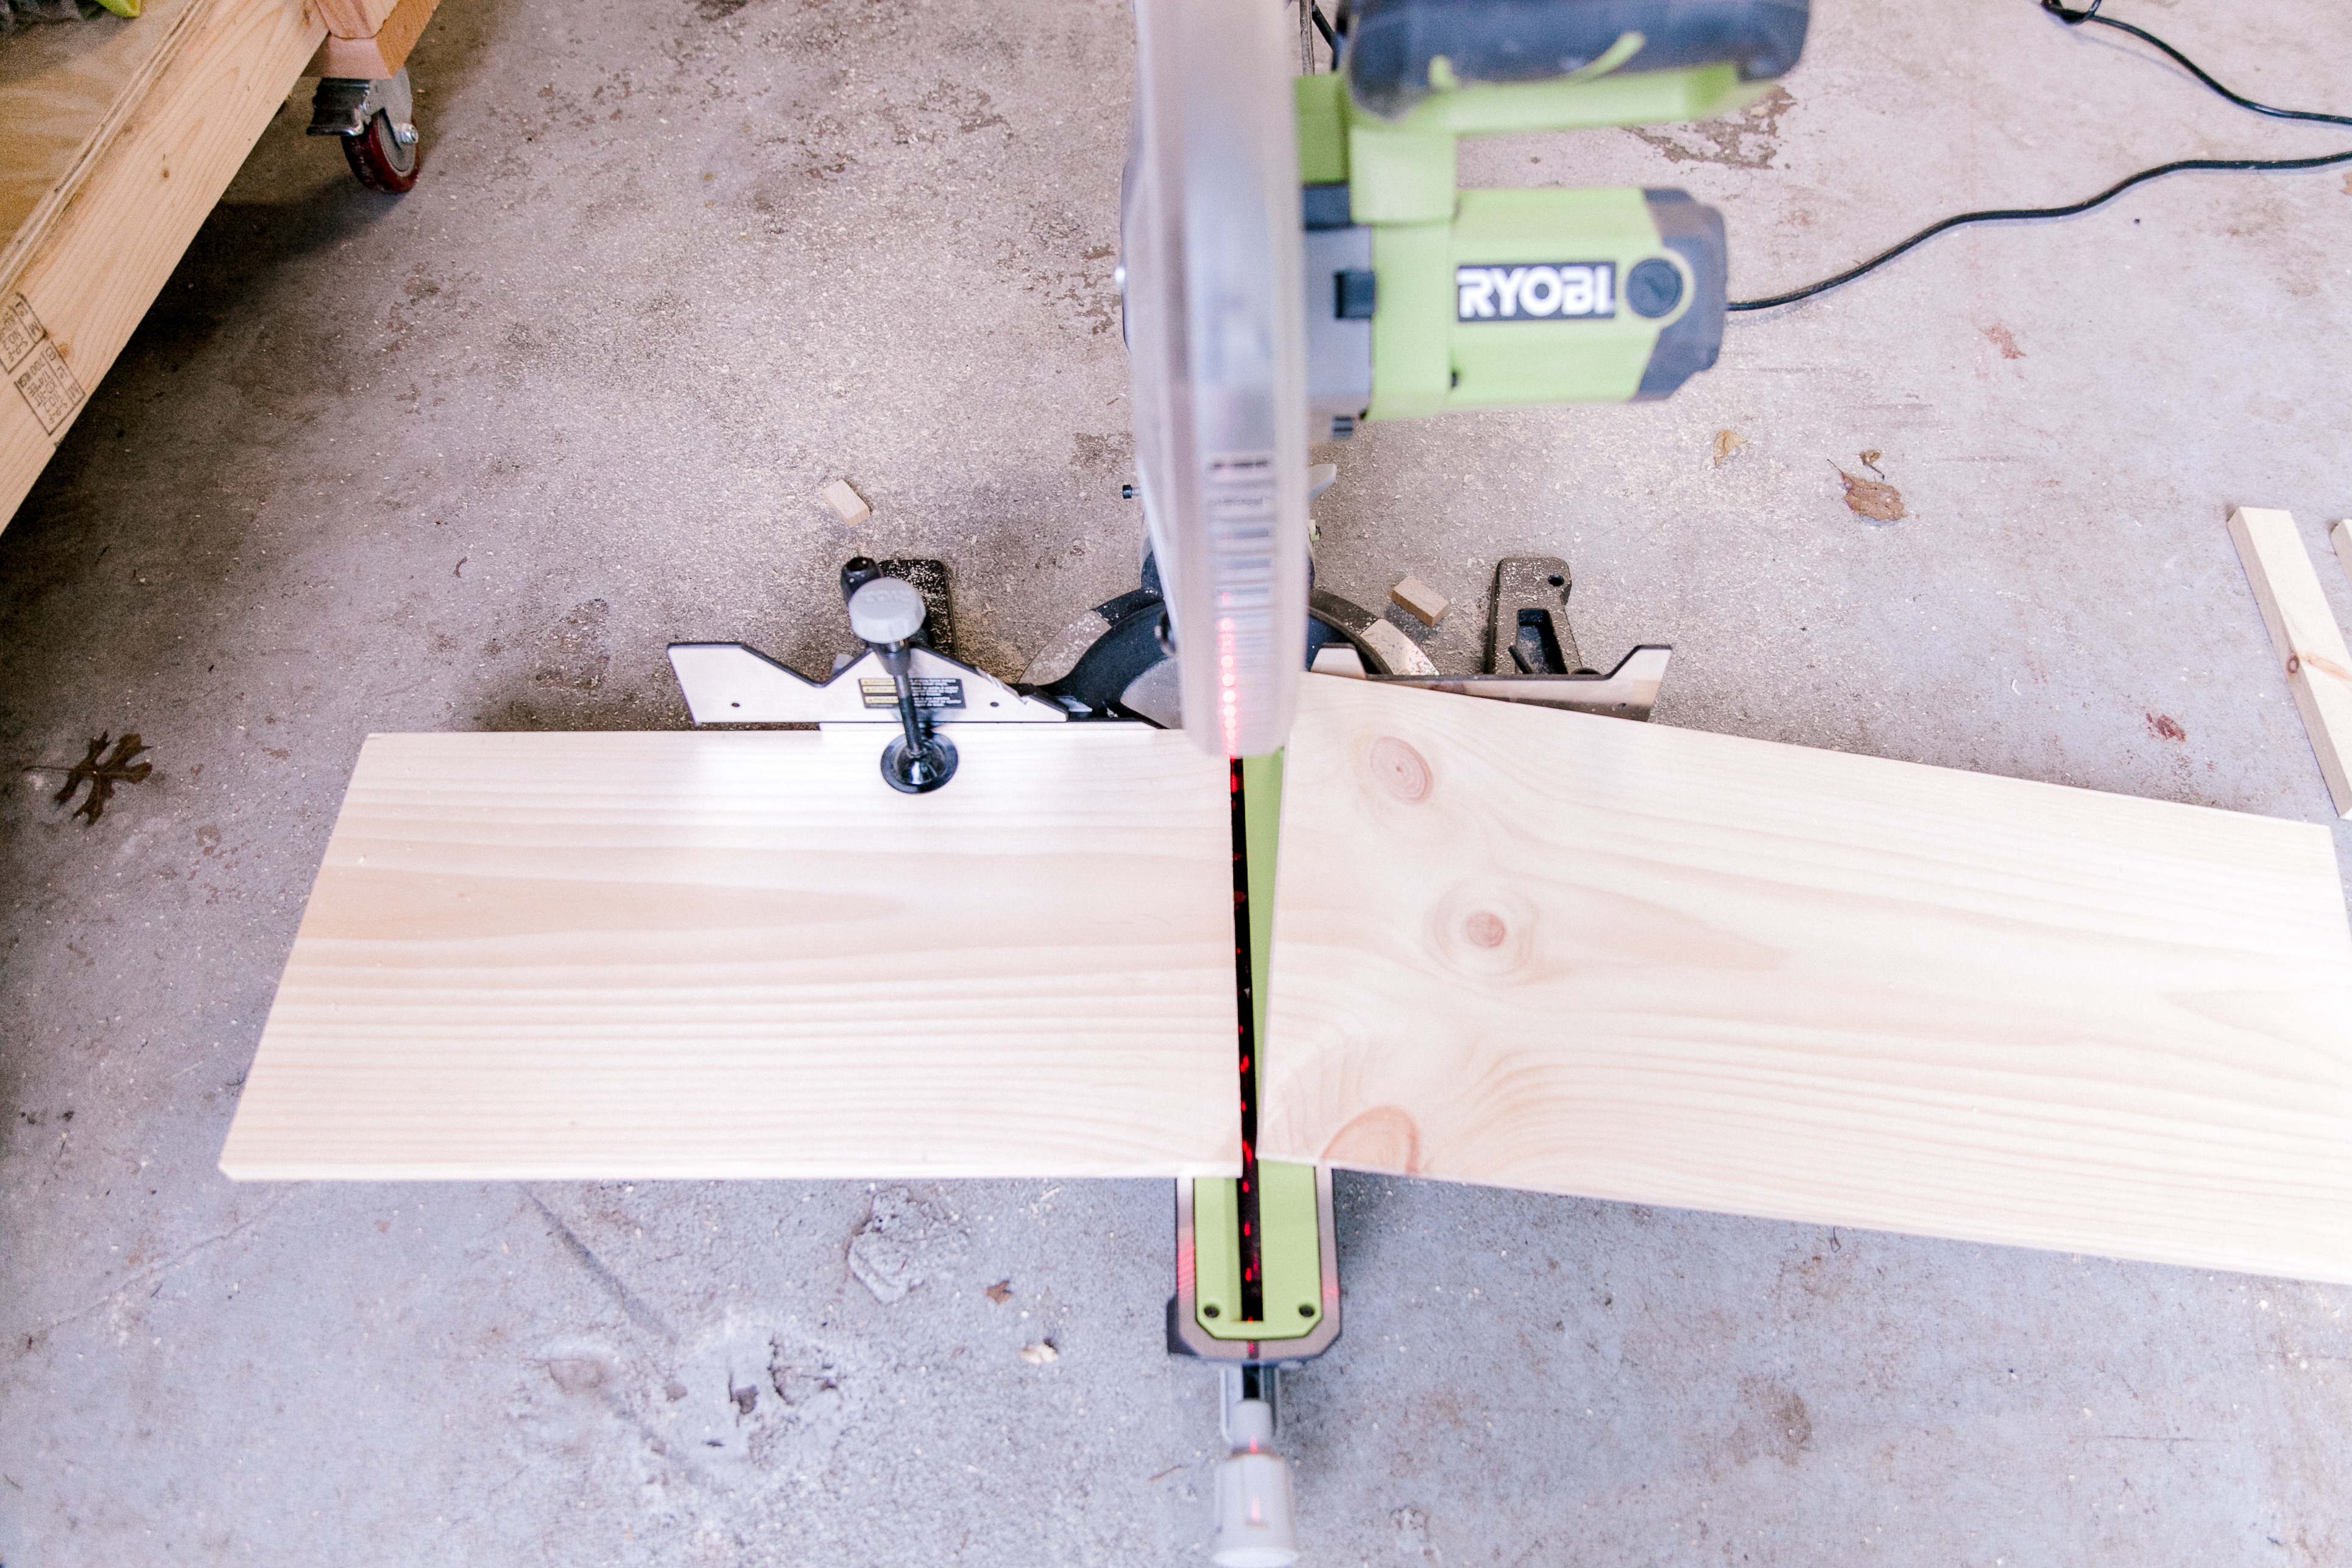
  3. Cut wood to adjusted lengthDIY ENTRYWAY ORGANIZER VERTICAL
  4. Sand the boards. I started sanding with P80 but then realized hand sanding is better for this project.
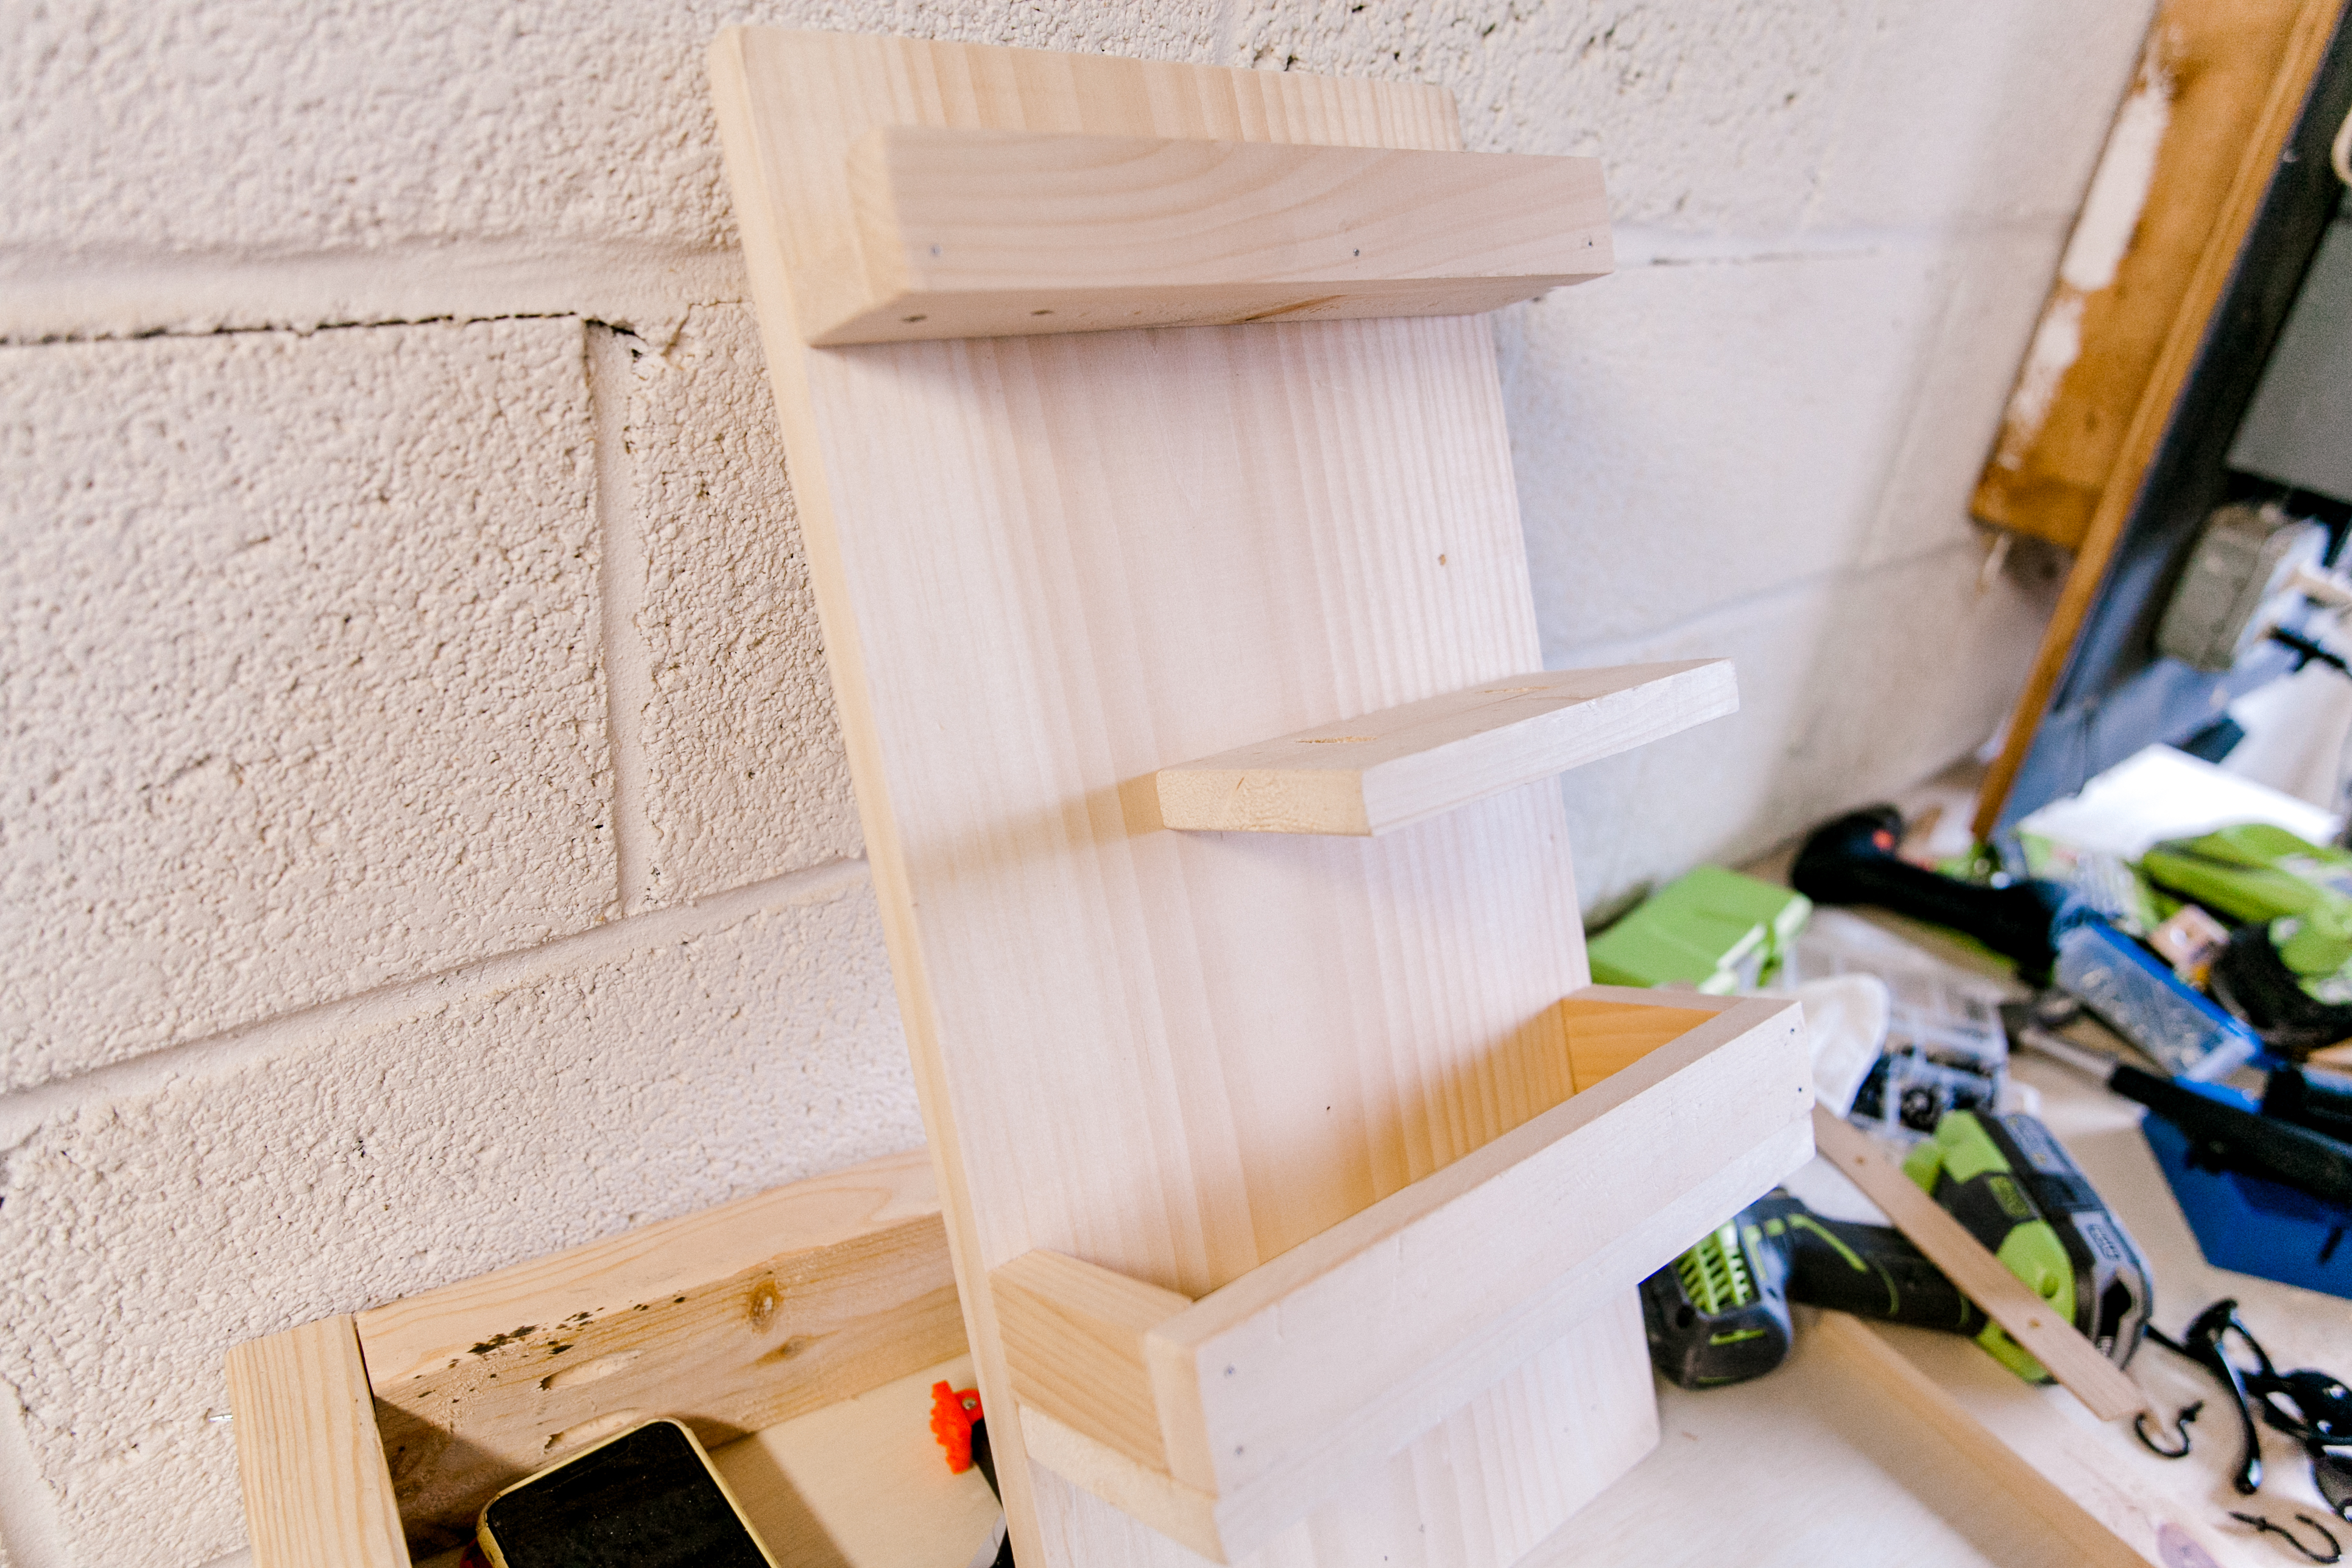
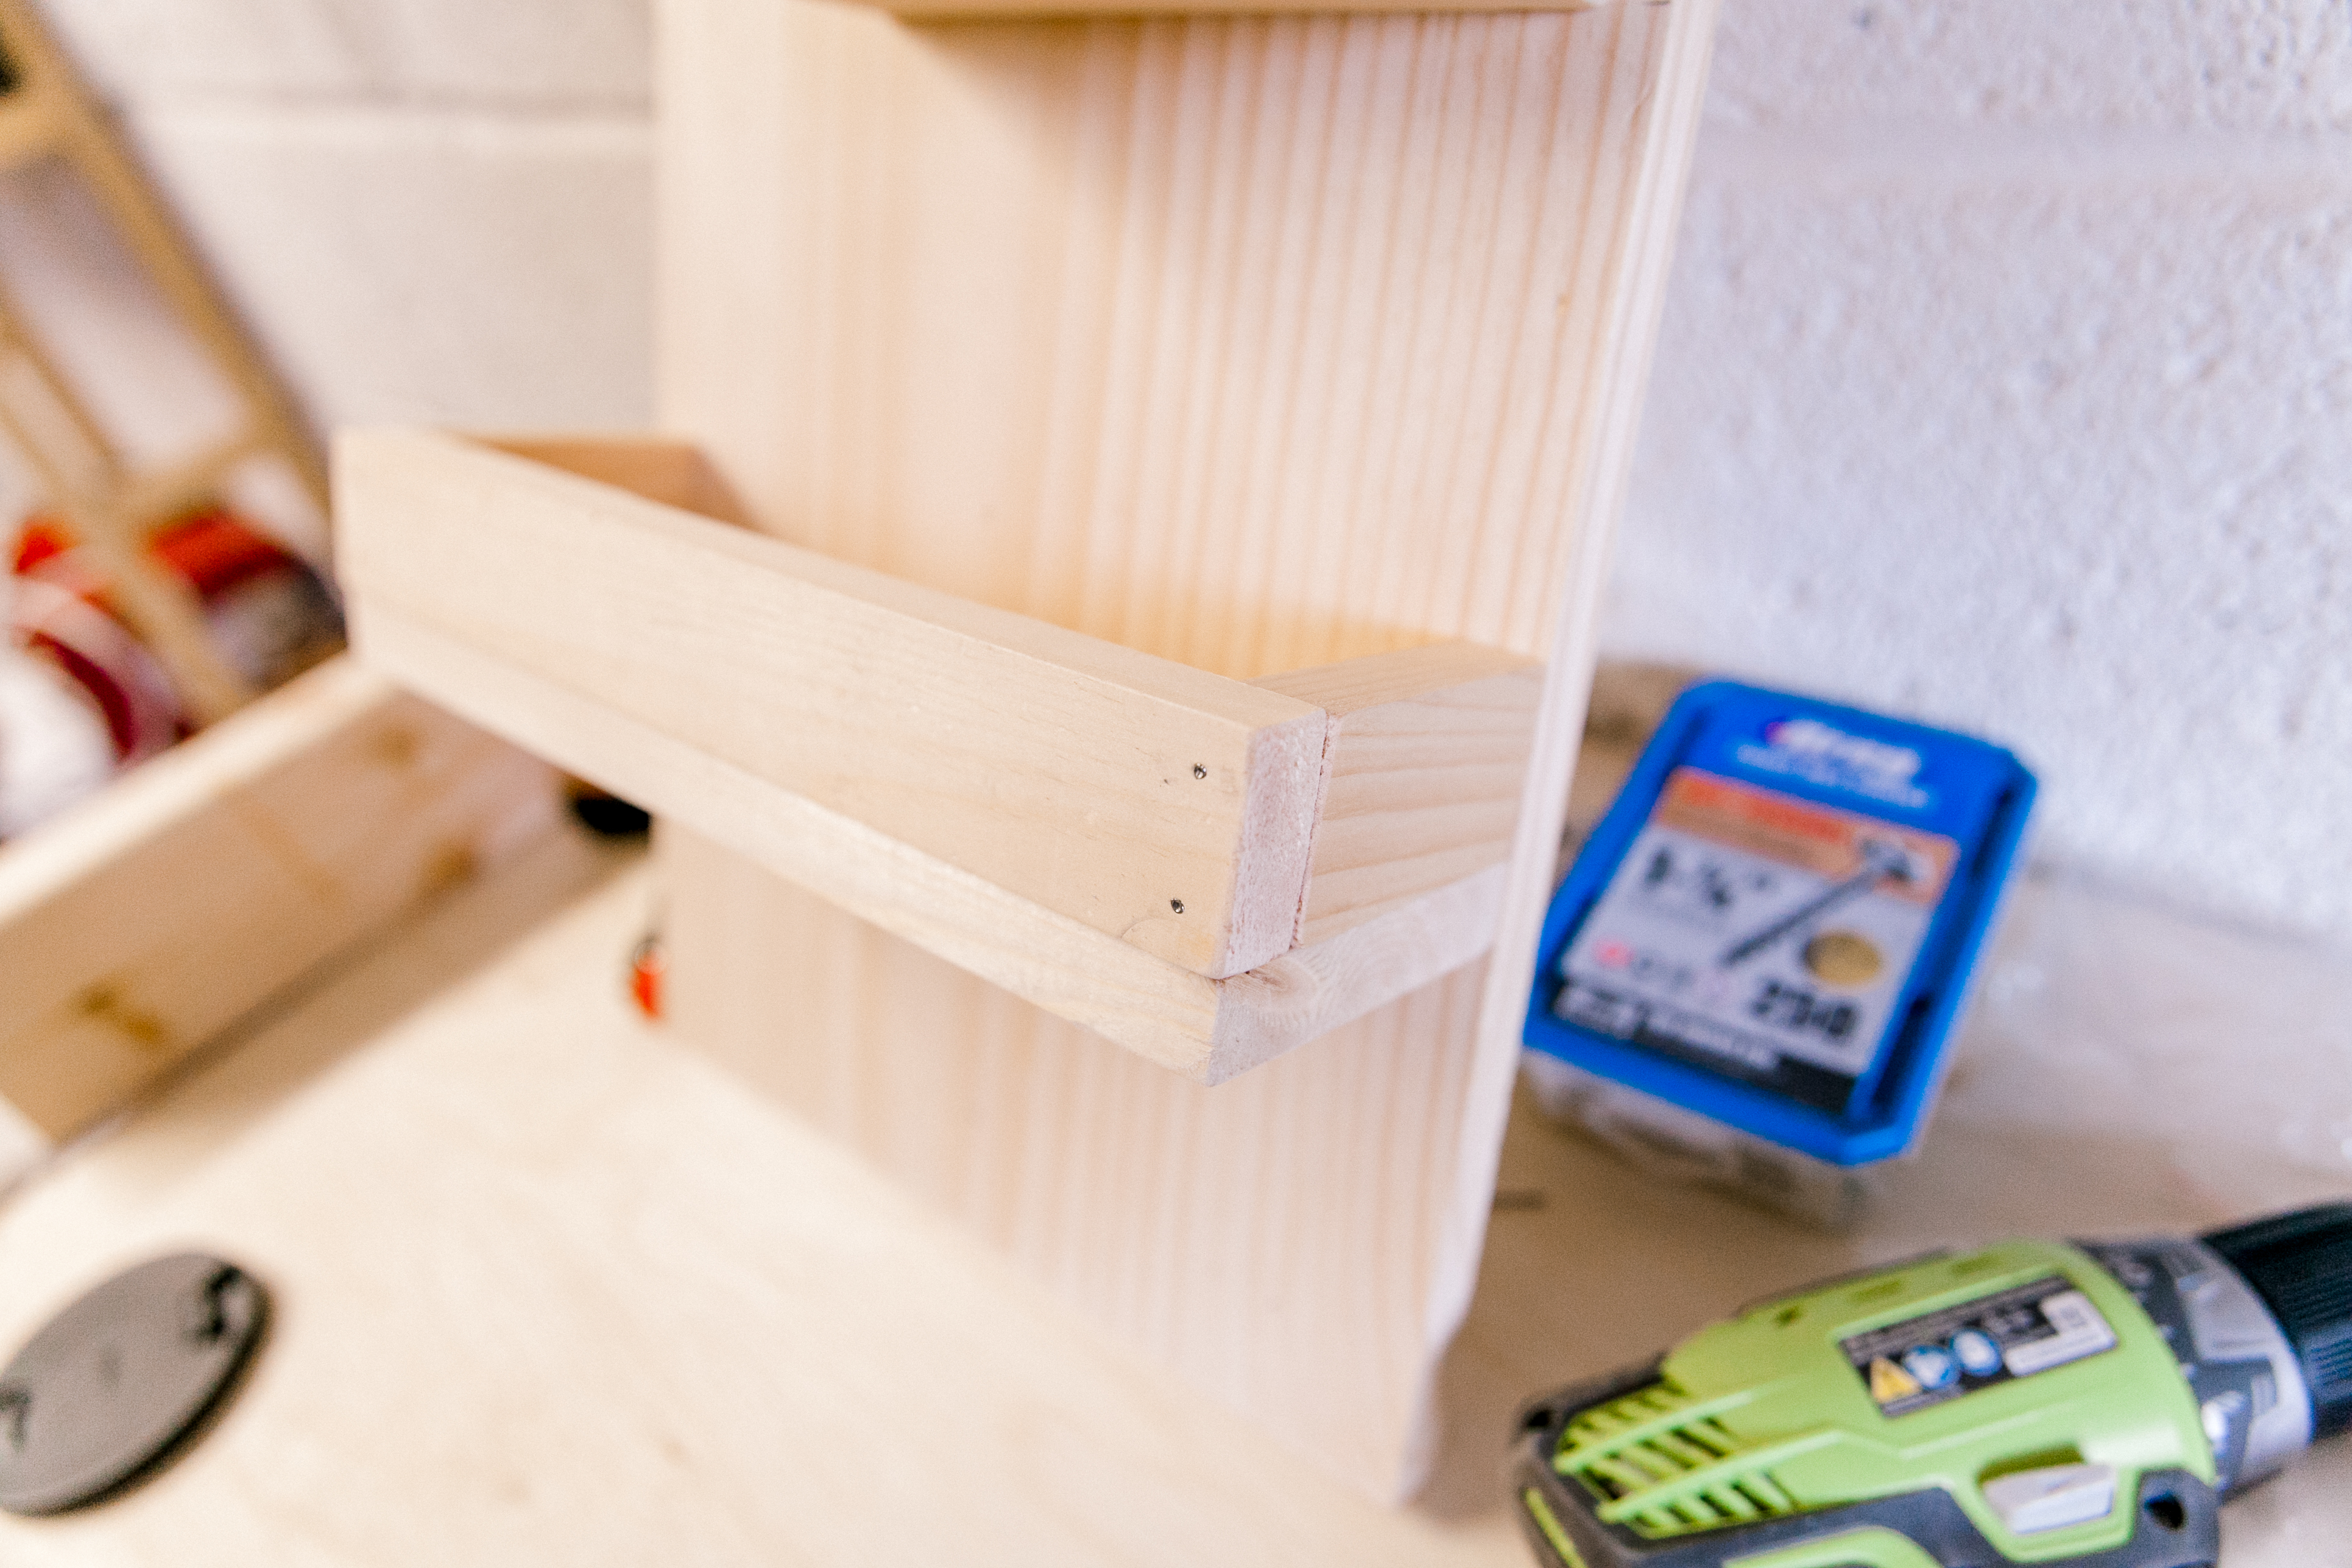
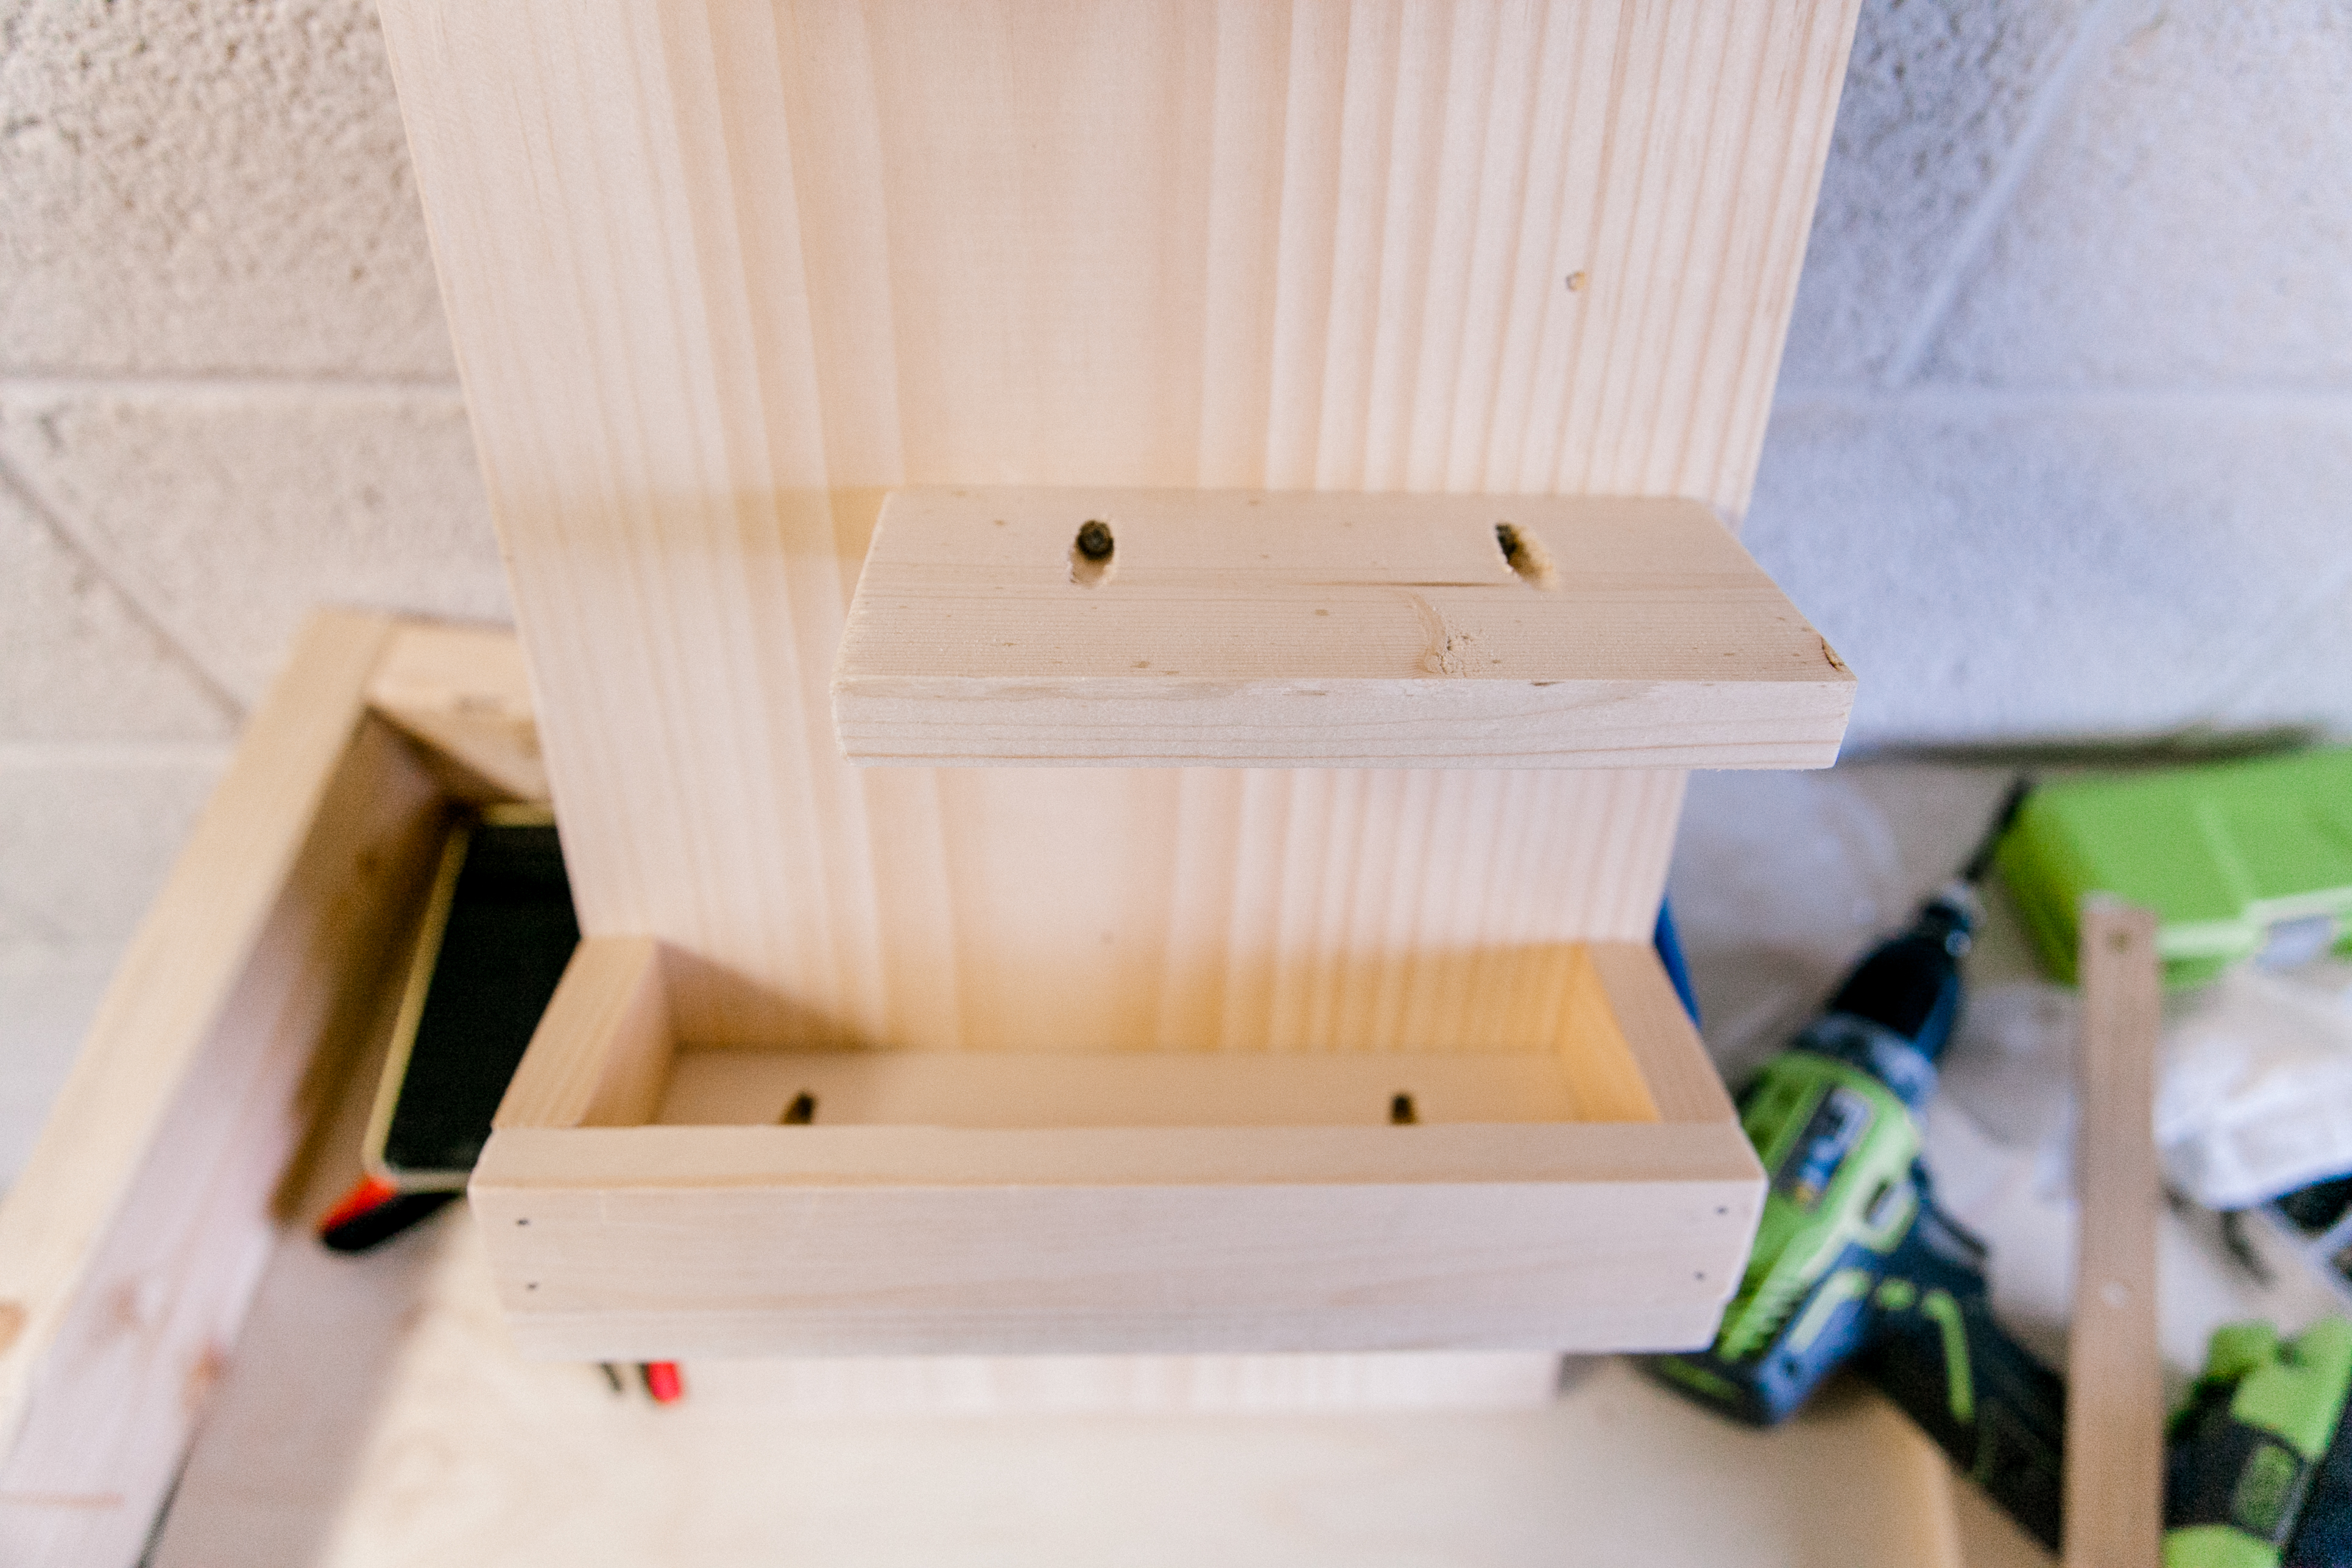
  5. Put parts together with screws and nails.
  6. Set up hooks DIY ENTRYWAY ORGANIZER VERTICAL
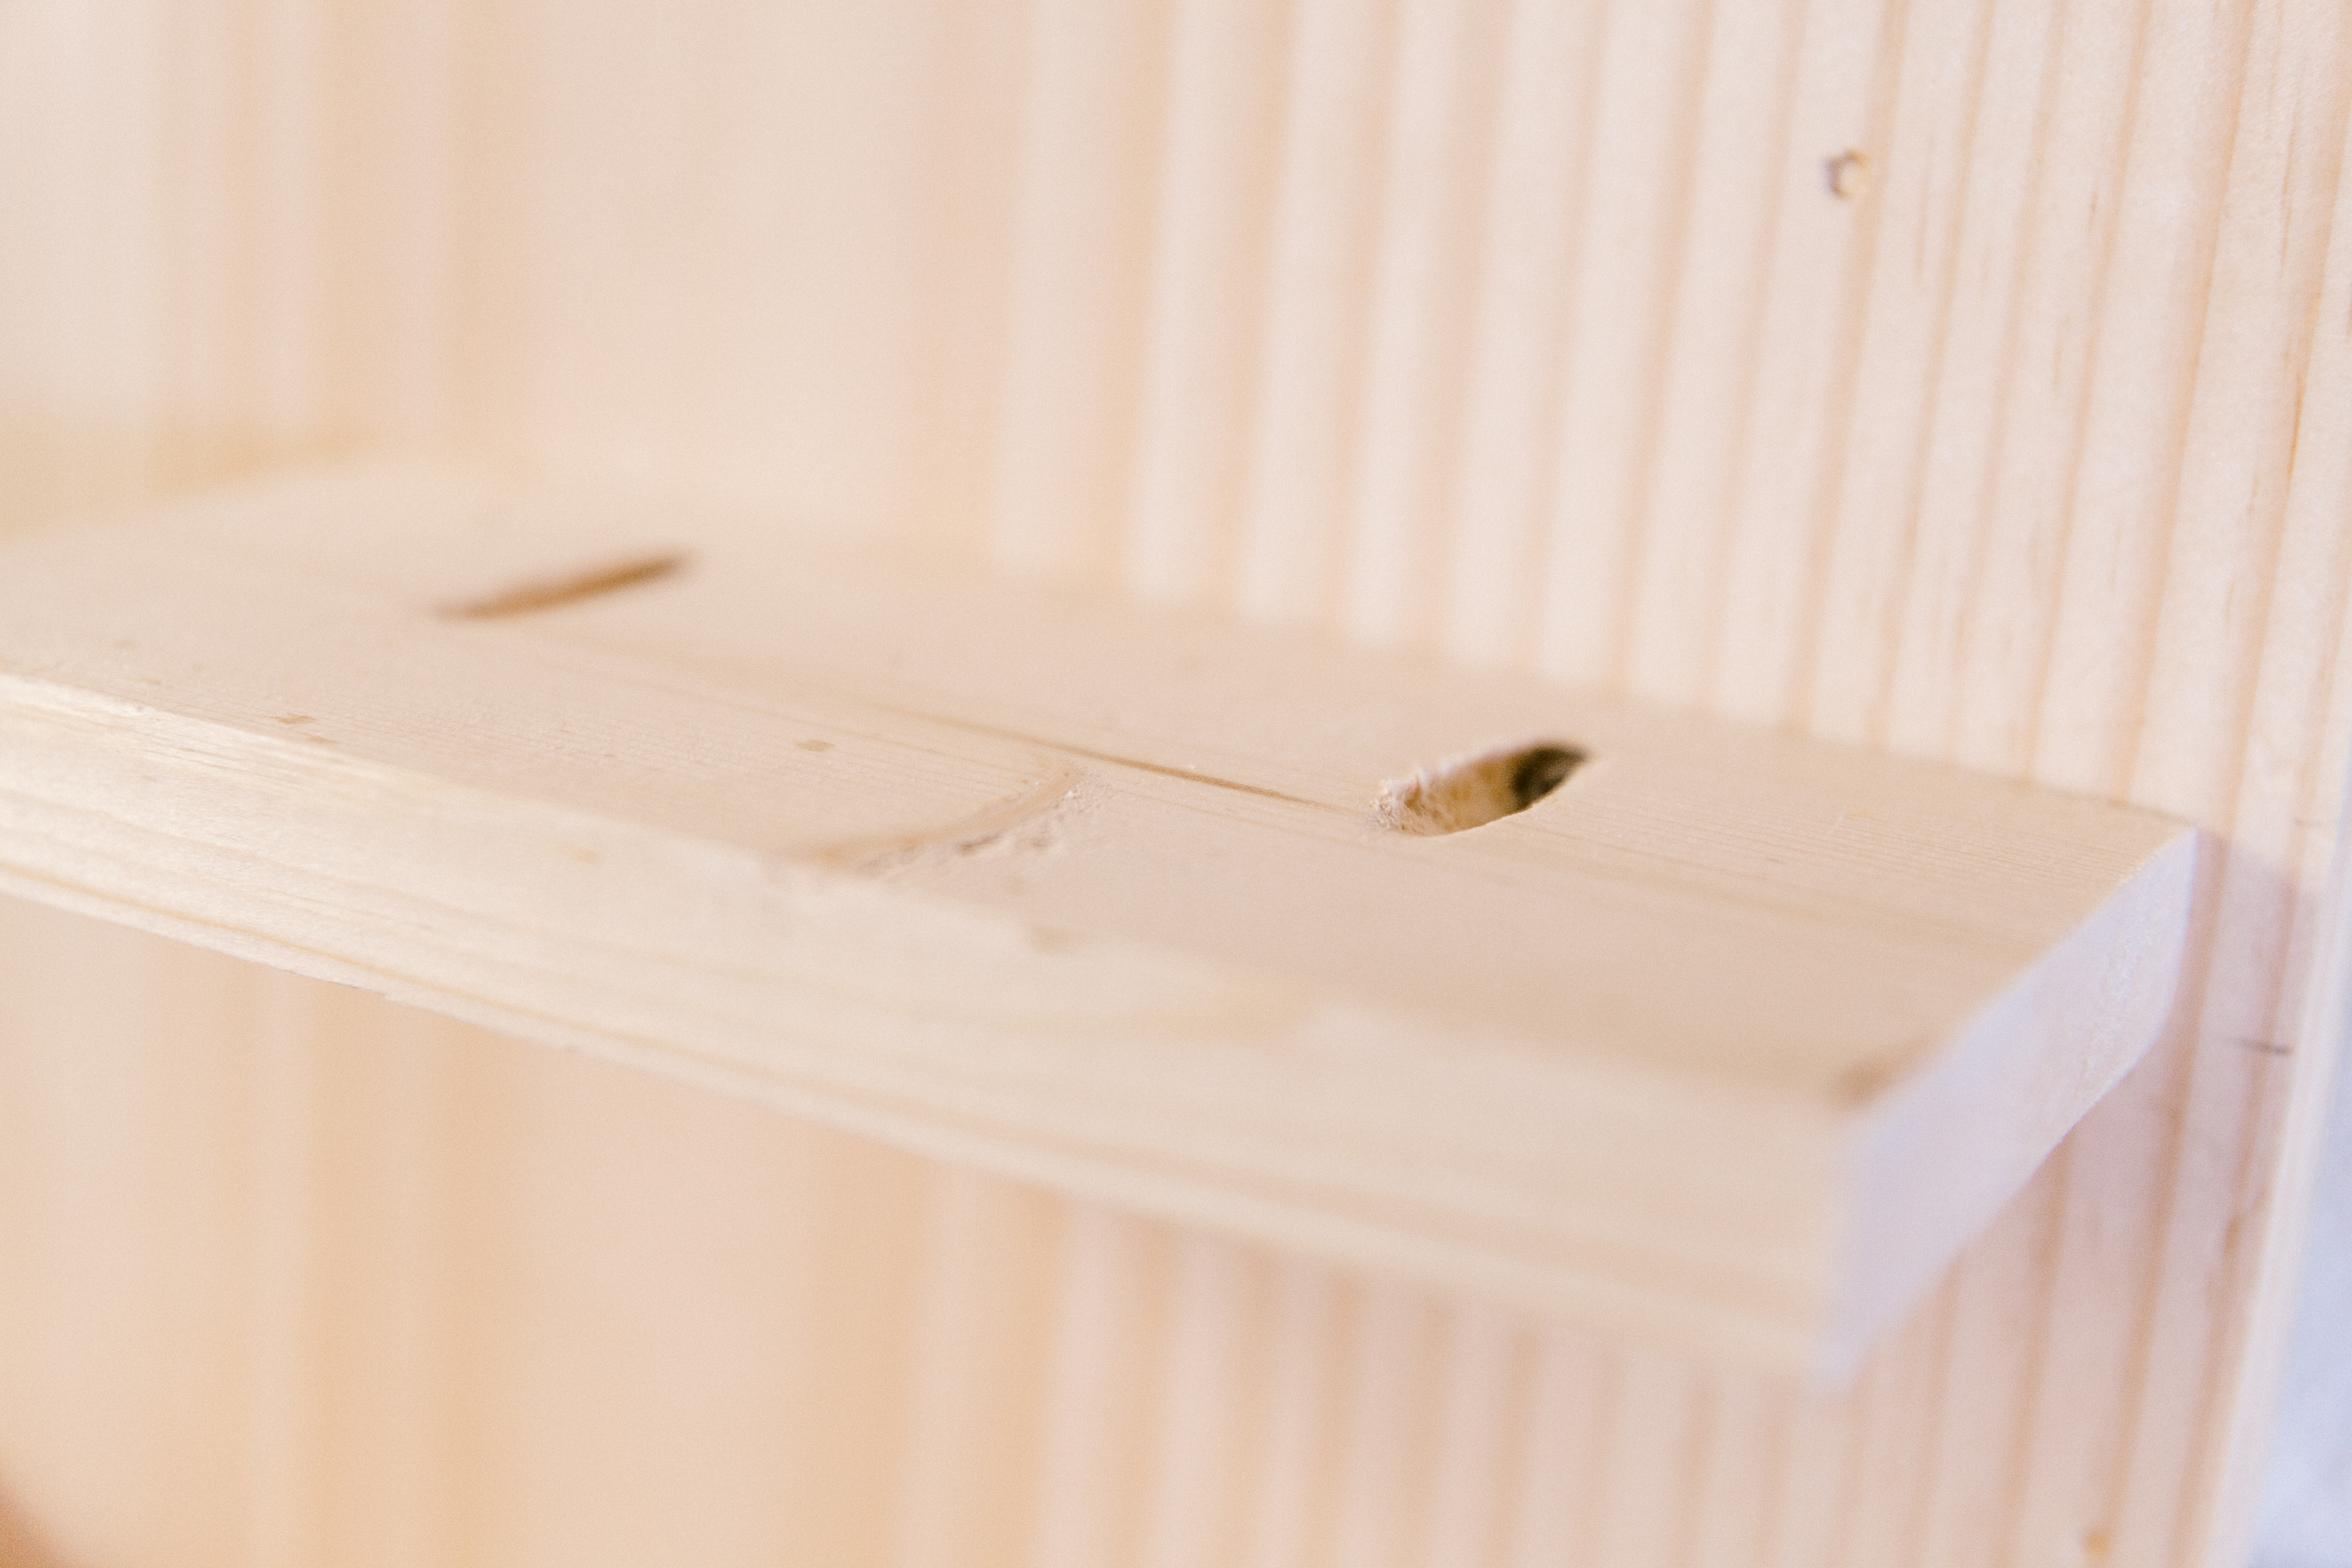
  7. Stain your organizer. You can stain before you assemble it but I prefer to do it as the last step to make sure all pocket holes from screws are also dark.

DIY Vertical Entryway Organizer is a super easy less than an hour project. I really hope you will try it. Let me know in the comments how it went and send me pictures! I love to see what you created!

WE THOUGHT YOU MIGHT ALSO LIKE:

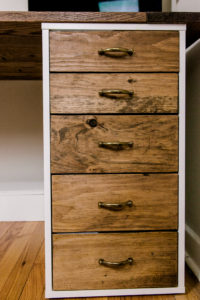
UNIQUE IKEA ALEX DRAWER UPDATE

ELEVATED RAISED GARDEN BED

HORIZONTAL VERSION OF THIS ORGANIZER

diy entryway organizer shelf

I hope you enjoyed this tutorial!

ARE YOU FOND OF SQUARES? LET'S BE FRIENDS!ย @ifonlyapril. I try to post in stories my progress with all the projects.

And check out my YouTube Channel!ย 

I post there room makeovers, DIY projects, and a lot of other fun stuff!

xoxo,

April

« DIAPER CAKE WITH SURPRISES {+ pattern for an easy crochet flower band}
20+ date night ideas from the comfort of your home »
FacebookPinPrintEmail

Reader Interactions

Leave a Reply Cancel reply

Your email address will not be published. Required fields are marked *

Primary Sidebar

Hi, I'm April! I love woodworking and making things! I hope you will stay for a while and get inspired to make something!

More about me โ†’

Popular

  • 5 Simple Mistakes To Avoid Getting Into DIY
  • How to DIY a gold Parisian mirror frame
  • How to make a Montessori floor house bed (full size)
  • 12 IKEA Alex drawer hacks that will inspire you (must see)

ifonlyapril

DIY Lifestyle Mom | ๐Ÿ“CT
New week, new build๐Ÿ˜Š I was so excited to replic New week, new build๐Ÿ˜Š I was so excited to replicate my first build ever that I made 3 years ago for one wonderful girl this week.

Plans are available on my blog ๐Ÿ˜Š
#ifonlyapril_diy #diyfloorbed
A friend of mine today told me that as a "not a DI A friend of mine today told me that as a "not a DIYer" she can't fully appreciate what I did to this closet. To her it doesn't feel like this transformation is so magical. 

So my DIYer friends, let's take a moment and appreciate what I did with this closet!! 
Swipe to see the "before"๐Ÿ™ˆ
#diymakeover #diyclosetmakeover #ifonlyapril_diy #diyyoutuber
Christmas decor video is live on YouTube ๐ŸŽ„ Swi Christmas decor video is live on YouTube ๐ŸŽ„

Swipe to see my almost successful experiment with epoxy and wooden rounds๐Ÿ˜„ watch the video to see what went wrong and how I think you could fix it. 
Details are on the blog and YouTube.
#diychristmas #diychristmaswreath #diychristmasdecor #christmaswithapril
This year I decided to update our stocking holder This year I decided to update our stocking holder and create this beautiful village.

The problem occurred when I couldn't decide how to finish it - to leave the wood as is or paint cute details in traditional Christmas colors.

So I made both ๐Ÿ˜
Which one would you choose?

Find full tutorial on the blog and YouTube.

#diychristmasdecor #diychristmas #diyyoutuber #christmaswithapril
Guess what?๐Ÿ˜๐Ÿ”ฅ It only took me about 6 month Guess what?๐Ÿ˜๐Ÿ”ฅ

It only took me about 6 months but I finished the playroom! ๐ŸŽ‰๐ŸŽ‰๐ŸŽ‰

EVERY piece of furniture is made by me over the course of last 6 months๐Ÿ˜ and decor tooโ˜บ๏ธ are you excited to see it?

I'm so excited! There are no words to describe it! 
The reveal will be on YouTube tomorrow at 10am est. Subscribe and turn on notifications to not miss it!!! It's epic!๐Ÿ˜๐Ÿ”ฅ 
#diymakeover #playroommakeover #ifonlyapril_makeover
NEW video is live on YouTube ๐ŸŽ‰ Last week I mad NEW video is live on YouTube ๐ŸŽ‰

Last week I made this Pottery Barn inspired bulletin board and I'm in love๐Ÿ˜ it turned out so much better than I imagined๐Ÿ˜
Read about all the details and material list on the blog.

And now to the real question - should I put it in the kids playroom (as intended) or keep it to myself?๐Ÿ˜๐Ÿค”

#ifonlyapril_diy #makersgonnamake #makersofinstagram #diyhomedecor
Witch wears Louboutin ๐Ÿ˜‚๐Ÿ‘ป @louboutinworld #d Witch wears Louboutin ๐Ÿ˜‚๐Ÿ‘ป

@louboutinworld #diyhalloweendecor #diyhomedecor #diyhalloween
Oh my! If someone told me 2 years ago when I just Oh my! If someone told me 2 years ago when I just picked up some power tools that eventually I'll be able to make drawers I'd think they were joking!!
But here we are! This day came when I can proudly say that I built a desk with DRAWERS!!! 

I was so so intimidated by drawers that I felt I'd never be able to make them.

Well, here we are! I'm presenting my new furniture design - kids desk with flutted drawers โ˜บ๏ธ

Watch my kids reaction in stories :) and official video will come live to YouTube on Monday. ๐Ÿ˜Š

Plans will be available in 2 weeks on the blog. Since I'm traveling ๐Ÿ˜… watch stories for that too!
Kisses ๐Ÿ˜˜๐Ÿ˜˜๐Ÿ˜˜

#diydesk #diykidsdesk #diyprojects #ifonlyapril_diy #makersgonnamake #ryobitools #diyfurniture #trendyfurniture #girlsehobuild
Load More... Follow on Instagram

Footer

โ†‘ back to top

About

  • Disclaimer

Newsletter

  • Sign Up! for emails and updates

Contact

  • Contact
  • Media Kit

As an Amazon Associate, I earn from qualifying purchases.

Copyright ยฉ IfOnlyApril 2022

Share this ArticleLike this article? Email it to a friend!

Email sent!