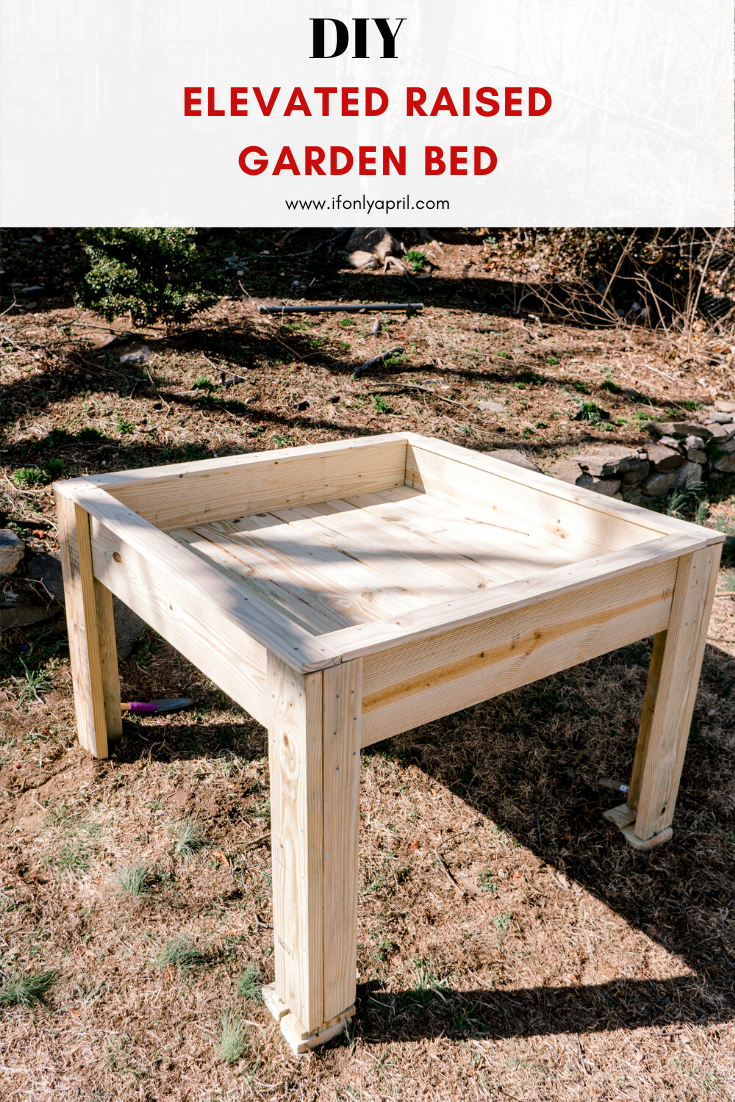
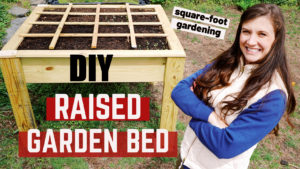
The idea to have a garden was brewing inside for a while. I guess I caught the spring gardening bug, but over the weekend I decided to finally make an elevated DIY raised garden bed.
I have easy to follow printable PDF plans at my shop, hopefully it will make your build a breeze.
Why elevated raised garden bed?
1. It's cheaper than store-bought.
2. It's more comfortable to tend to (no need to bend over and hurt your back)
3. It looks so esthetically pleasing.
4. It might protect from small animals (let's see if it will protect the garden from squirrels- would love to hear your ideas in the comments)
Getting started with Square Foot Gardening
I read the book "Square Foot Gardening" by Mel Bartholomew and was immediately hooked. It's so fascinating and has a lot of great ideas.
While growing up we had a garden, where I spent most of my childhood summers. We had 600 sq meters of land and I wasn't very pleased when my grandmother would make me work outside - planting, weeding, watering...
It's a bit ironic that now, after 15 years since my last time at our Dacha I'm craving this connection with the soil ;D
Starting the garden, I already had some knowledge but needed to brush it up by reading the book.
Mel explains everything in a simple way and it's an easy book to read.
I highly recommend it for reading if you are planning to start your garden or build an elevated raised garden bed.
Building a DIY elevated raised garden bed
I used the plan from this website to make this DIY elevated raised bed but made a few changes.
COST OF MATERIALS: $110 + $50 for soil
TIME SPENT: 5 hours
LEVEL: Beginner
Choosing lumber for DIY elevated garden bed
First, about lumber. After extensive research, I chose to use pressure-treated lumber. Cedar sounds like a wonderful option but my store didn't carry too many options in sizes and it was way out of my budget.
We are renting this house and I'm not even sure if I'll take it with us when we move, probably not, so I didn't want to invest in something that I might leave behind.
There is some controversy around pressure-treated lumber but also a fact that after 2003 companies stopped using chromate copper arsenate (CCA) in pressure-treated lumber and utilize alkaline copper quaternary (ACQ) as a replacement for CCA. It is also a chemical but it's not harmful to humans in the amount it leaks into the soil. This is a great article to read more about it.
Note: When working with pressure-treated lumber make sure to wear protective gear and not to inhale the sawdust.
Be prepared to ask for help since it's super heavy. It's great for the structure since it's stable but bad for your back, so a helping hand won't hurt.
If you are more of a visual person, here is a VIDEO VERSION of this blog
Materials and lumber
- 2” deck screws
- 1-⅝” deck screws
- 2 – 2 x10" x 8' (for the frame)
- 4 – 2 x 2 x 36” decorative balusters (for the boards that hold up the soil)
- 2 – 2x6"x6' boards. Cut these boards in half to make one part of the leg (approximately 36inches long).
- 2 – 2x4”x6' boards. Cut in half to make another part of the leg (approximately 36inches long).
- 4 – 1x4”x 6' board. (The top plates to finish off the square foot garden)
- 4 – 2x6″x8' board. Cut these boards to 46-¼″. ( For flooring)
- 1 – roll or piece of fiberglass screening to cover the bottom of the Square Foot Garden. This prevents dirt from plugging holes in the bottom of the square foot garden.
- 3 - 1x2x8 (for the grid)
Instructions
Step 1 - make a box
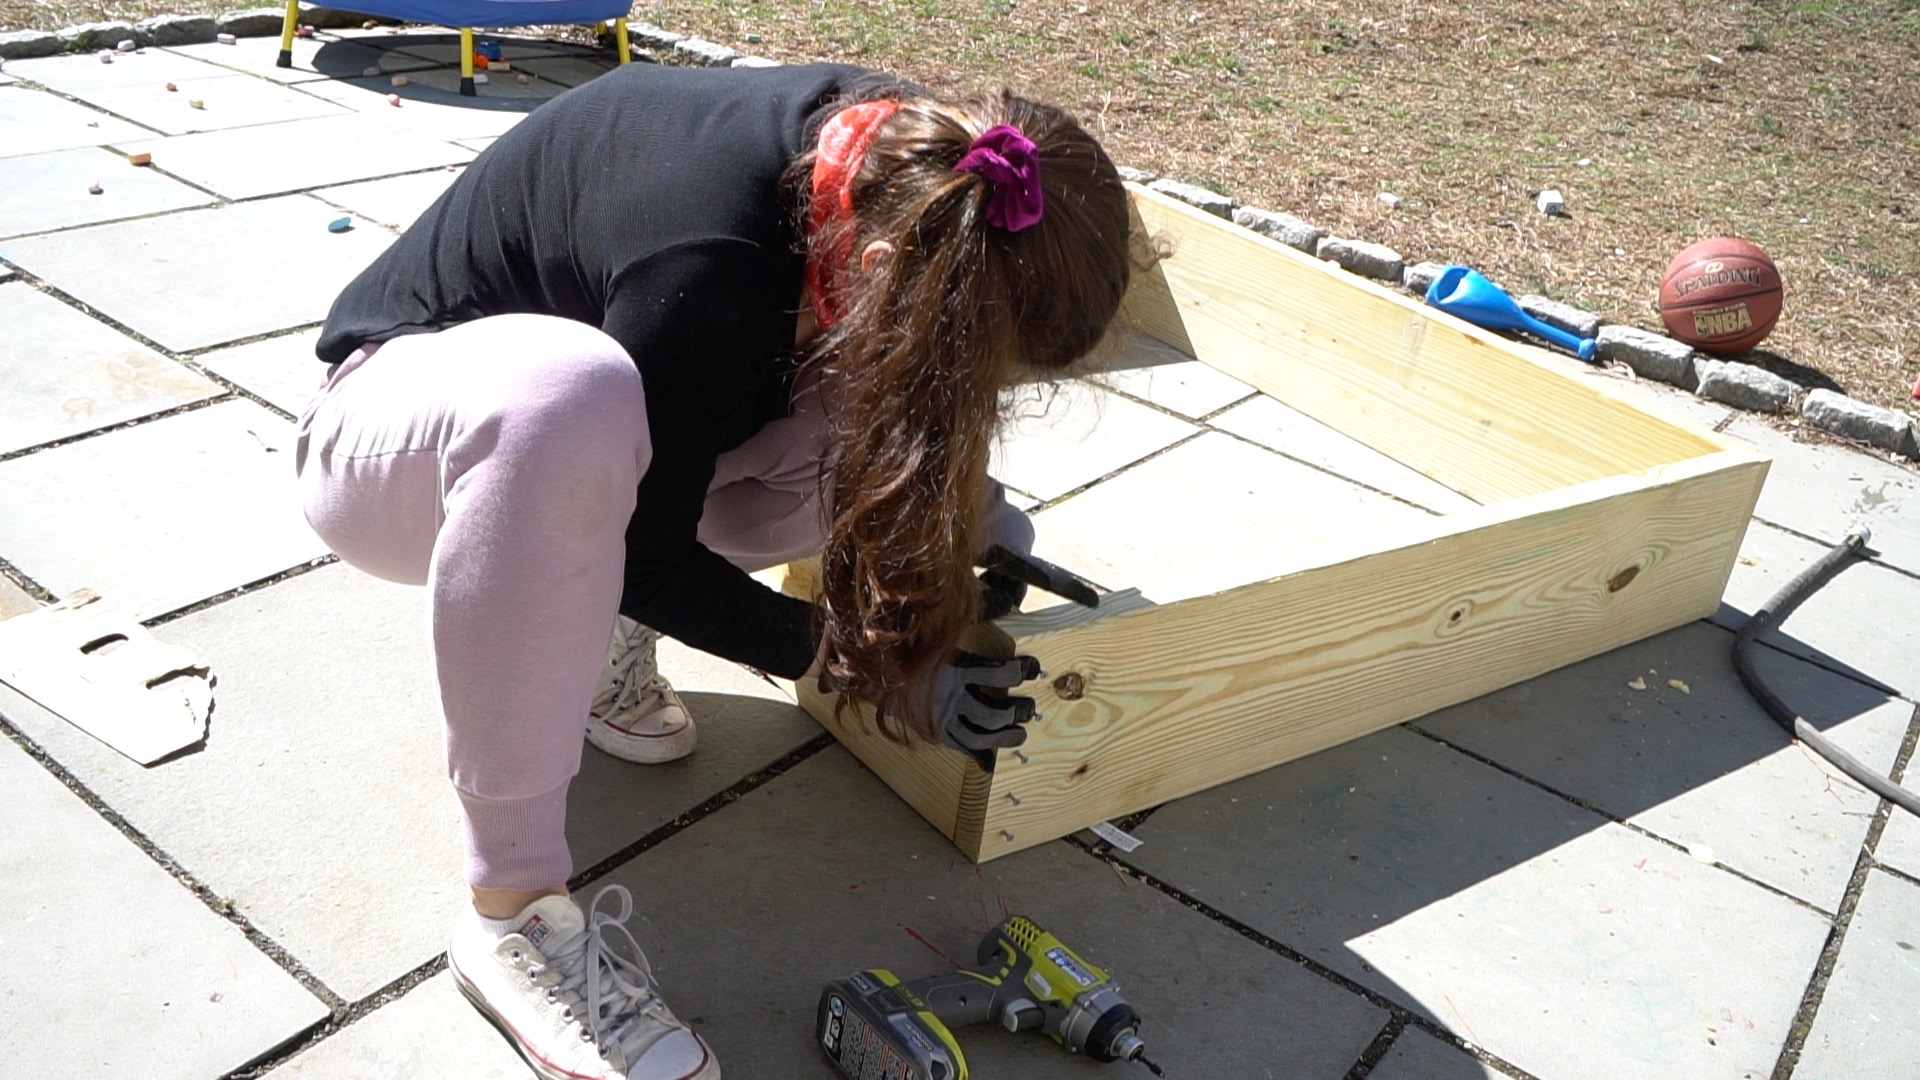
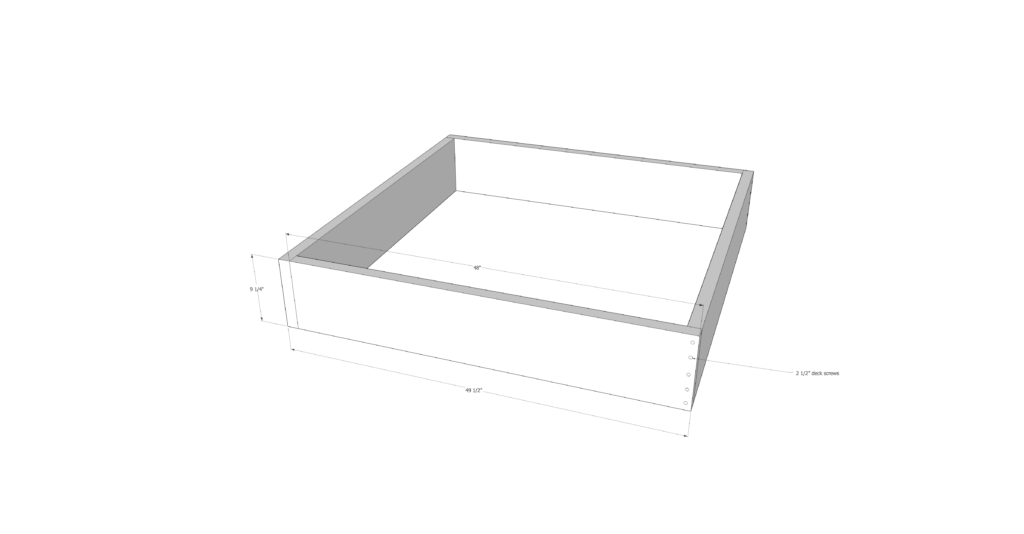
Take two 2x10"x8' and cut them at 48". Create a box using 2 ½" deck screws. You could also use a Kreg jig but I think screws do just fine. Make sure to use a square to ensure a perfect 90-degree angle.
Step 2 - make legs
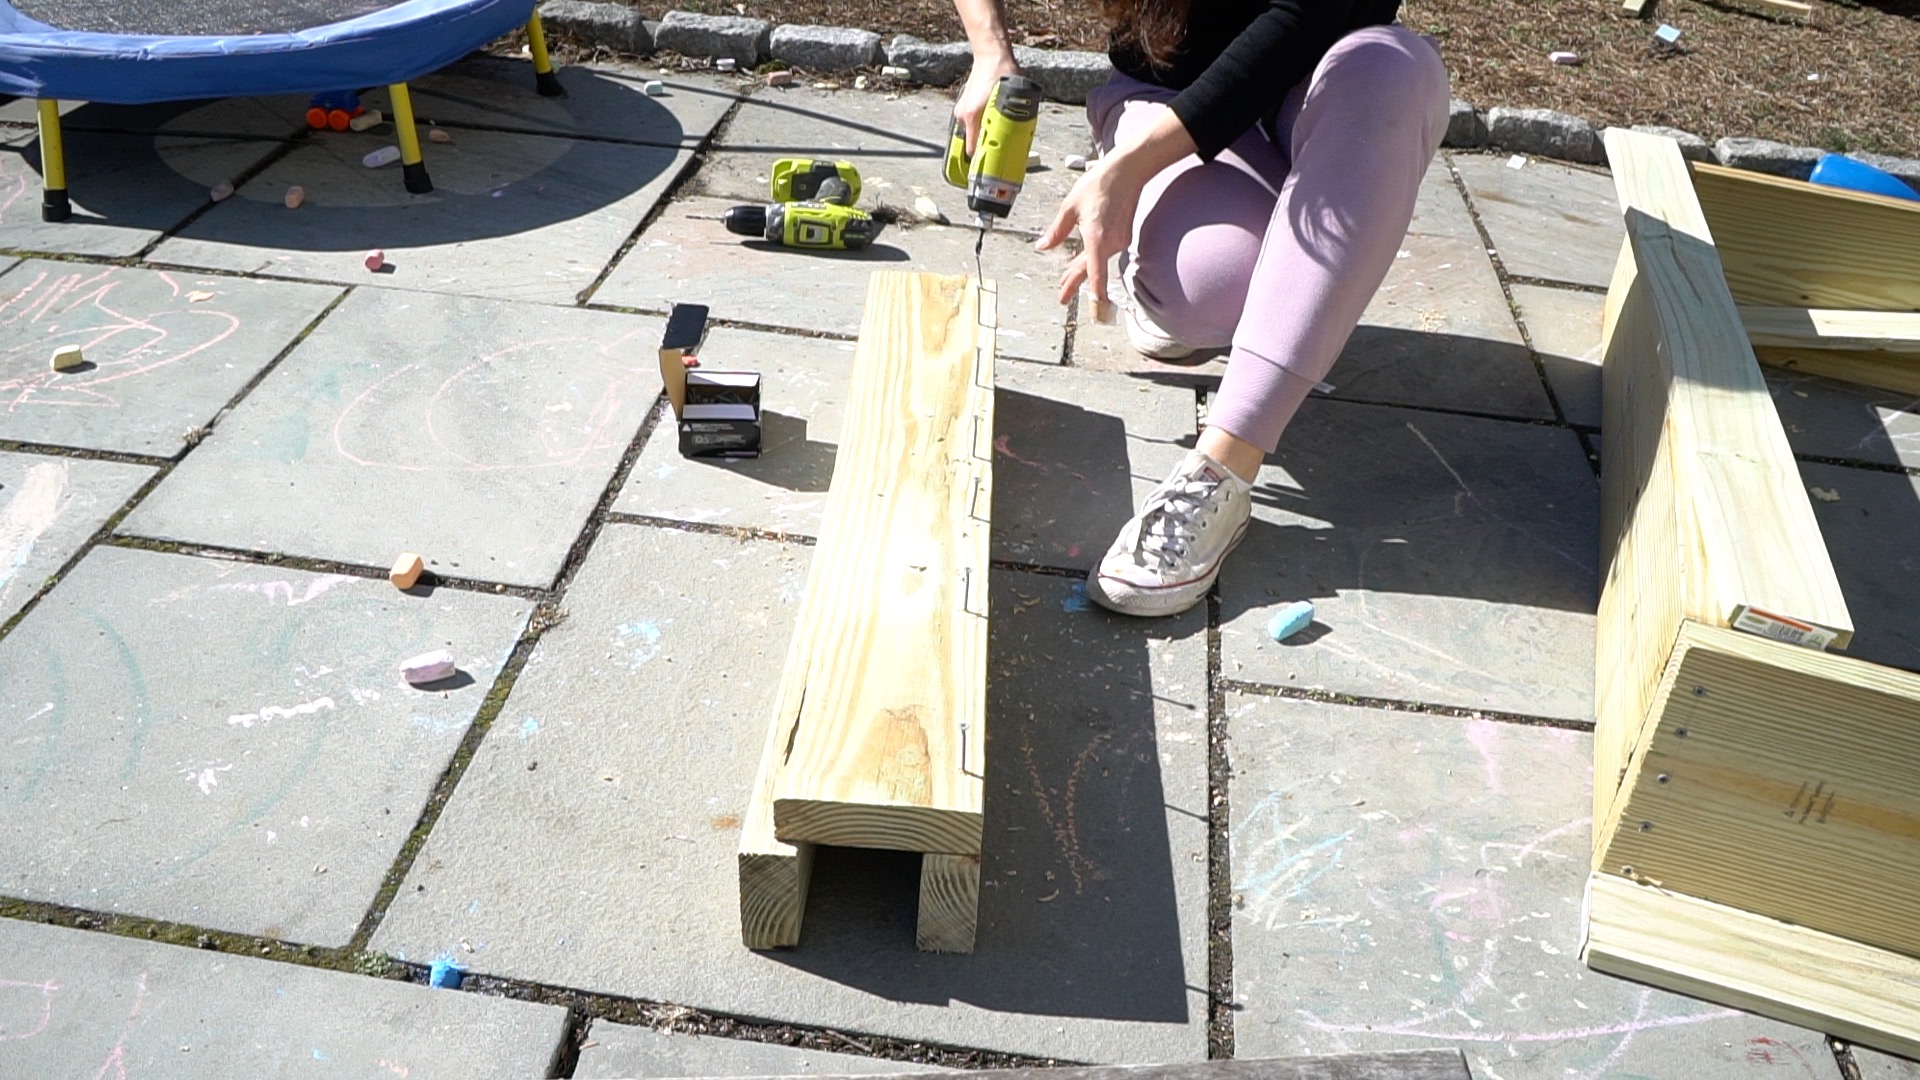
Cut four 2x6" at 36" and four 2x4" at 36". Attach 2x6" to 2x4" using 2 ½" deck screws.

Step 3 - attach legs to the box
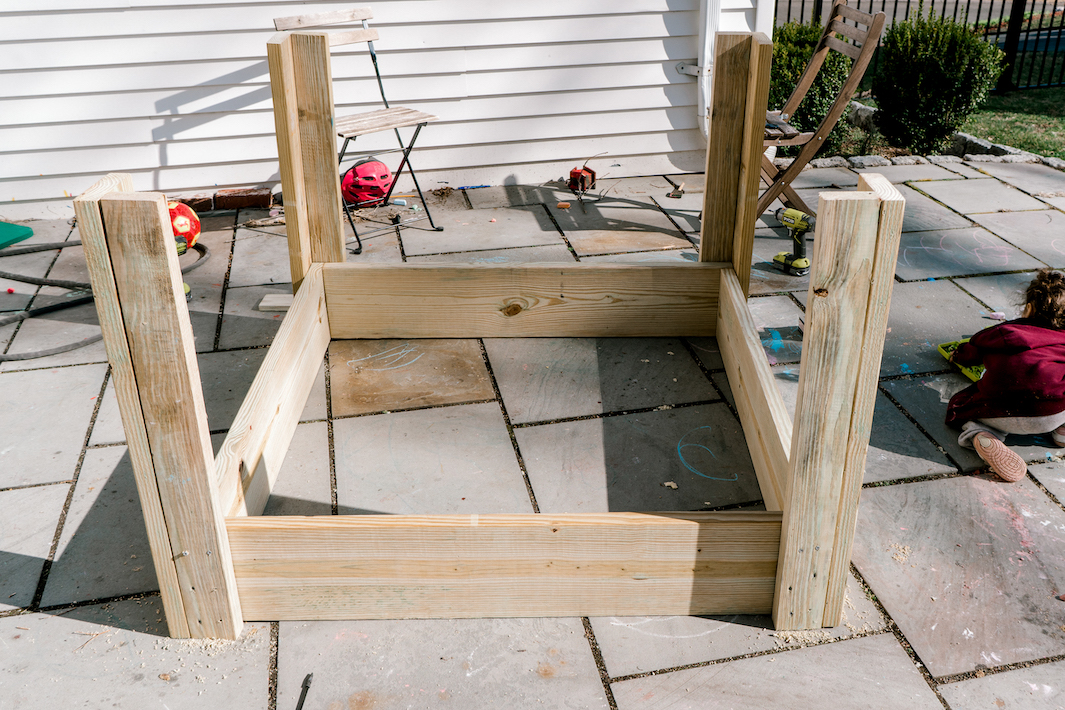
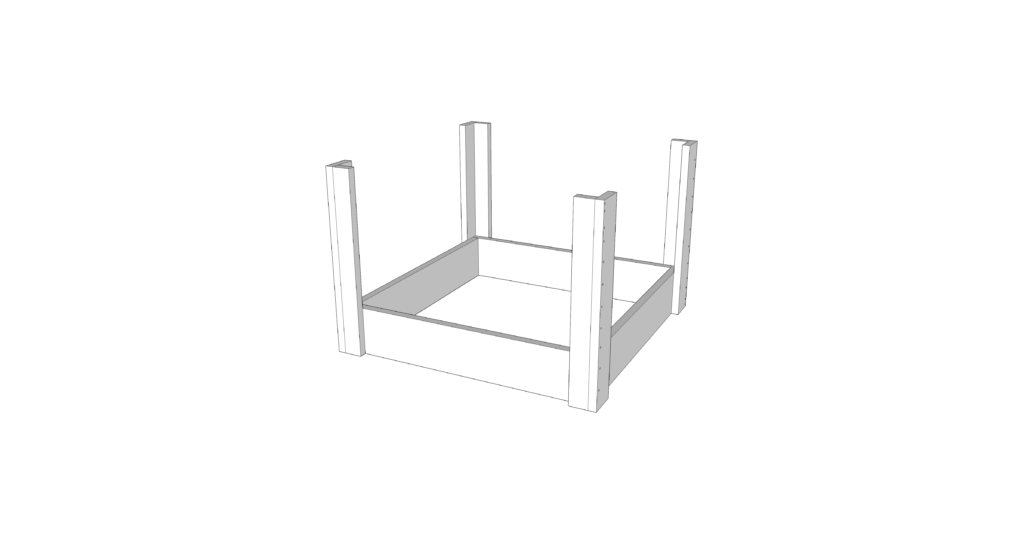
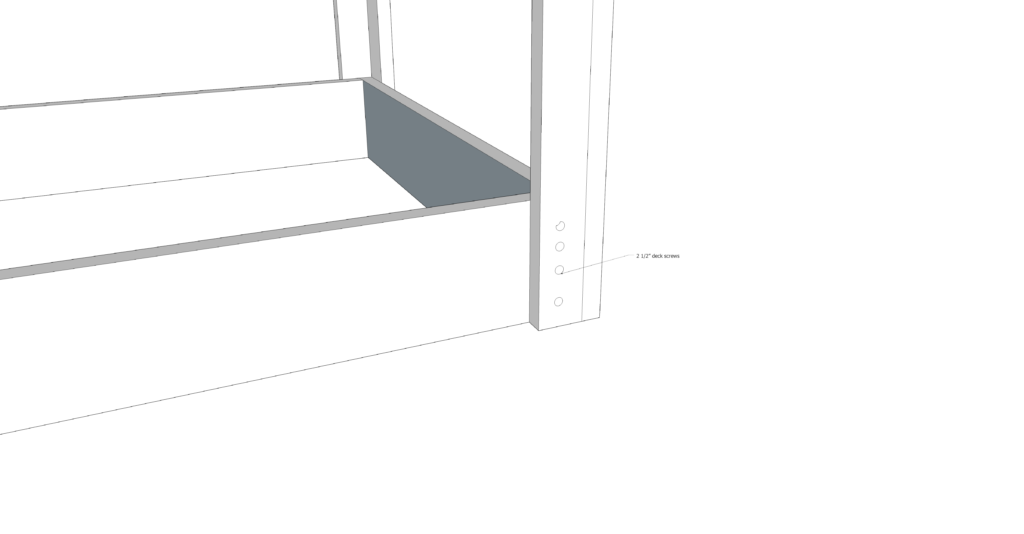
Put the box on the bottom and attach legs on four sides. Drill pilot holes and attach with 2 ½" deck screws from all the sides.
Step 4 - add support for the bottom
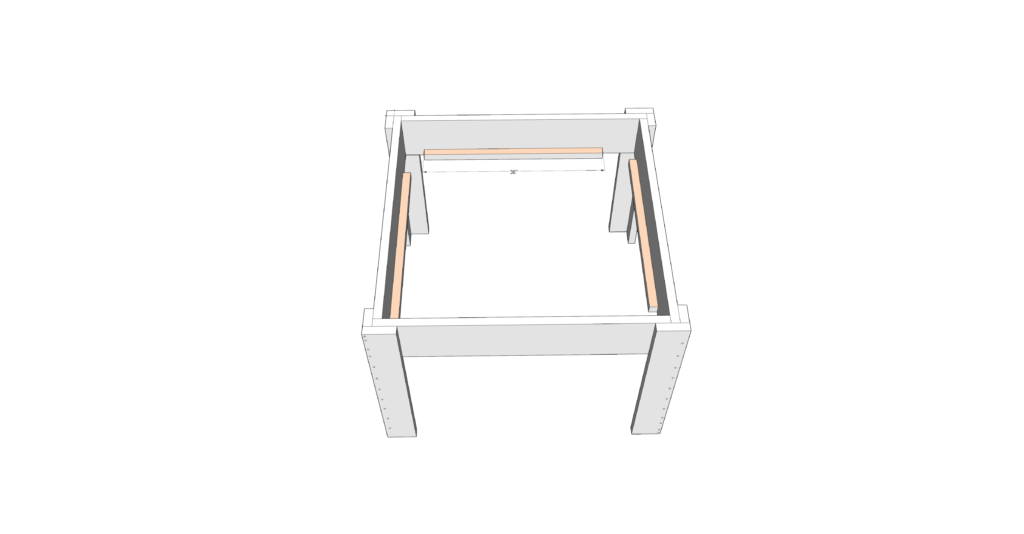
Cut two 2x2"s at 36" and attach them to the bottom of the box.
Step 5 - add boards for the bottom
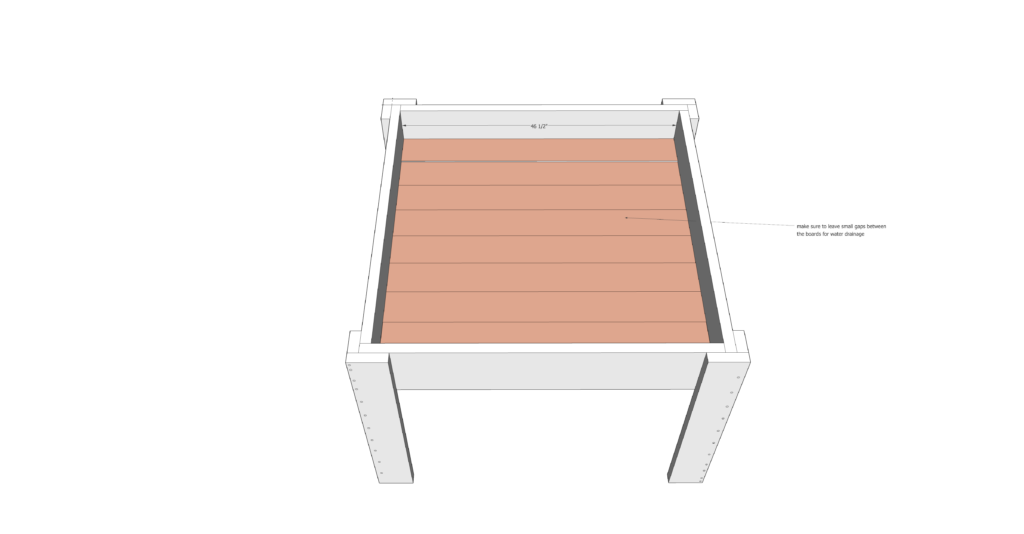
Cut eight 2x6" at 46 ½" and lay it out on the bottom. Arrange them to leave ¼" spacing between for drainage. This way you can avoid drilling holes.
Step 6 - add fiberglass screening
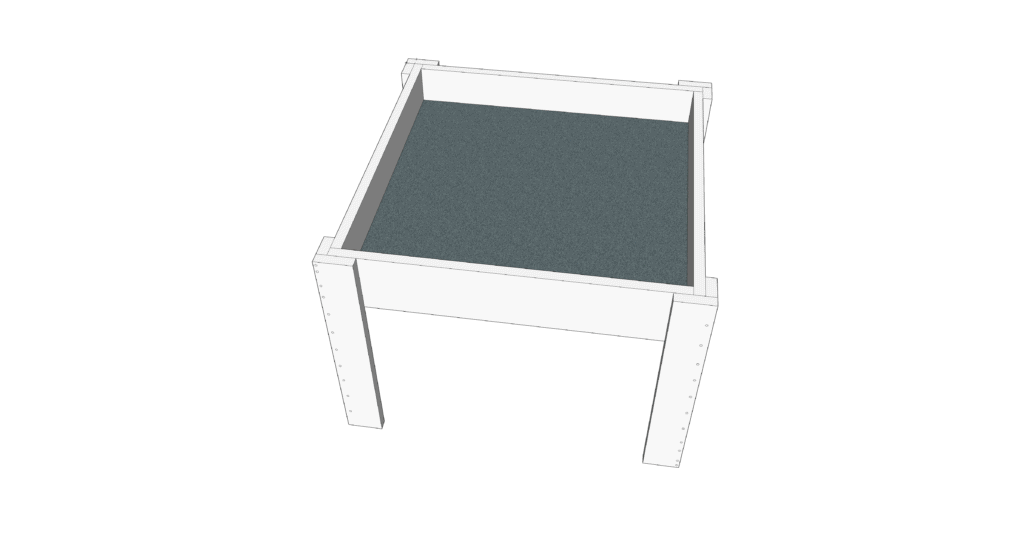
Cut fiberglass screening the size of the bottom. And add it to the bottom of the garden box. Use a stapler to attach it to the wood. This will prevent the soil from falling off through the gaps.
Step 7 - add the top
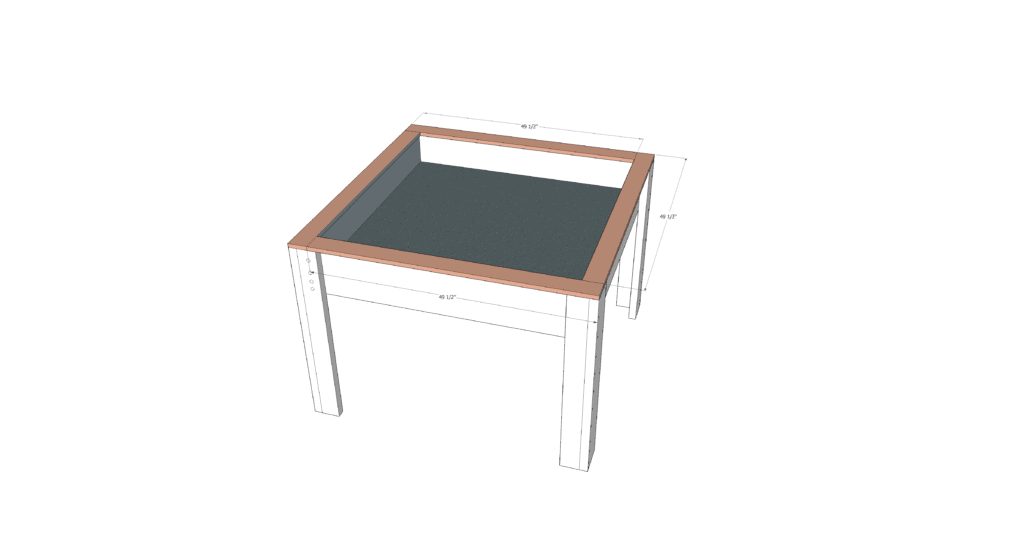
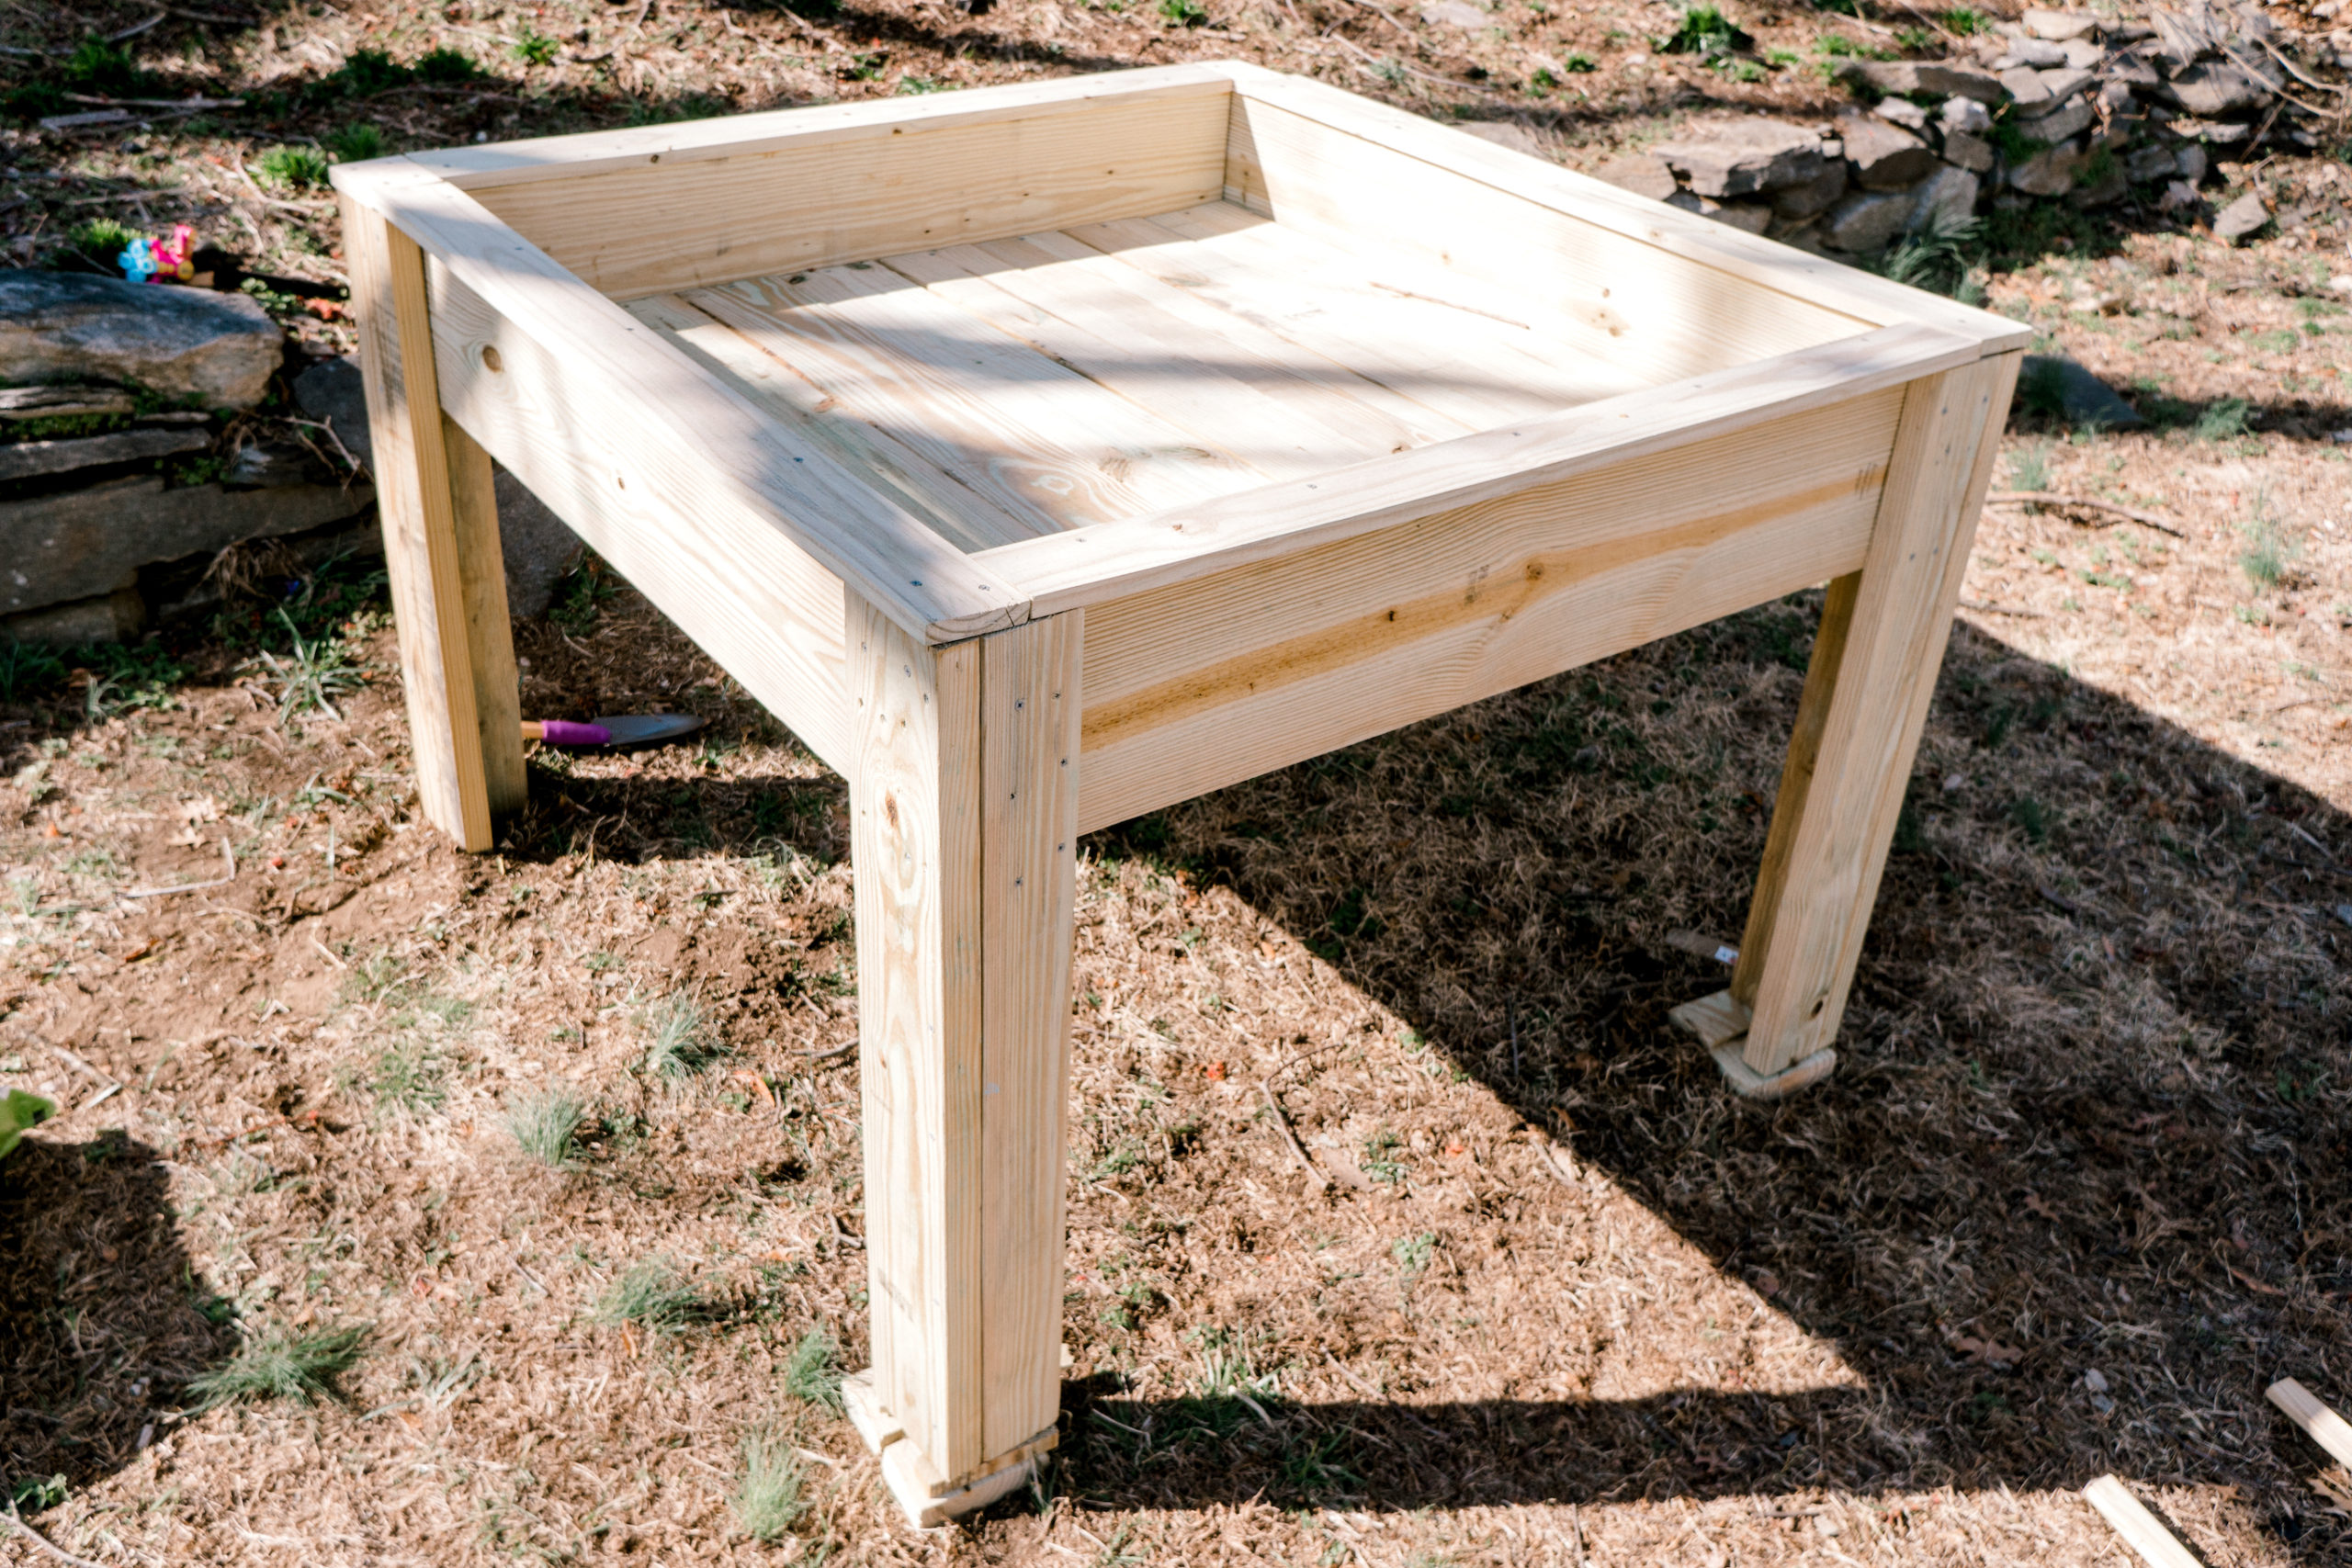
Cut 1x4" at 49 ½" and attach them to the top of the box using 1 ¼" deck screws. I used 1x4"x4' on my garden bed and for the decorative top part, the plan was to add square ballisters. They were $9/each so I thought I could opt out of it and just used the scraps of wood in the end.
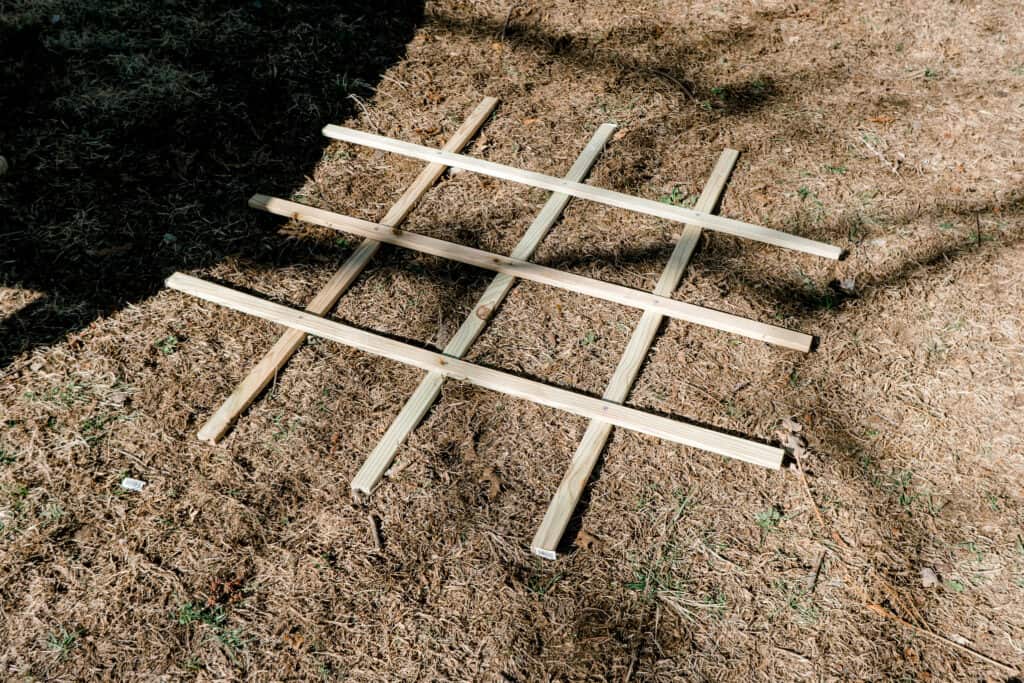
Step 8 - add a grit (optional)
The store I went to didn't carry lattice so I had to improvise. I used 1x2x8 to make dividers and just screws to connect them.
In my humble opinion, it turned out divine! I can't wait to grow a bunch of vegetables in it!
You need to place your raised bed in a sunny spot, where the sun comes for at least 6-8 hours a day.
I ran into a problem of uneven ground. Our backyard doesn't have much even space and wherever it's even, it's in the shade most of the time.
I had to dig 2 holes for the back legs and elevate the front legs.
When it was super stable it was time to add soil.
Adding soil to your DIY elevated raised garden bed
After reading the "Square foot gardening" book I was very determent to make Mel's mix which contains ⅓ part of vermiculite, ⅓ of peat moss, and ⅓ of compost (5 different kinds).
I honestly went to the store thinking I'll get it all and make my own mix, but when the store didn't carry vermiculite, I thought it's much easier to use organic raised bed soil. Since my garden isn't too big, 4 - 1.5 qt. bags were enough. I also added ⅓ of the 2qt. Bag of peat moss. And added a 40-pound bag of cow manure.
Get your printable PDF plan here
I'm planning to grow tomatoes, cucumbers, carrots, beets, radishes, and some salads and herbs. If you'd like to follow my gardening adventures, I post in my Instagram stories about my progress and obstacles that come on the way! (Like the squirrels that dug out my seeds after I planted them. ahhh! I think it will be a fun summer! ;D) Will see you there!
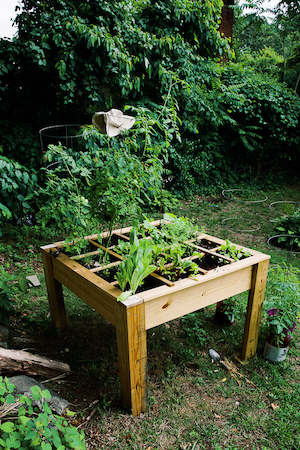
UPDATE: (07.20.2020) This is how my garden looks like now. Few things I'd like to suggest. If you follow me on Instagram, you've seen what kids of war I got into with squirrels. At some point, they came and took ALL my tomatoes!!! Plus, I've learned that tomatoes and cucumbers grow very tall and it's not convenient to tend for them when they are so high up. Next year I'm planning to make something like a covered greenhouse, so the squirrels can't get to my tomatoes!
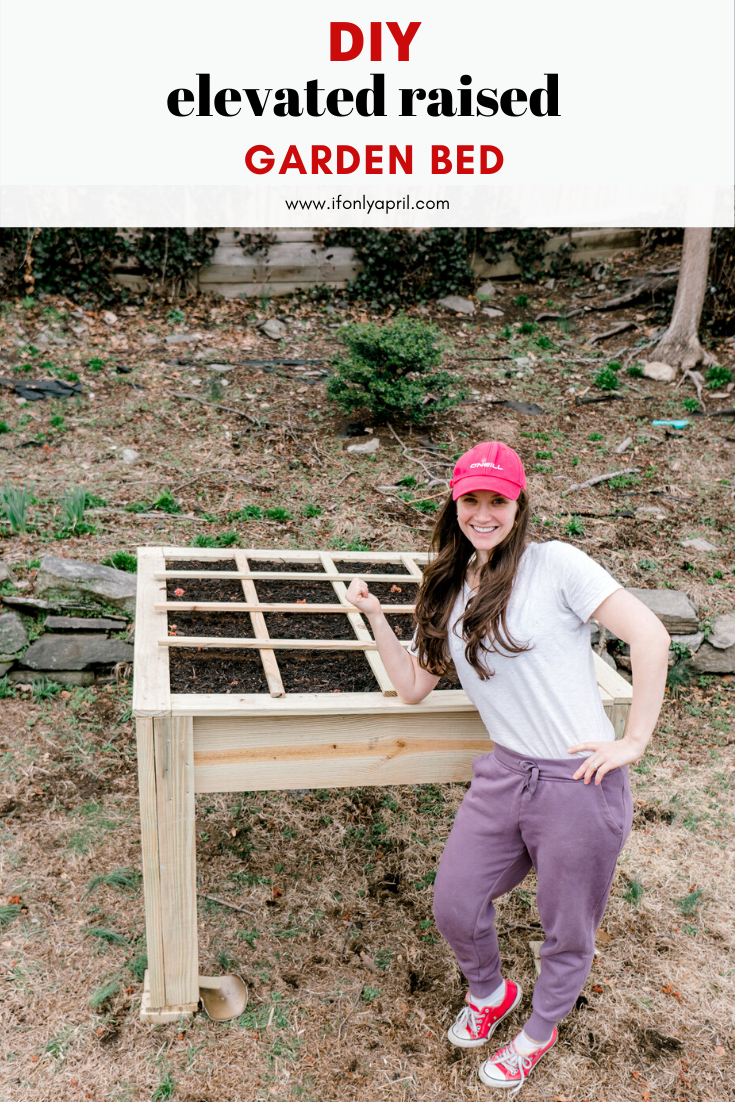
PIN FOR LATER>>>>>>>>>>
YOU MIGHT ALSO LIKE
HOW TO BUILD A SANDBOX PICNIC TABLE
HOW TO MAKE A UNIQUE MACRAME + NATURAL DYE COTTON ROPES
MAKE A CITRONELLA CANDLE + FREE PRINTABLE LABEL

xoxo,
April




Leave a Reply