I absolutely love functional furniture "with a twist", something that serves more than one purpose. Summer is in full swing here and kids spend a lot of time outside. We've already got a DIY sensory table (that mainly used for water activities), a playground that I built earlier this year, and a balance beam. To keep the summer backyard entertainment going, we needed a sandbox picnic table!
I love the concept of a sandbox hidden on the picnic table! It fits perfectly into my idea of "functional furniture with a twist". When not in play mode, it can be just a picnic table for kids! Brilliant!
I was trying to find plans on how to build it but had no luck so I just came up with my own plans.
Cost: around $35 (it can be cheaper if using regular wood instead of pressure-treated lumber)
Time spent: 2 hours
Level: beginner
The video version is available HERE.
Subscribe to my channel to watch it!
Materials
- (4) 1x4x8' lumber
- (1) - 1x6x8'
- 1) - fence picket (or could be replace with (1)- 1x6x8
- ¼" plywood sheet (18"x32")
- 1 ¼" outdoor screws
- paint (optional)
Cut list:
(4)- 1x4 @ 27" at 30-degree angle for legs
(4) - 1x4 @16" for sides of the box and dividers inside the box
(2) - 1x4"@32" wider sides of the box
(2) -1x4 @ 34" side planks on the table
(2)- 1x6" @ 34 middle boards on the top
(2) - 1x4" @ 42" benches support at a 30-degree angle
(2) - 1x5.75" @34 for benches (I used 1 picket fence board, but you can use 2 of 1x4"s on each side instead)
Few words on choice of lumber
A couple of words on wood. I used pressure-treated pine for this project. We are planning to have our picnic sandbox table outside in the not covered area, and it will be exposed to rain all the time. Cedar would be nice, but first, my local home improvement store doesn't carry any, and second, it's quite pricey.
If you plan to have the sandbox picnic table on the patio, you can totally use a regular pine, which would make this project so much cheaper (probably around $10 in lumber).
I'm not a big fan to work with pressure-treated wood, but it serves the purpose. Just make sure to wear a mask and protective gear when you sand it since the chemicals when cut, could be harmful to the body.
Instructions
[1.]
Cut all the wood as per instructions (you can download my plans below). You can adjust the length and height to fit your kids better.

[2.]

Make a box for the sand. I was debating if I should make it deeper but realized that 3.75" would do just fine and more sand would mean heavier and less mobile structure.
[3.]
Cut legs at a 30* degree angle. I used my miter saw but you can just measure it with a triangle to get the right angle, in case you don't have a miter saw and use a Japanese saw to cut it by hand. This tiny thing is a beast!
Attach legs to the box.

Attach the plywood board to the bottom.
[4.]
Cut supports for the benches. I cut mine with the same 30* degree angle, so the ends don't stick out. Attach it to the legs.

[5.]
Attach benches to the supports. So I ran out of 1x4"s and had to use fence pickets from my stash. I might change it for 2 boards of 1x4" on each side since it would give more space for little touches to seat on.

[6.]
Pat yourself on the shoulder because you are practically done. Or you can go further and make dividers inside the box. I decided to add two boards inside the box to create space for all the toys and gadgets needed for a play in the sand.

[7.]
Align the wood on the top, to make sure it fits on this sandbox picnic table perfectly. Then take two 1x4"s and attach it on the sides to the box (I think it will be nice to have arm support for little hands, plus it can add some space to play on!).

The remaining boards in the middle ( I used 1x6") would be acting as a removable top. Flip it over and with some scrap wood attach together.


[8.]
Paint the table! Since it is meant for kids, I feel it has to be painted in bright happy colors! I painted this mural and it makes me happy to look at it! It was inspired by the Grand Canyon and hot sun ;D
If you'd like to have plans, they are available at my Resource Library!
You can download it here a get it directly to your inbox!

I absolutely love how it turned out! The kids are happy and spend hours playing it! Well, for now, it's new and exciting! Let's see if it will stand the test of time! I have to say, our sensory table is going strong second year in the row! So I have high hopes about this picnic sandbox table too! The time will show!
Happy kids = happy mama! While they are busy I'll have time to work on something else😄 I already have a couple of more ideas on how to take the backyard play on a whole new level!

IF YOU LIKE THIS TABLE, YOU MIGHT LIKE:
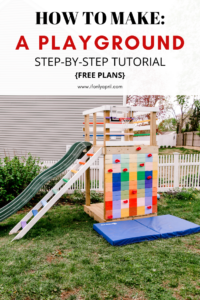
A playground that I made this summer, it's such a great entertainment center!


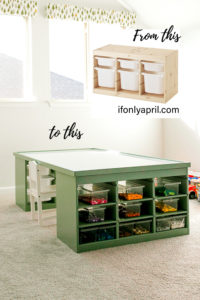
Also, check out the Montessori-inspired sensory table that could be made from scrap wood, using plastic containers.

You might also like this tree playhouse that I made for my kids last fall!
Stay awhile and explore! I'm sure you'll find a DIY project that you like! 🙂
If you like this blog, make sure to check my YOUTUBE channel and Instagram @ifonlyapril. I try to post in stories my progress with all the projects.
Also, don’t forget to follow me on Pinterest, where I create inspiration boards for my next projects.
xoxo,
April


Great ideas! 76 and looking to start some easy woodworking with basic tools. Any suggestions?
Thank you Cheryl! And it’s amazing that you want to start some woodworking!👏🏼 I’d suggest for you to pick an easy project and get tools for it. I recently made a video “6 easy DIY gifts from wood” on my YouTube channel. Maybe you could find something that you would love to make there? Also, I have the section on my blog “all things wood” where I have most of my woodworking project tutorials.
Just choose one project and take it from there!! And share with me what you make, I’d love to see it!!😘
I'm searching all over this page and site for the plans mentioned, but cannot find them any where. Please help
Hi Sam! If you sign up for the newsletter, you'll get a password to resource library where I keep all the plans. I hope this helps