
Disclaimer: Please note, that some of the links below are affiliate links and I will earn a commission if you purchase through those links (at no additional cost to you). Thanks for your support this way.
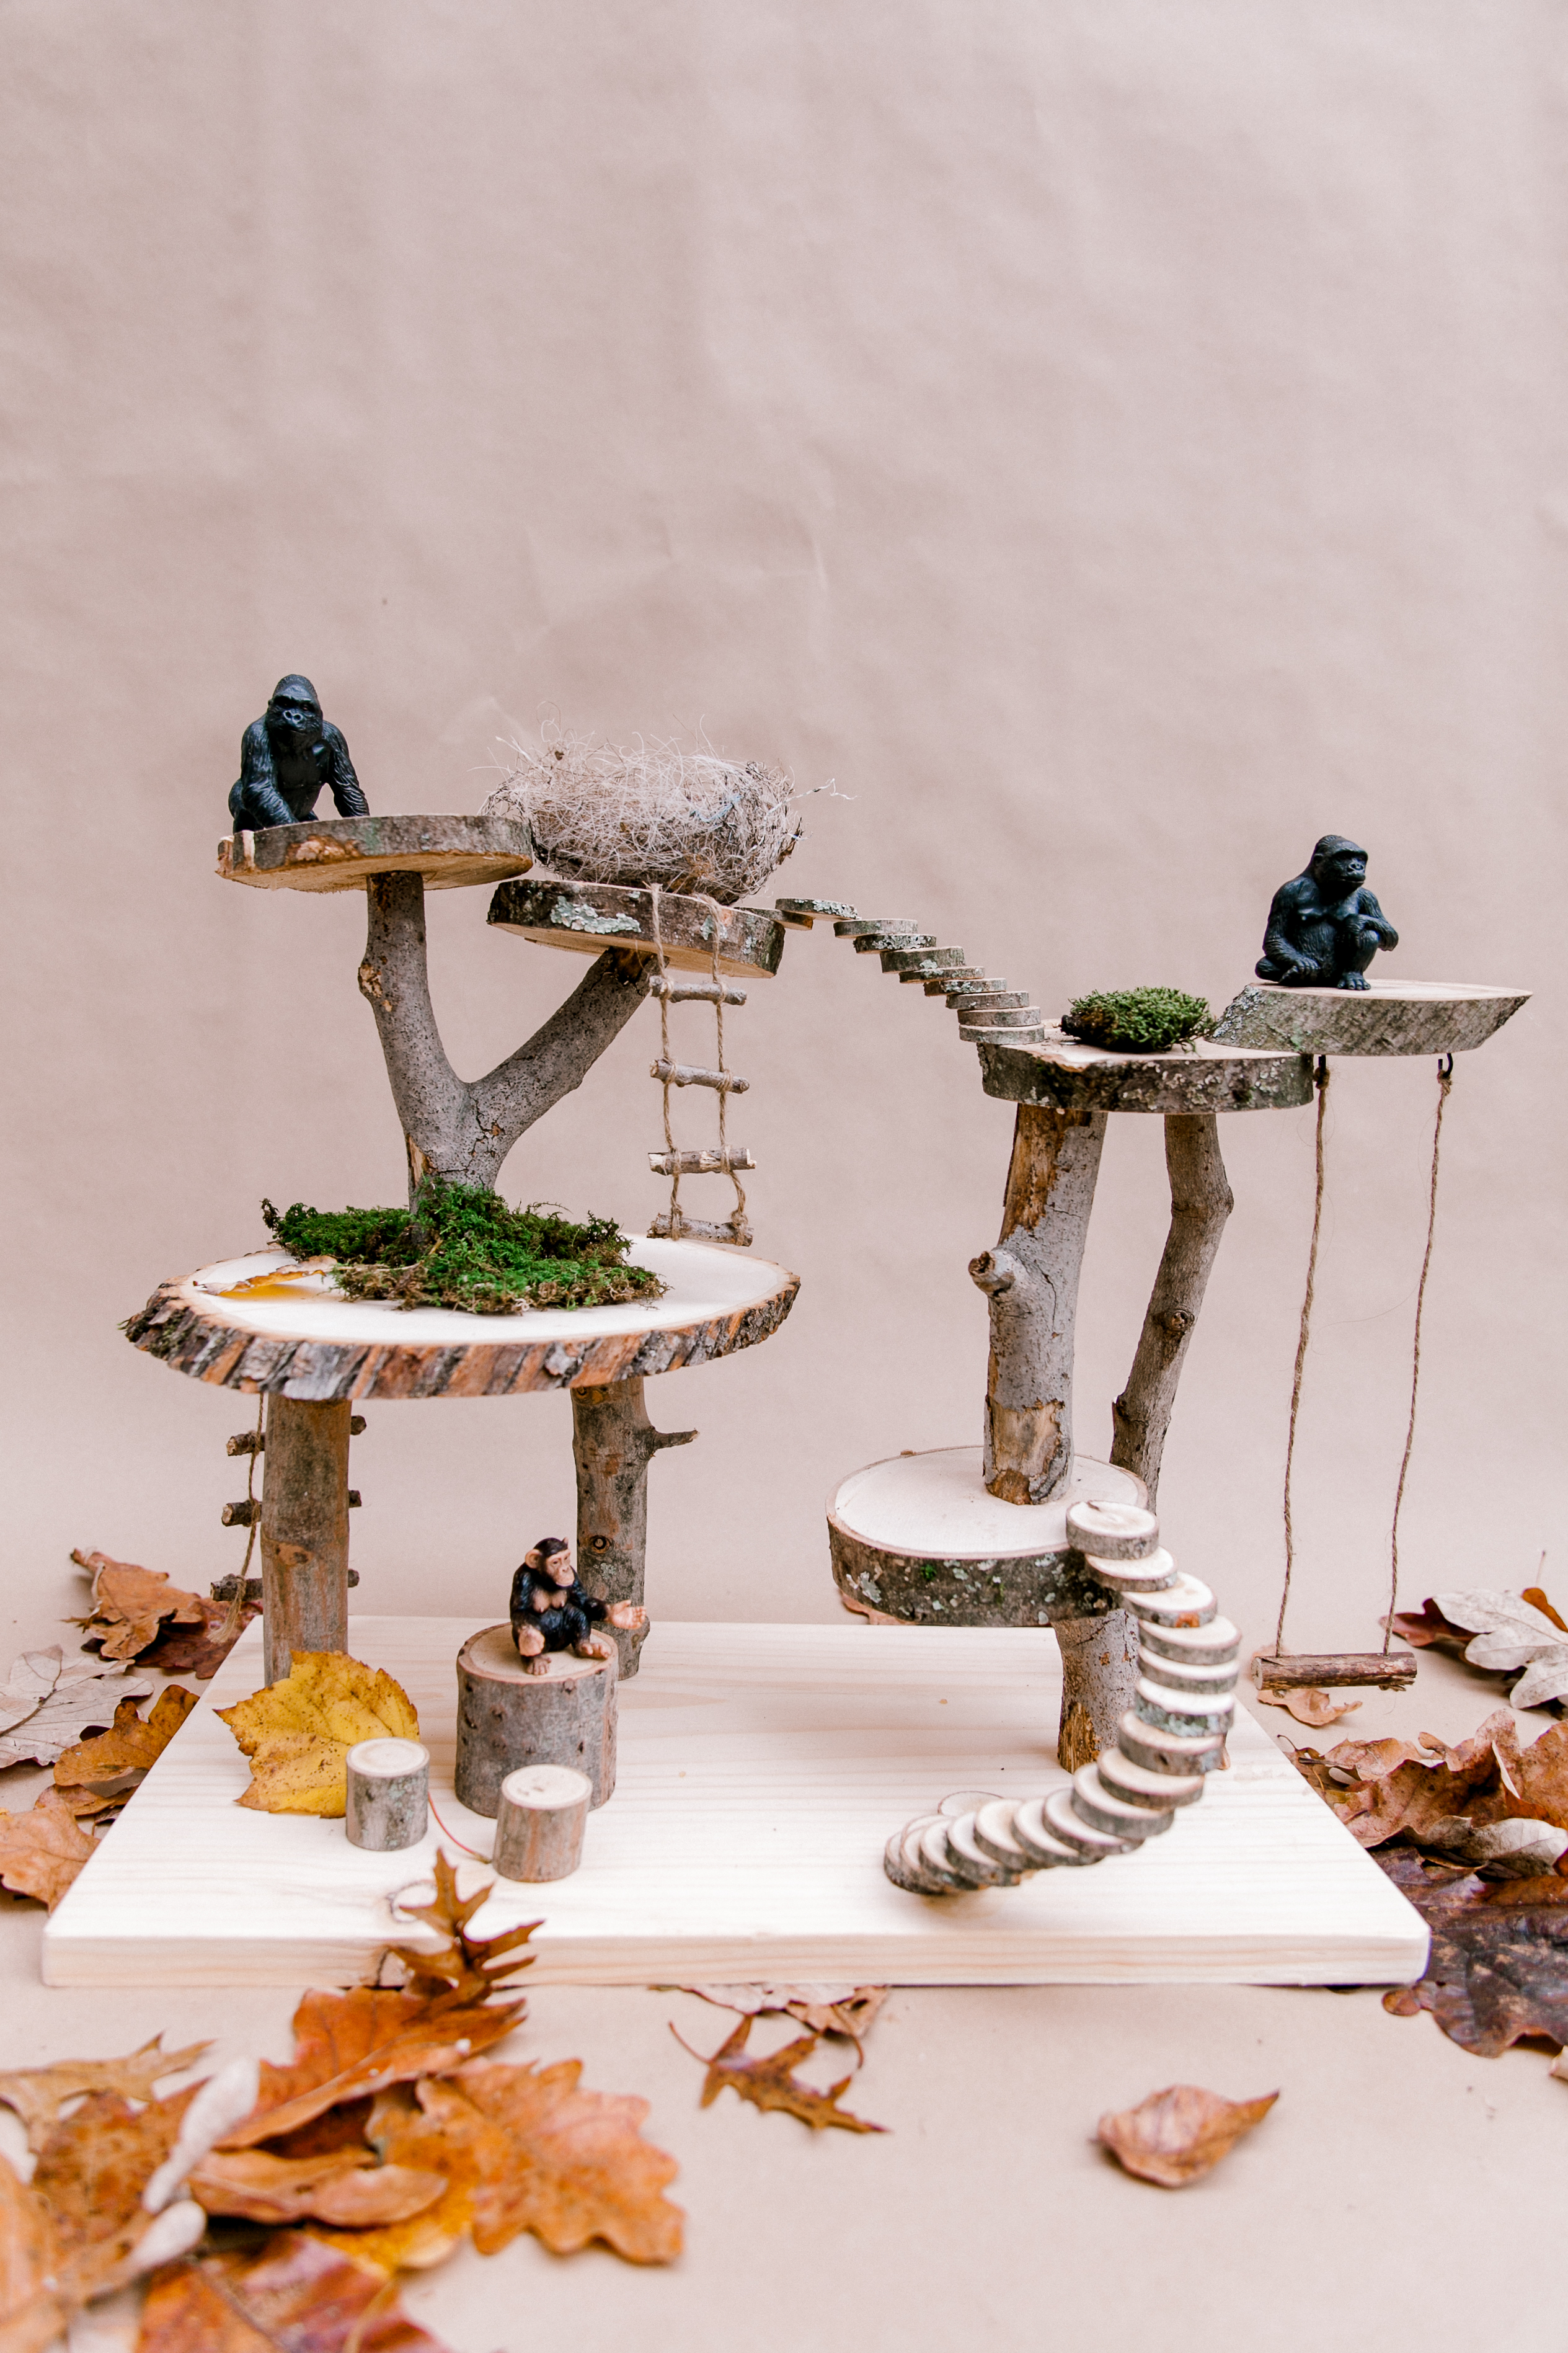
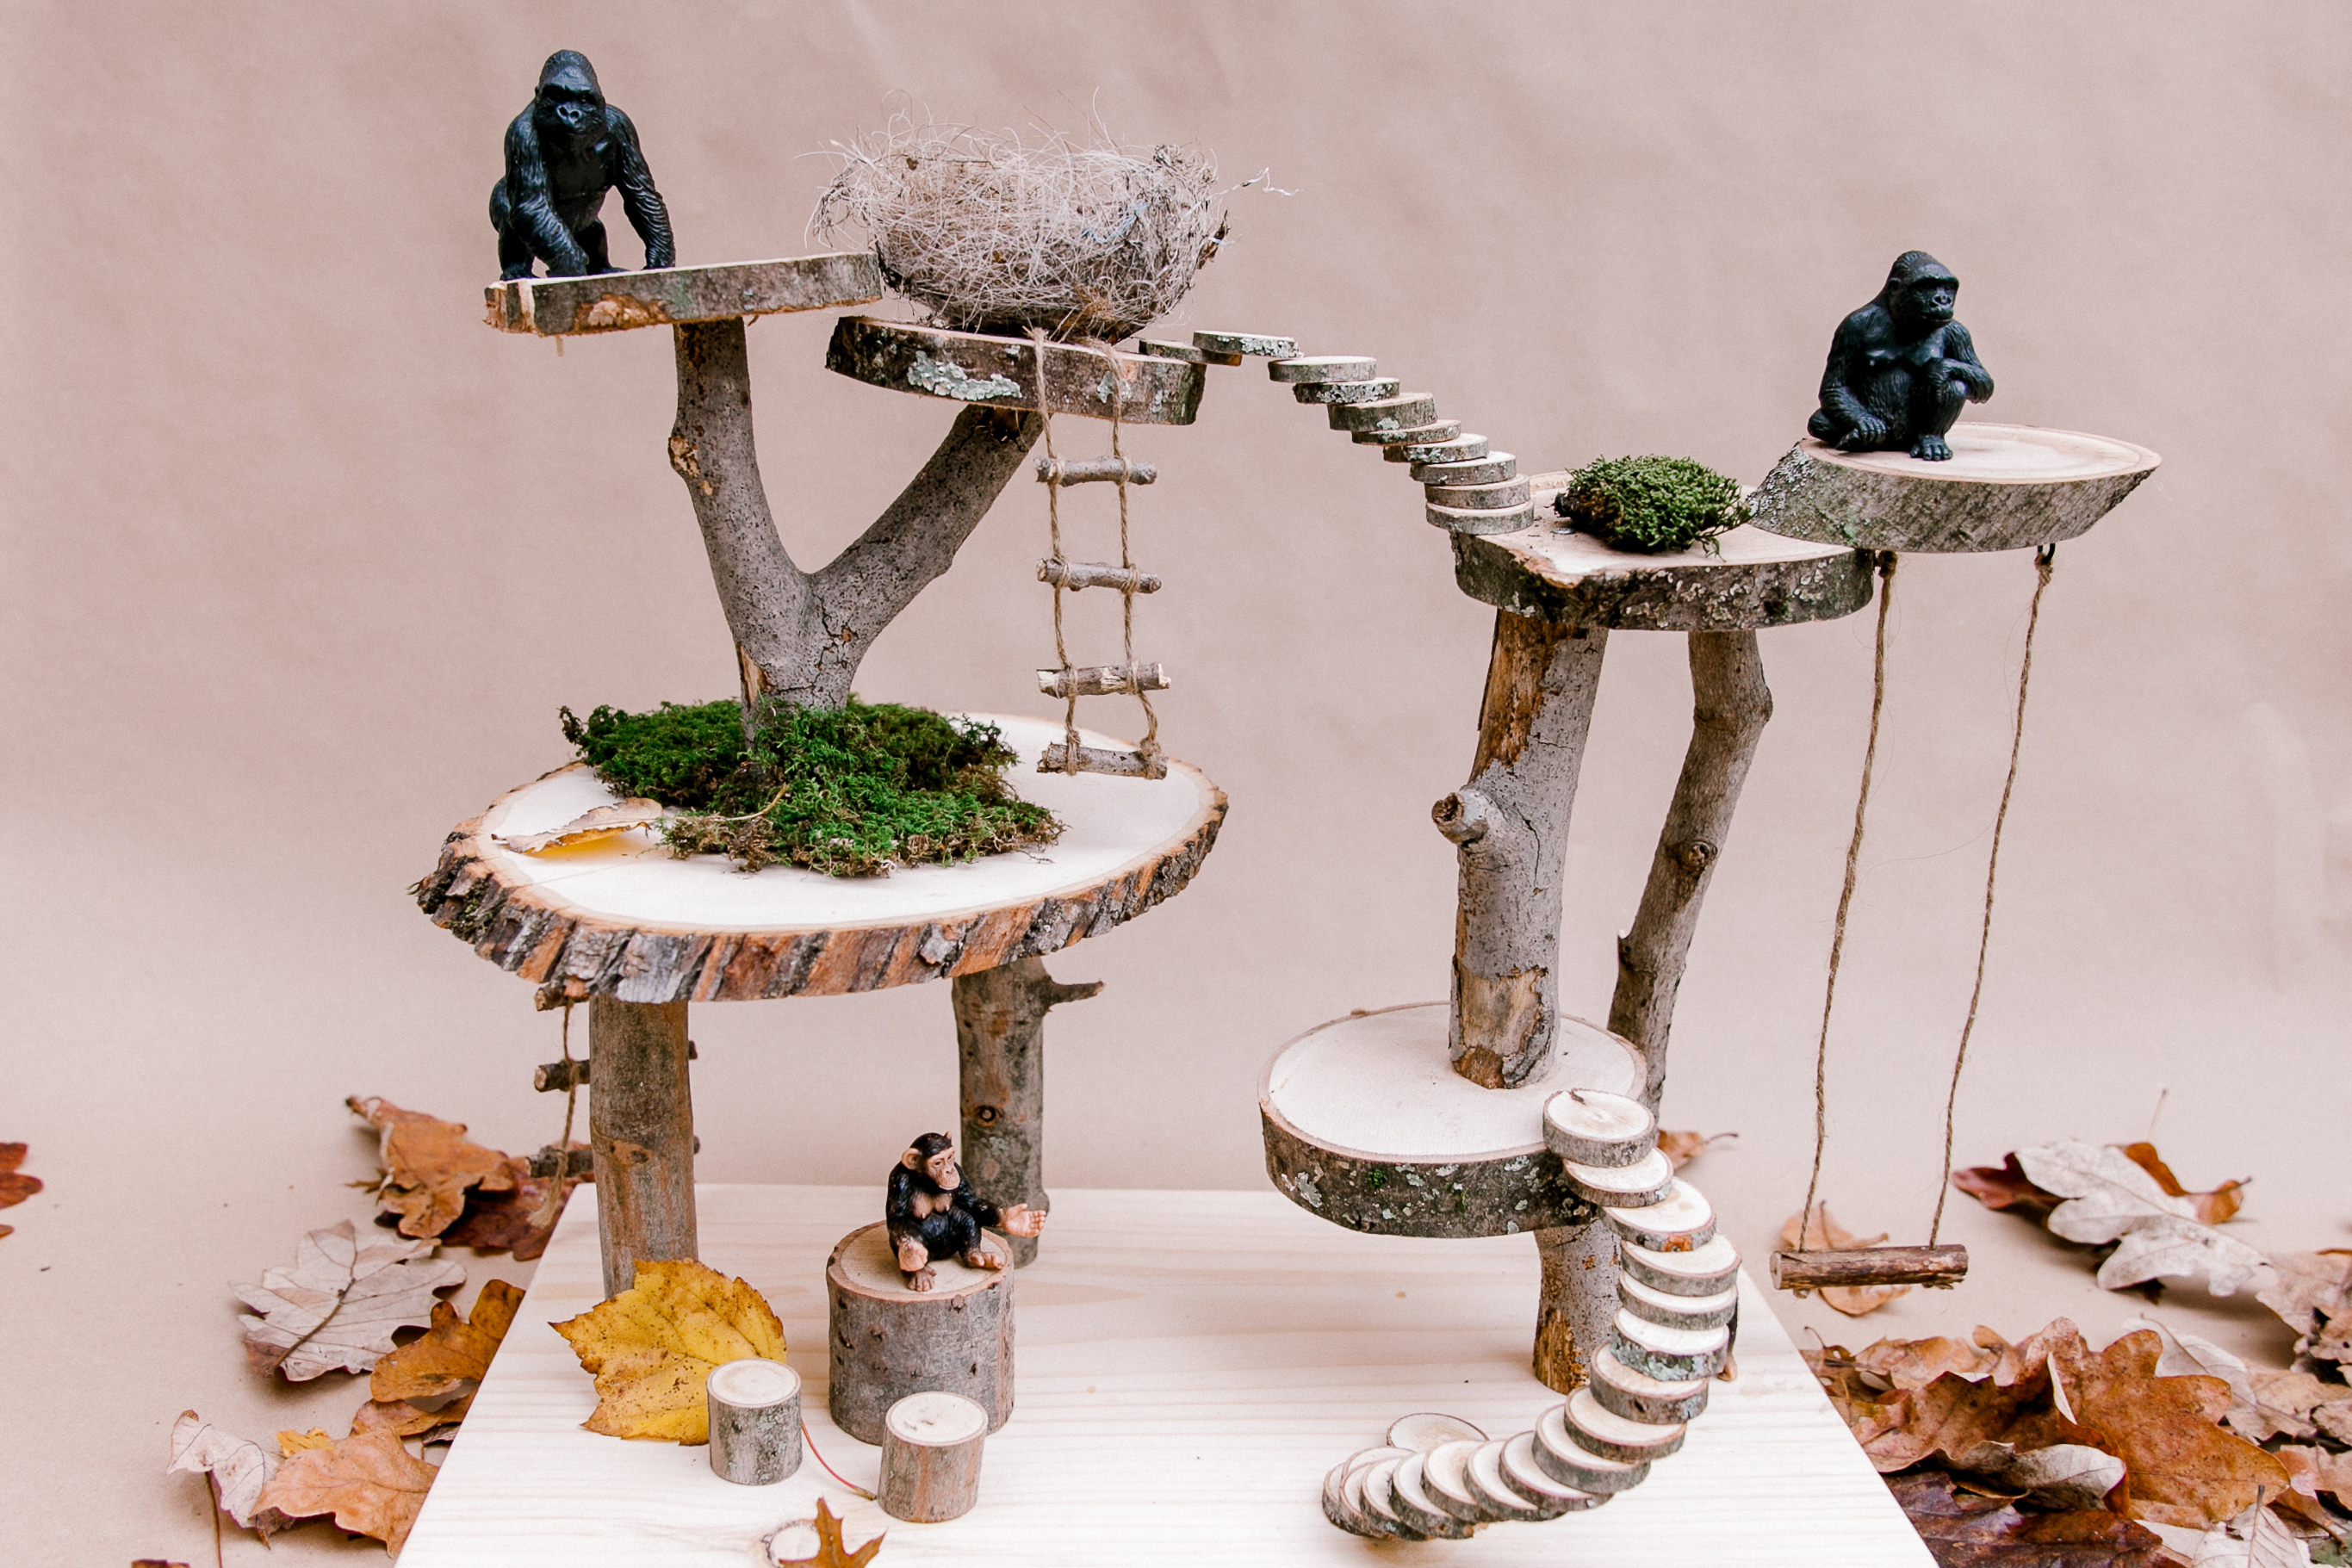
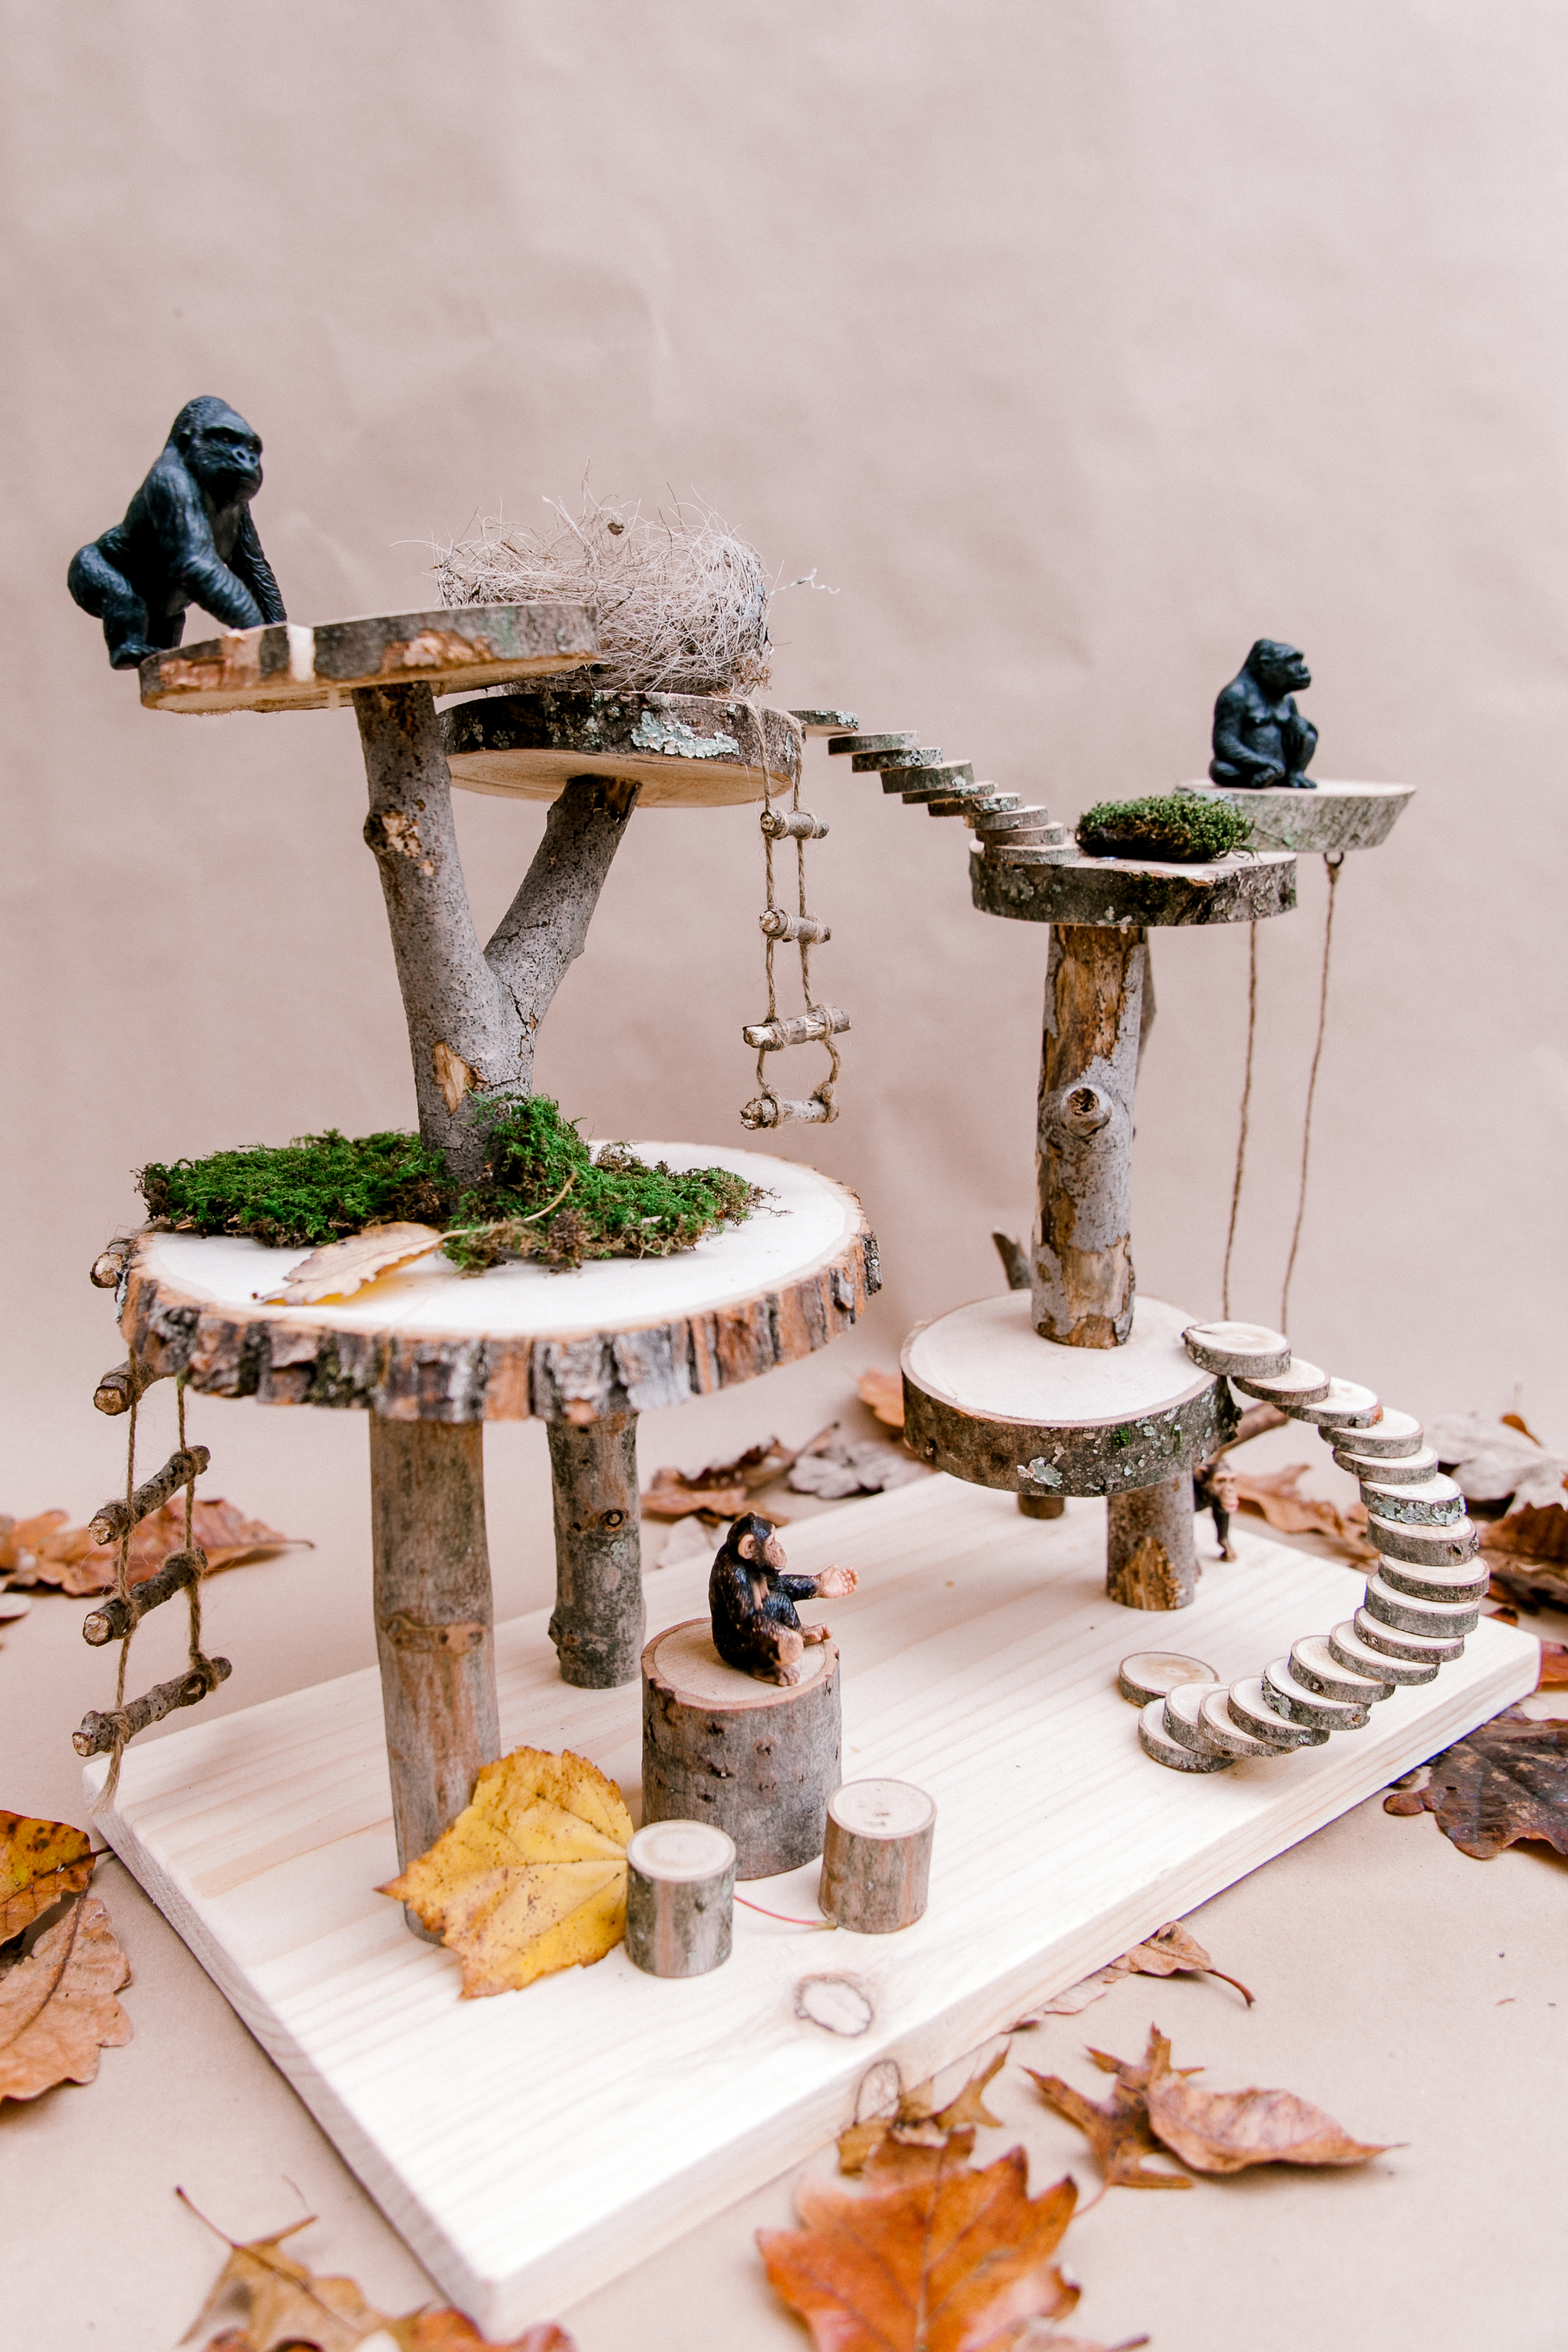
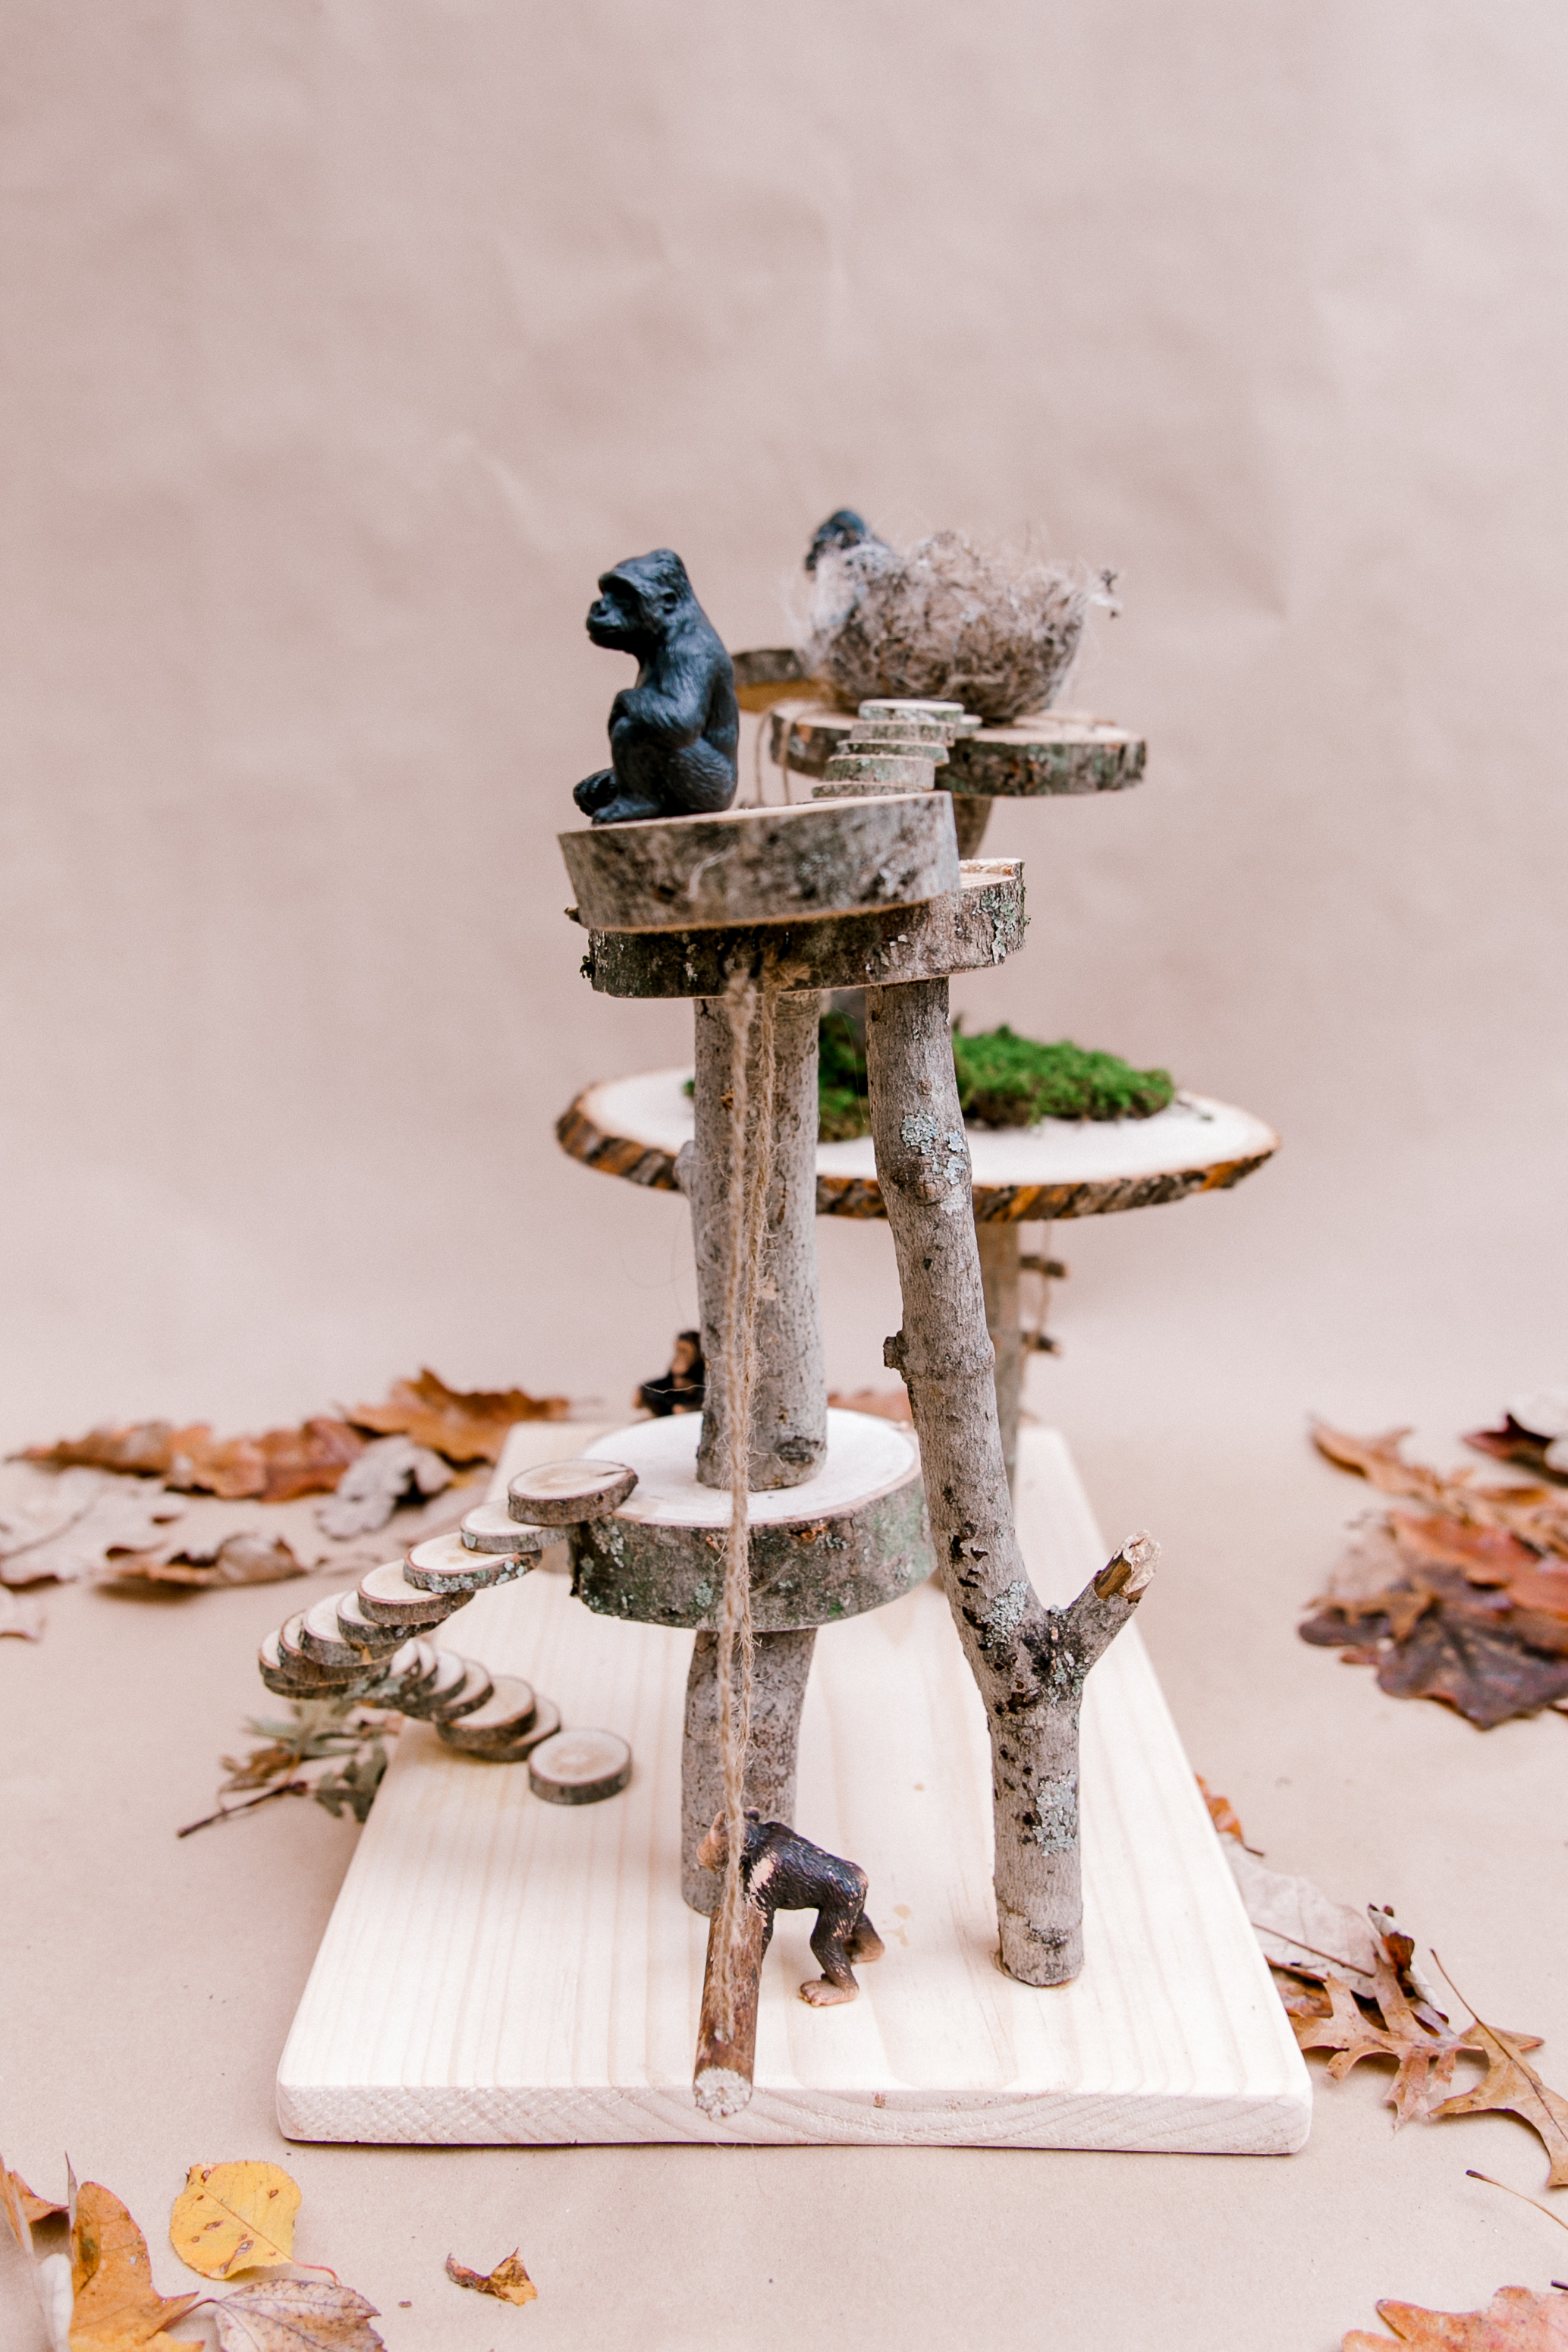
Since fall is at its peak we wanted to make some Fall Inspired project for the kids, using only natural materials aka things we found on our long forest walks. That's how the idea of a DIY Toy Tree House for pretend play was born.
Fine, not everything you see here was collected in the woods. I found free firewood on the Facebook marketplace and thought that was my chance to finally make Sasha and Sia and natural version of a dollhouse, just for her extensive collection of animals. As usual, there were few tree houses on the market that I've been drooling over, like this one or this. I think mine turned out to be very lovely but if you are not a handy type, you should check out the options above.
So how did I do it? Let's dive in!
 MATERIALS
 MATERIALS
- wooden log
- branches
- nails
- rope
- plank for the base
- moss
- wooden glue
- 2 self tapered hooks
- animals to play with, we love these ones
TOOLS:
- miter saw or any saw you have
- a hammer
INSTRUCTIONS:
1. While you are enjoying a walk in the woods, collect the branches, logs, moss, and other things you'd like to add. Check the Facebook marketplace if someone just cut the tree and needs to get rid of it.
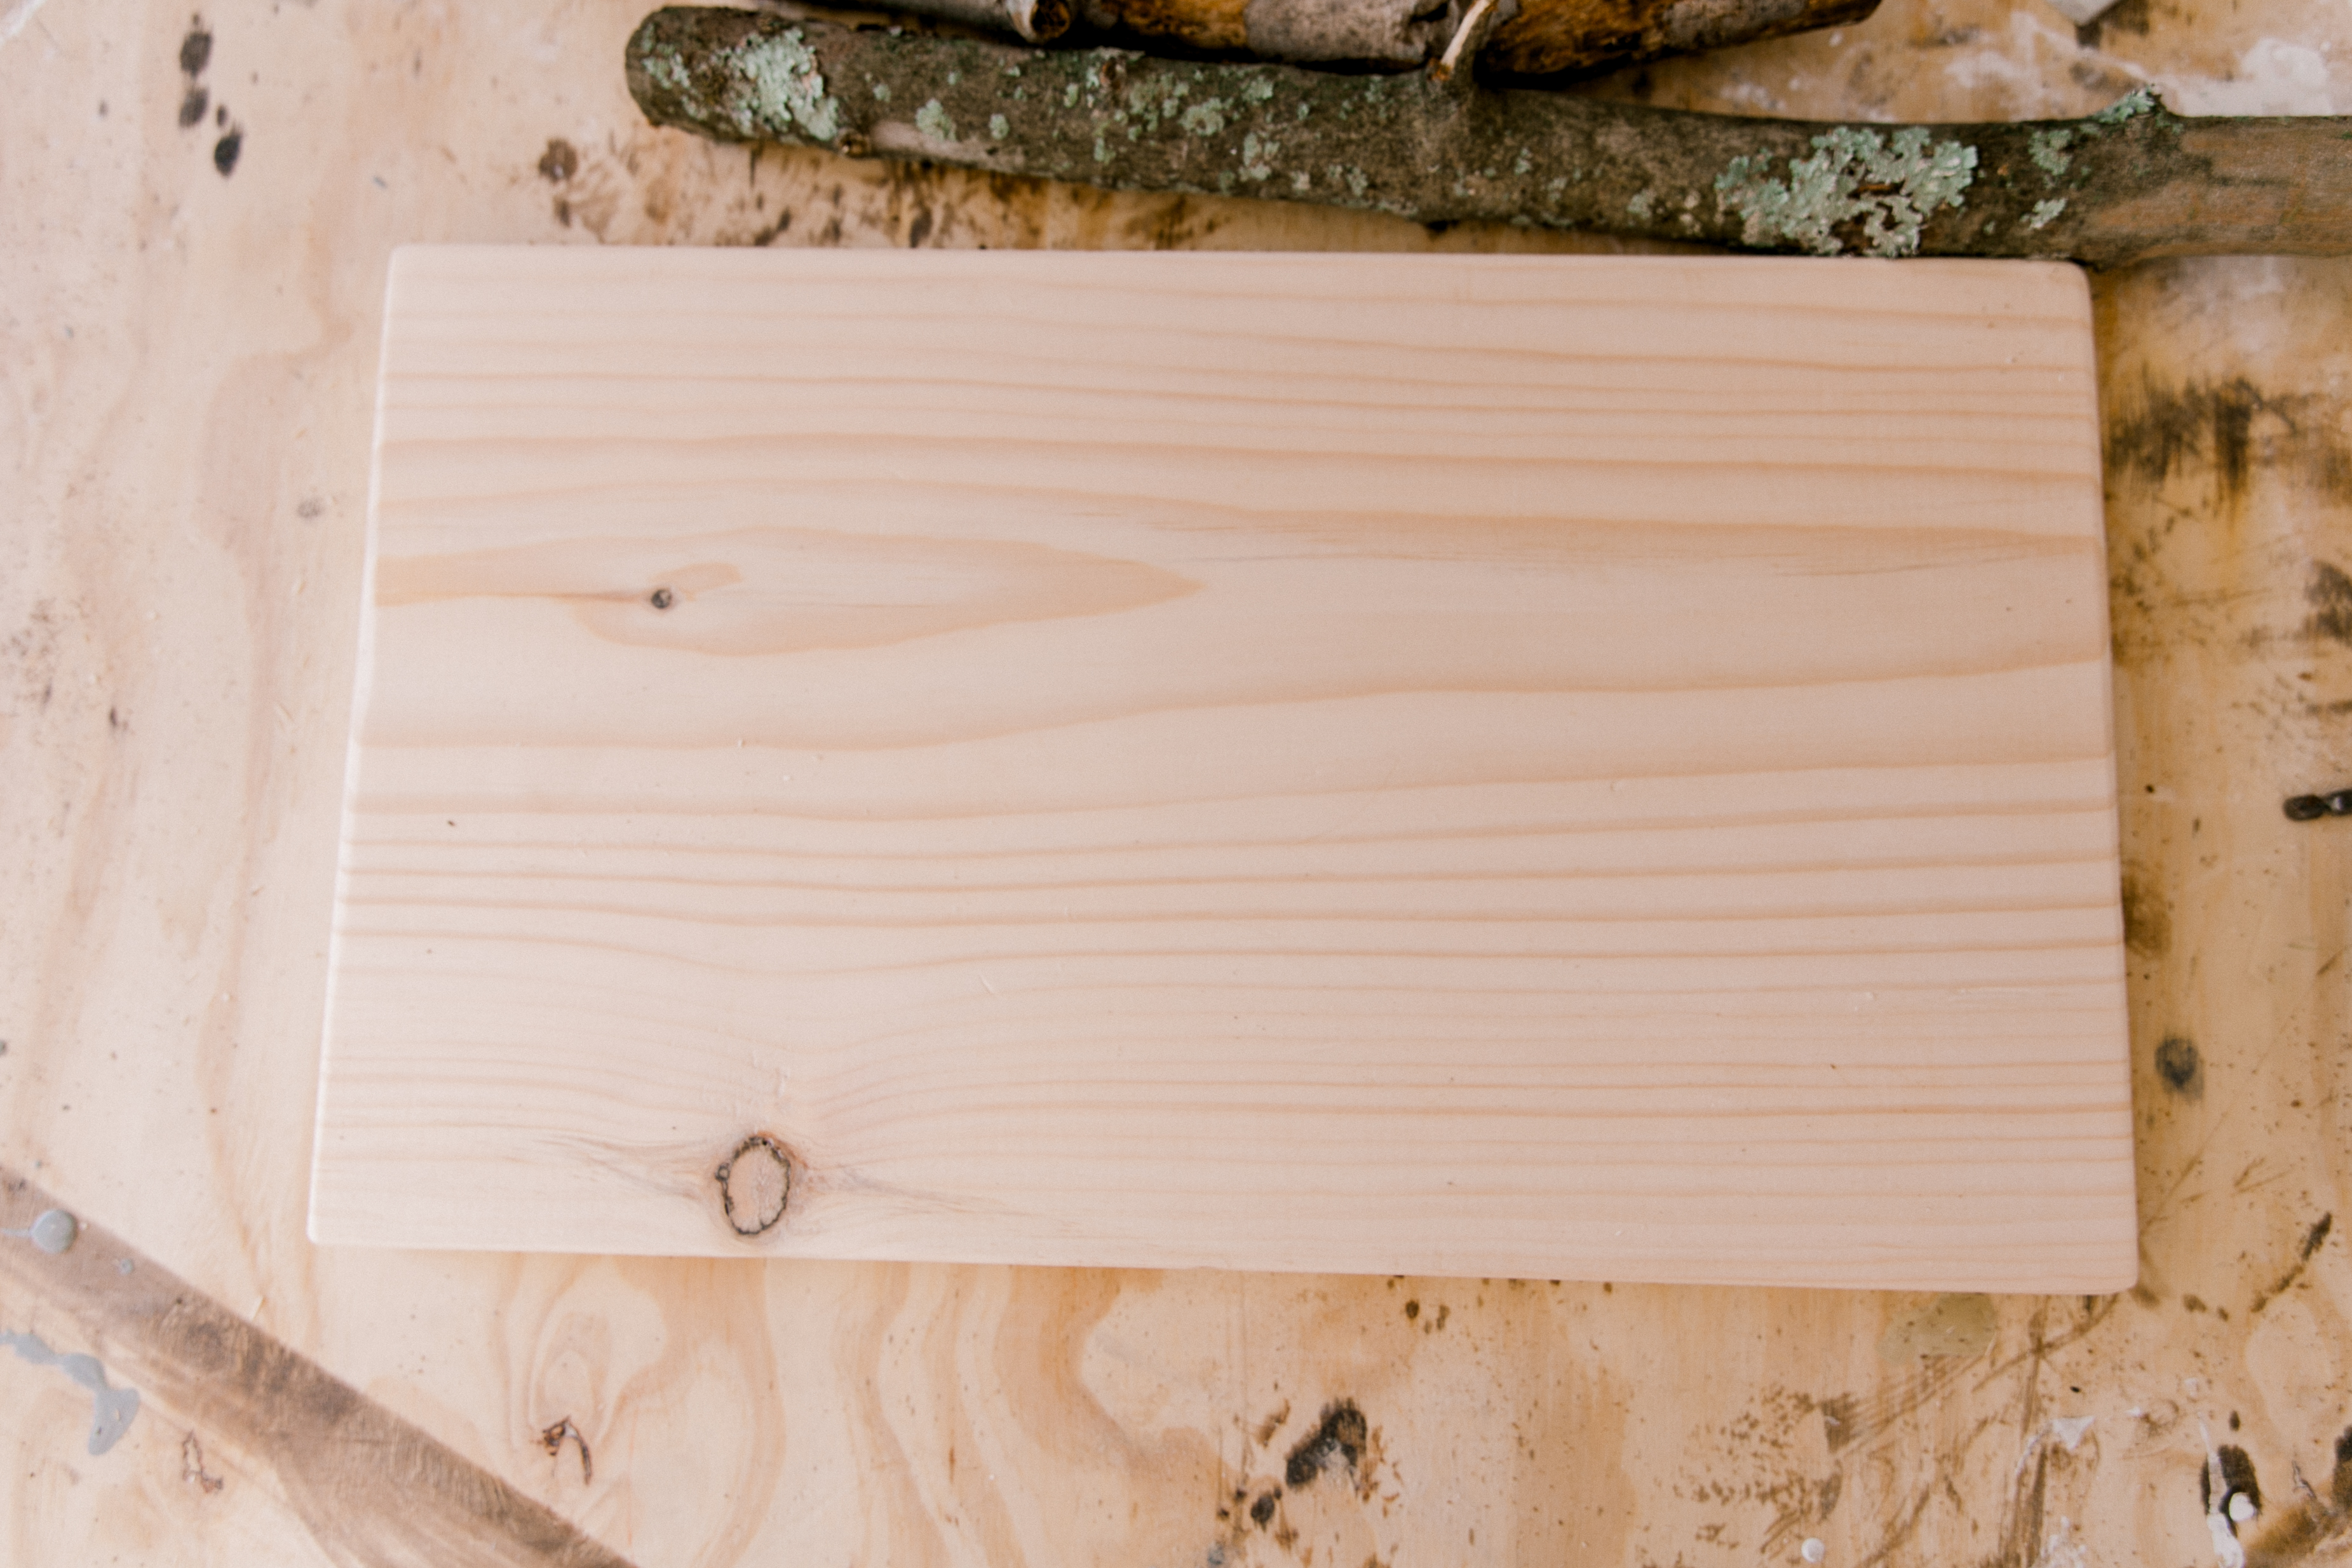
2. Choose a base for your treehouse. I wish I had a scroll or band saw to cut out some lovely shape for the base, but since I only have saws with straight cuts, it wasn't an option. I could try to do it with a jigsaw but honestly, didn't want to be bothered and just used a rectangle-shaped base.
3. Try to visualize how the tree will look like. Even better - draw a plan. I thought I'll go with the flow and didn't have anything particular in mind. The beauty of nature in its uniqueness.
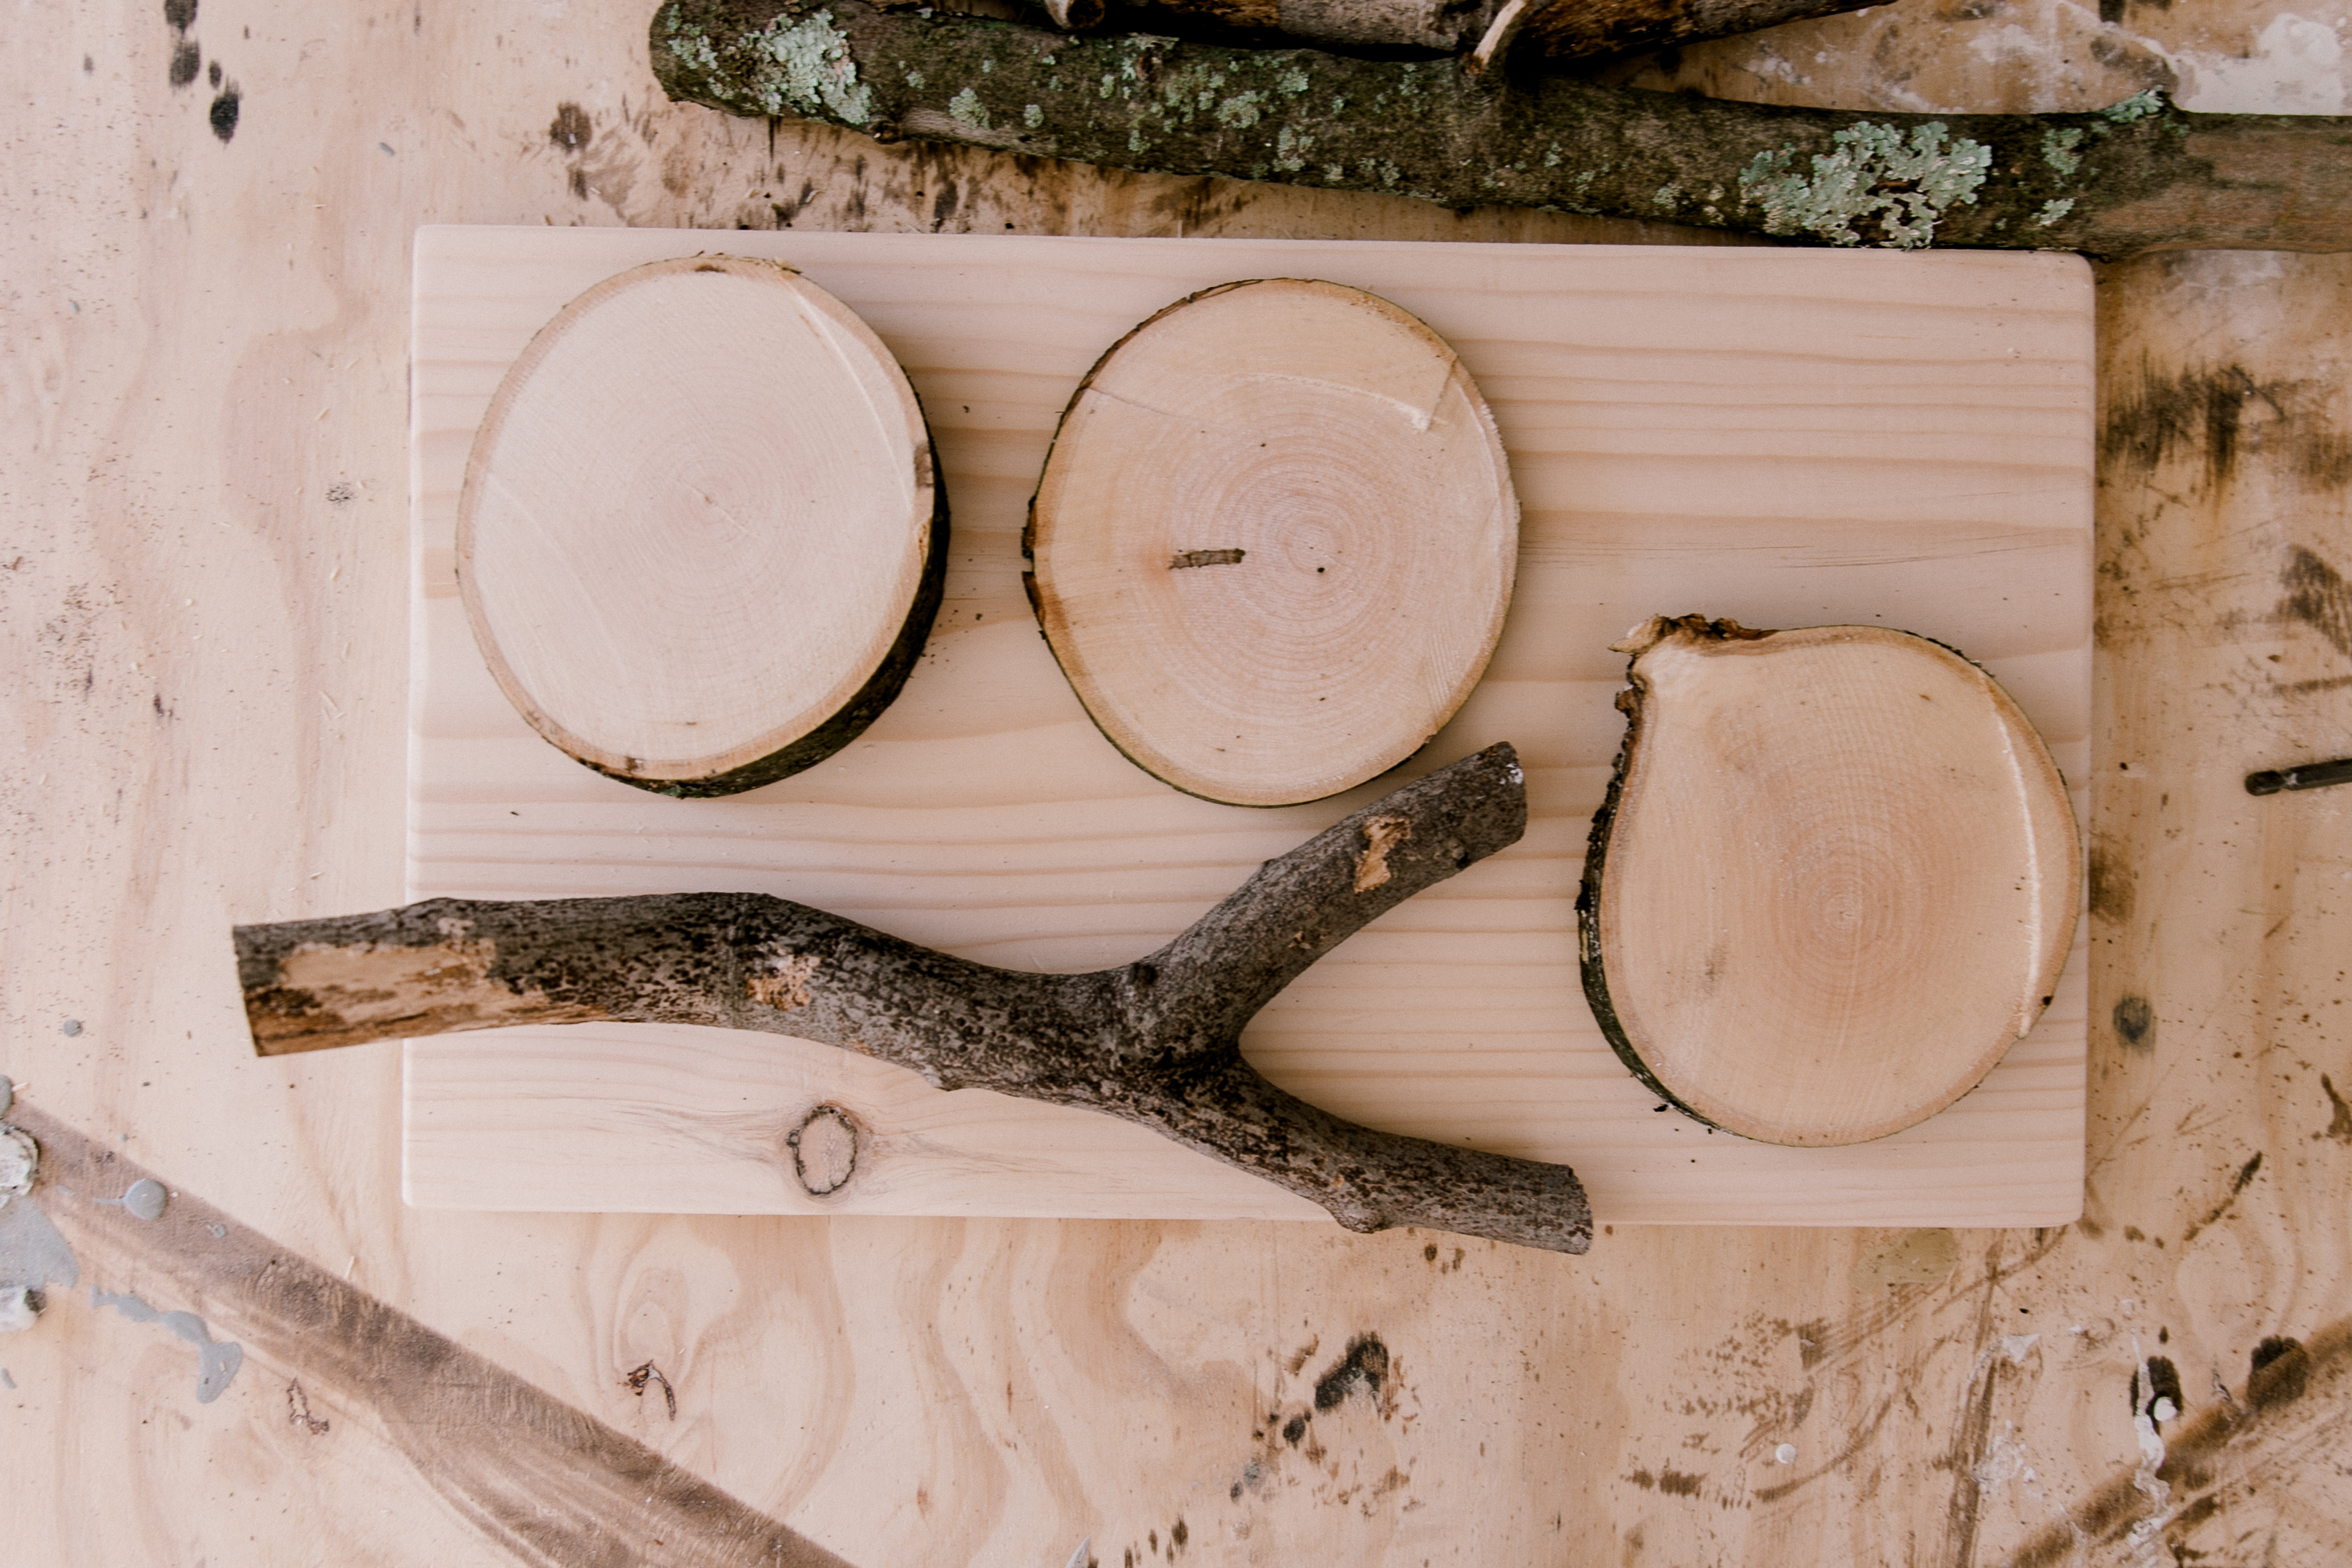
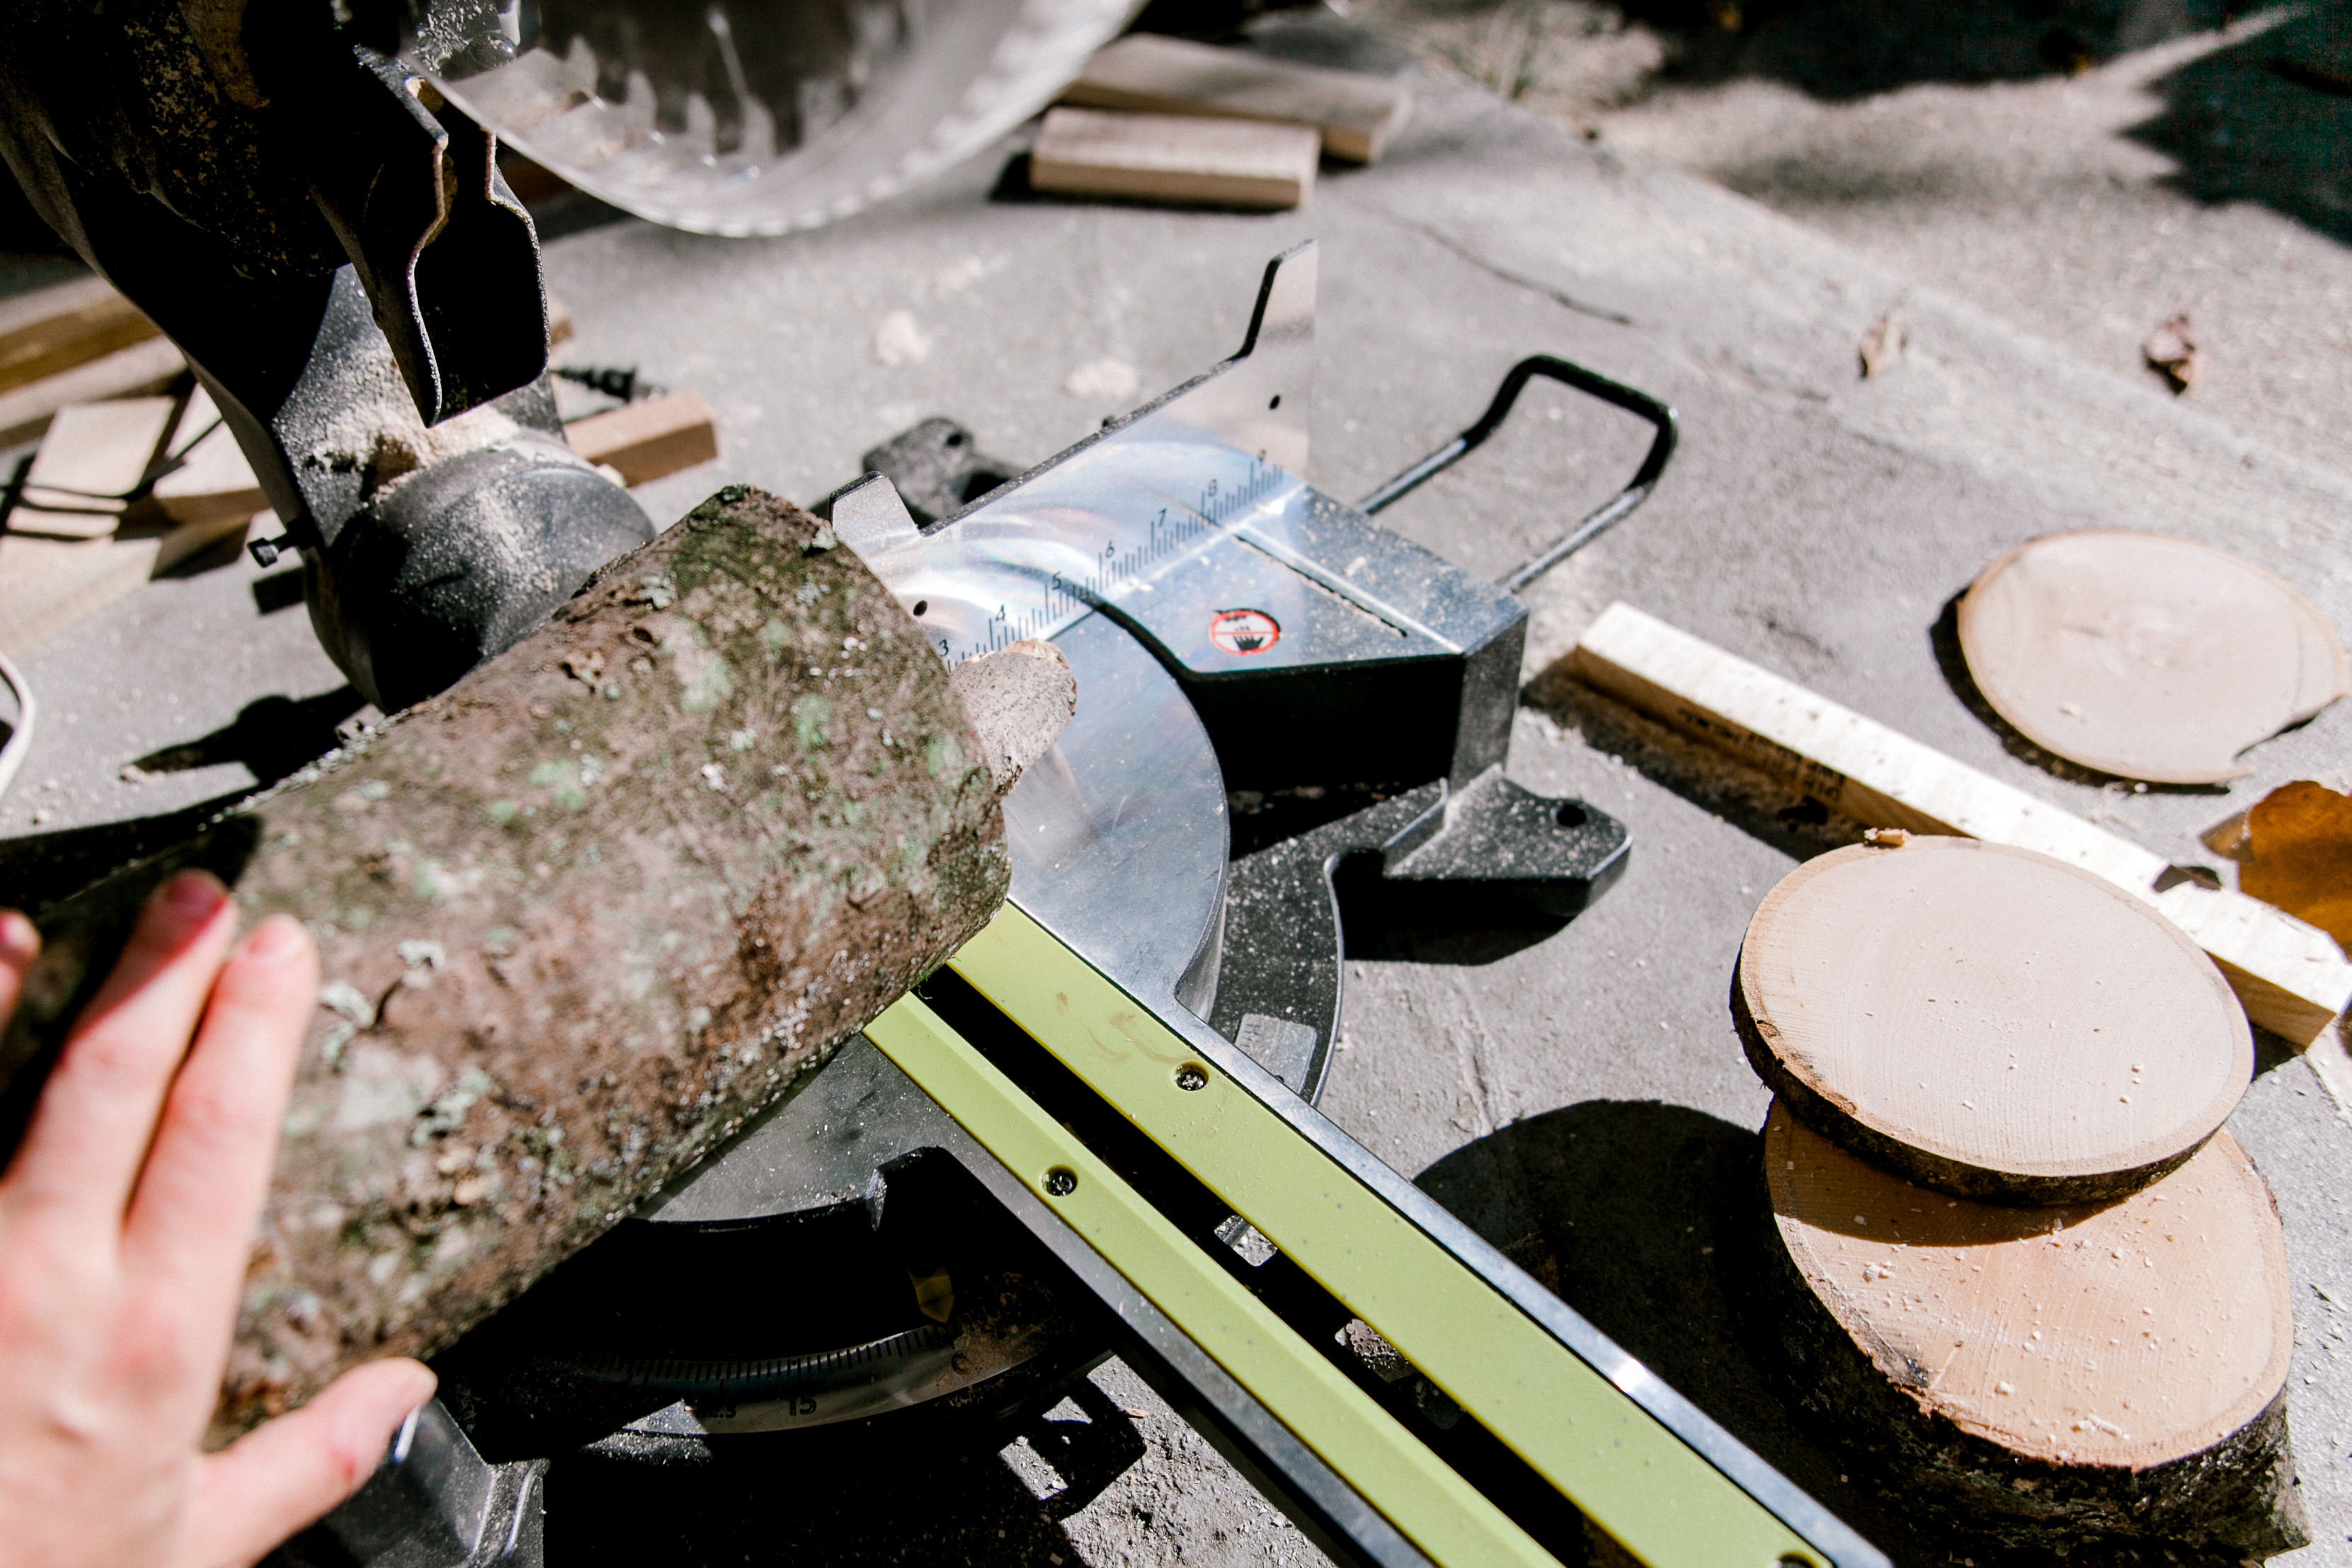
4. Now comes the fun part. Cut your log to make disks (it will be a base for your levels). I used my 12" miter saw and had to turn it around while cutting since it didn't cut through.
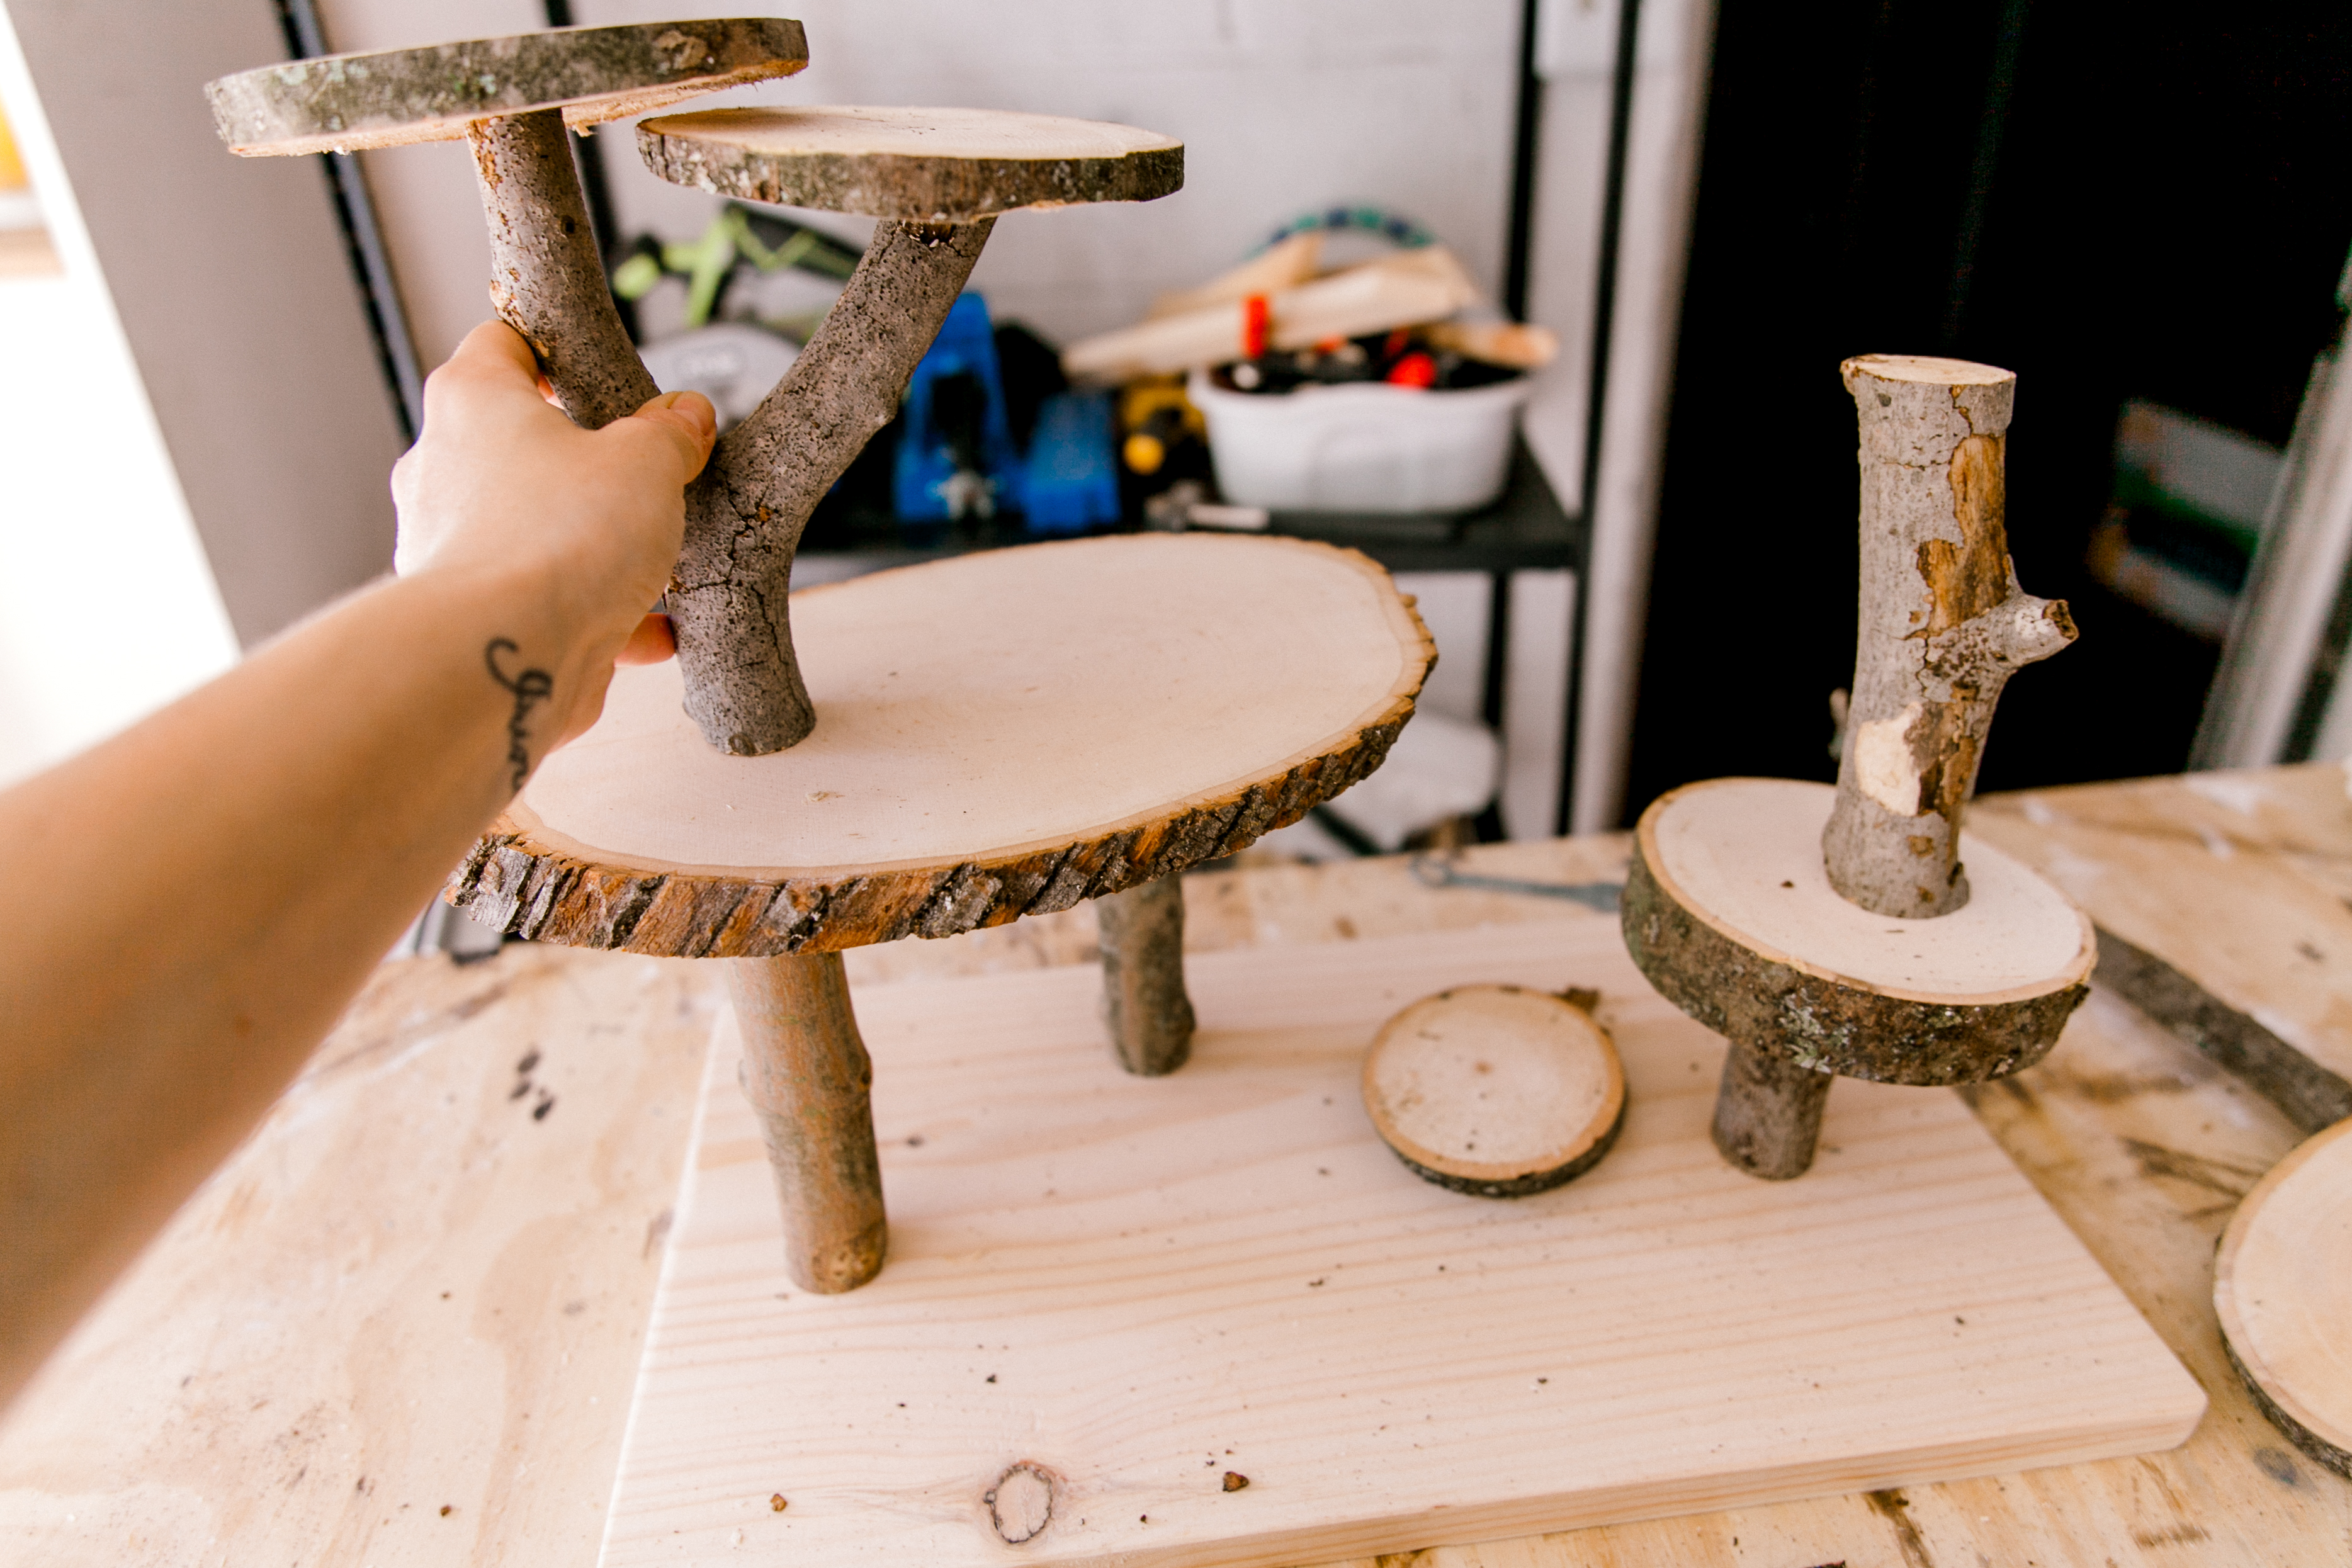
5. Arrange your wooden disks and imagine where the support logs would go. Pretend you have 10 hands to hold everything in one place and cut the support legs. It takes a bit of skill but you'll get there.
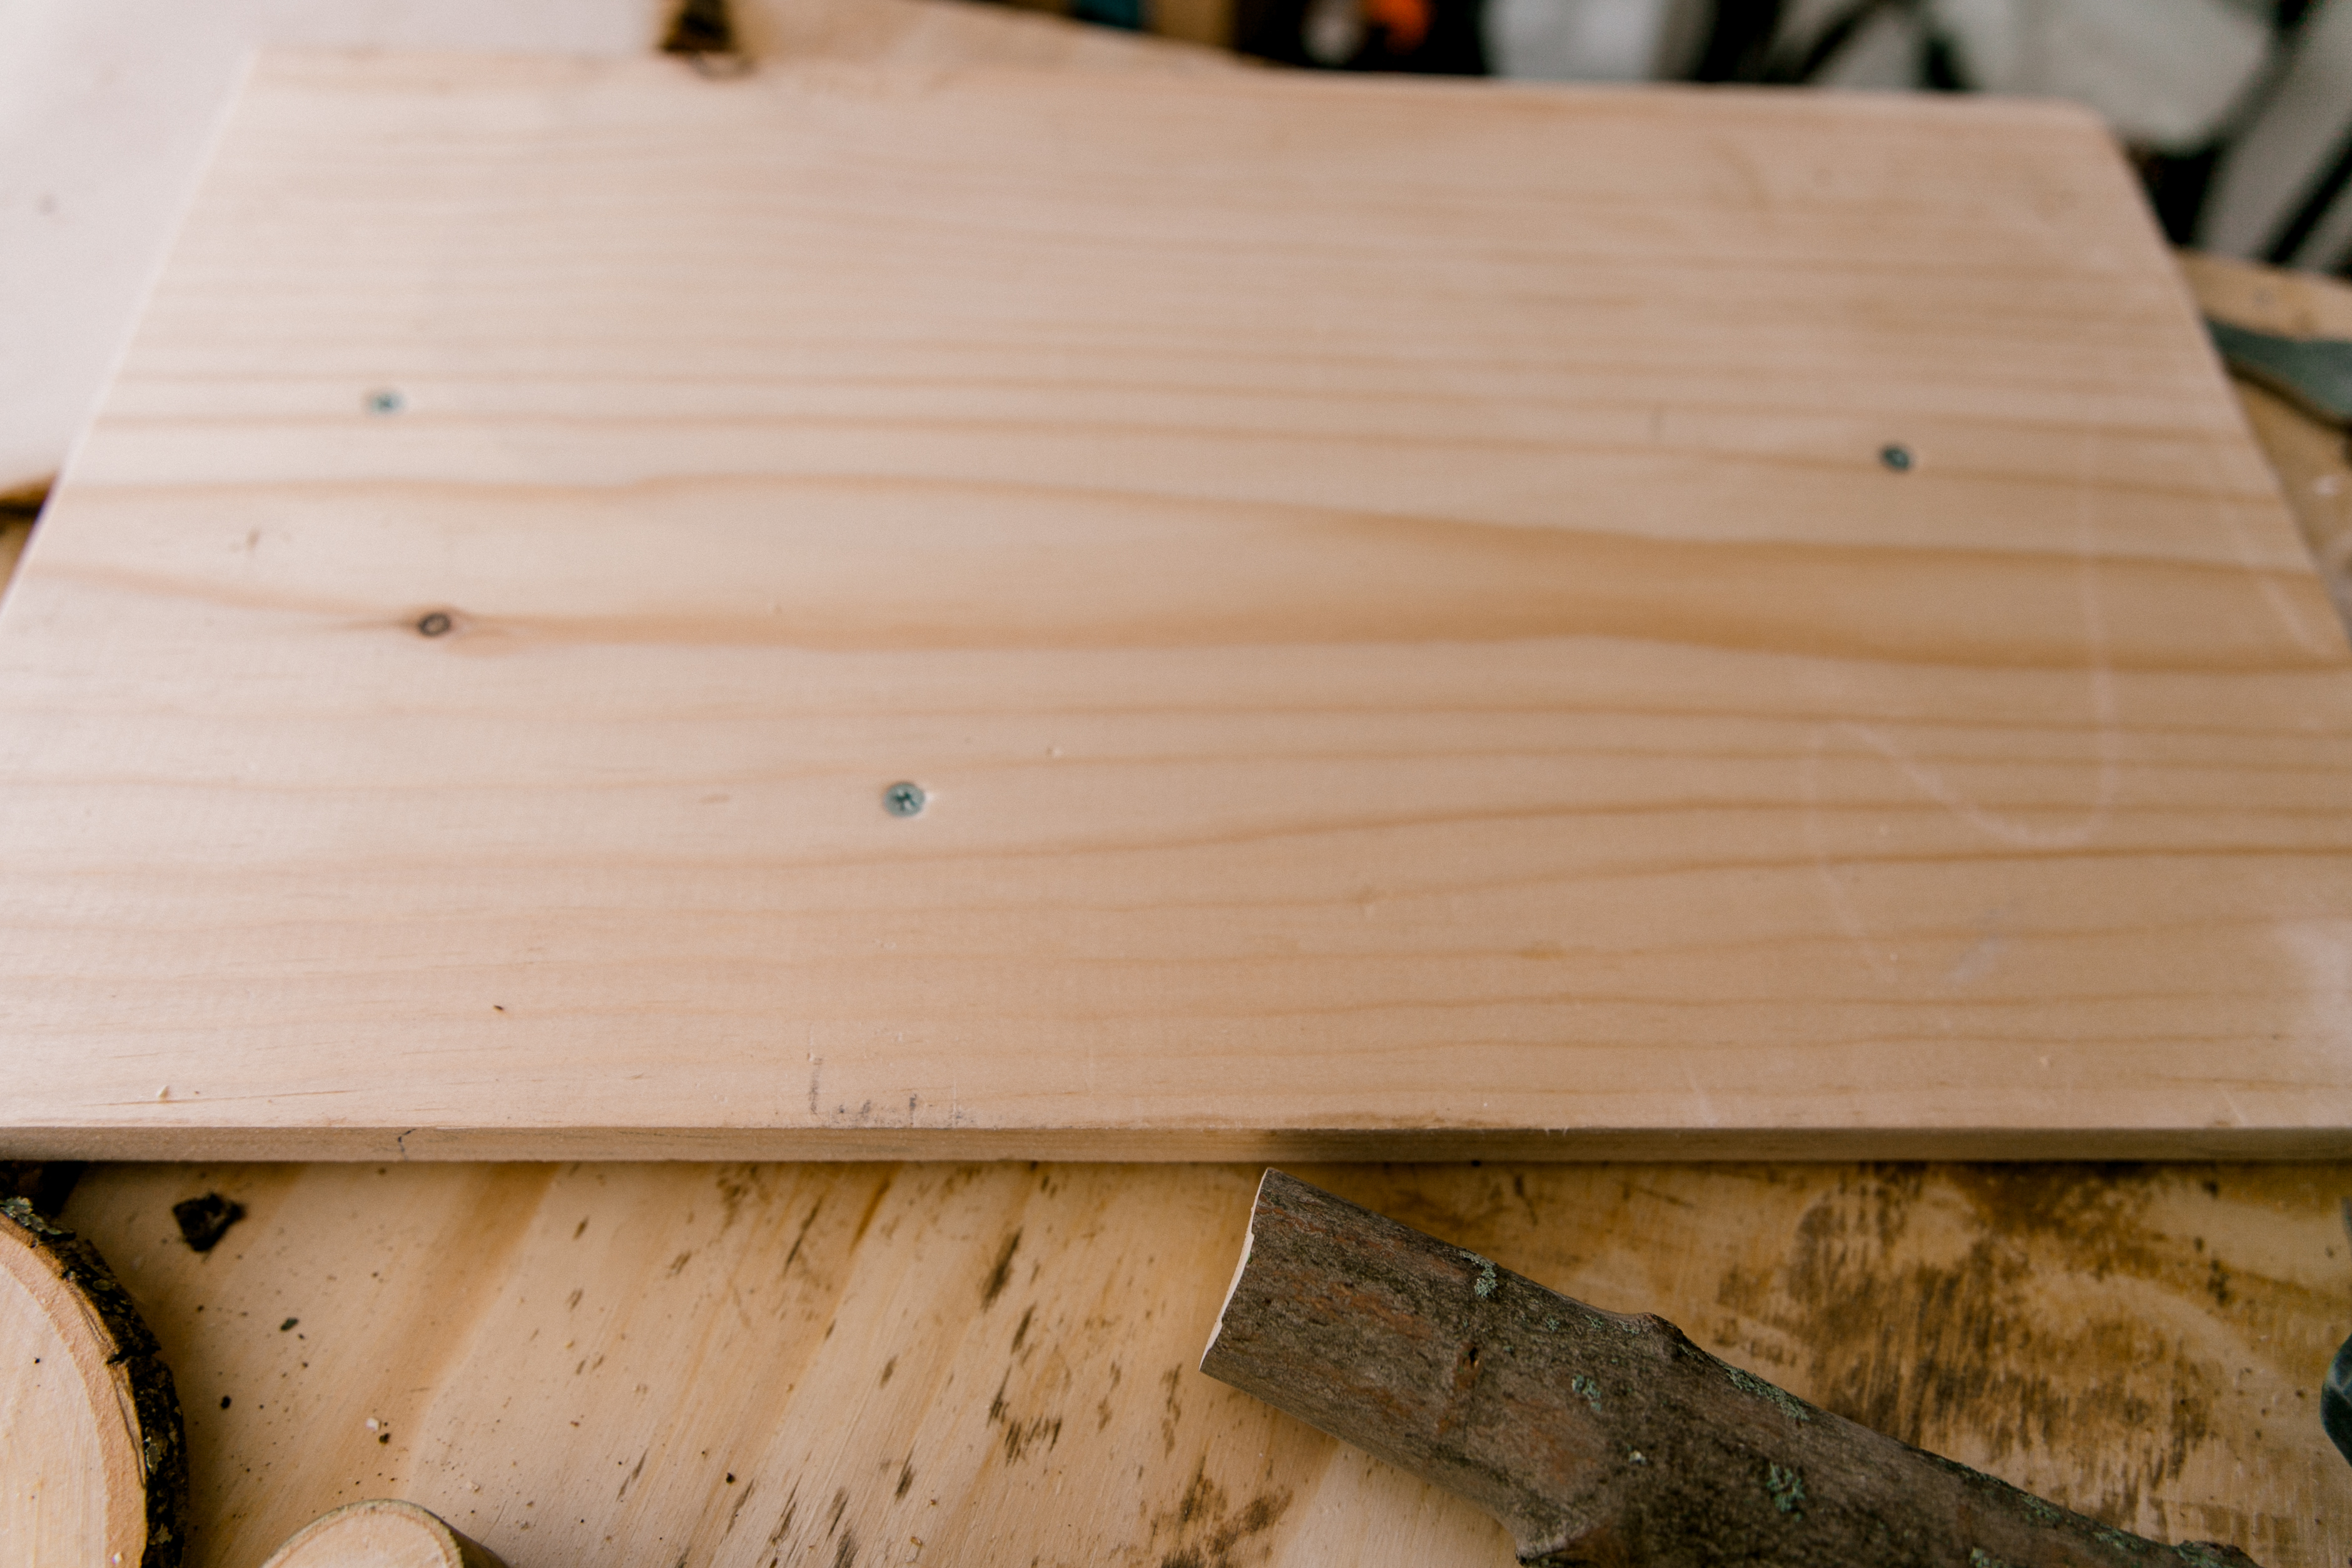
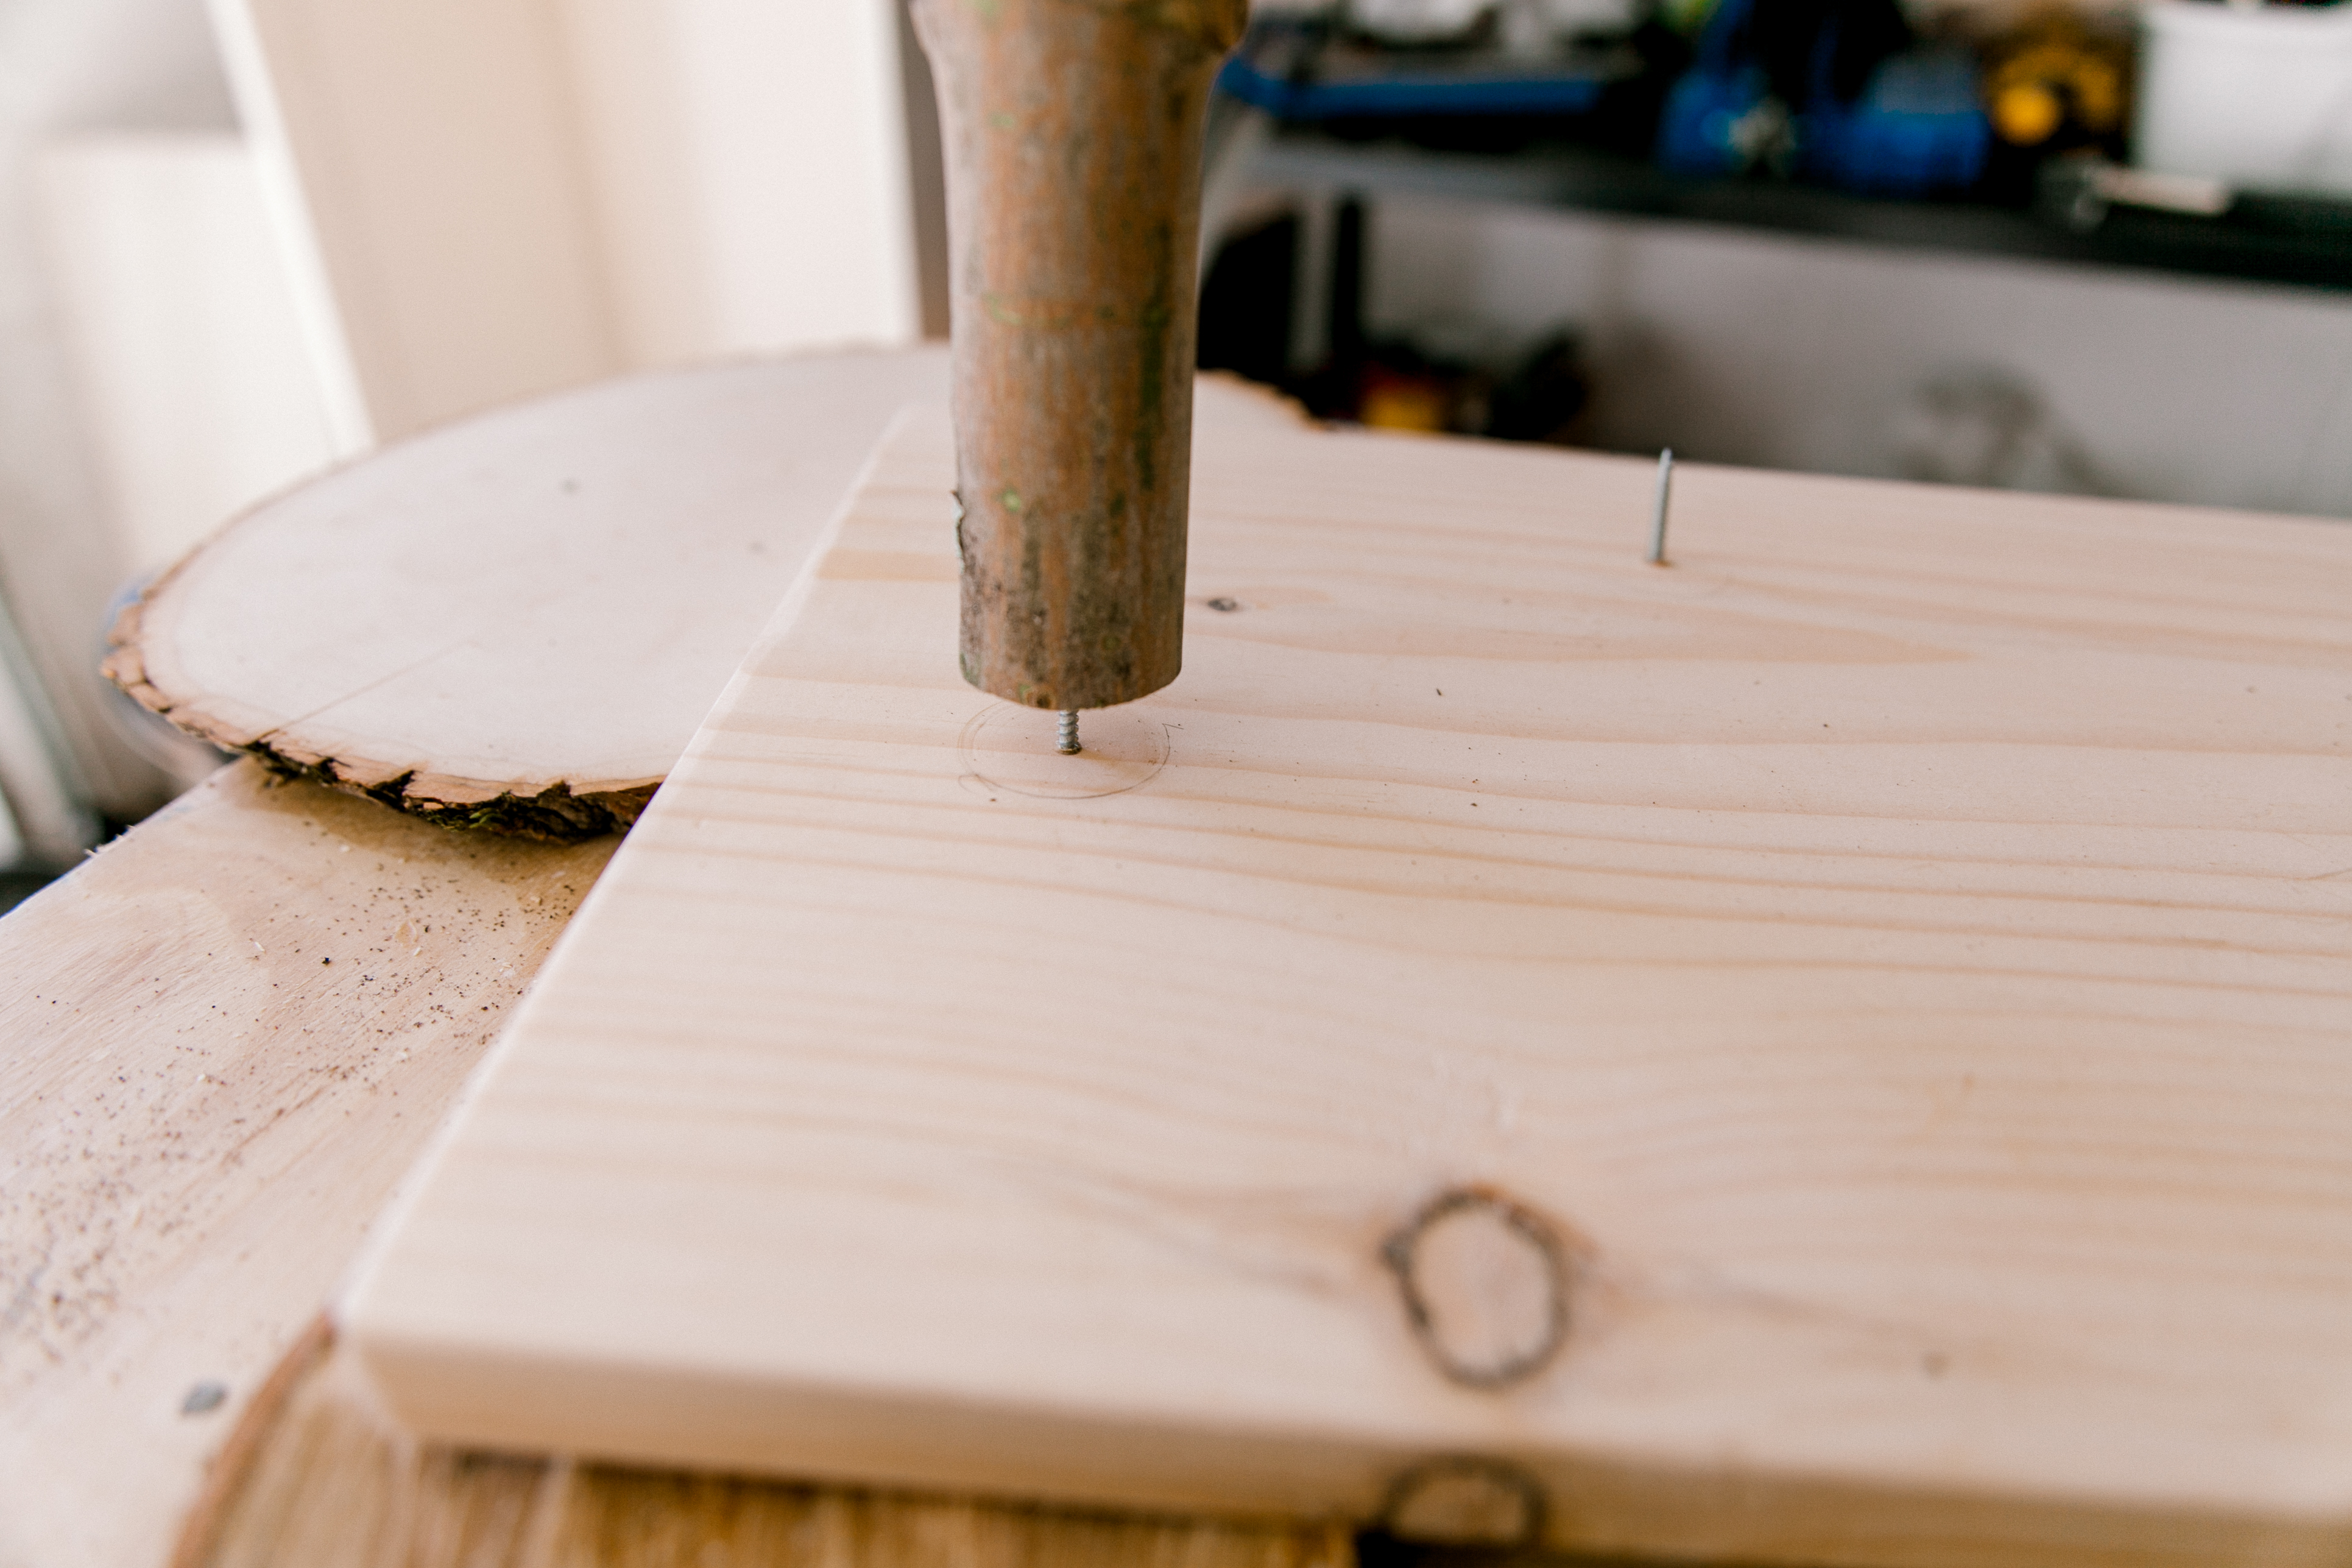
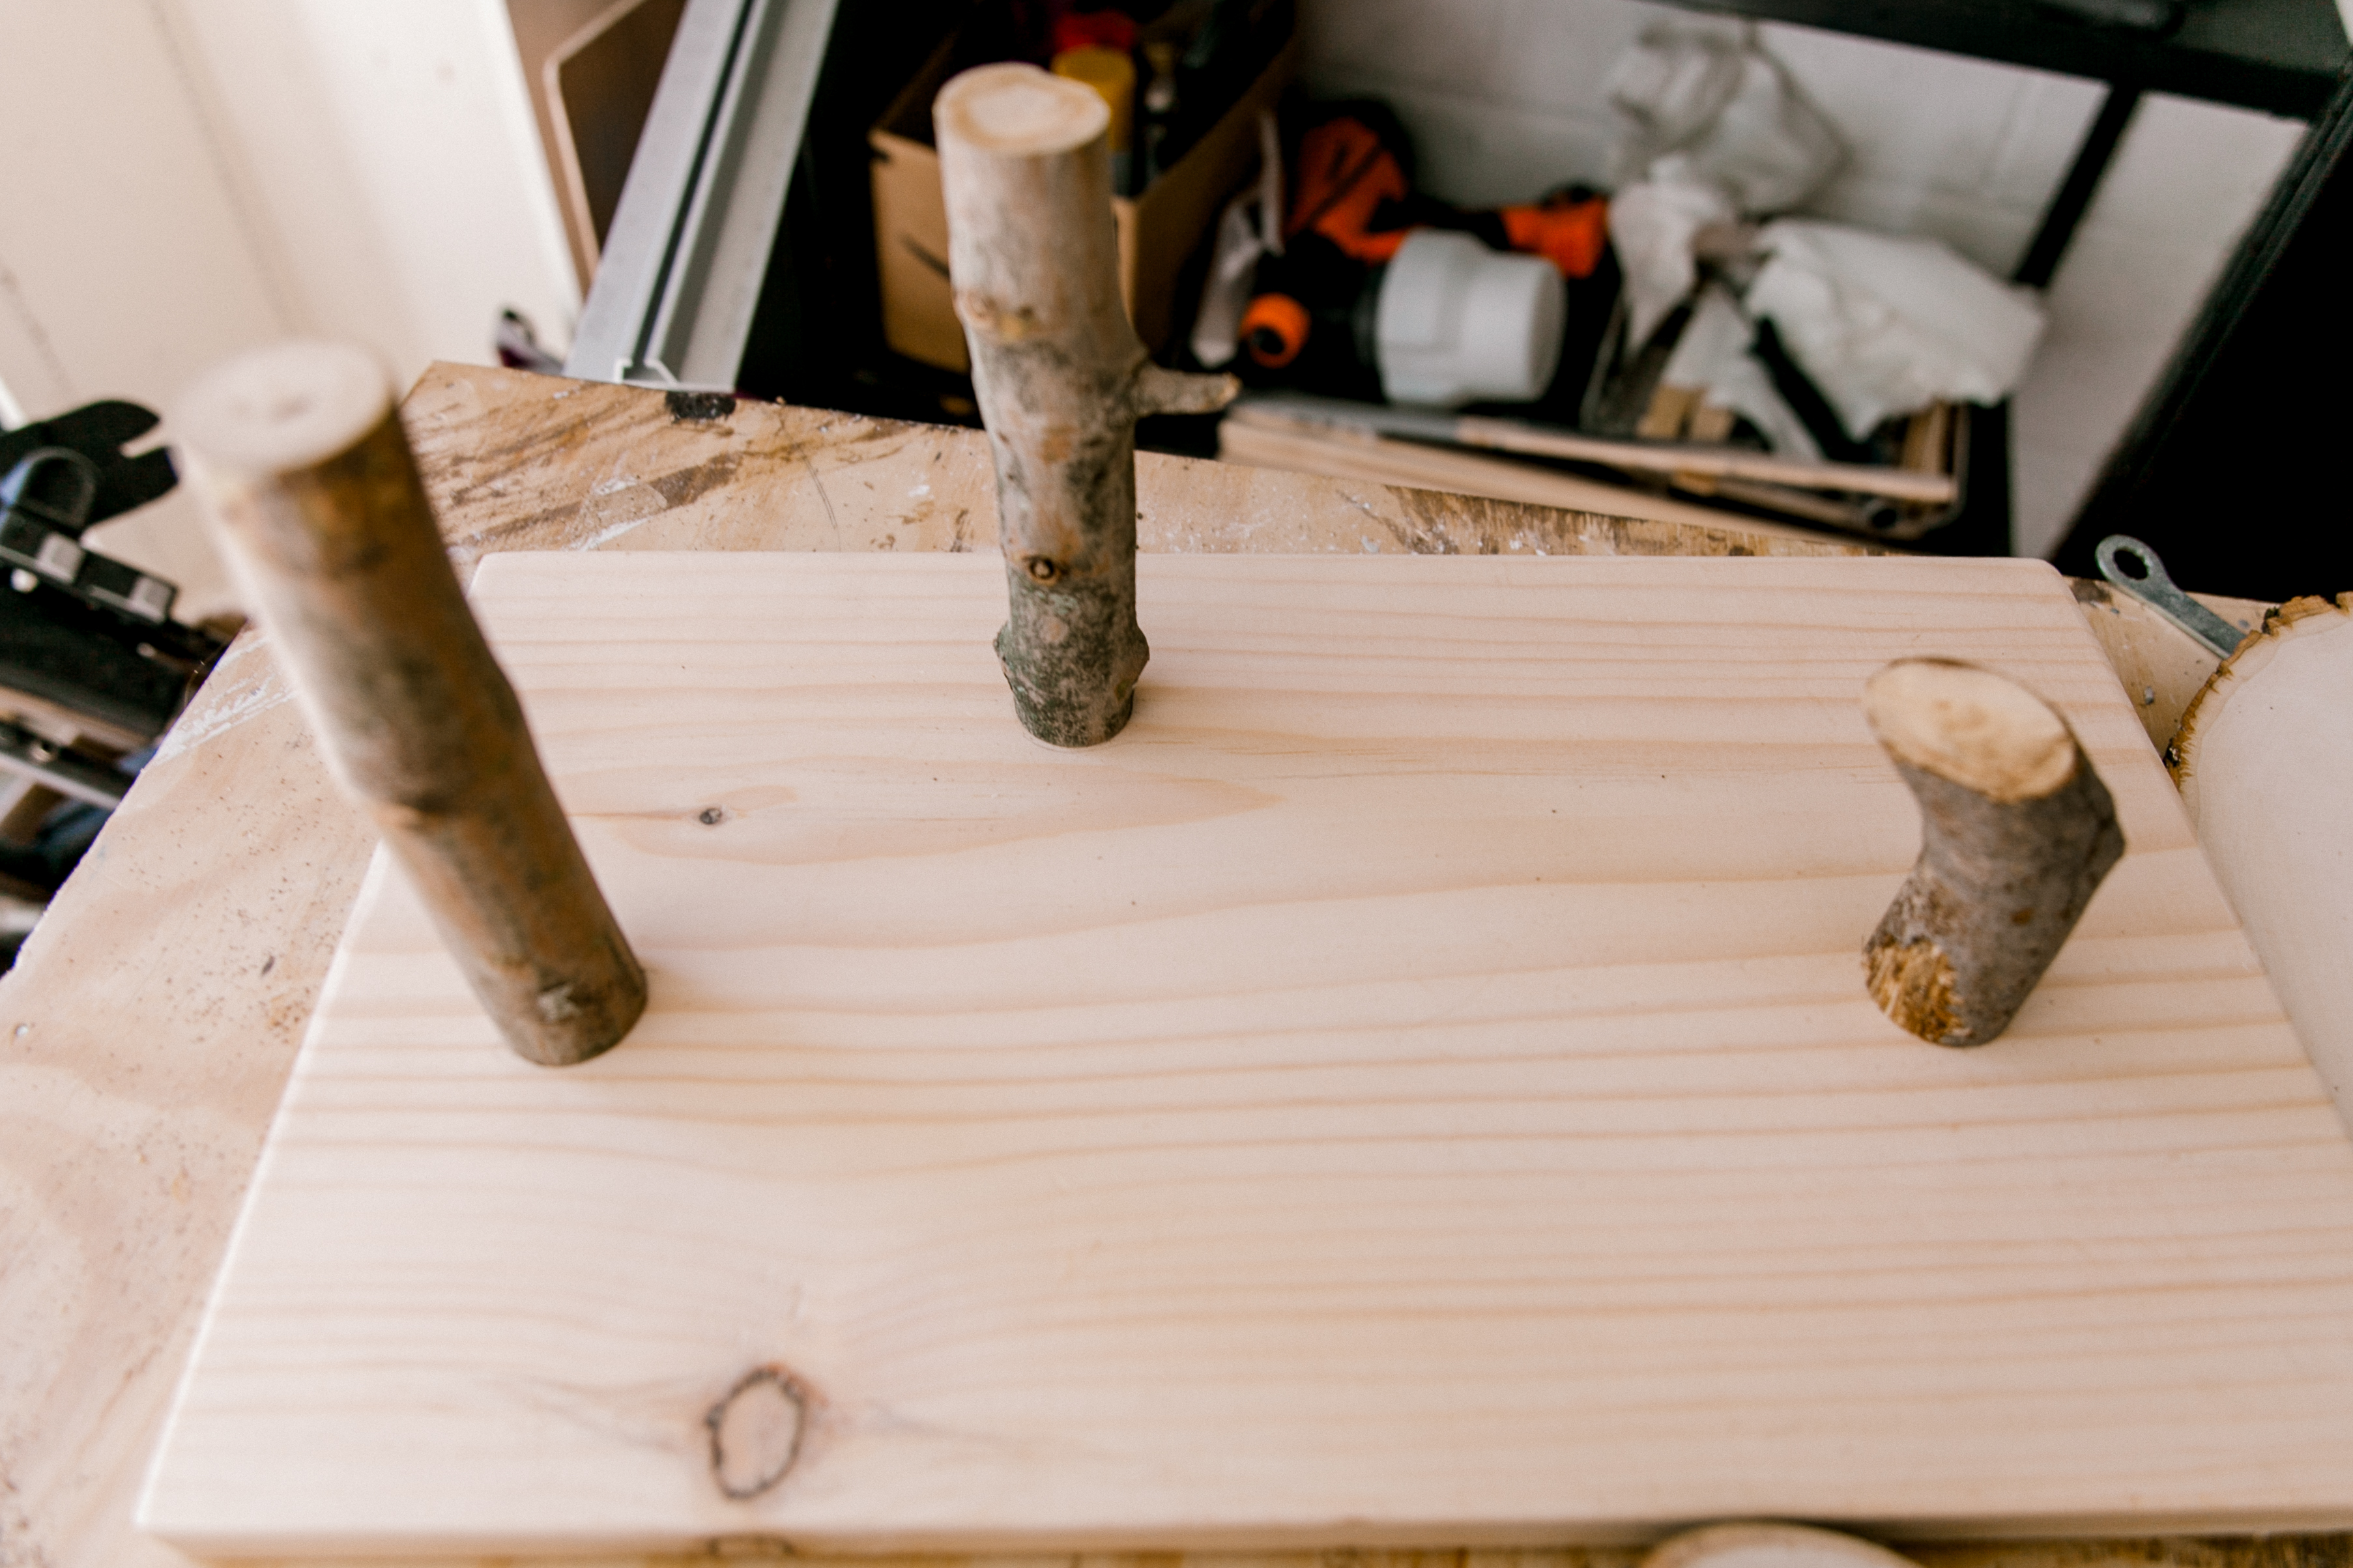
5. To connect wooden disks with the legs you might need to try a few things. Just wooden glue doesn't work. It won't hold the surface and will fall apart when your kid decided to play rough with it.
I didn't want to have nails on the top of my wooden platforms and tried to attach it using small finishing nails, connecting 2 pieces. I also used the glue but it didn't work as expected and I ended up using screws and attaching it from the top (yes, you can see it and it's not perfect, but we are clearly not after perfectionism here).
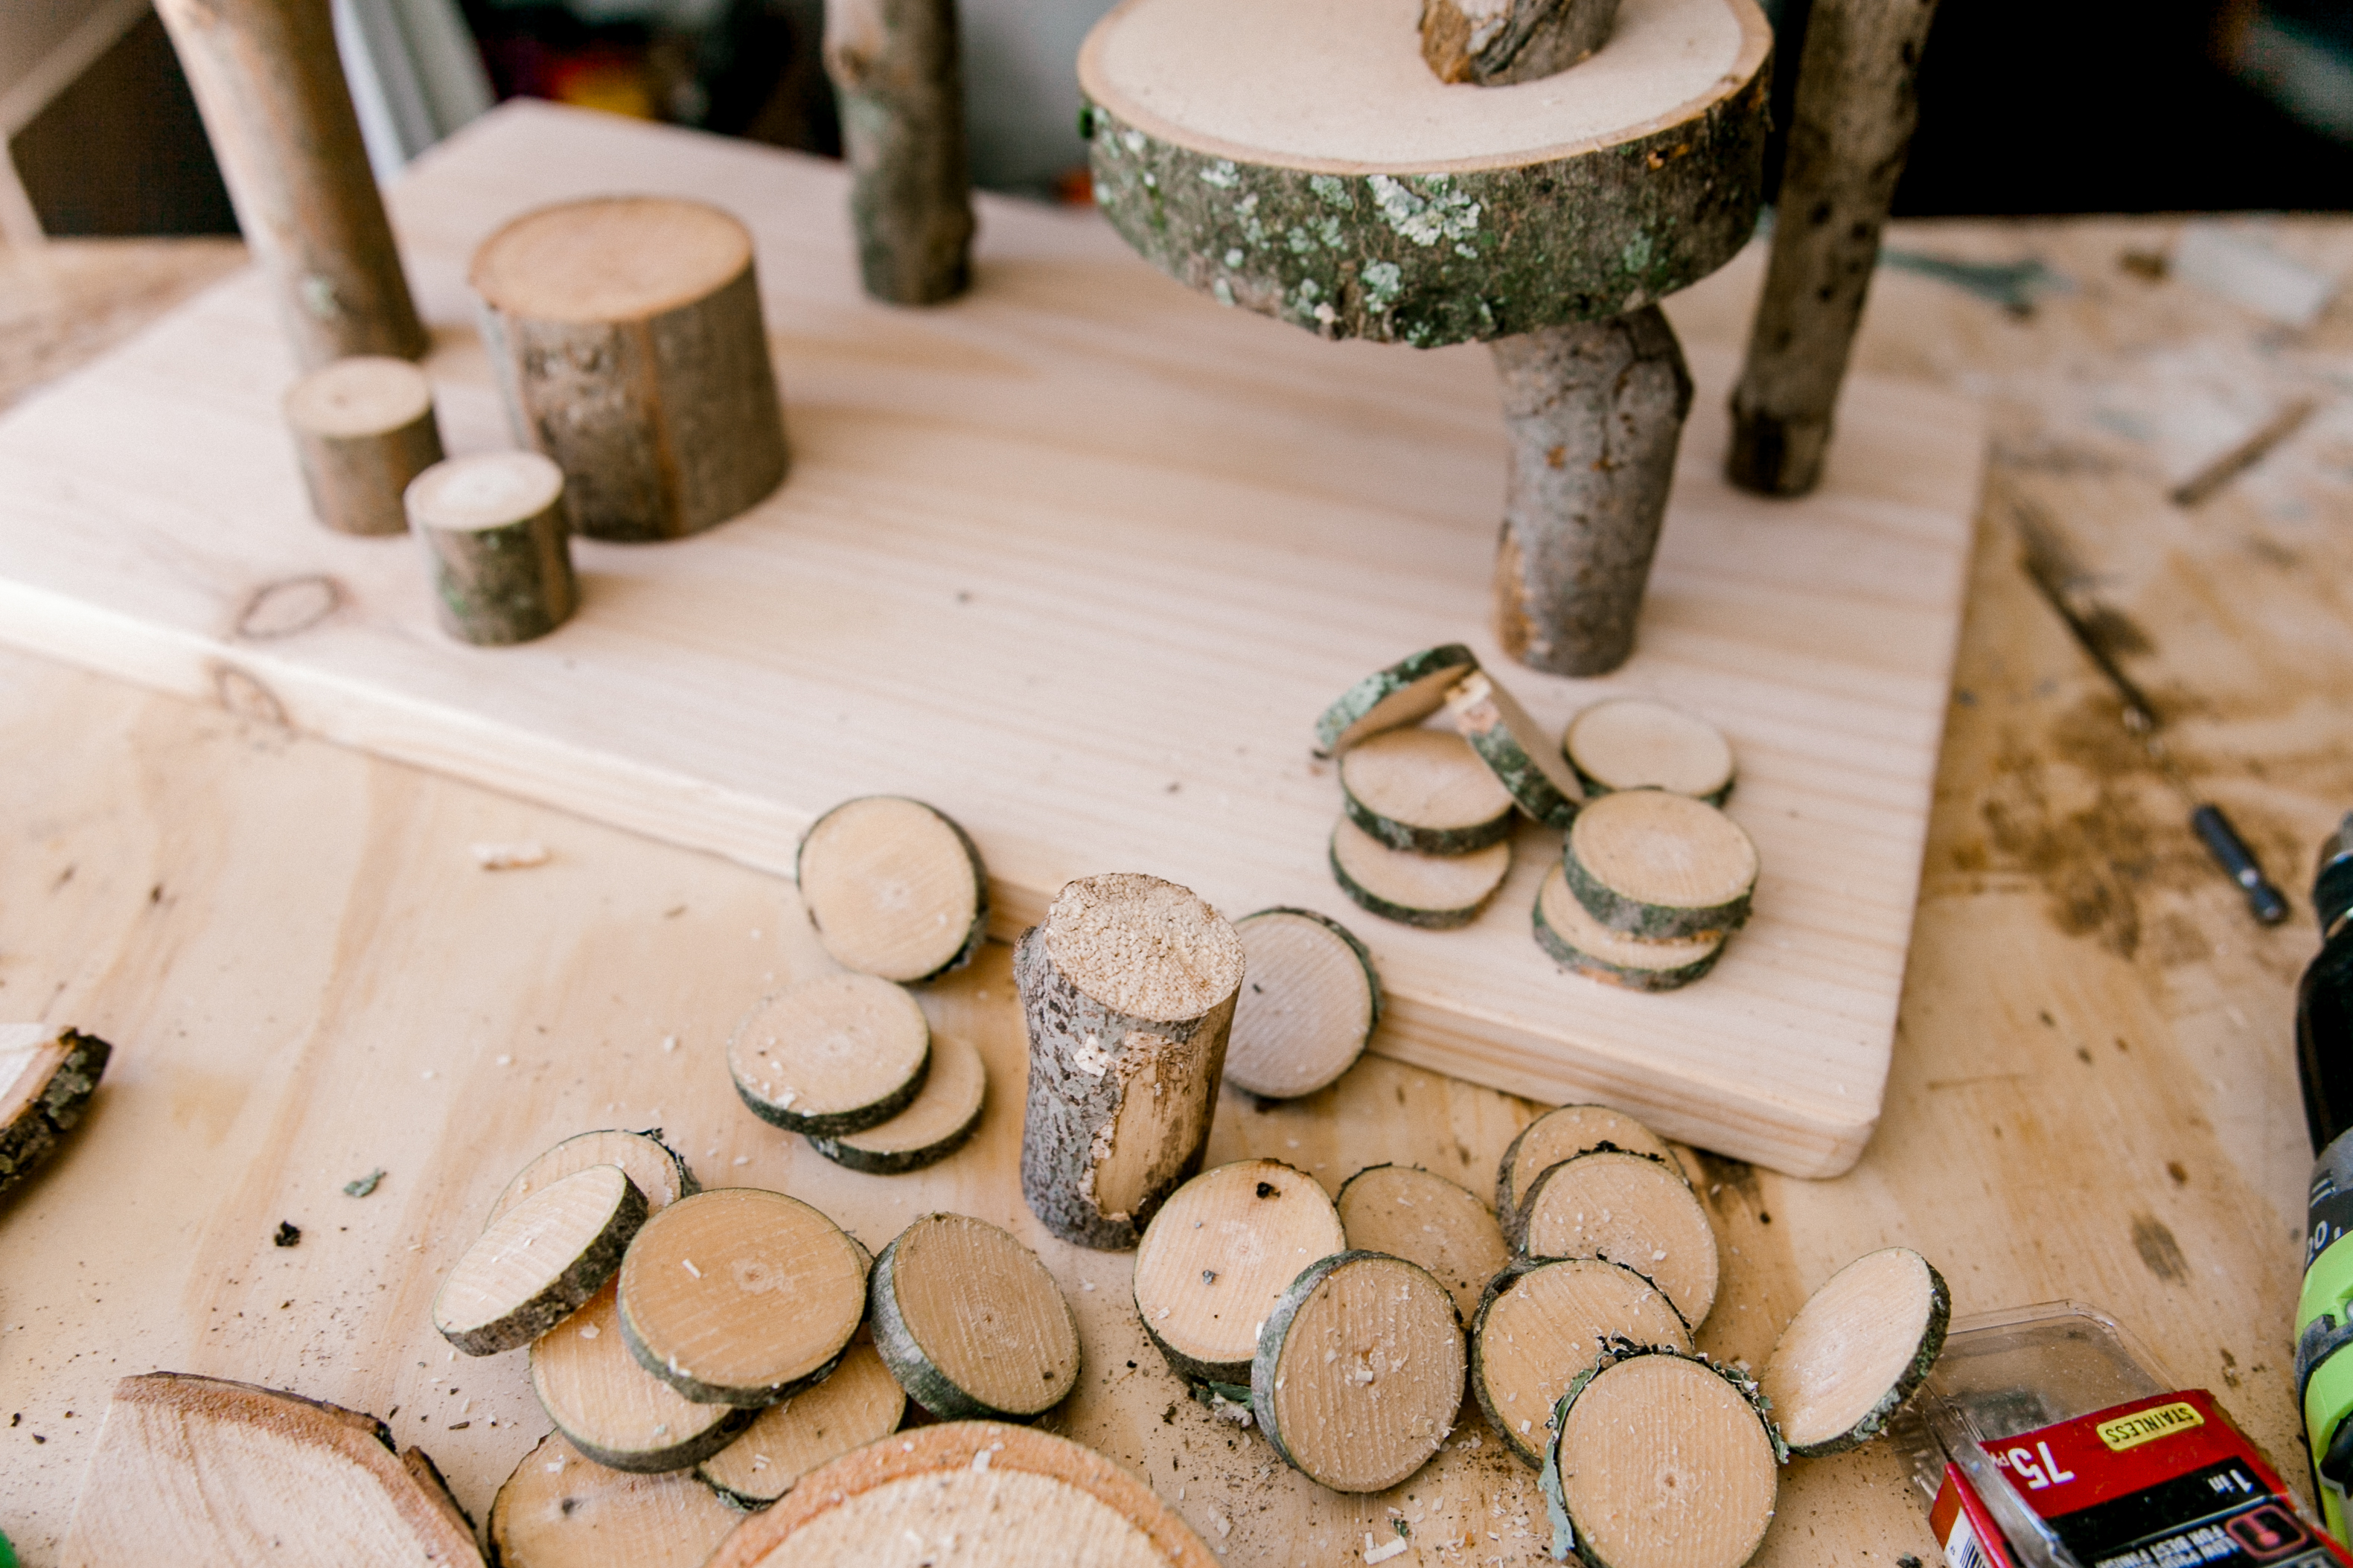
6. When all the basics are attached, it's time to decorate. It took me a few days to make this little staircase from the tiny disks since it didn't glue as fast as I expected and I had to attach them a few at a time.
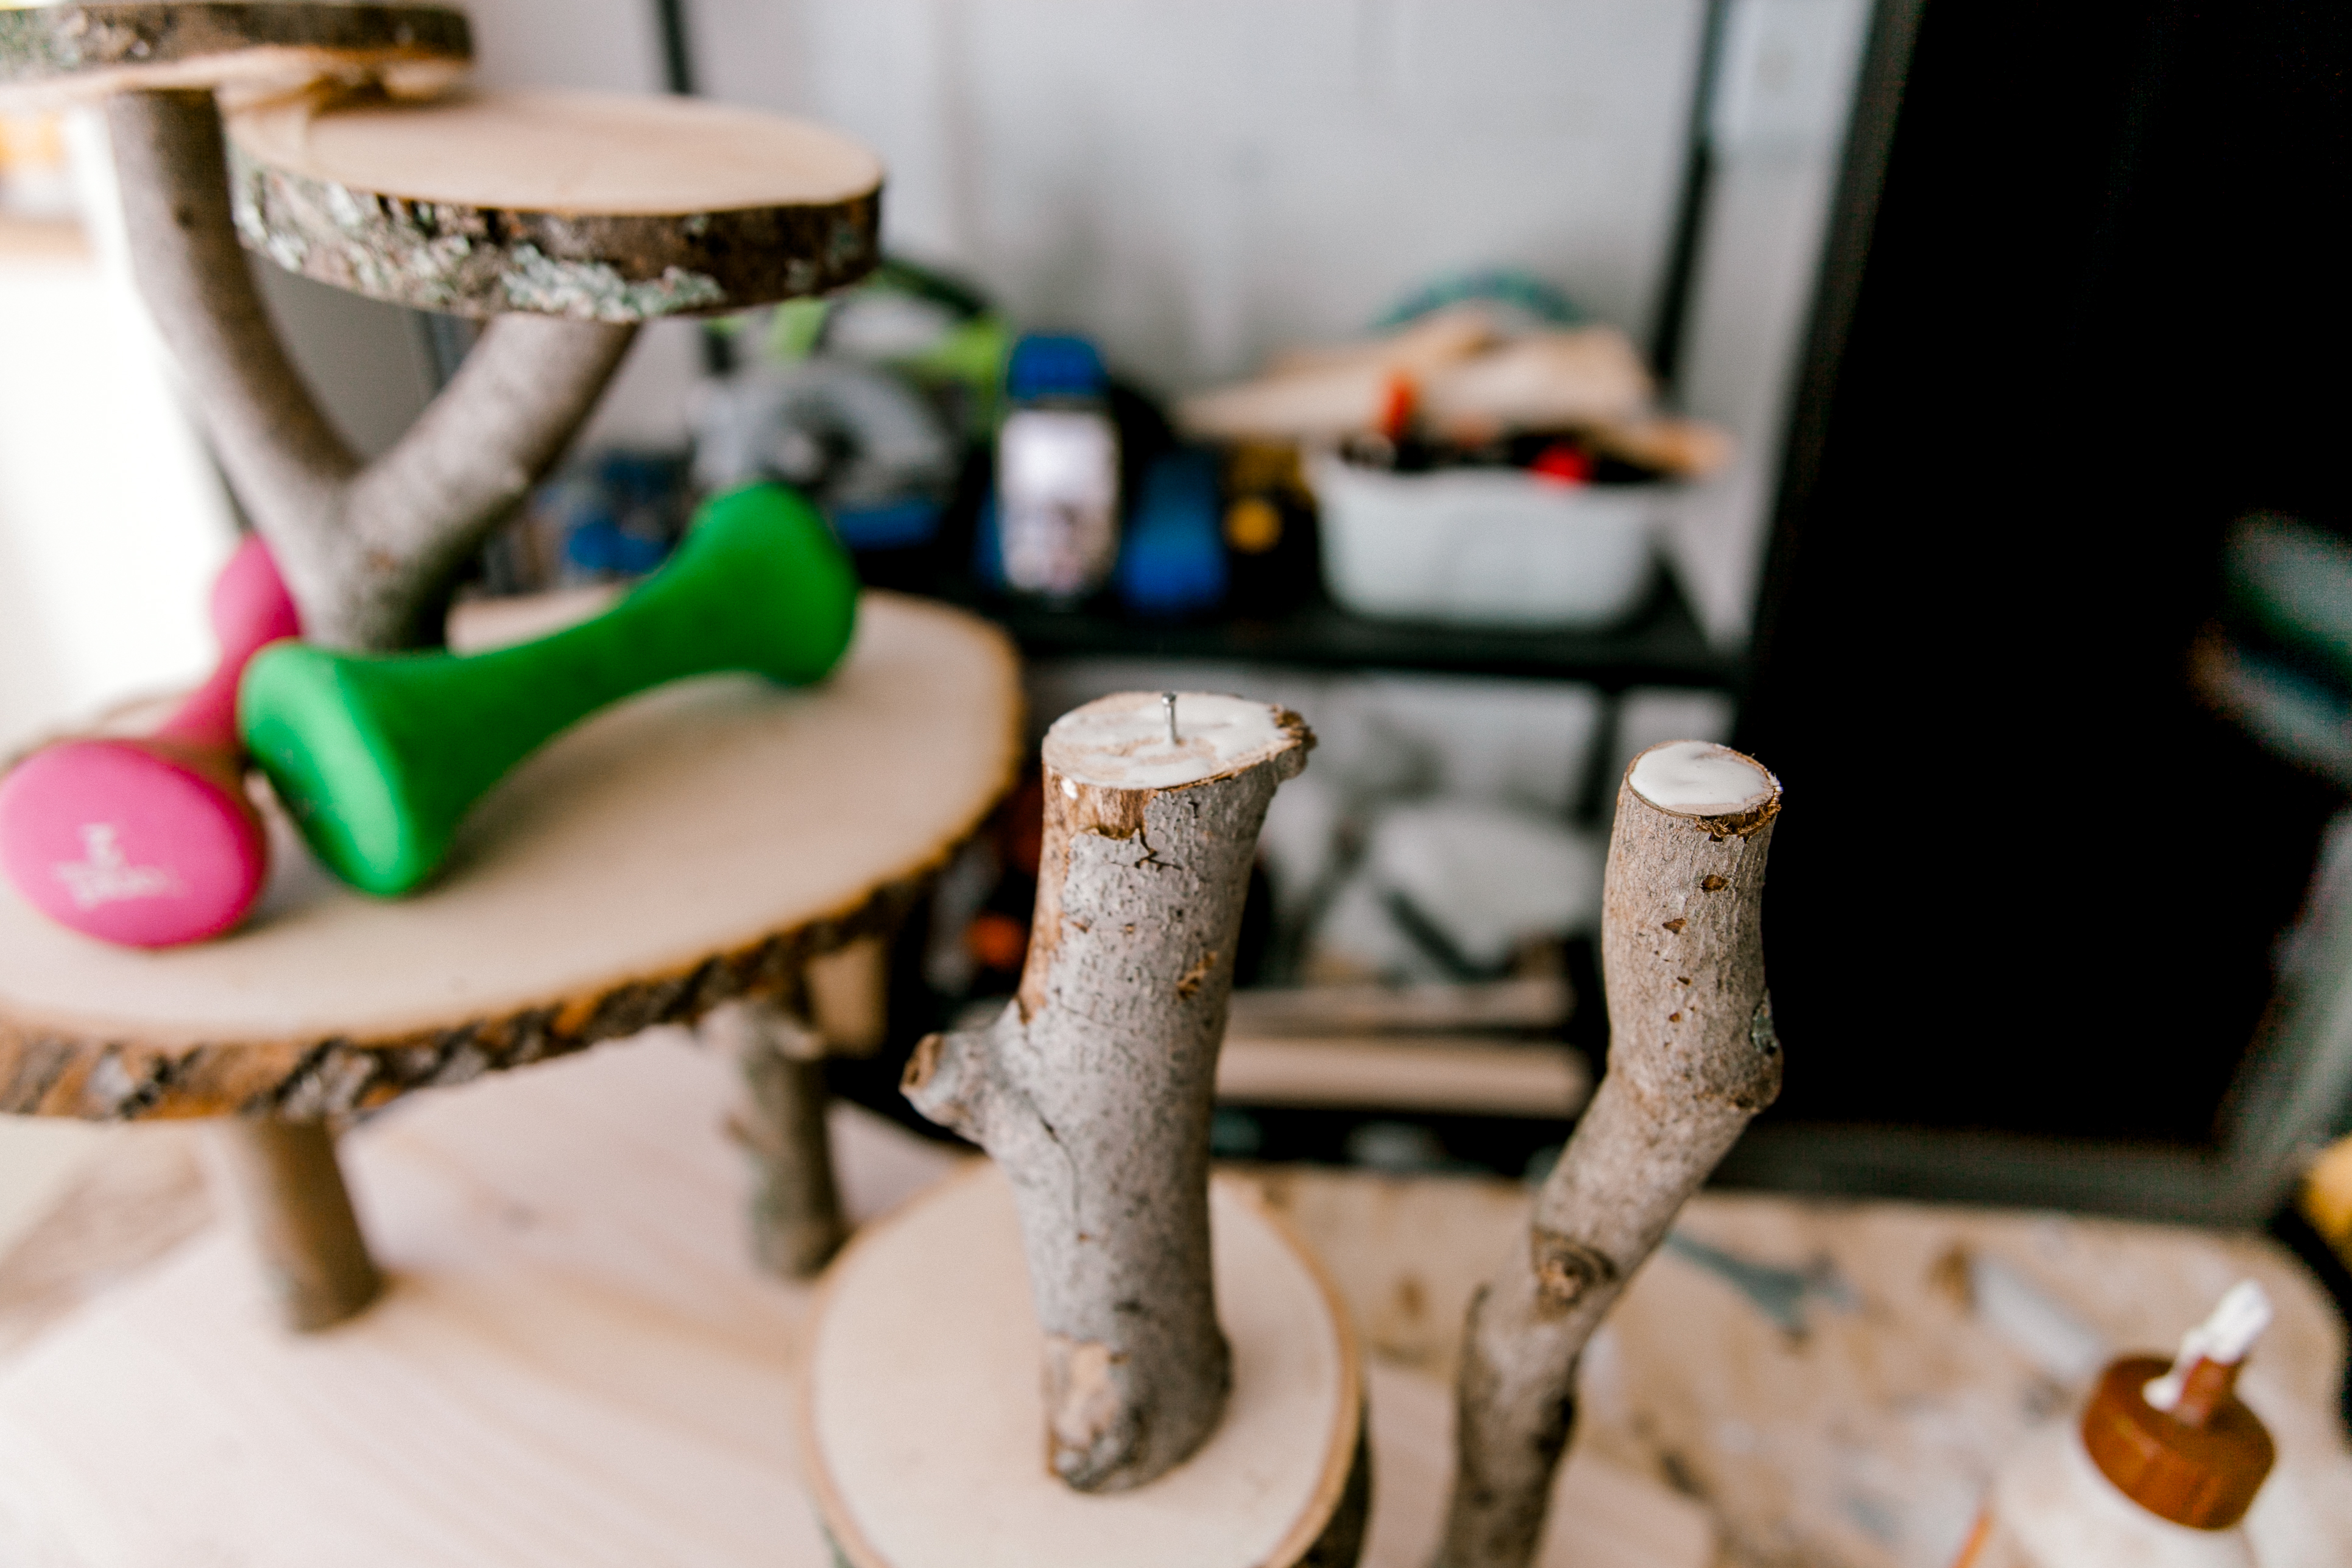
FINAL TOUCHES
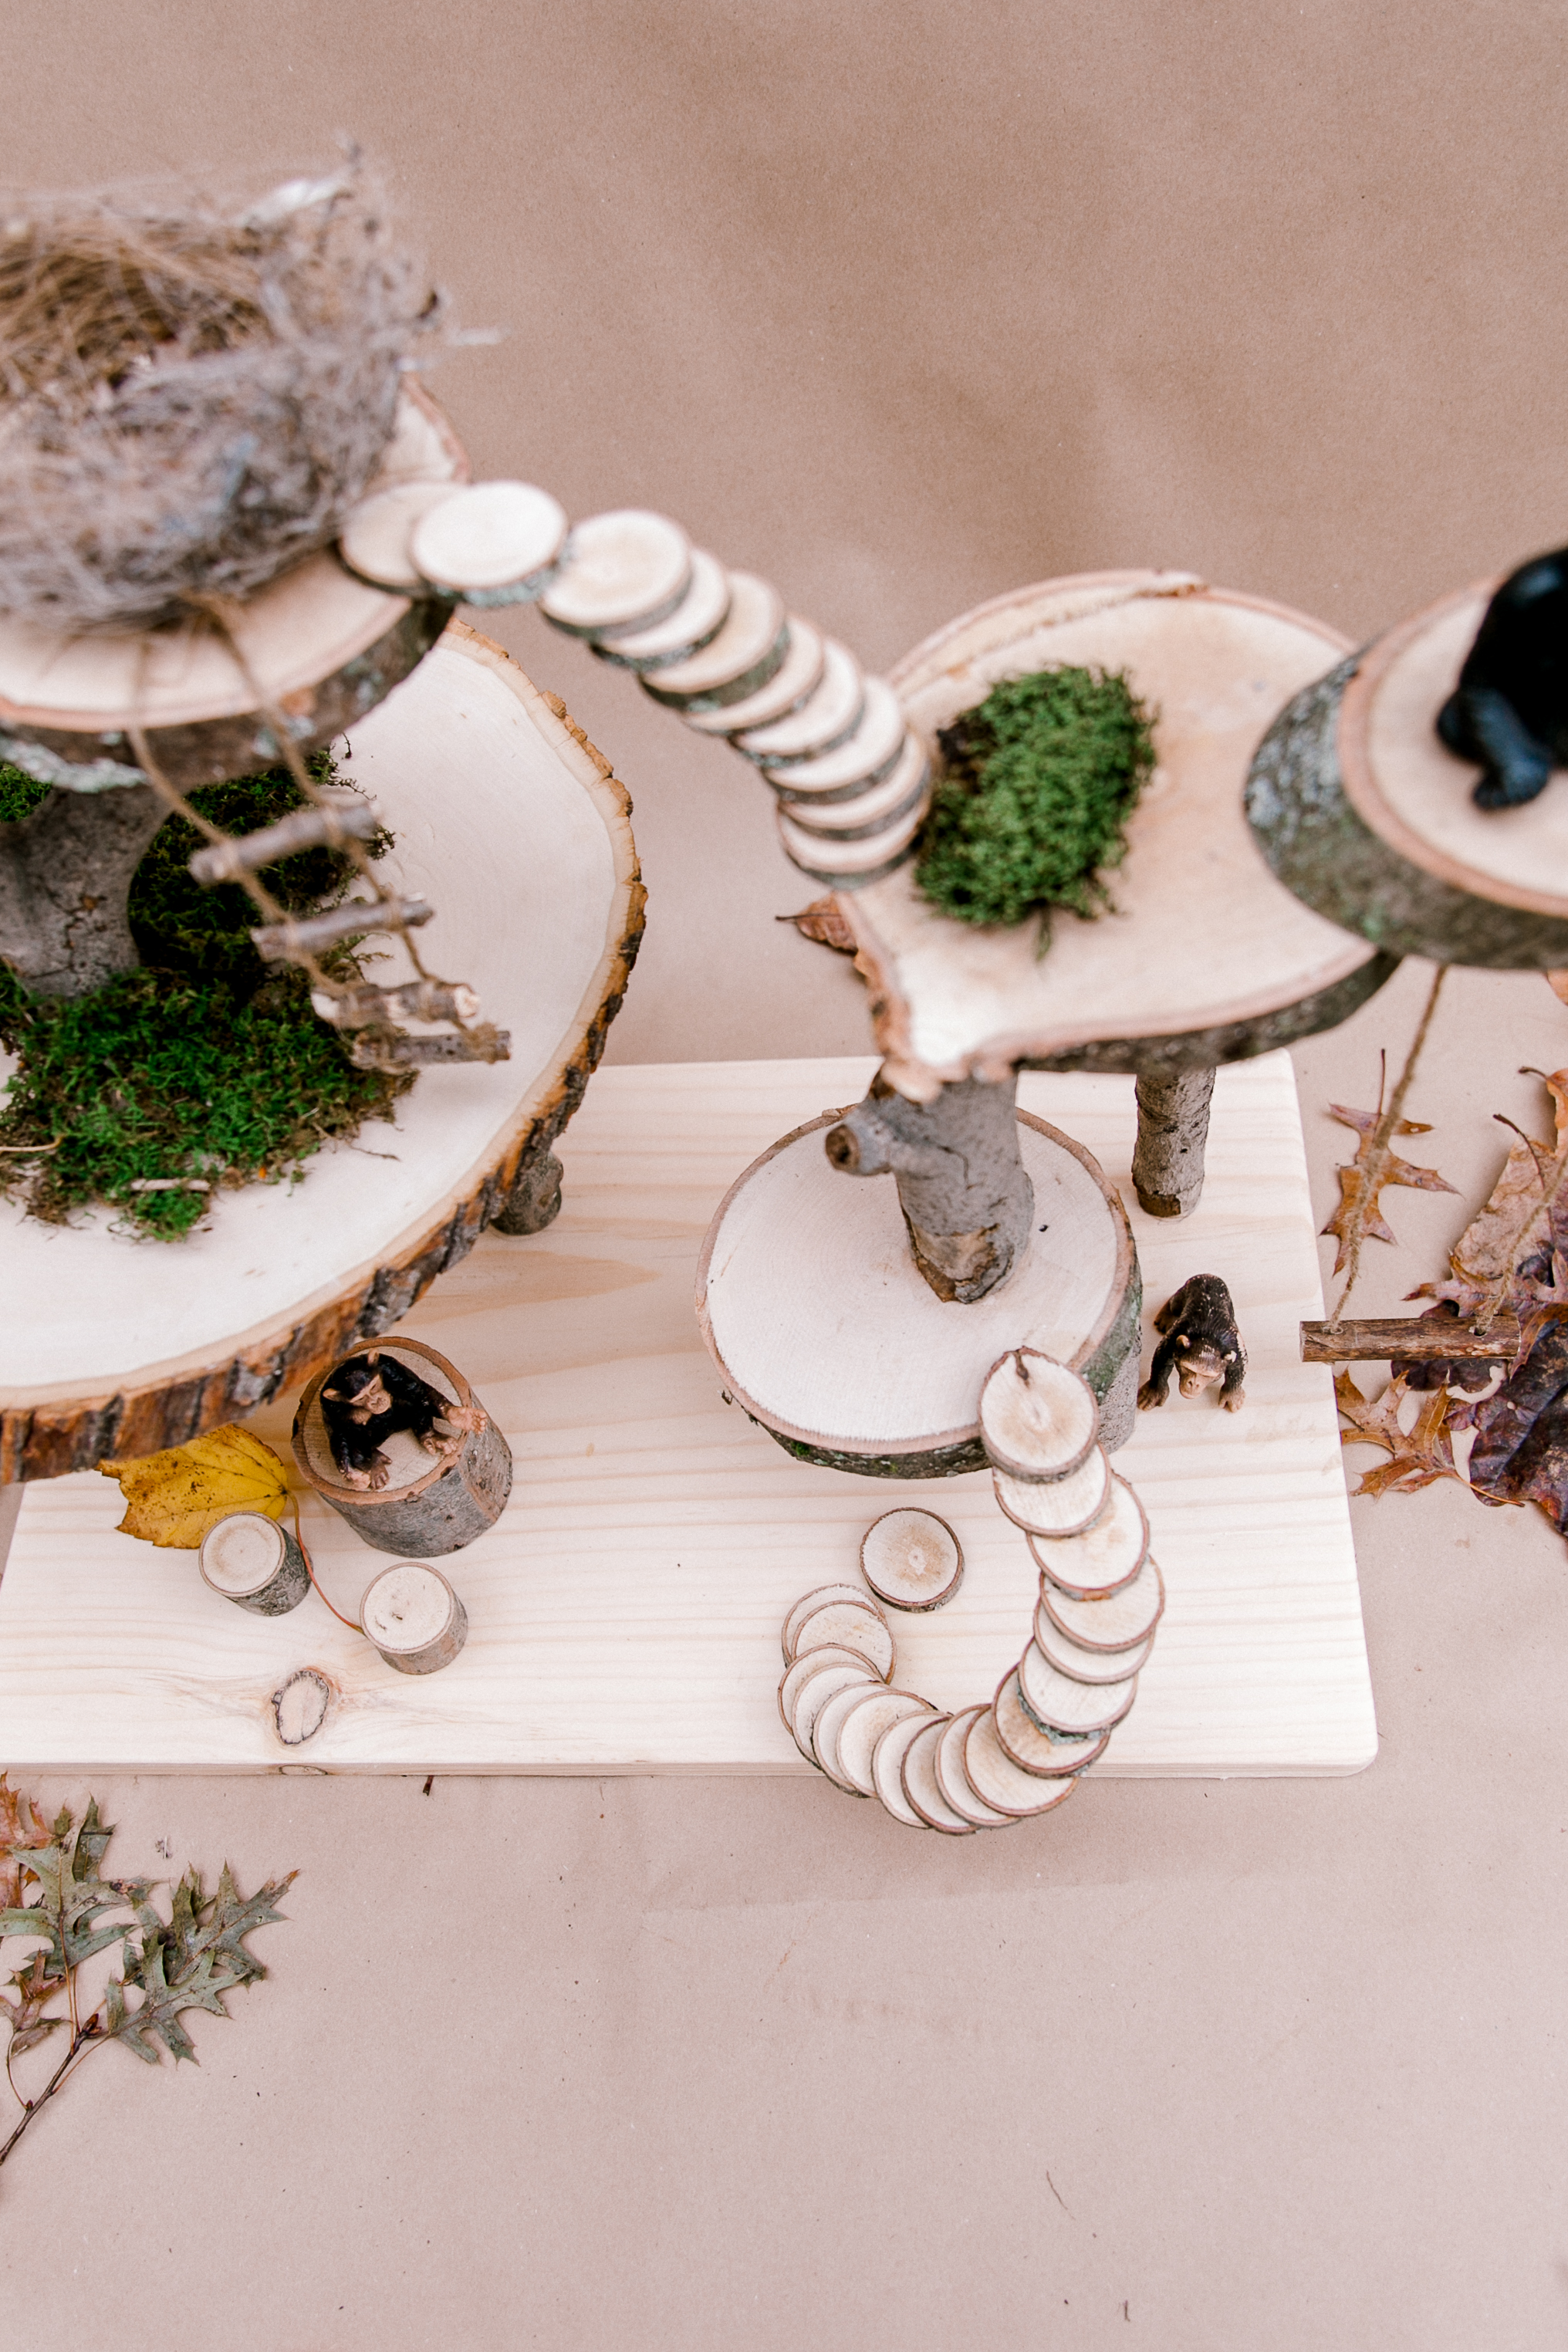
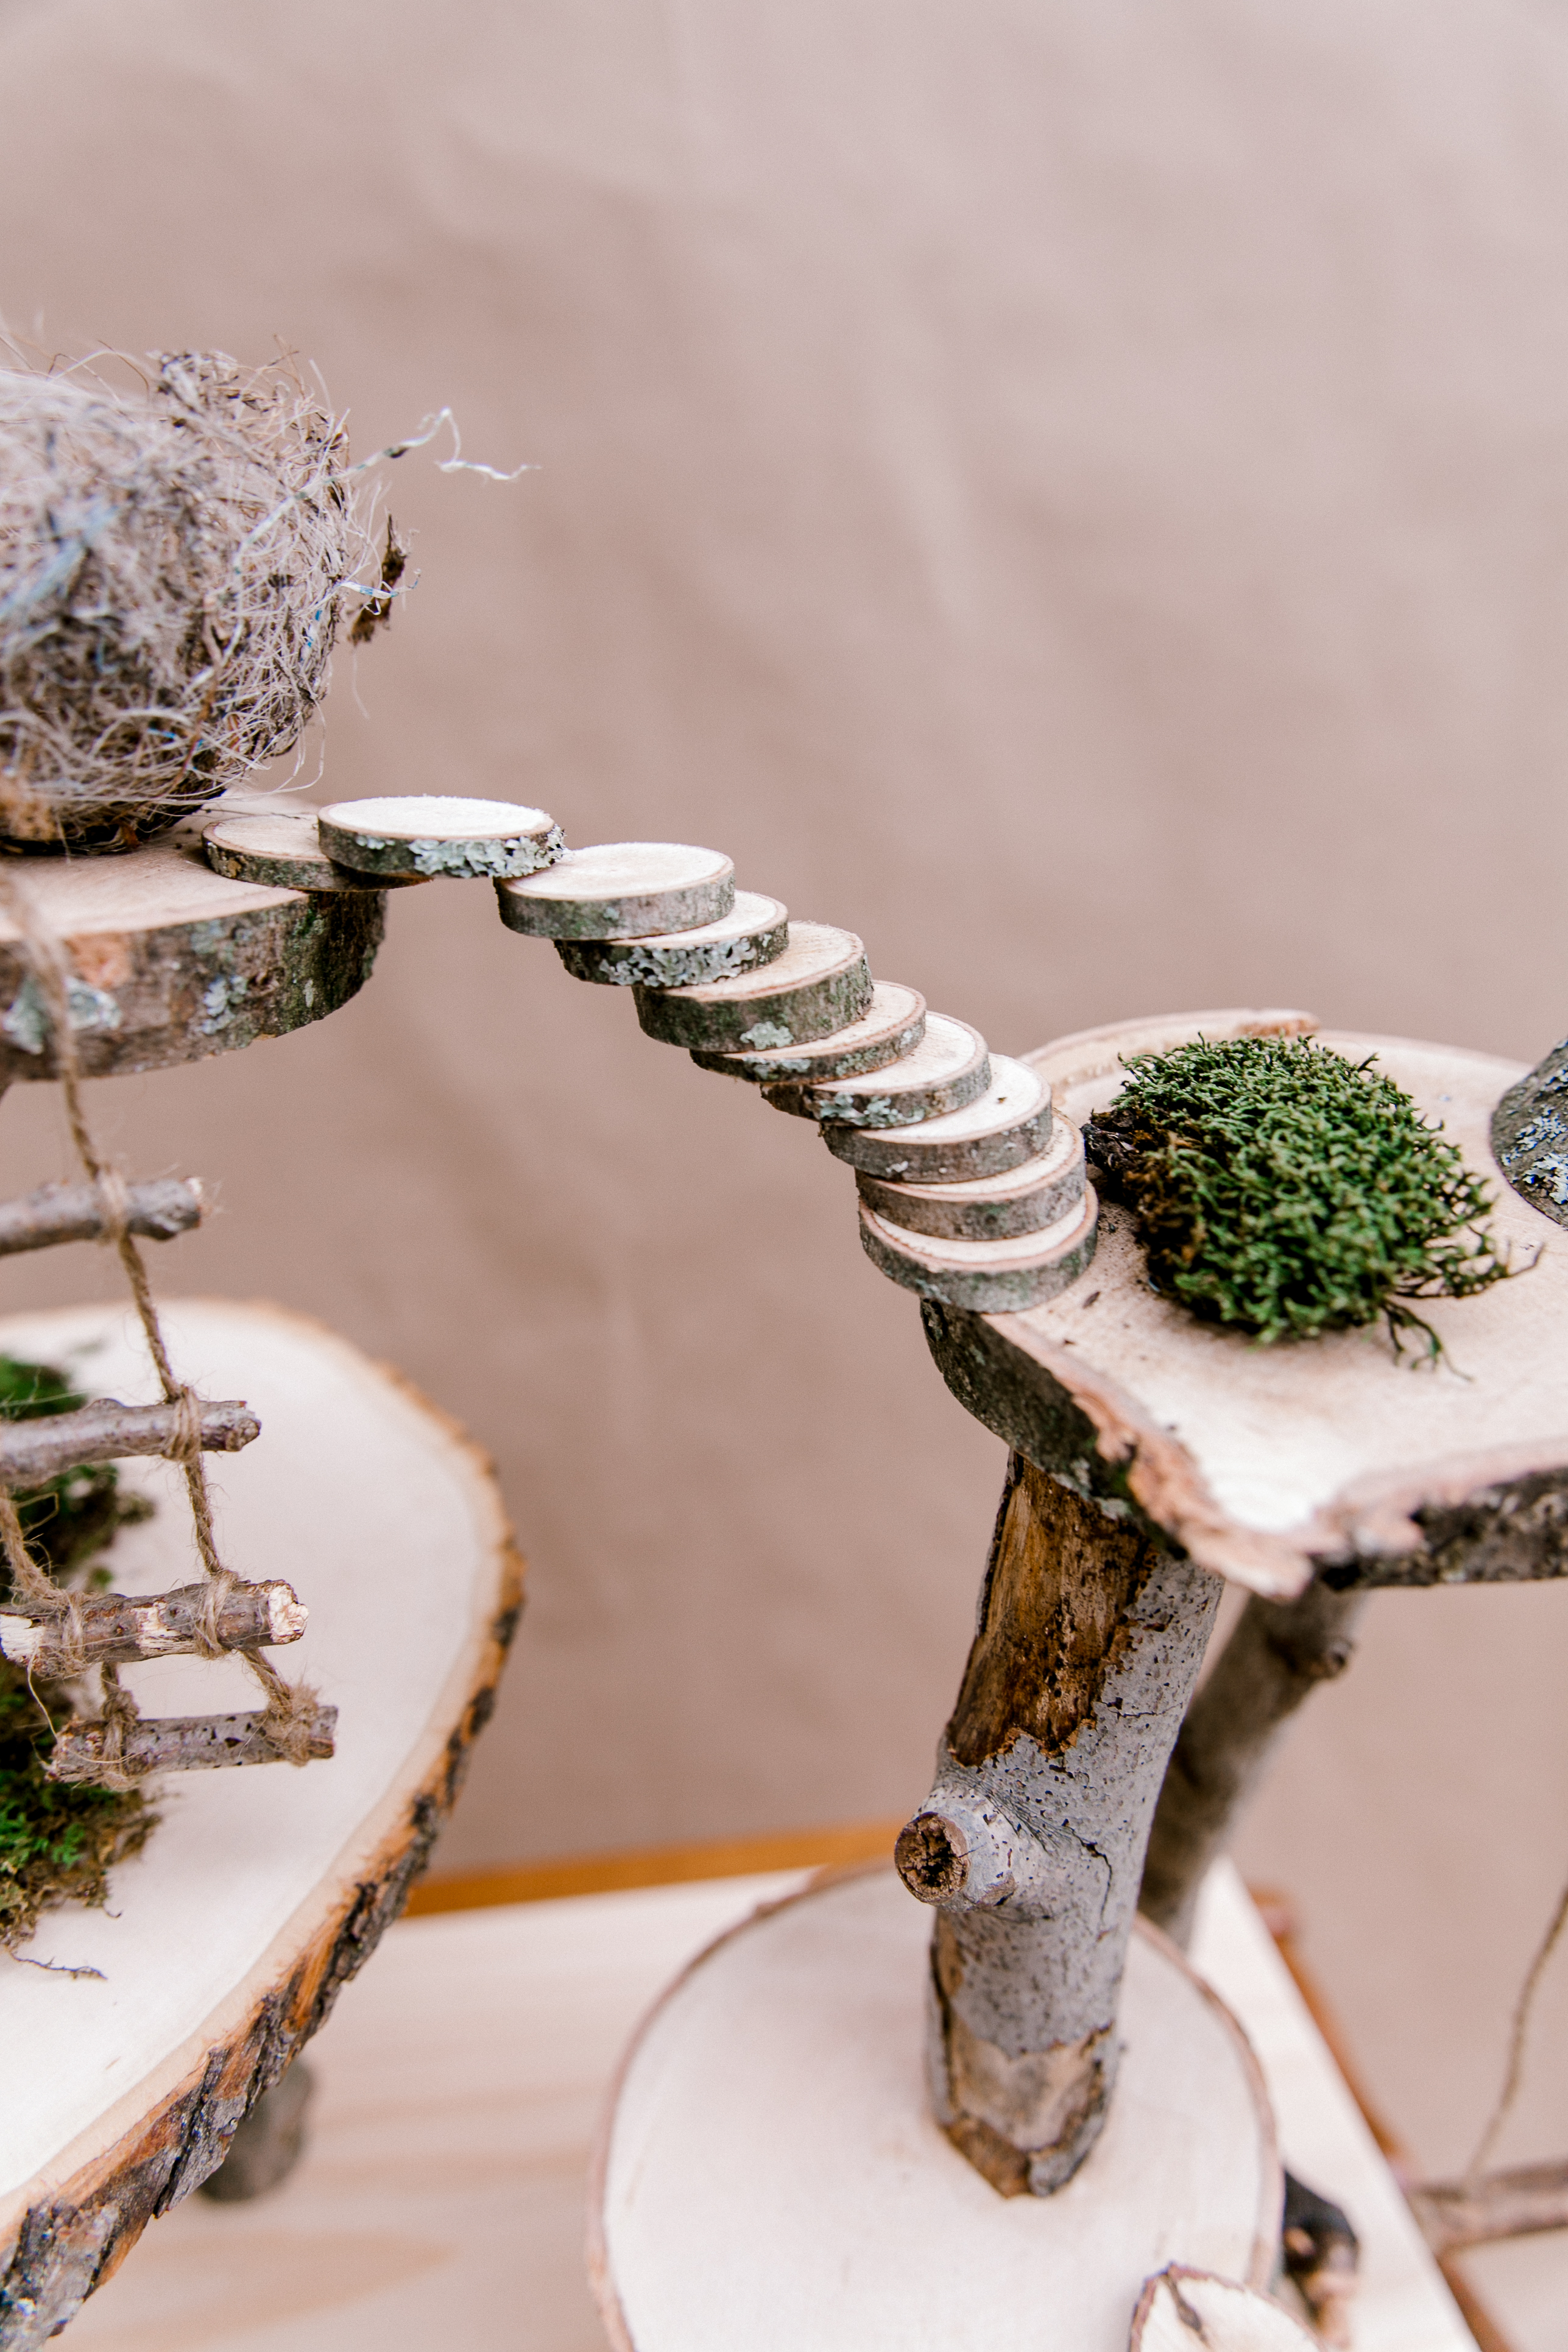
The stairs were the most painful part of the project. When I finally was done I've got a brilliant idea (as always good ideas come after the fact) to use a hot glue gun... ta dam! It would dry and stay in place so much faster than wooden glue.
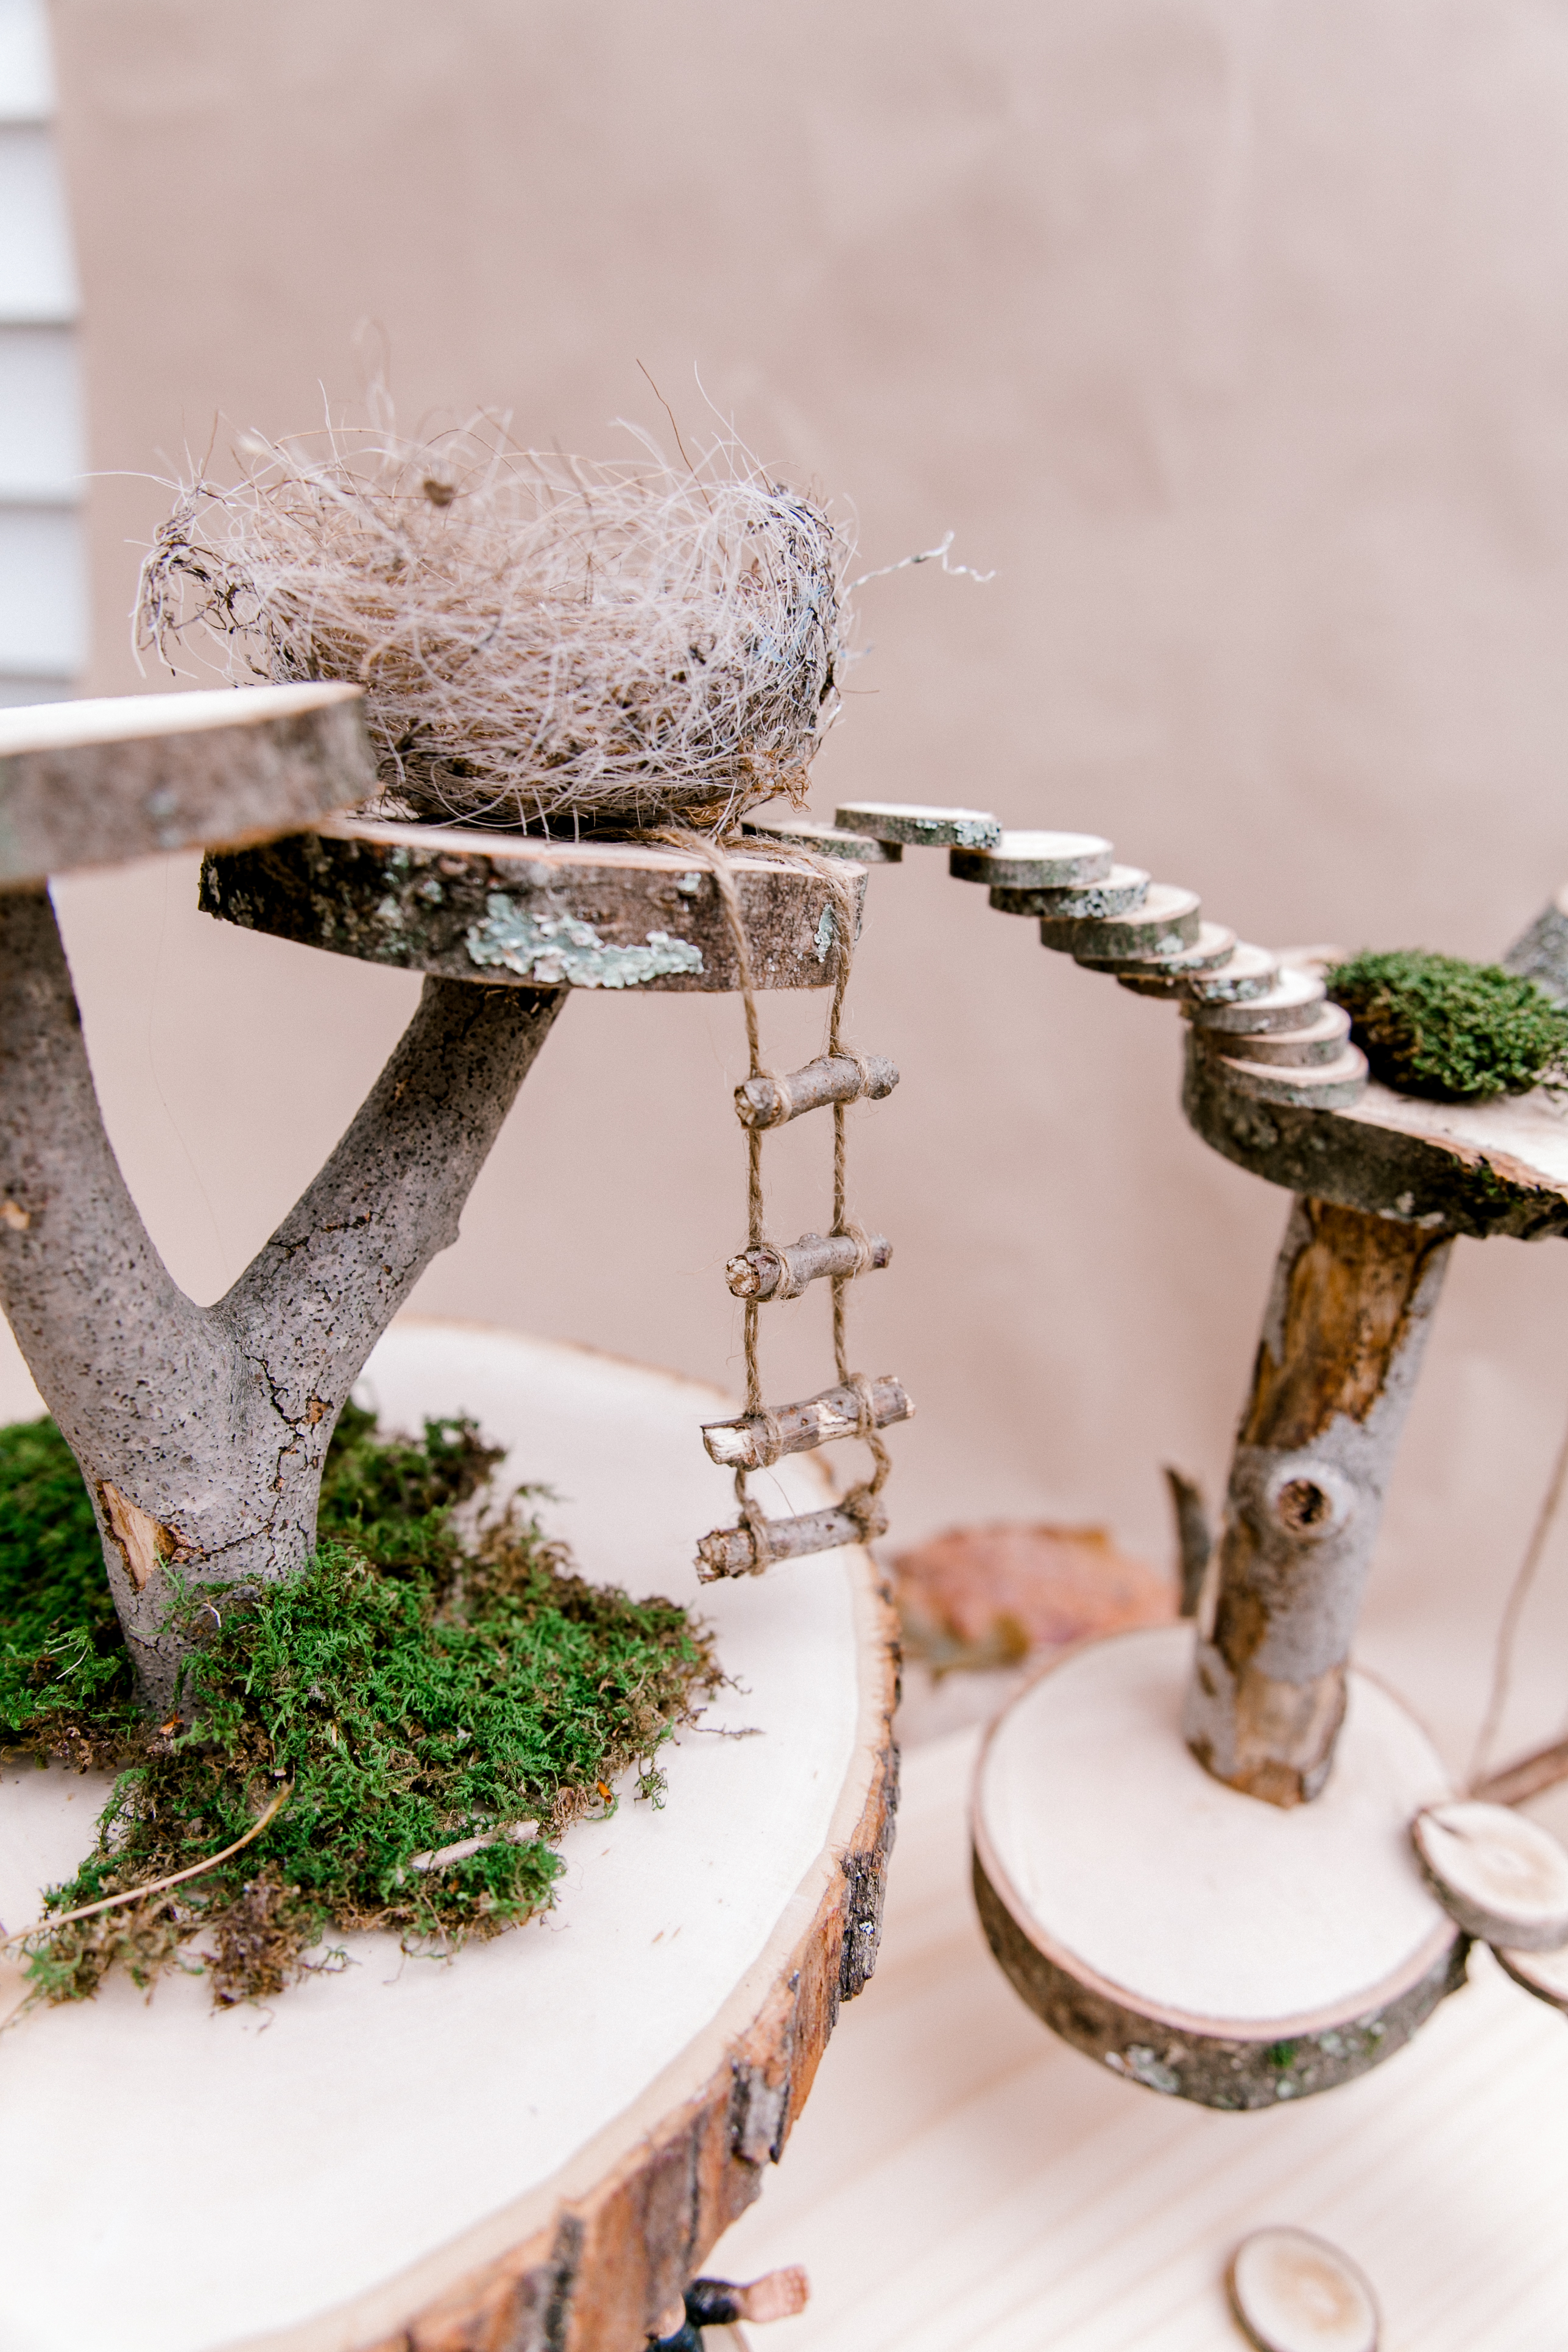
To make the hanging ladders I used a small branch, cut by size, and tied it with the rope.
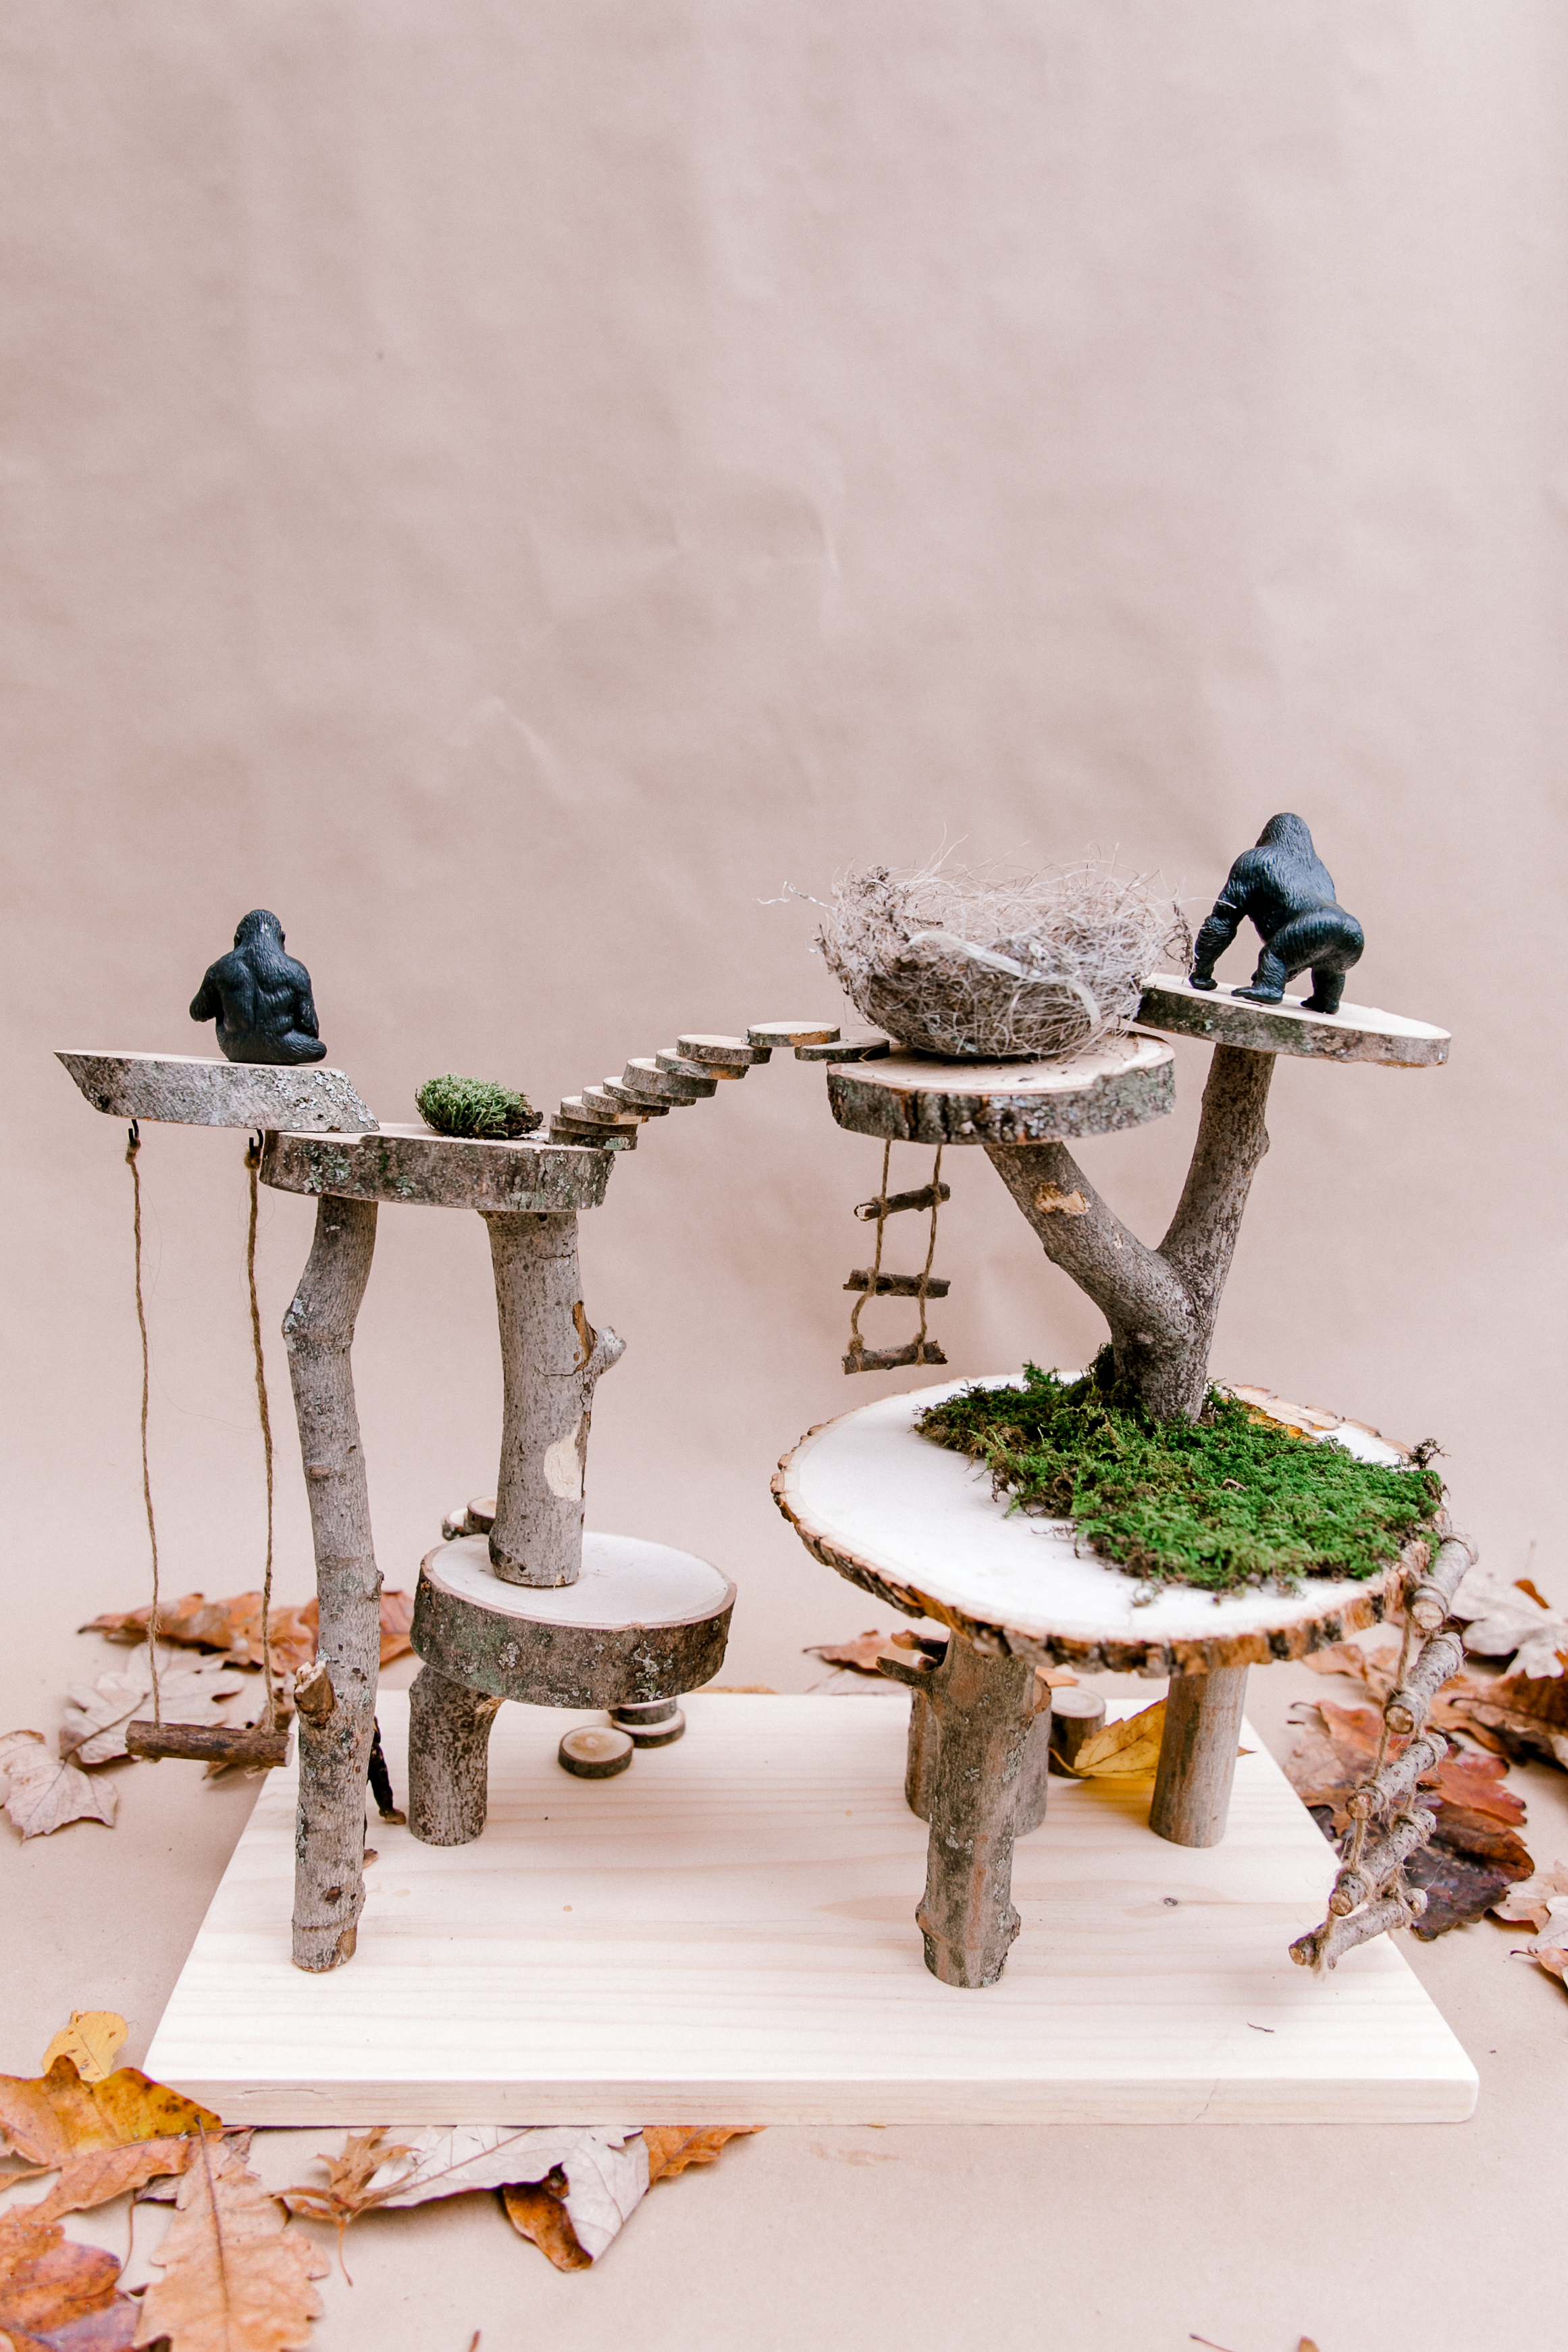
To make a swing I simply drilled two holes in a branch and hanged it on self-taping screws.
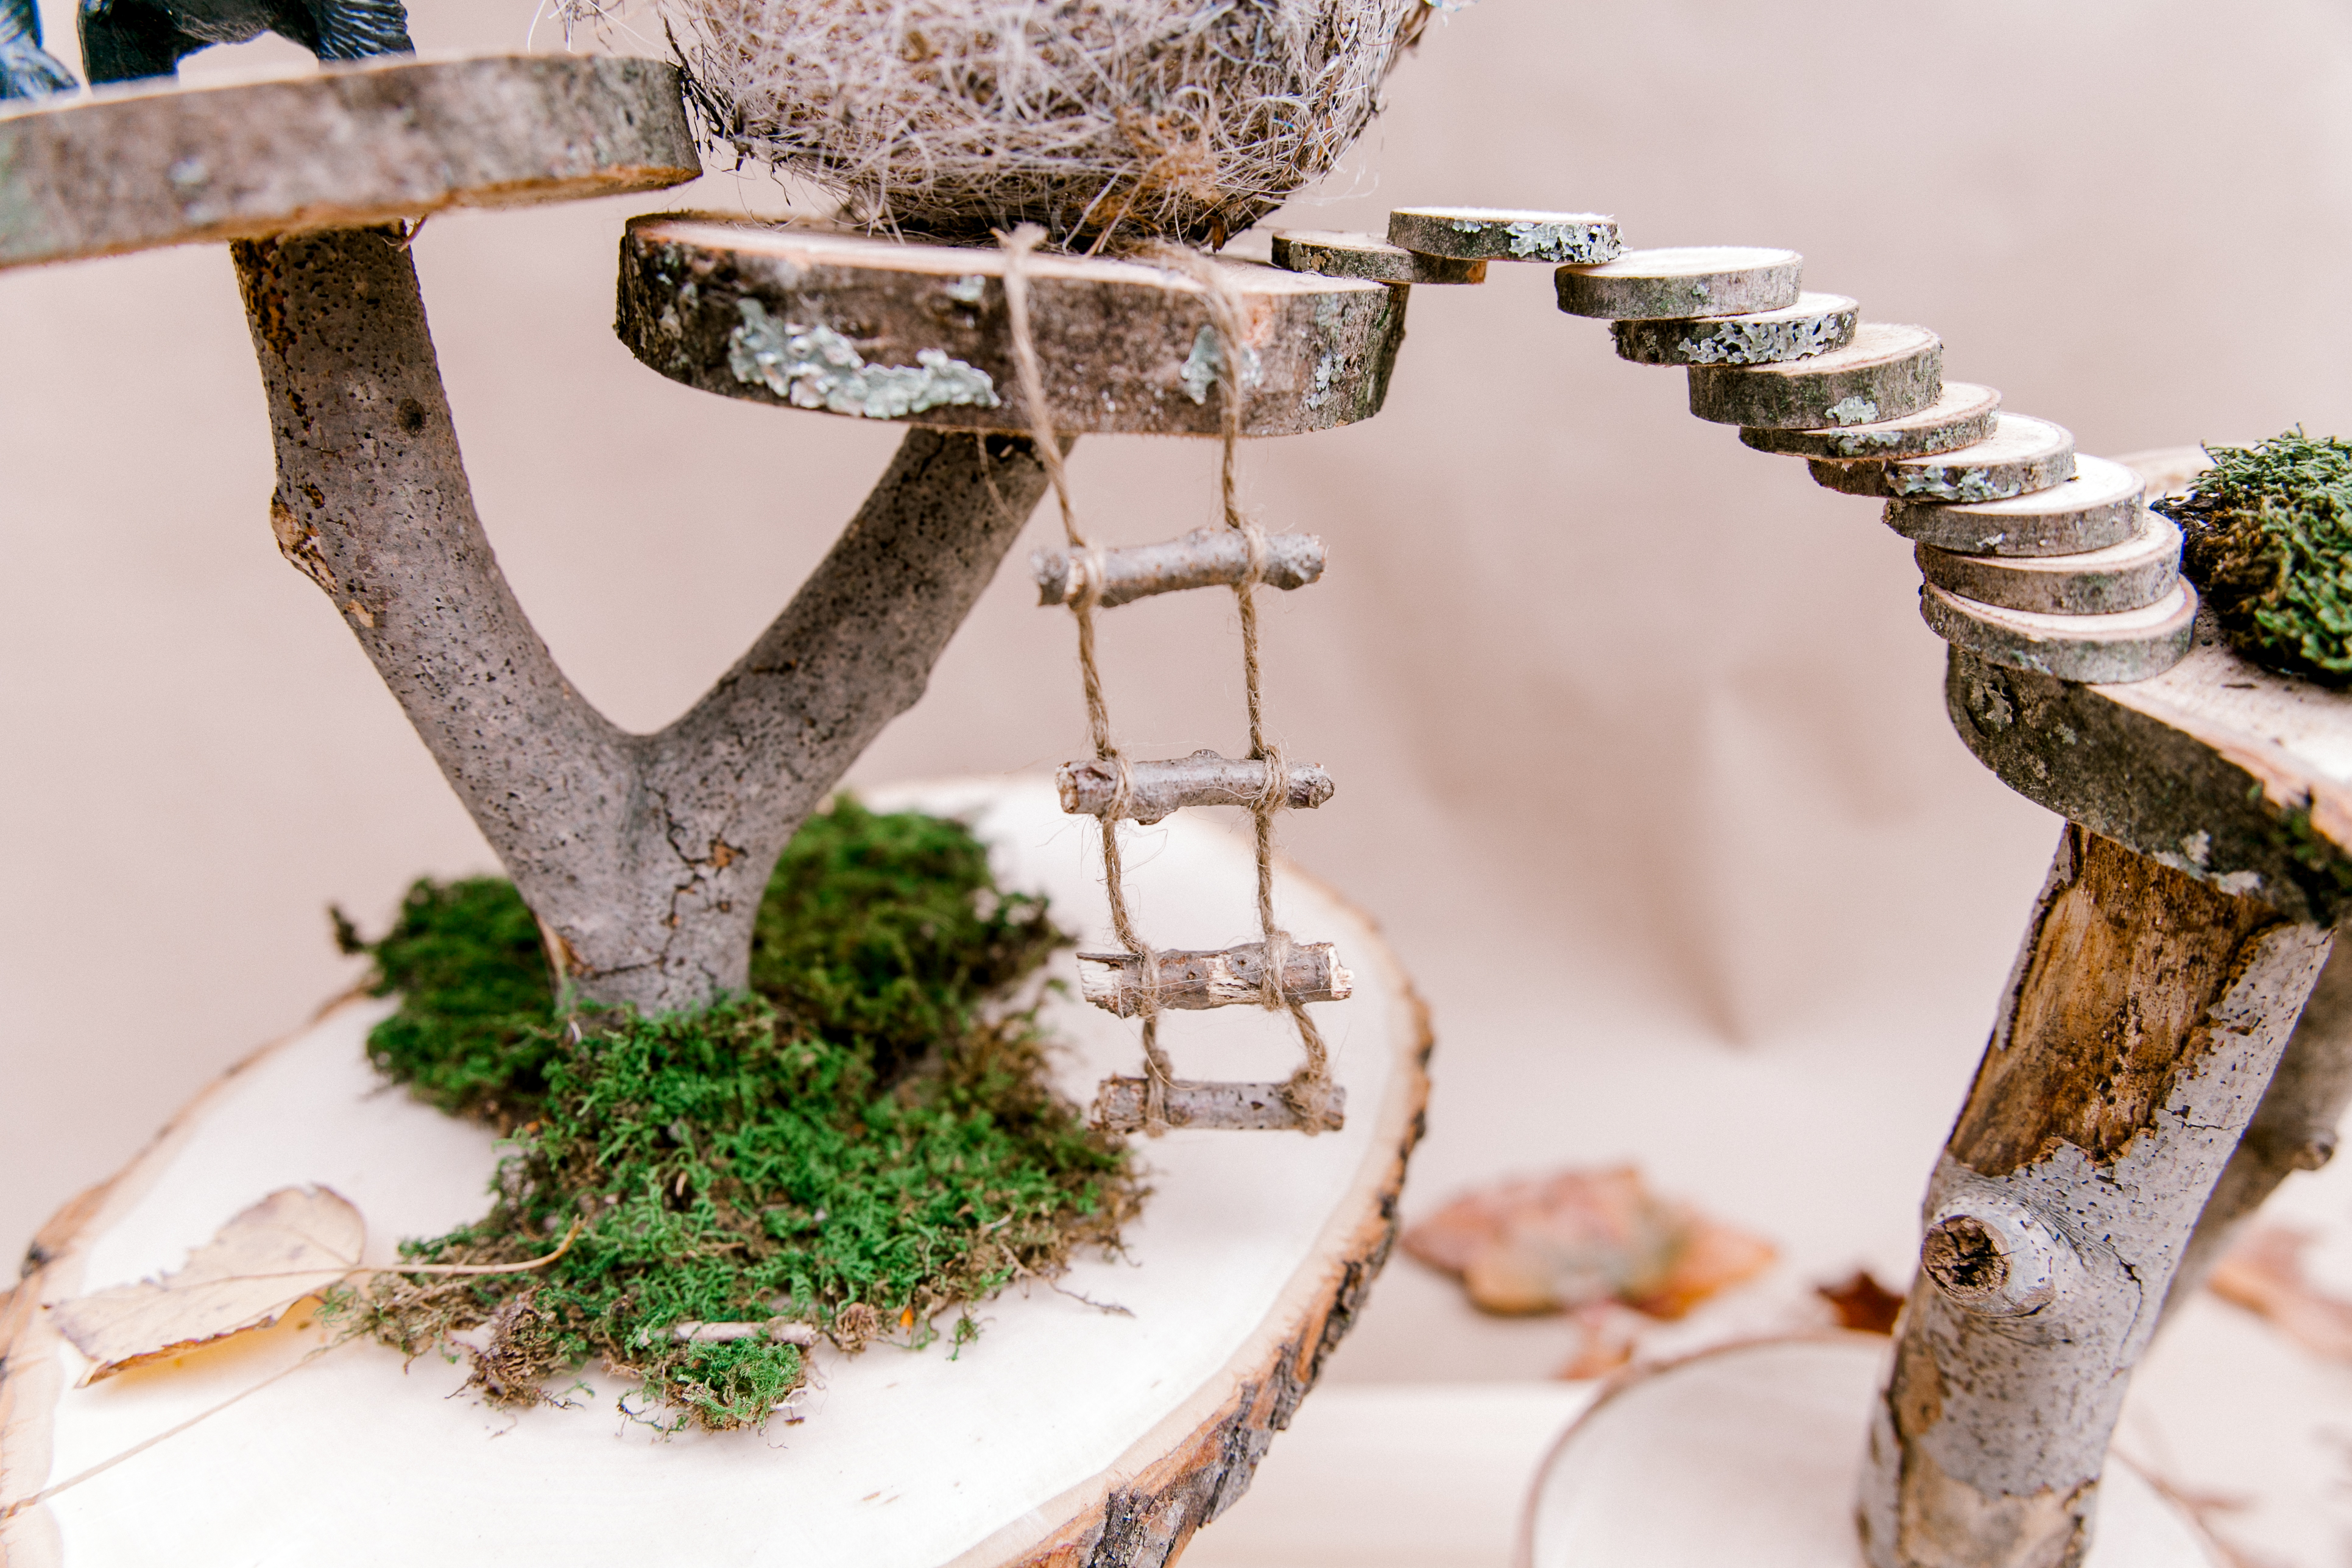
I used real moss but not sure how long it will last. I've got some artificial ones to replace it when the time comes. 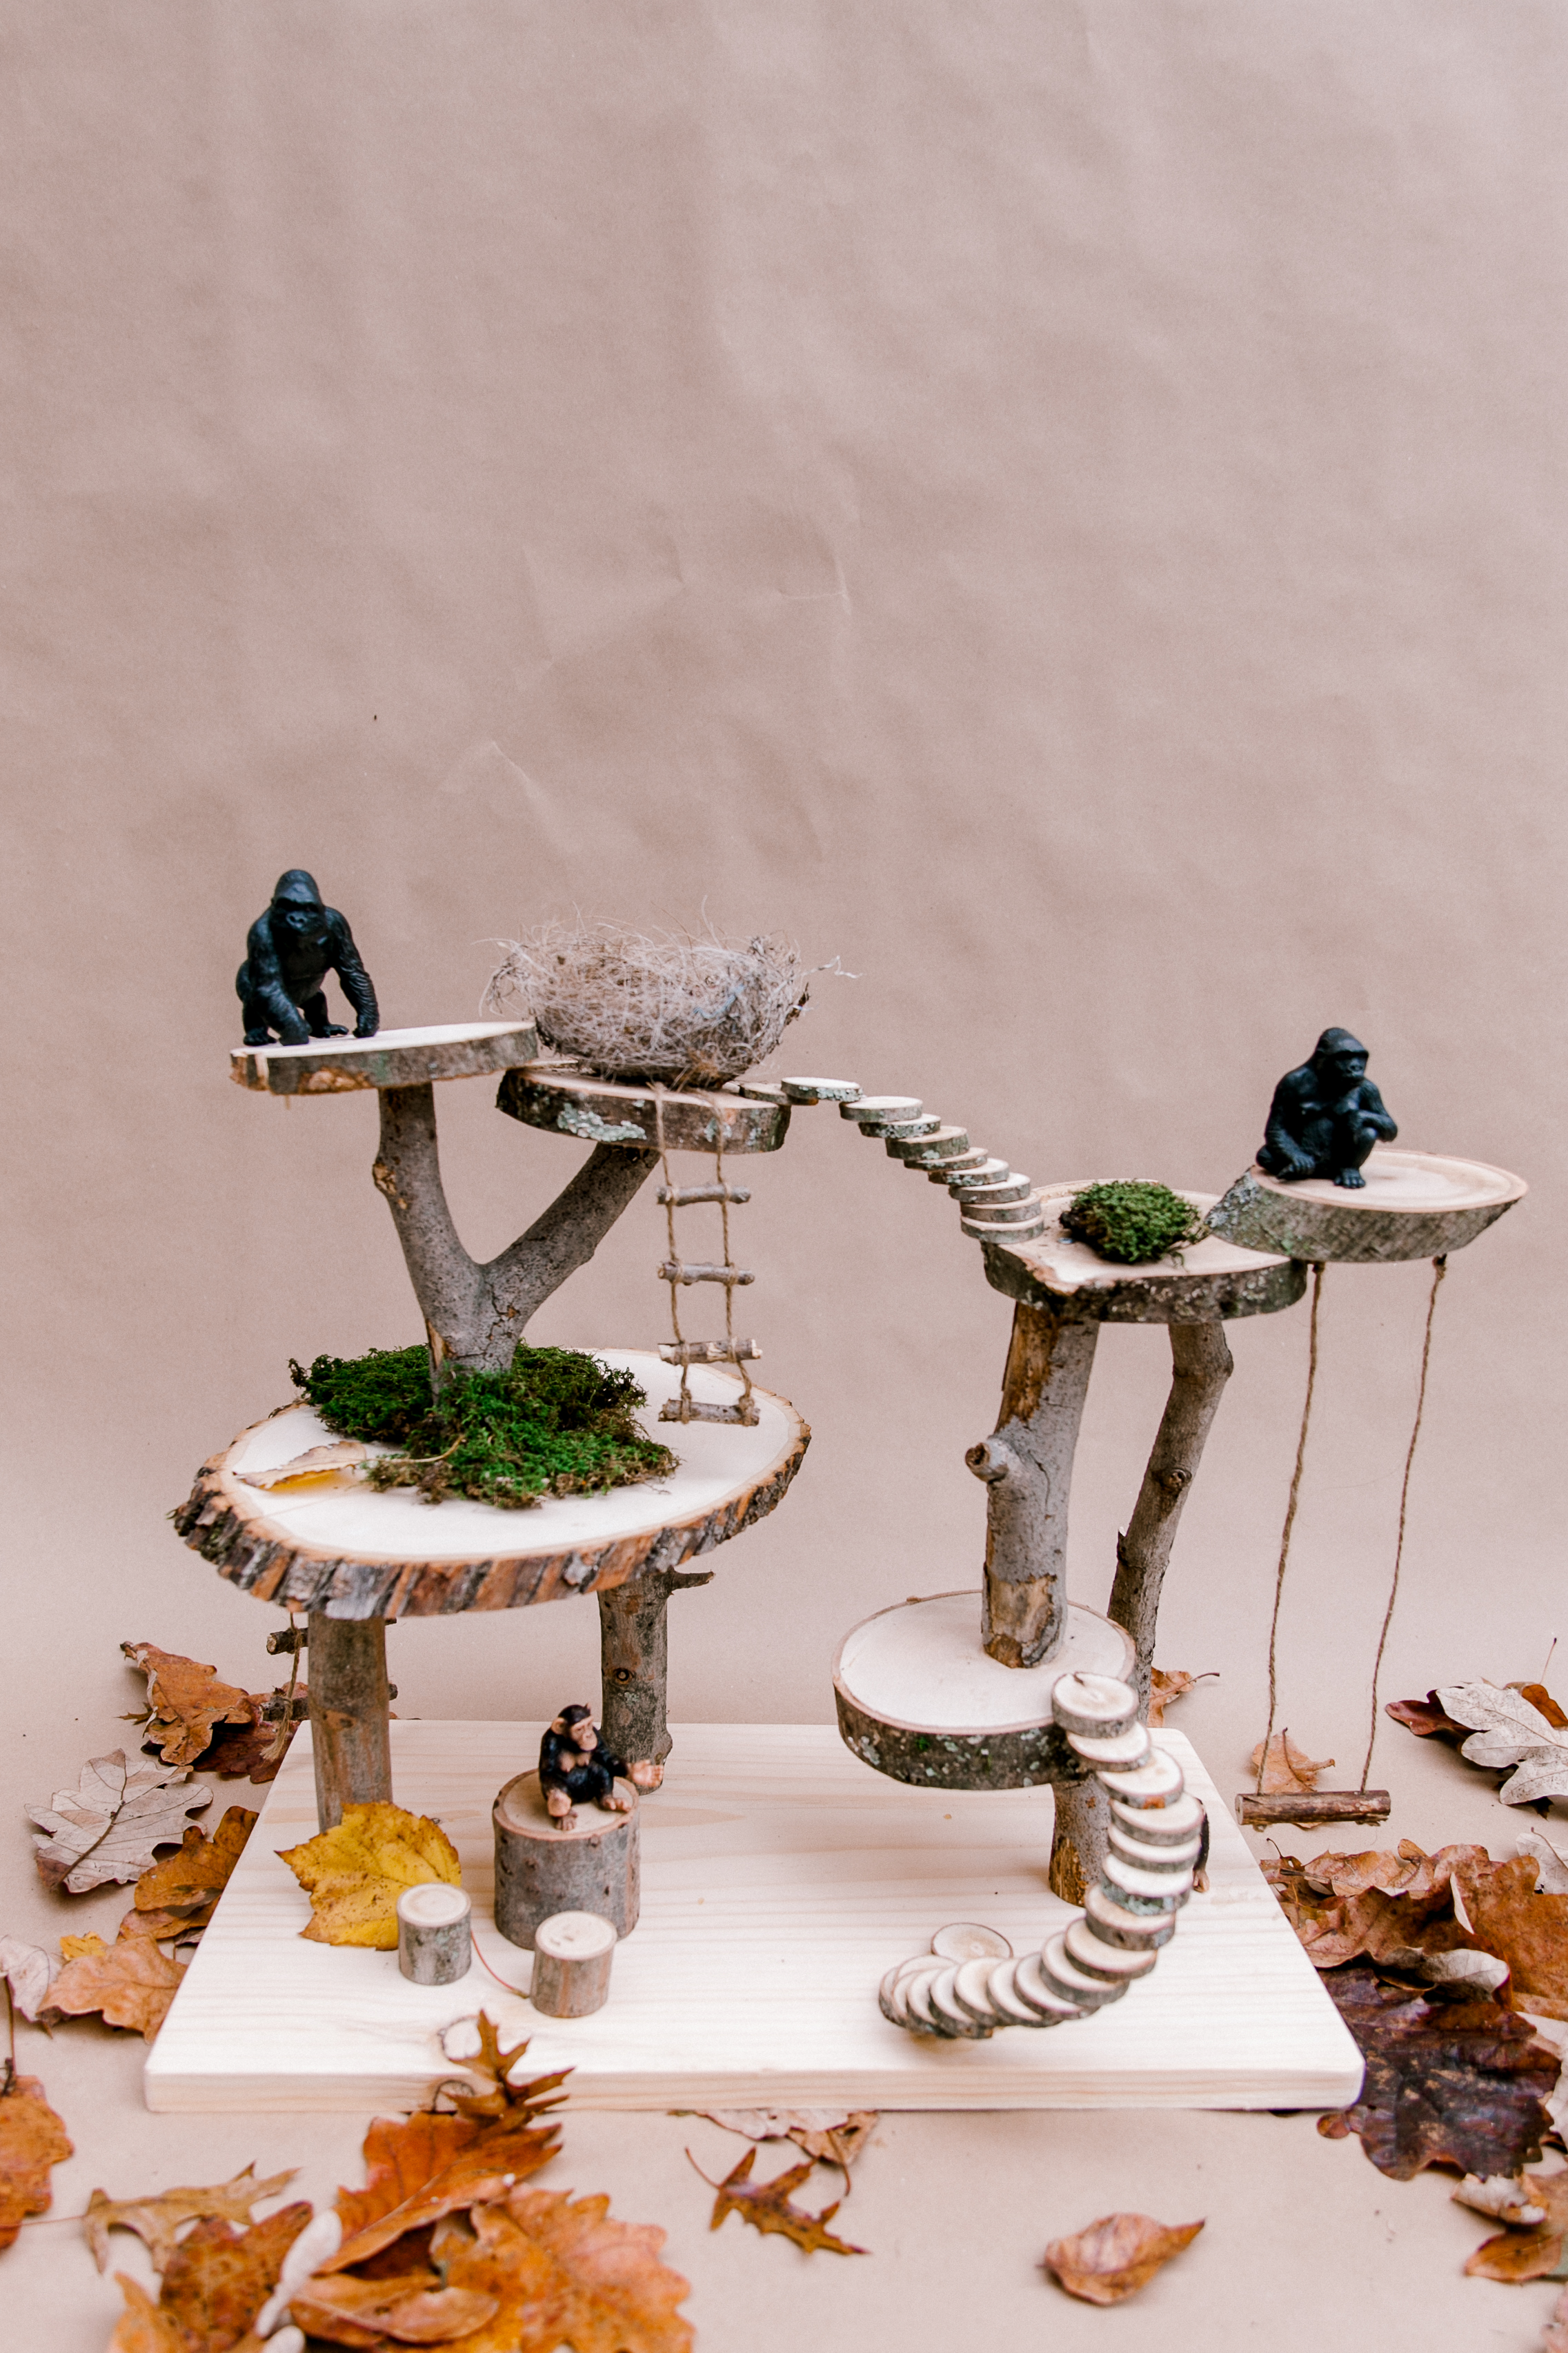
The nest that you see on the top is the one we found in our backyard. Maybe when I have time I'll make eggs to put in there. Probably right by Easter 😀
I'd say it was a relatively easy project but if you'd like something similar without the hassle of making it, I found great options in multiple places like Etsy, Magic Cabin, and Bella Luna Toys
WE THOUGHT YOU MIGHT ALSO LIKE
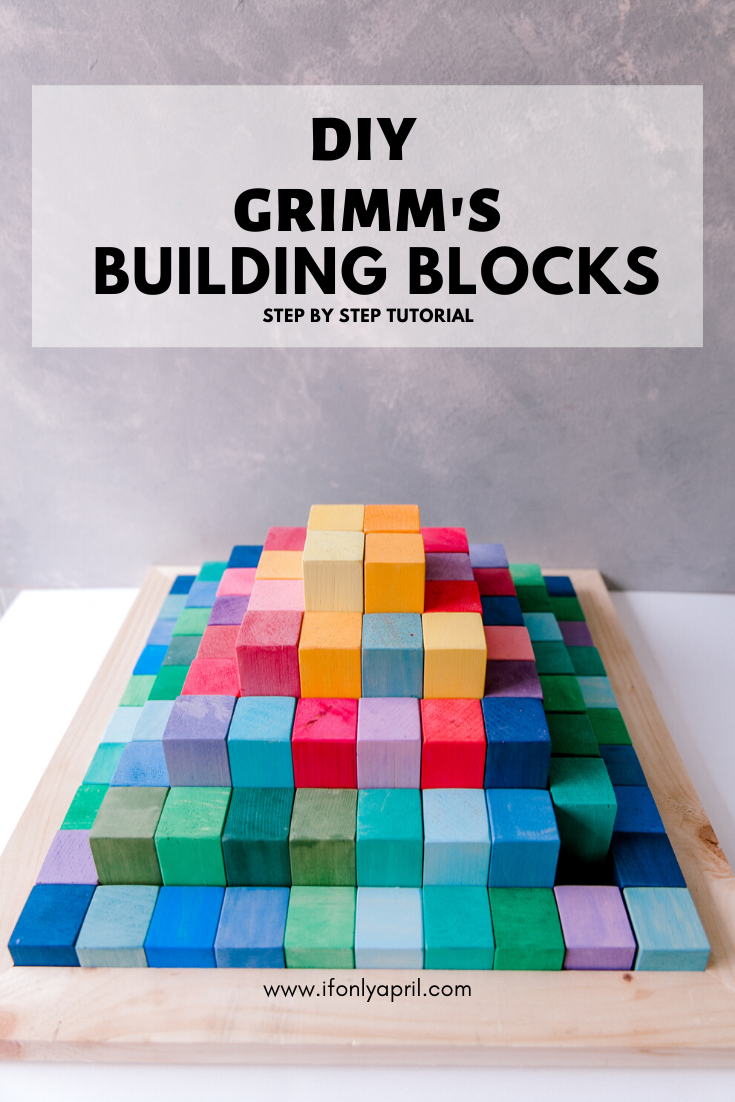
These colorful wooden building blocks inspired by Grimm's wooden toys.
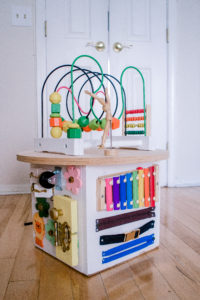
Activity cube that will entertain toddlers for hours
If you like this blog, make sure to check my YOUTUBE channel.
I hope you enjoyed this tutorial on how to make a toy tree house for pretend play! If you like it, follow me on Instagram @ifonlyapril. I try to post in stories my progress with all the projects.
Also, don’t forget to follow me on Pinterest, where I create inspiration boards for my next projects.
Till next time!
xoxo,
April


Stephanie says
This is BRILLIANT! I just LOVE it! But I do have a question. Since the wood was taken from outside does it need to be treated or coated in something for preservation?
April says
Thank you Stephanie! Great question, I'm actually not sure. My kids destroyed it within 2 years 😬🙈 but the wood held up nicely, just make sure it doesn't have any bugs inside and looks clean and I think you are good to go! If you decide to take bark off for a more neat look (then you can apply a coat of poly to preserve it).
I hope this helps!