
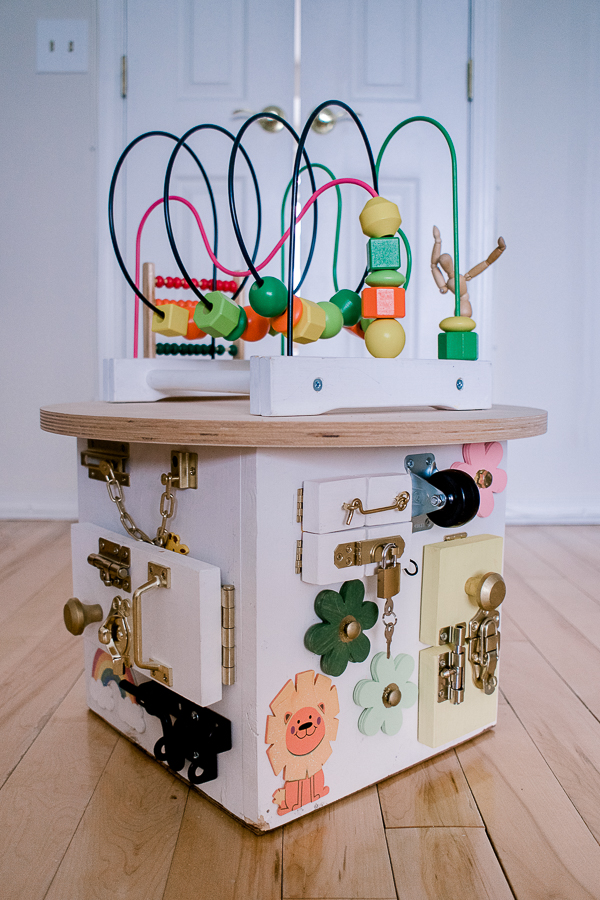
My favorite kind of toddler is a busy toddler. I bet yours too. Moms and caregivers know all too well that child's mood is like the weather in Hawaii - changes all the time. Their brain designed the way they can't focus on one thing for more than 4 minutes. That's why a busy board, activity cube, or activity station is the golden find. It has so many different details that can keep your child occupied for a longer time. My DIY activity cube for toddlers is inspired by creative Elsie and Emma from A Beautiful Mess. The great thing about this activity cube is that you can customize it any way you like, or to be more exact, anyway your toddler likes. For example, Sasha has an obsession with zippers and buckles so I knew that my activity cube will have it on one side.
Why do we prefer an activity cube in comparison to the busy board:
1. Either it's a board or a cube when you put all buckles, hinges, etc it gets heavy. The activity cube is more stable and doesn't require fixing to the wall. With the cube structure, you shouldn't worry it'd fall on your child's feet and hurt him.
2. The DIY activity cube minimizes the space needed for this toy. I can imagine your house is already like a war zone with an enormous amount of different toys laying around. I think the cube can fit more activities while saving space.
3. I think different sides give an effect of surprise every time your child moves around it. I've noticed that Sasha can sit and play with one side for ages and then turn it around and make a "whoa" sound when she discovers a new side with new things on it.

Disclaimer: Please note, that some of the links below are affiliate links and I will ease a commission if you purchase through those links (at no additional cost to you). Thanks for your support this way.
MATERIALS:
- 12"x1" at 4' board
- round plywood birch 19" ( I ordered this one)
- white paint
- drill and drill bits
- wood glue
- nails and hammer
Materials for zipper side:
- zippers
- xylophone (I had this one that broke but was perfect to be glued to the cube)
- buckle
Materials for spinners and latch side:
- various door latches and hinges (check the hardware store)
- wood peace for doors
- wooden flowers for spinners ( I used this ones from Michael's and glued 3 together)
- screws for spinners and corresponding bolts
- painted wood shapes of animals ( mine are from Michael's)
- stickers of animals decorations (also could be found in Michael's)
- small padlock with keys\
Materials for door and latch side:
- various door latches and hinges
- wooden peace for doors
- slide bolt lock
- painted wood shapes of animals
Materials for magnetic board side:
Materials for the top:
- Bead roller coaster from Ikea
- Small abacus
- Wooden man on a stick (I had mine for as long as I remember and finally I found a good place for him)


INSTRUCTIONS:
- Cut 12x1 board in 4 even parts. Put together a box with wood glue and nails. Use clamps and triangle ruler to secure positioning and make sure the angle is 90 degrees.
2. Put together the sides
Spinner and latches side
Before you attach all the parts lay them out and make sure they will be working next to each other. I didn't do it and as a result, the door with the padlock when opens hit the wheel and don't open fully. Oops!
To make spinners I glued together 3 thin wooden flowers from Michael's, painted them in different colors, made a hole in the middle with a drill, and attached a bolt with a screw on the back of the box. Overall, inside of this activity cube doesn't look pretty and you need to make sure that it's secured so your baby won't get there.
To make various doors I used some scraps of wood that I had, painted them, and attached with gold hinges that I found in a local hardware store. Sasha loved to find a cute animal behind each door. It made the process of opening the locks so much more fun.
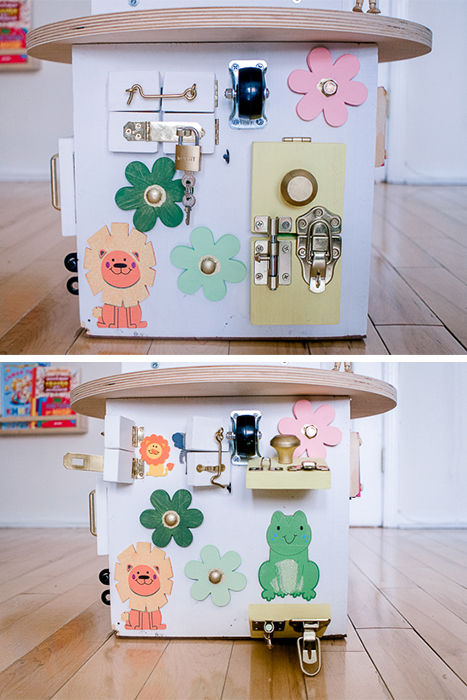
Big door and latched side
I used as many locks and handles as possible on this side. The great thing about creating your activity cube is that you can customize it to your liking and adjust to materials that you already have.

Zippers and buckle side
I used screws to attach the zippers and buckle to the cube. This way they are secured to the cube and even now, a few months of use later, are still in place.
This xylophone Sasha had since a long time ago and it broke so we couldn't use it separately anymore. I found a perfect place for it on this side of the cube.

Magnetic board side
Sasha loves to attach magnets from the fringe to this board. It's so much fun!
Velcro strips are not as popular, but I need to attach the inner side with a screw to the cube so she won't need to use both hands to play with it.

Top of the DIY activity cube for toddlers
I got this bead roller coaster from Ikea a while ago and always thought it could have a better use. I painted the base white but it was not necessary.
I used the cheapest abacus I could find because this cube was made on a budget but if you can splurge there are so many amazing ones.

Update: the man is no longer there since one day when Sasha quietly played with this cube for an hour she completely destroyed the man. Oops!

DON'T FORGET TO PIN TO MAKE IT LATER>>>>>>>>>

Do you absolutely love this idea?
Let me know what you think about this activity cube in comments and share your creations as well!
WE THOUGHT YOU MIGHT ALSO LIKE
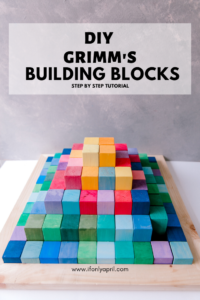
DIY WOODEN BUILDING BLOCKS
DIY PLAYSILKS FOR OPEN-ENDED PLAY

TOY TREE HOUSE FOR A PRETEND PLAY

UPDATE: 04/03/2020
I'm planning to make a video version of this DIY Activity cube for toddlers on my YOUTUBE channel, so make sure to check that out.
Are you a fan of little squares? Follow me @ifonlyapril.
Also, check me on Pinterest, where I create inspiration boards for my next projects.
Thank you for stopping by! See you soon!
xoxo,
April


Leave a Reply