
Let me tell you a story about how our life changed after I made the best eco-friendly toy for open-ended play aka DIY play silks.
Play silks were always on my "must-have" item on the kids' list. Over Christmas, I was ready to get it as a present for my 3-year-old toddler. My first option was infamous Sarah's silks. They are so lovely, made from 100% silk and just pure perfection. The second options were to look at Etsy. I found this adorable silk set. The price isn't perfect though and I felt there could be other alternatives for the same thing. This is a cheaper alternative on Amazon but they are made from polyester. I always prefer natural materials. I also prefer to make it myself and save rather than buy it 😀

At first, I wanted to make play silks myself from scratch but stopped myself at the right moment since it would take so much time. Ugh! Instead, I found this amazing website where you can get already premade 100% silk scarfs in different sizes. To dye play silks I used food coloring. It was so easy and fun! I'll explain step by step how to DIY play silks below.
YOU MIGHT BE INTERESTED IN DIY GRIMM'S PYRAMID
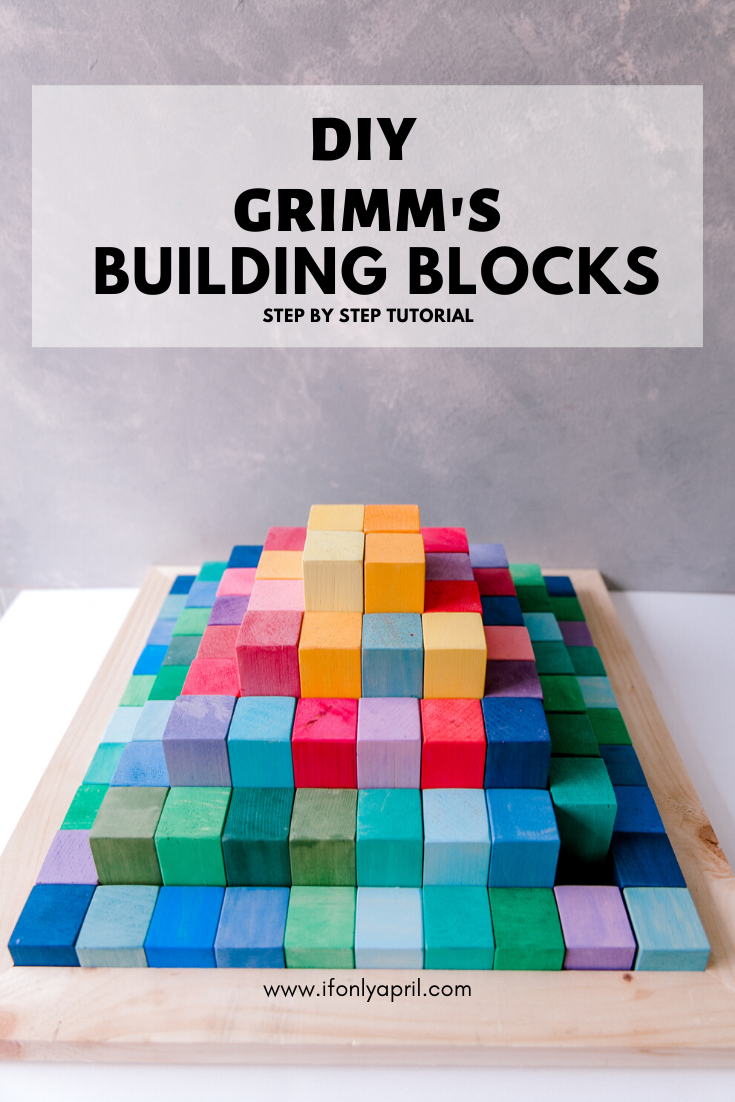
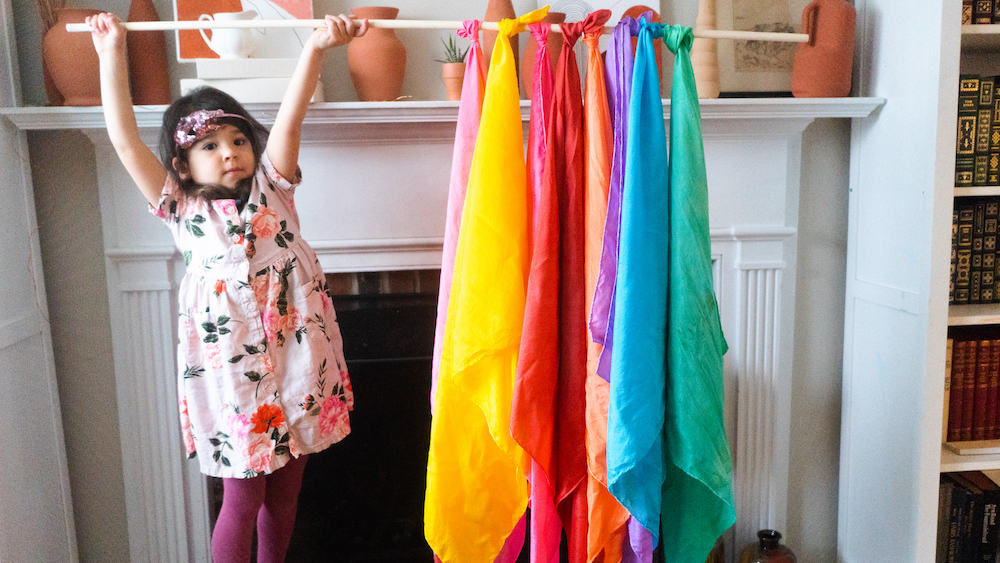
Remember I made these awesome wooden building blocks? I thought that was the best eco-friendly toy for open-ended play. As much as my kids love building blocks and play with them often, it turns out DIY play silks ARE a real hit! I won't be exaggerating if I say that both of my kids (1 and 3-years-old) play with colorful silk scarfs every day. It's such a fun thing to play with! Usually, my oldest turns on the music and invites the youngest to gem with her. It's the funniest thing ever!!!
Things to do with DIY play silks
It's an amazing open-ended toy and potential is limitless, but here are few ideas inspired by my kids:
- dance with them
- play pick-a-boo
- wear them as a hairpiece, as a piece of clothing
- play different characters
- build a fort
- dress a doll
- just throw them in the air and feel them falling on your face
- try to tie a knot
- use it as a blanket for toy dinosaurs...


My kids don't stop surprising me with ways to play with the play silks. It's truly impressive and encourages creativity in such a beautiful way. I'm looking forward to seeing all the cool things kids will come up with. If you have any ideas, let me know in the comments below!
While kids do their thing with play silk I can catch up on my work or get a cup of coffee in peace. It's truly the best eco-friendly toy for open-ended play.

Materials
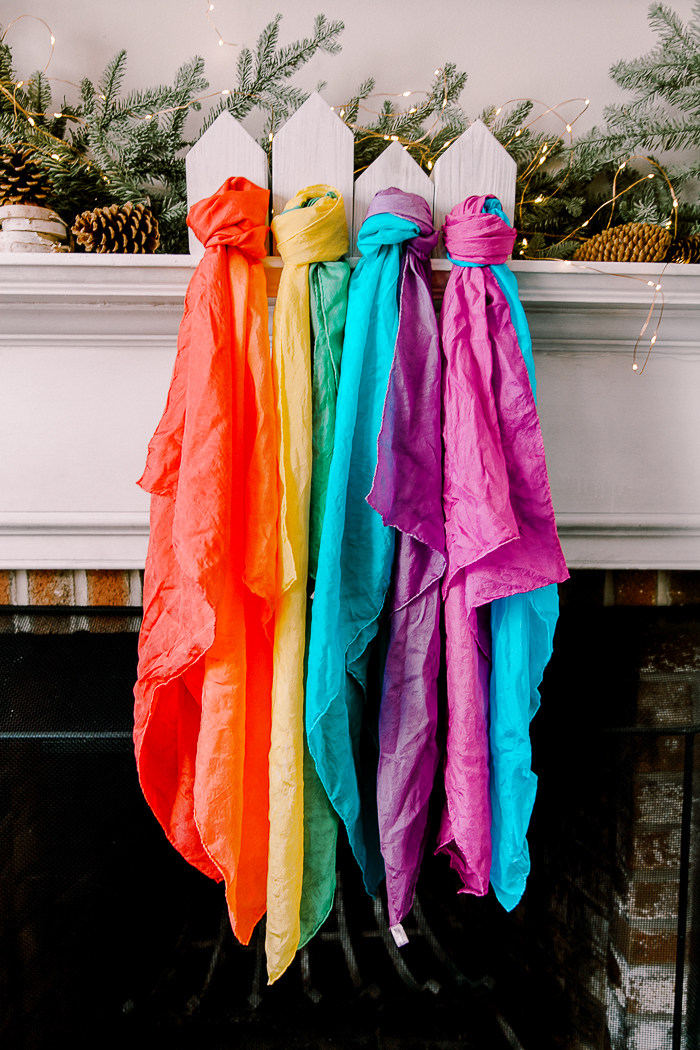
- 100% silk scarfs (mine are 30x30")
- food coloring (I used this one and will refer to these colors below)
- white vinegar
- water
- large pan for boiling water
How to dye silk
Note: I've never dyed any fabric before and perhaps there is a better way to do it. It worked great for me and I'm very happy with my experience and results.
I got 8 scarfs 30x30" (I figured since my kids are still small, it will be enough, but I plan to make another set of bigger play silks later). It cost me $56 for 8 scarves. If you get more than 12 you get a discount. (For this price, you can get only 4 Sarah's silks.)
- Wash your silks with gentle soap.
- Soak them in water with vinegar for at least an hour. Mine soaked for about 4 hours.
- Fill a large pan with water (Approximately 3-4 liters). Bring it to boiling temperature.
- Add 2 cups of vinegar. I've learned that the exact amount doesn't matter and only measured vinegar only for the first color.
- Add watercolors to the boiling water. I'll explain how I got a certain color below
- Using a spoon, stir constantly until you create a vortex.
- Add one silk scarf to the water and continue stirring until silk absorbs all the color. How much watercolors will be absorbed depends on the color itself - some might stick instantly, some won't.
- Take your scarf out of the pot and rinse it under cold water until the color fades or the water runs clear.
- Hang the scarf to dry.
- Dump water from the pot or leave it for the next color (instructions below)
(I apologize for the lack of photos. For some reason images that I took on my phone doesn't load ;( If I'll do it again I'll make sure I photograph the process on my camera)
Color directions
The color turned out wonderful! Maybe not as I expected, but overall, I love how vibrant they are and how they look together. I'd say the red color was the trickest of them all. I had to do it again since when it dried it looked a lot like the orange color. I didn't count drops for each but rather just did eye measurement
- RED: Mix of Sunset red and Real red (I had to do it the second time since color was dull. I added a drop of brown and a drop of blue to get this bright red)
- ORANGE: Sunset red and sunset yellow
- YELLOW: Lemon yellow and Sunset yellow
- GREEN: using remaining water from the previous color, add Royal blue and Fruit green
- BLUE: Royal blue
- TEAL: Royal blue mix with Teal ( I also used the same water from the previous color)
- PINK: Pink. I didn’t like that pink was too bright and dipped it after purple with a bit of grape violet. It turns out looking like magenta
- VIOLET: after pink-colored water, I added violet
I'd say with confidence that I consider this DIY play silks the best toddler toy for 3-year-olds. And I have a feeling it will be a source of entertainment for a lot more years to come.
I hope you enjoyed this tutorial. It took me about 2 hours to make (including boiling water in a gas stove) and it was super fun, easy and exciting!
Watch a step-by-step video tutorial on my If Only April DIY YouTube Channel

If you'd rather buy
Play silks by Sarah's Silks and Silkies from MamaMayI are great alternatives.
I hope you enjoyed this tutorial! Follow me on Instagram @ifonlyapril. I try to post in stories my progress with all the projects.
Here is the link to my YouTube Channel where I post videos about DIY decor, organization hacks, furniture builts, and DIYs for kids.
PIN FOR LATER>>>>>>>>>>>>>

xoxo,
April


Mckenzi says
What happens when you wash the silks? Does the color bleed?
Thanks!
April says
I wash it by hand in cold soapy water. The color bleeds but not too much. We’ve had it for over a year and as much as color faded a bit it still looks good. You can always redo the process and dye it again ☺️
Karen says
As the Grandma of a 3 year old, I can promise that this is the most loved present ever! The only thingI have to add ( after all, I was in the tie dyed 60’s) is after the right color is reached, don’t rinse with water - drop into a pan of ½ water and ½ vinegar to rinse. The vinegar sets the color forever. Then rinse with running water - there will not be a drop of color!
April says
Karen, thank you! This is such a great tip! I’m actually planning to make it again as a gift soon and will definitely use your technique! Thanks for sharing ☺️
Cora Whitmoyer says
Hello, thank you for you DIY. I clicked on the link for food coloring, but it says it is unavailable. Do you happen to have another link for food coloring that is similar to what you posted above? Thank you