Finally, I got my hands on epoxy resin and did a project with it! I got this epoxy set last year but didn't have time (*khe khe* was intimidated) to try. Today I'll share with you what I've learned and tips on how to use epoxy for small projects. I'm planning to make something big as well, but that's not gonna happen anytime soon so till then we only gonna talk about small projects.
Materials
I used this set of epoxy resin. Since I don't have anything else to compare with, I'll show you how to use this one. But when I try different brands in the future I'll make sure to compare them both.
Most of the time epoxy and hardener sell in a pair.
You'd need gloves since it contains chemicals and you shouldn't be touching them with bare hands. Wooden sticks are convenient to mix up epoxy and hardeners. And plastic cups with measurements are also very handy since you can wipe them off with a paper towel after using them and using them again.
Epoxy that I used hardens in 24 hours and becomes clear.
I saw @huntersofhappines used a different type of epoxy that hardens in 10 minutes and becomes white. She used this type. Honestly, I'm not sure what's the difference and why that other one hardens so fast but it sounds super convenient and I'll try it out next time.
So here is what I learned after a few epoxy projects under my belt.

Tips on how to use epoxy
#1. Prepare your materials before you start

Gather all your materials before you start mixing epoxy with hardener. This way you won't have to run around searching for a mold that you need while epoxy already started drying. That would create the unnecessary hustle and you'd end up touching something with gloves covered in epoxy.
Not an ideal situation, so prepare all the materials before you start!
That also includes a mask since epoxy is a dangerous material to breathe in.
#2. Be accurate with your mixing ratio

Don’t rush the process! This is probably the hardest outtake that I’ve learned. Be super careful when mixing resin with a hardener. They suppose to be mixed in exact same proportions so don’t try to change that.
Pour resin and hardener into two different cups. Make sure you have an exact amount for resin and for hardener.
Also, it goes without saying but is worth mentioning, don’t use resin and hardener from different brands. Their chemical formula could be different and the project won’t look good in the end.
Tip #3. Be patient while mixing it

Don't try to rush mixing the hardener with resin.
I know, it sounds so daunting to mix for 5 minutes but it's a necessary evil. Haha, that's probably the hardest part for me since I'm not known to be a patient person 😁
You need to mix in slow circular moves as slow as possible. If you rush the process you'd end up with a lot of bubbles. It's not that easy to get rid of the small bubbles and doesn't make the final product look it best.
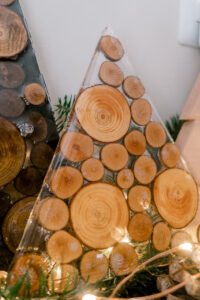
When I made butterflies for the pinboard it didn't really matter since I painted them over, but for the Christmas epoxy tree, I've got tons of bubbles! It doesn't bother me but obviously much better to avoid. Perhaps, the small bubbles were created from the wooden circles. When I made coasters from wooden circles I also encountered this problem. But when I just used dried flowers it went well and bubbles weren't that visible.
Tip #4. Prepare the curing place before

Resin is very heat sensitive so your curing time might differ if you choose the wrong place. Choose a warm space since resin doesn’t cure well in cold areas.
Also, if you are casting resin in silicone molds, make sure you have a movable board underneath (if you are moving molds to a different place to cure). You wouldn’t want to try moving soft silicone molds (like coasters for example) right after you pour epoxy in. That would end up in a messy situation. How do I know? Yep, that happened to me.
PIN IT FOR LATER

Tip #5. Pour slowly
Pour epoxy in small batches and very slowly. Damping a big pour in one step will create a lot of bubbles that would be hard to get rid of. It also might end up being messy or overflowing from the mold.
Smaller batches are easier to control, so be mindful about it.
Tip #6. Get rid of bubbles

I’ve learned that the heat gun is the best tool to get rid of bubbles.
I haven’t tested this yet but the idea is that you wait for bubbles to get on the surface of your project, and before they start hardening, use the heat gun directly on the bubbles to pop them.
Removing all the bubbles early in your project would create a beautiful epoxy project.
It’s a lot of fun to work with epoxy resin. I’ve tried it a bunch of times in the last few months and can’t wait to do something soon again.


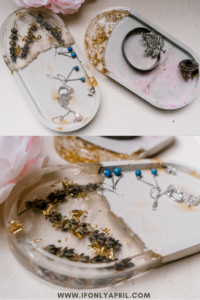
Here are the epoxy resin projects that I’ve made so far.
- Pinboard with epoxy butterflies
- Epoxy Christmas tree with wooden circles
- Rustic epoxy resin coasters
- Gorgeous trays from cement and epoxy
- Epoxy resin coasters with dry flowers
- Epoxy resin coasters with golden flakes
Those are my tips on how to use epoxy for small projects.
What was your experience with epoxy resin? What’s your favorite project?
Follow me on Instagram for behind-the-scenes fun!
xoxo,
April


Leave a Reply