


Summer is here. I think the best way to spend summer for kids is running naked on the grass, splashing in the water, playing all day long outside. My oldest loooves to play with water: pouring it over, washing her animals, her hands, and doing other things that don't make much sense to me, but clearly super fun for her. I decided to make this Montessori-inspired water table for kids that can serve so many purposes.
I had an idea for a while to make her a huge water table where she can fulfill all her water-related needs. Our youngest daughter is already 6 months. My girls already started fighting over toys and possessions. I had to make something big and wide enough to fit at least 2 kids without them stepping on each other's toes. I got inspired by this amazing water and sand table by Ana White.

It was super easy to put together and I used wood that was left after I built a Montessori Floor House bed. The sensory table is meant to stay in the backyard so I didn't care much about finish and esthetics. This is all about functionality. It was built around these $4 clear 28 Qt/27 L container boxes and wooden 2x4s, 2x3s, and 1x3s boards. I used them because I already had the scraps and didn't want to buy new wood for this project.
What you'll need
- Wood planks
- Screws
- Kreg Jig
- Miter saw or any other saw that you have available
- 2 containers
- Behr Exterior paint and primer in one
How to make a sand and water table for kids
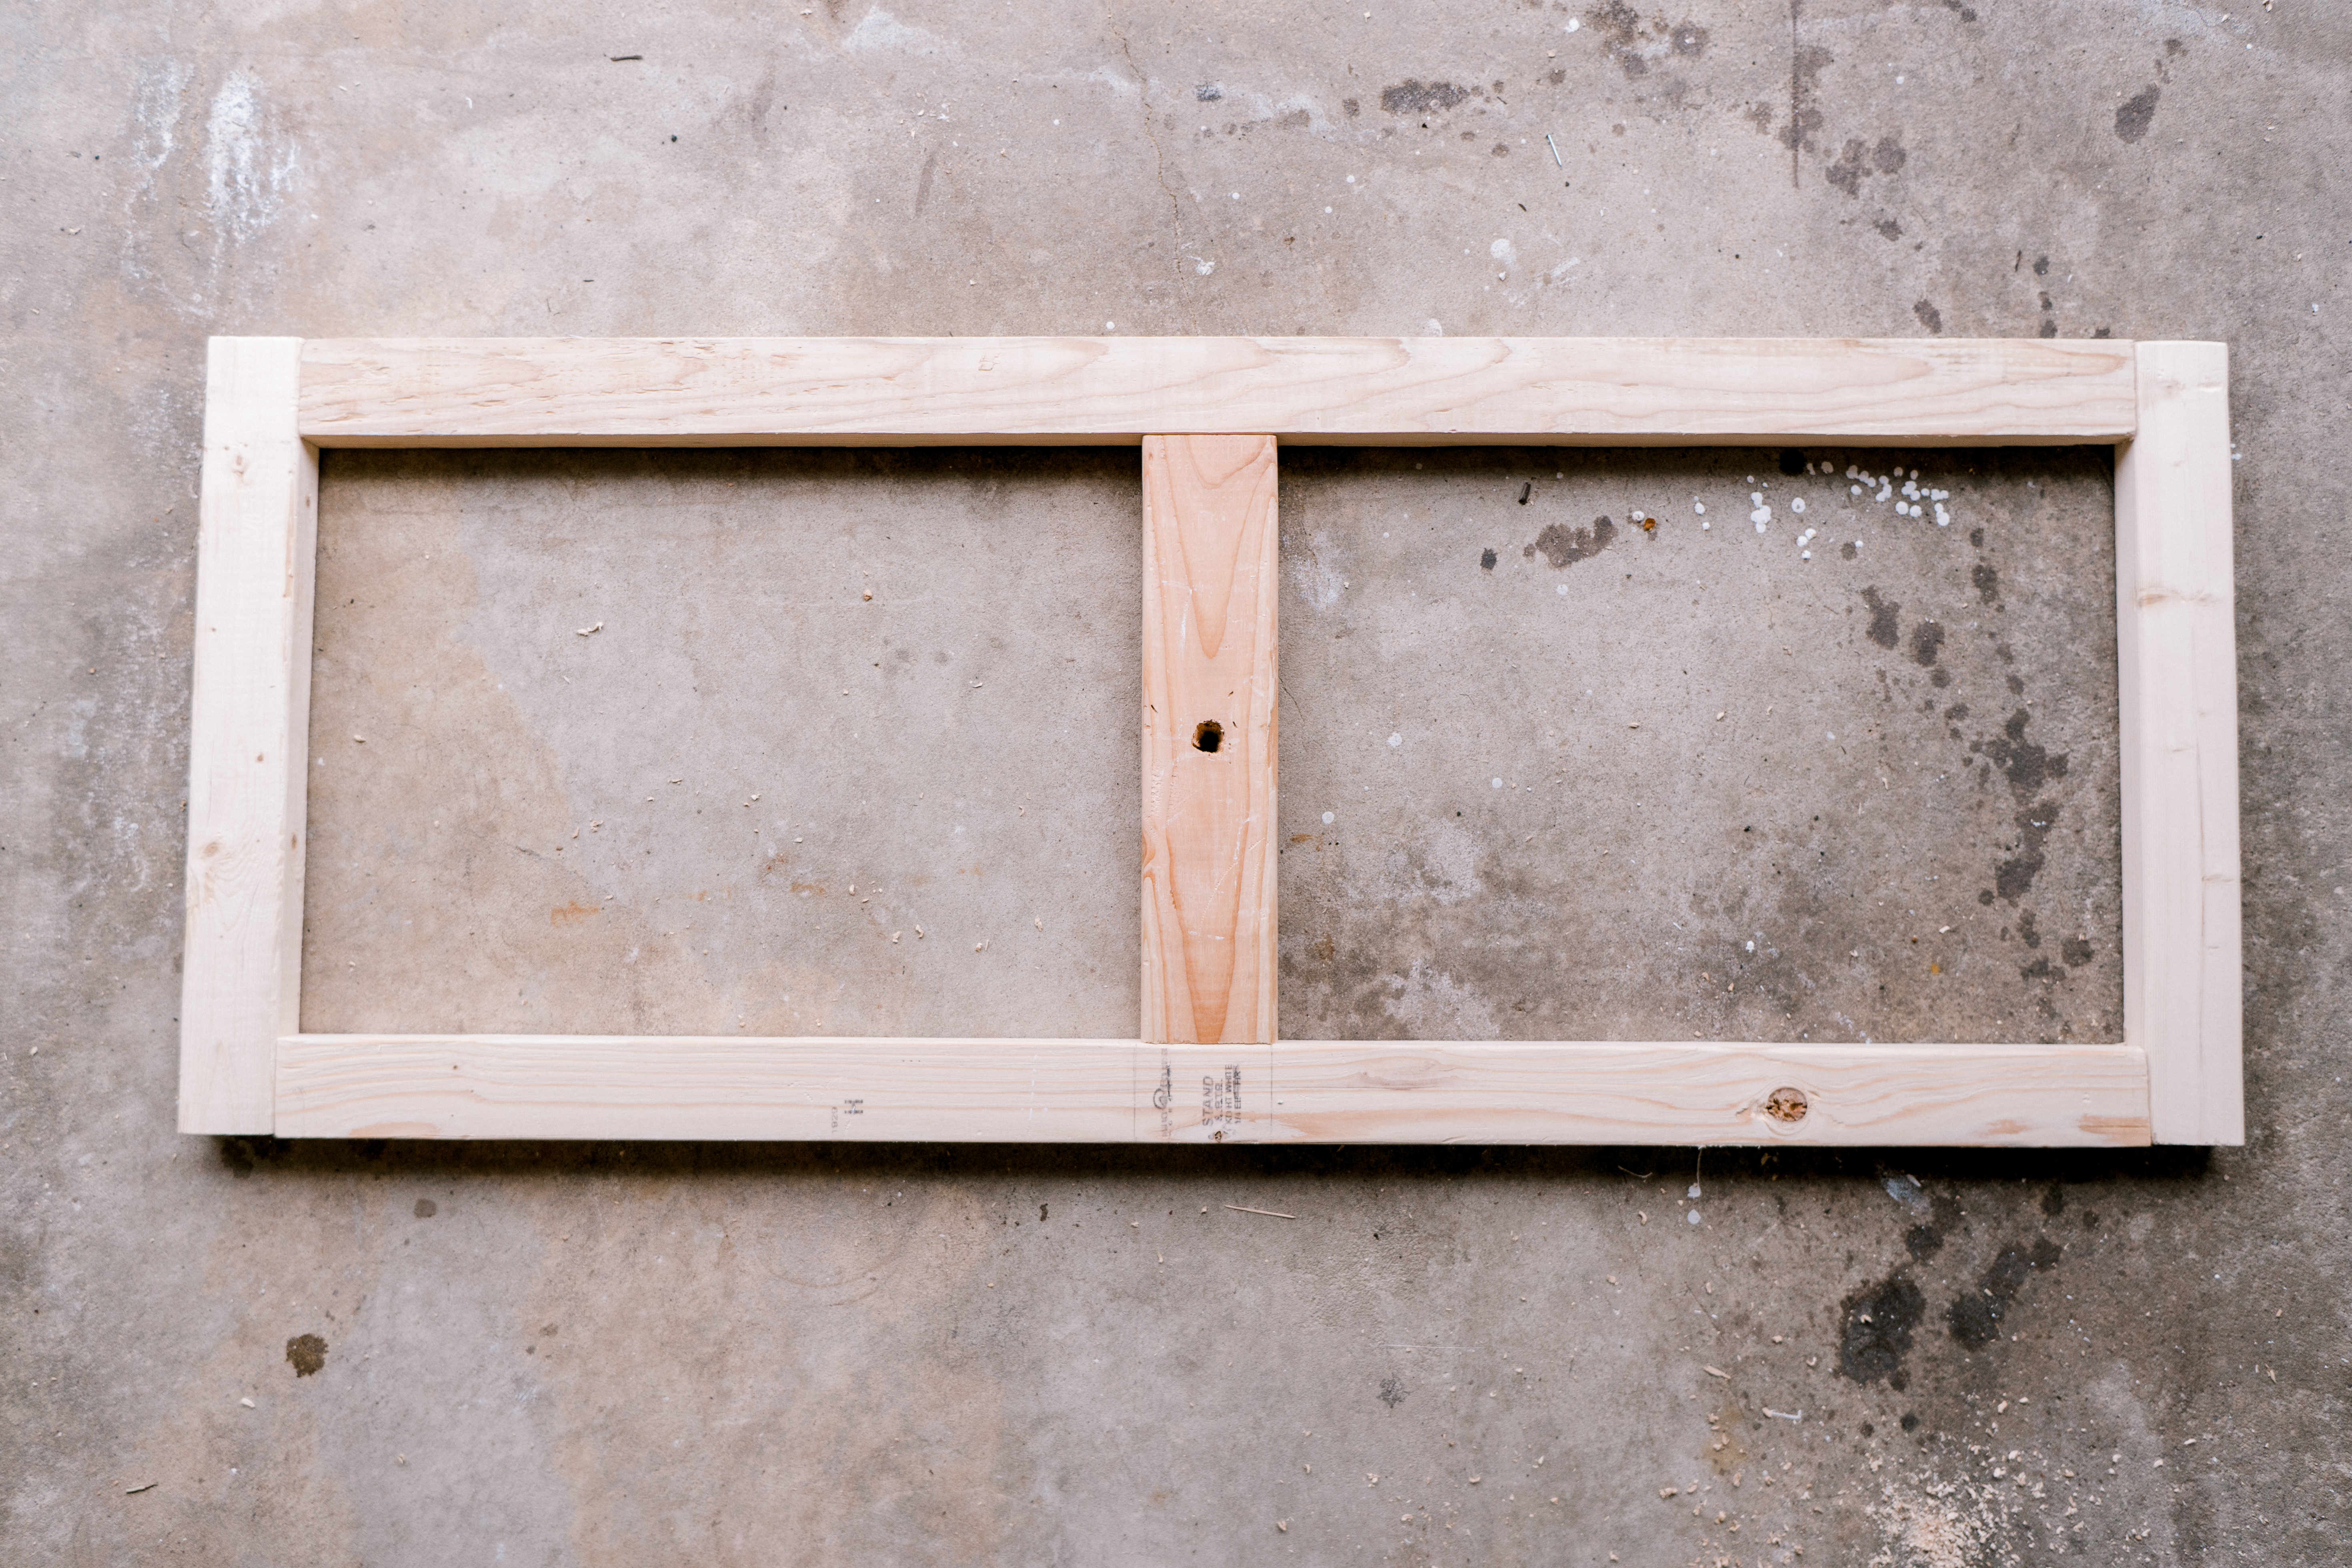
I started by building the frame around containers from the planks I already had.

Obviously, I used my favorite Kreg Jig to make pocket holes to connect the planks. You could also use a regular screws, Kreg Jig is a personal preference.
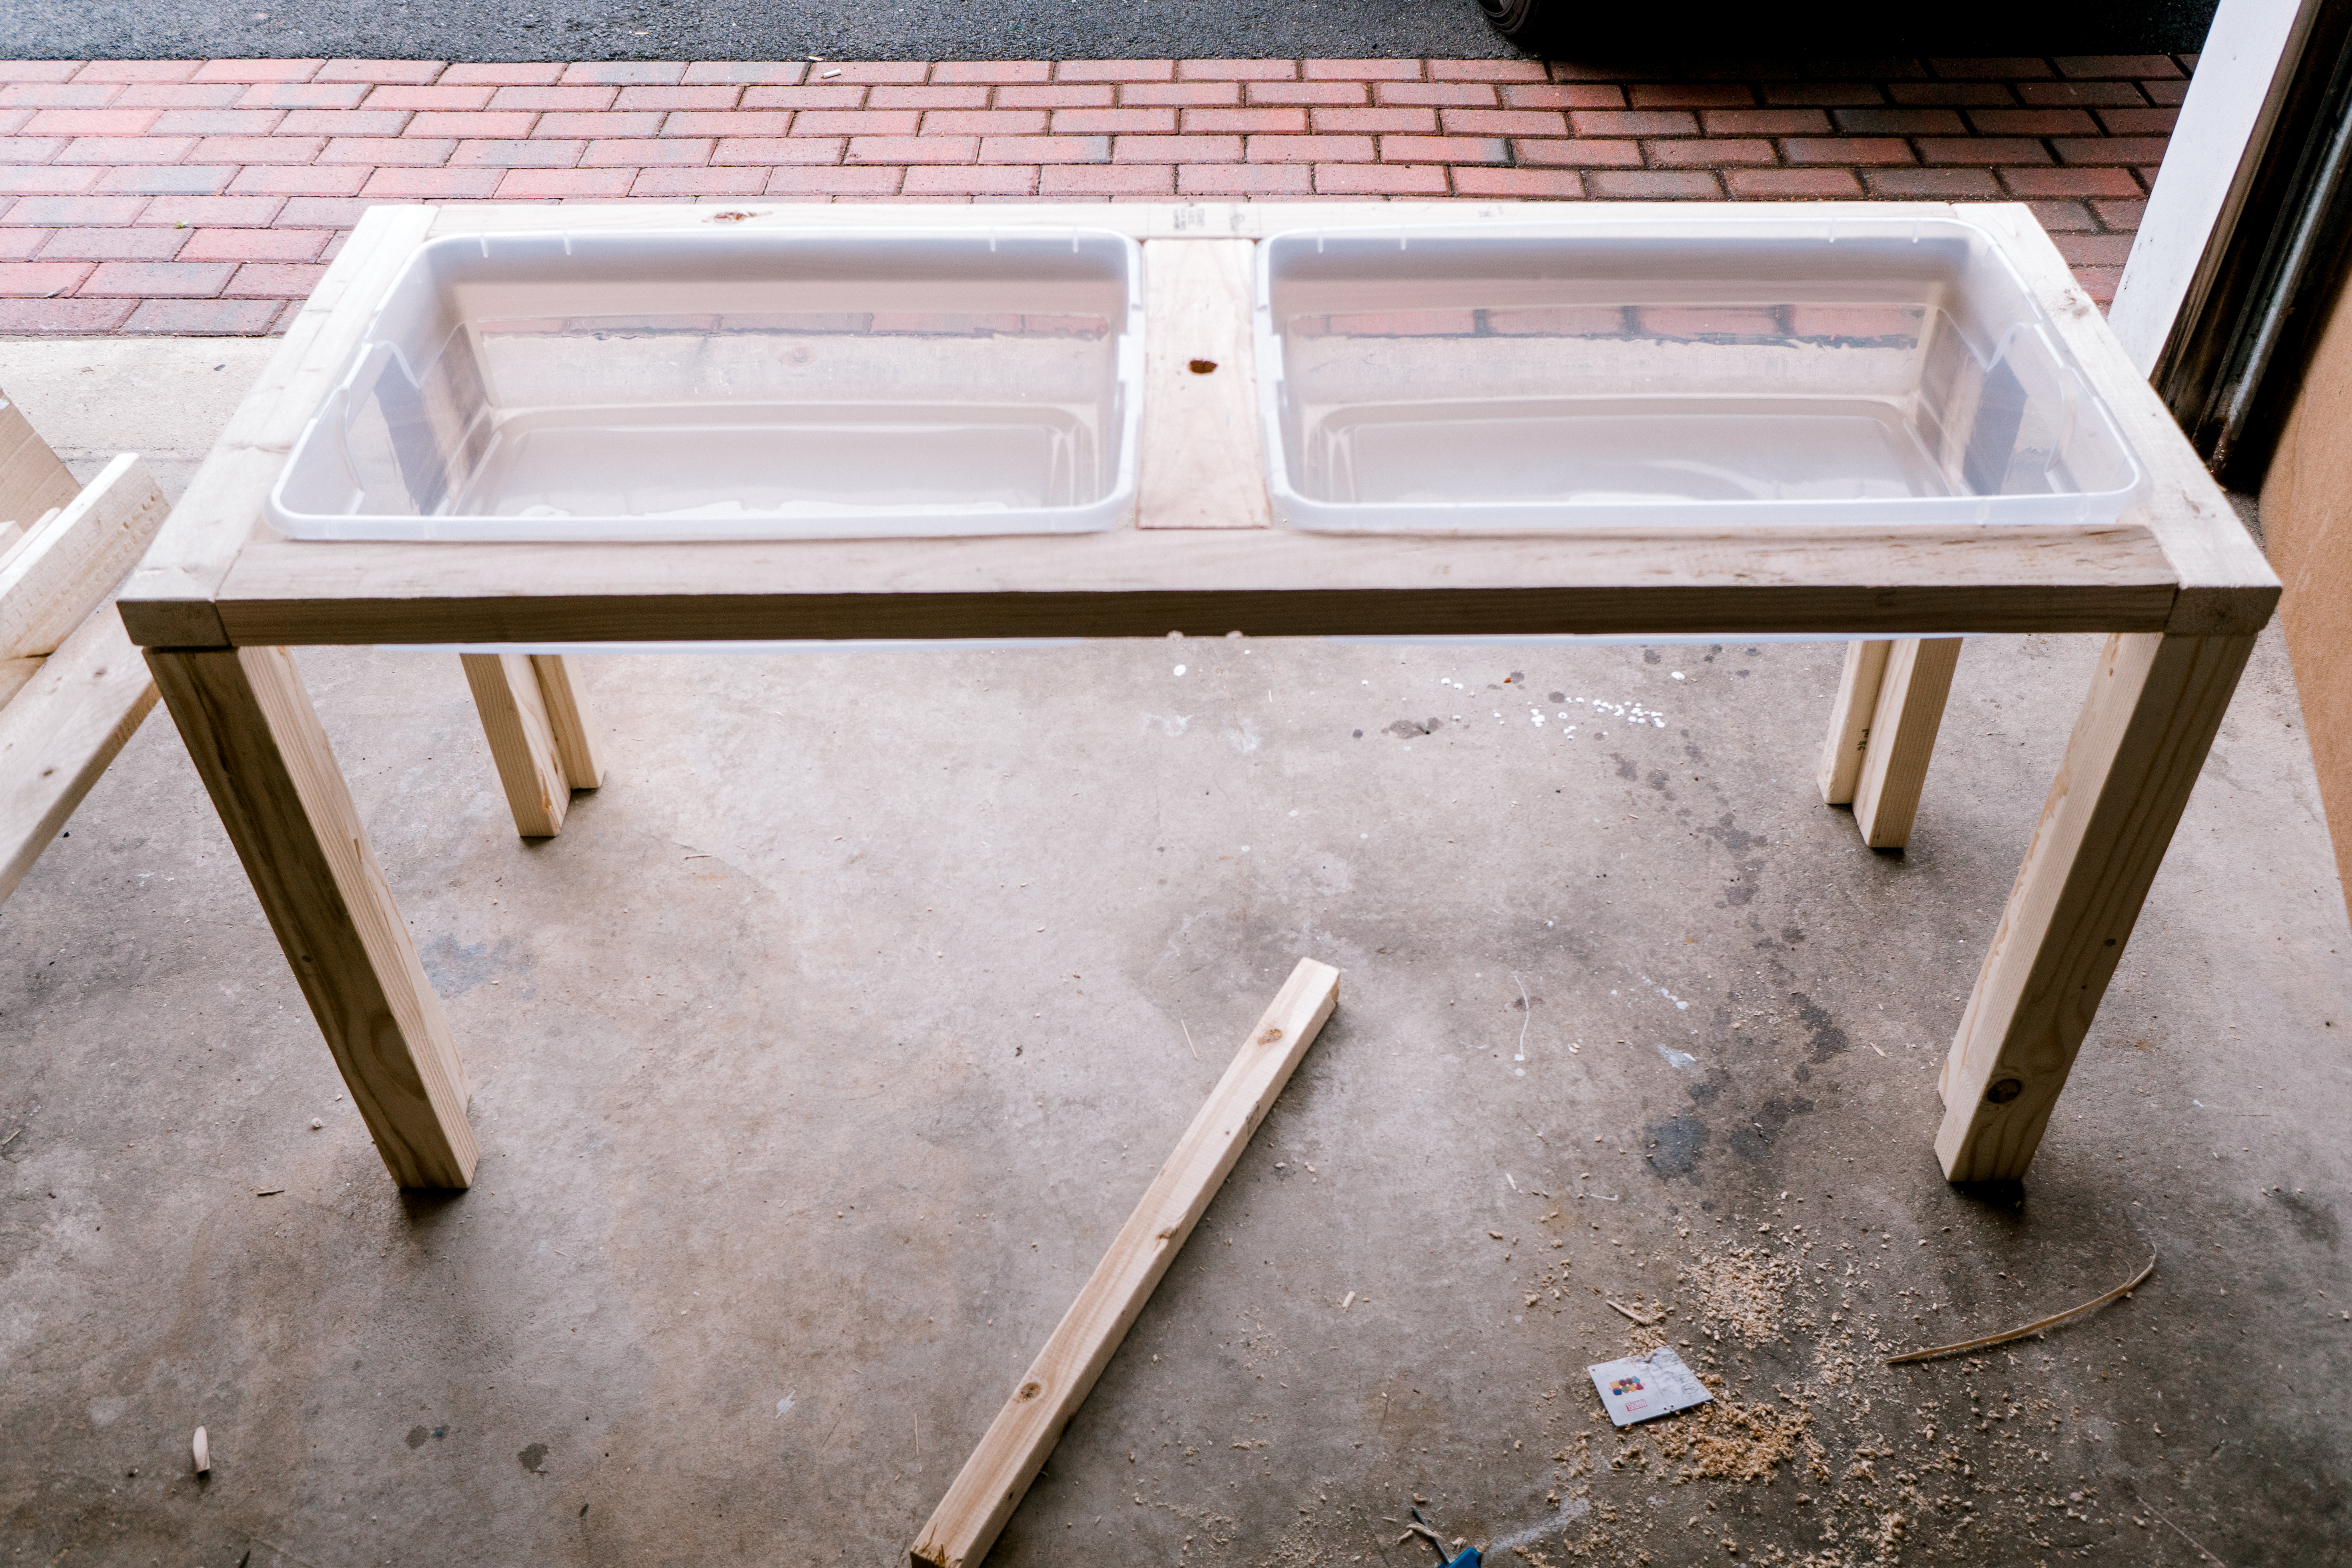
When I finished with a frame I realized that my wood was skewed and one container was sinking and didn't fit properly. Clearly, after heavy water pressure, it would fall through, so I had to add additional support on the side.
I used an extra plank to make the space for the container more narrow.
I made a shelf in the bottom to store toys and the container lids. The hole in the middle was my attempt to make space for an umbrella, but I didn't have the right size drill bit and decided against it. Our backyard is partially shaded so I didn't have to make this extra step.


For the final finish, I painted it with Behr Stain-blocking paint and primer in one, Exterior Satin Enamel. It supposes to help with the rain and humidity, although I plan to bring it to the covered patio when the weather isn't good.
I like the way this DIY water table for kids turned out. It's super functional, sturdy, and provides endless hours of entertainment for my toddler. Her friends come to visit and glued to this table as well. How do you entertain your kids in the summer?
YOU MIGHT ALSO LIKE

DIY ACTIVITY CUBE FOR TODDLERS

TOY TREE HOUSE FOR PRETEND PLAY

xoxo,
April


Leave a Reply