• Skip to primary navigation
  • Skip to main content
  • Skip to primary sidebar
If Only April
  • MEET APRIL
  • DIY PROJECTS
    • Kids projects
    • DIY furniture
    • Design plans
    • DIY holiday projects
    • Macrame
    • Transformations
    • Woodworking
  • VIDEOS
  • CONTACT
  • SHOP
    • Facebook
    • Instagram
    • Pinterest
    • YouTube
menu icon
go to homepage
search icon
Homepage link
  • MEET APRIL
  • DIY PROJECTS
    • Kids projects
    • DIY furniture
    • Design plans
    • DIY holiday projects
    • Macrame
    • Transformations
    • Woodworking
  • VIDEOS
  • CONTACT
  • SHOP
×

Learn how to DIY a wooden produce storage rack for $10

Please note, that some of the links below are affiliate links and I will earn a commission if you purchase through those links (at no additional cost to you). Thanks for your support this way.

FacebookPinPrintEmail

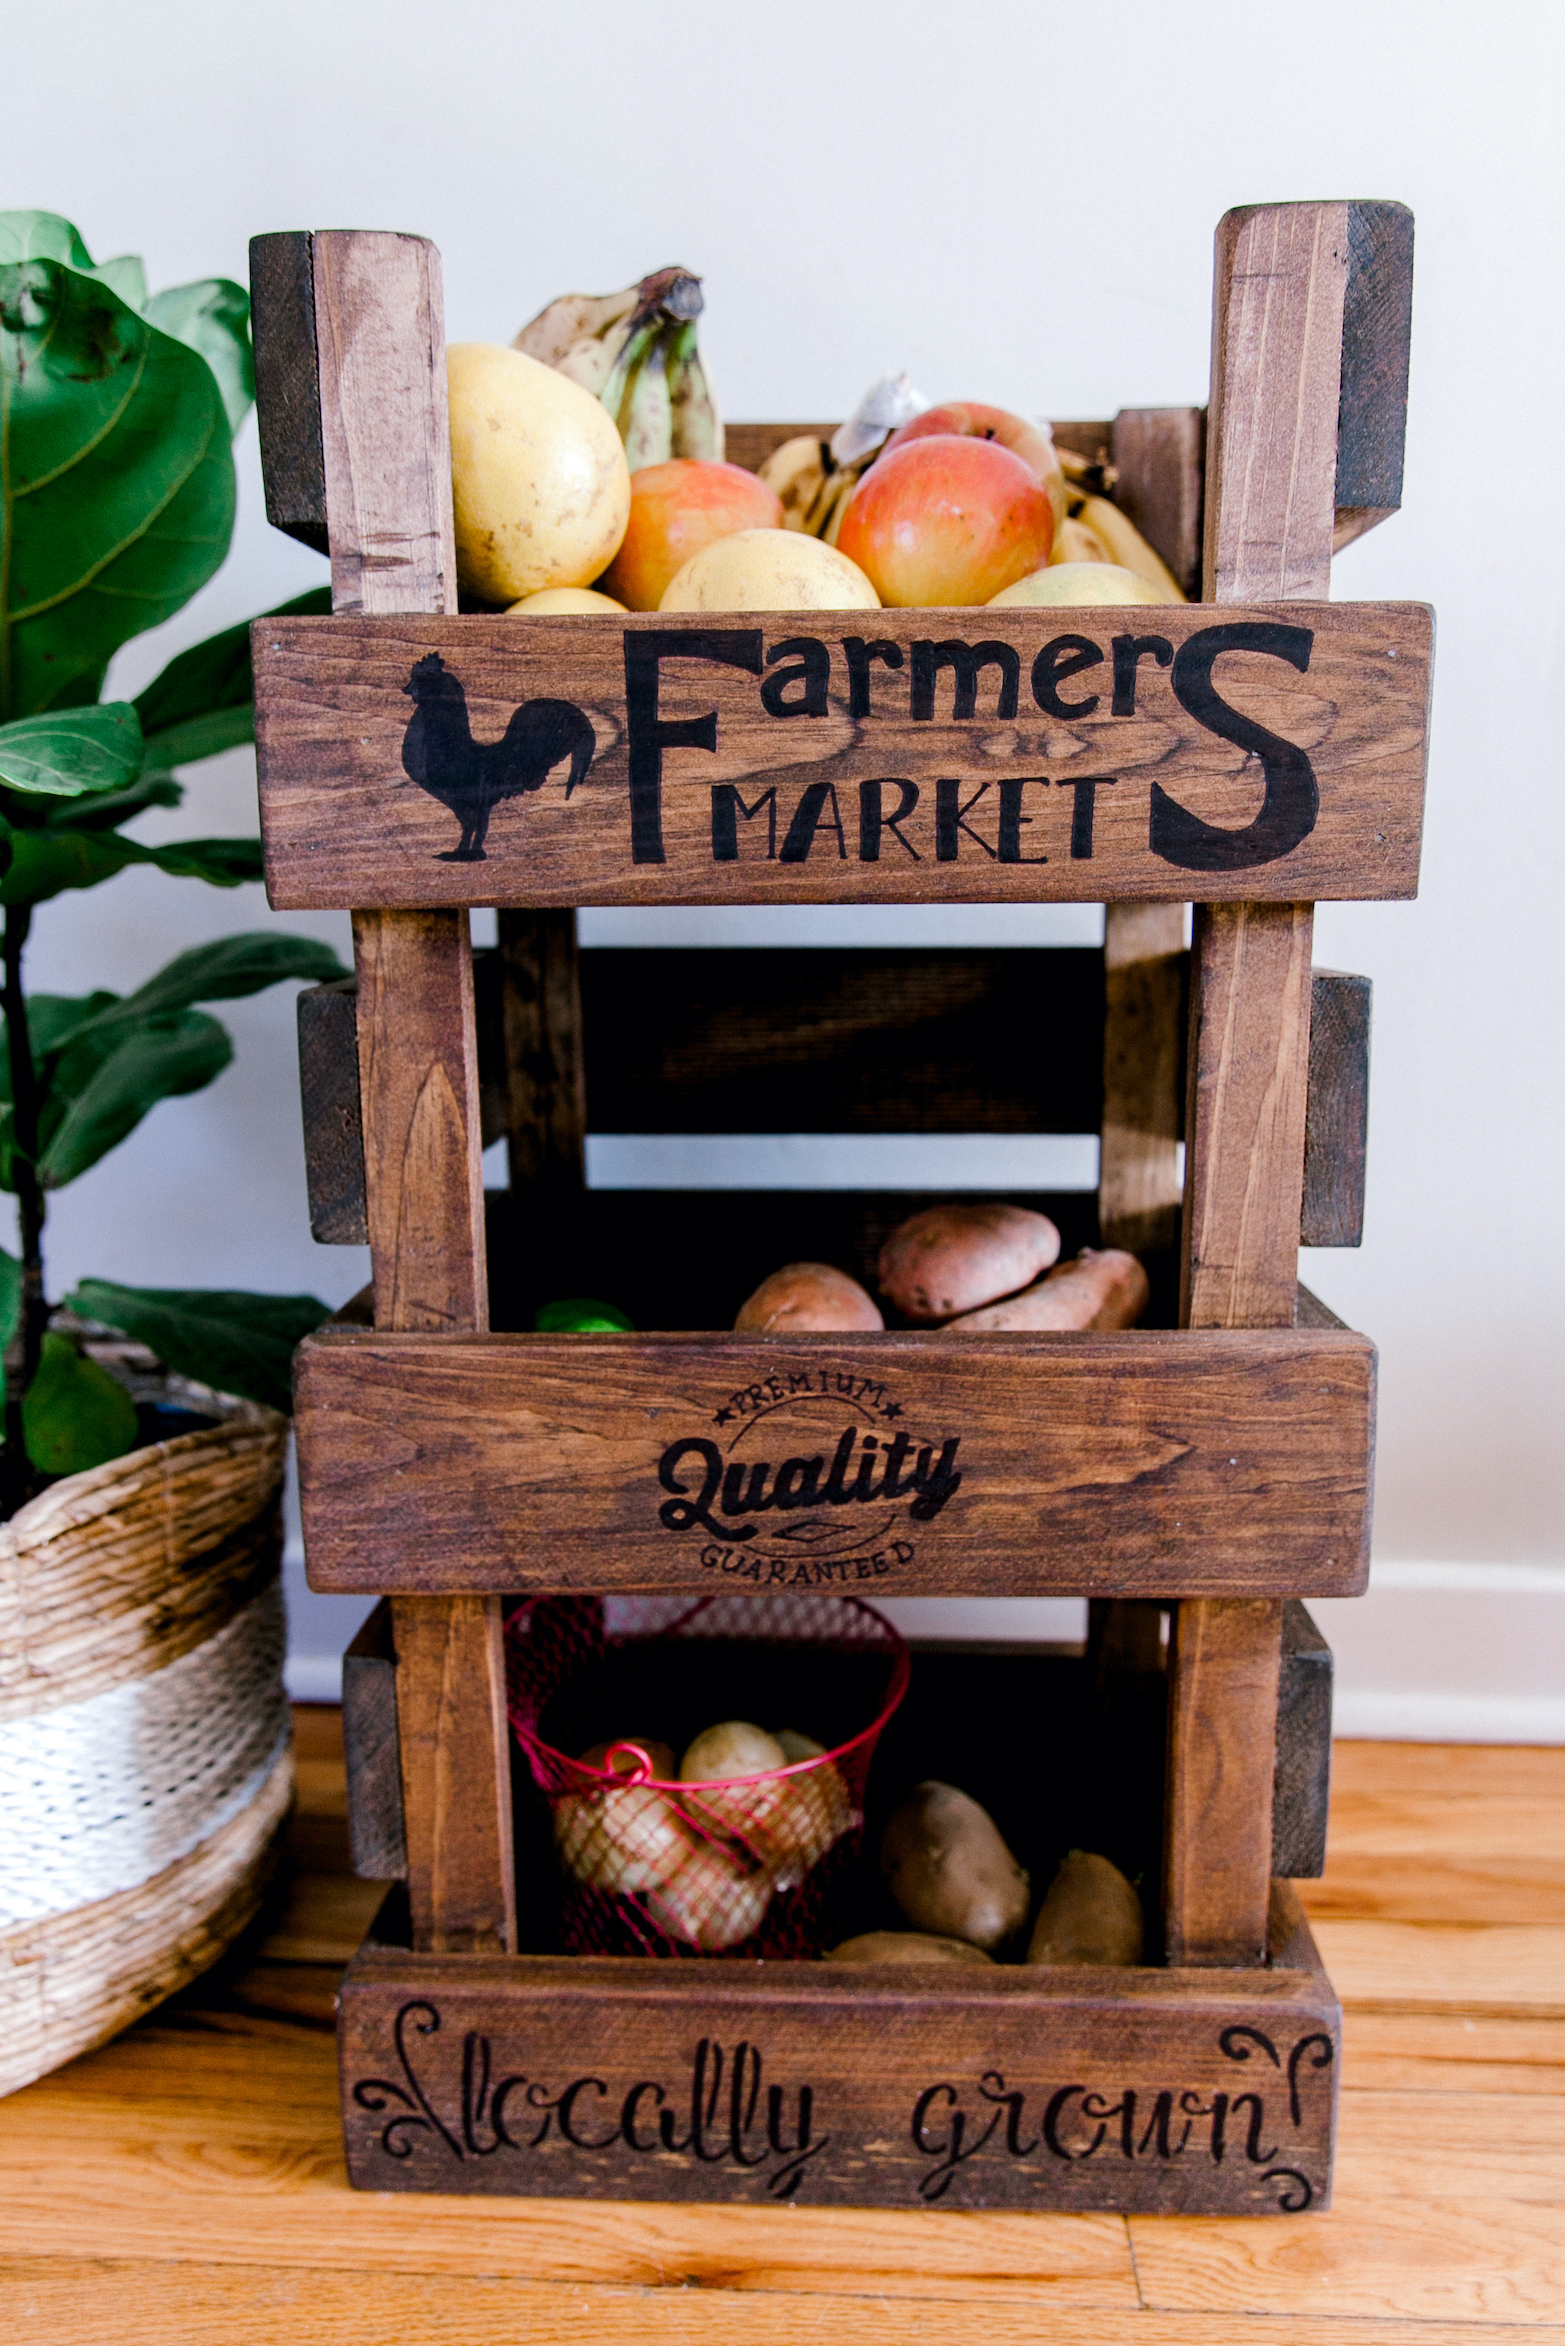
A few months ago I built a 16 sq foot elevated raised bed for my garden. I figured that I need a space for all those vegetables that I'll grow and I made a farm-style DIY wooden produce storage rack.

The inspiration for this stand was the one I saw at Home goods that cost $89. I figured that I could whip it up for so much cheaper and I was right.

The cost of materials is $10, which definitely beats $89. Leaving me with a spare $79 to spend on what I want 🙂

I wish I said it was an easy project but for some reason,  it's been quite challenging. Everything went wrong from the beginning.

I forgot to use the glue, then everything fell apart. I spent 2 hours staining it.

In the end, it turned out great though! And I'm so happy with it! 

But let's see how I made it and what went wrong.

Materials

  • pocket hole screws
  • Brad nails
  • Wood Stain (optional)
  • Wood glue

Tools

  • Miter saw
  • Kreg jig
  • Orbital sander
  • Brad nail gun

If you want to make the same one, I have printable PDF plans with a cut list, a list of materials, and step-by-step instructions in my shop. You can also download it below if you subscribe to my newsletter. (No hard feelings if you don't ;D)

Watch me make this stand here

Time: 4 hours

Level: intermediate

Cost: $10

Instructions to make DIY wood produce stand

Step 1 - cut the wood

Cut your wood according to the cut list. My stand is 28 ½" tall, 15" wide, and 11" deep.

diy produce cart

Step 2 - attach sides

Make sides of the produce stand by attaching 1x4s to 1x2s. I used a brad nails gun but you can simply use a hammer. 

Here's an important tip that I've learned by doing this part wrong: make sure to use glue with a brad nail gun. I just stapled it with brad nails and when I started assembling it further, it all fell apart. So I had to take the brad nails out and add glue. It wasn't fun and took a lot of time.

Use spacers to make an even space between planks.

Step 3 - cut and attach bottom of the shelves

Cut six 1x4" boards at 13".

Using Kreg jig make pocket holes on both sides of the boards for the shelves. Attach it to one side first and then move on to another.

PIN FOR LATER>>>>>>>>>

Step 4 - attach boards on the back and front

When done with the bottom of each shelf, you can attach planks on the back.

Cut six 1x4"s at 15" and attach it to the back using brad nails and wood glue.

Once done with that, attach 3 remaining planks to the front.

Step 5 - finish as desired

Sand thoroughly and smooth the edges and corners. You can use a hand router for it, but I just used a sander to archive the result. 

Stain it to your liking. I used Dark Walnut stain. It came out a bit darker than I wanted, so I think that Early American stain could've been better. It took me ages for some reason to finish it. Probably because there are so many small parts and you want to get all the parts.

Perhaps, staining your wood before building this  DIY produce storage rack wouldn't be a bad idea. You'd save a lot of time.

Step 6 - Adding rustic signs to the fruit and vegetable storage rack

diy produce stand

There are a few ways to add cool signs to the wood. I think I used 3 different ways here.

The probably would look nicer if I used paint for it, but it was too much work and I already spent so much time on this stand that wanted to get over with it as soon as possible ;D I simply used a black sharpie, and to be honest, I love how it turned out and it was completely mess-free.

  • I made the bottom sign "locally grown" with stencils and a sharpie. That's the easiest route. Just trace the stencil and get the sign. I got my stencils from Michaels and they did a very fine job.
  • To make the sign in the middle ('Quality"), I used an image, taped to the produce stand, and traced the letters with a pencil, pressing hard on the paper. It left a mark on the wood and I painted it over with a sharpie. 

UPDATED 07/07/2020: One of the members of our lovely DIY community suggested transferring signs to wood with carbon paper and I think it's a brilliant idea! Keep it in mind!

If you'd like to make the same one, you can download a printable of the hen and the "Premium Quality Guaranteed" sign below.

  • To make the chicken on the top I used the same method - I pressed hard on the pen and traced the outline of the hen. I wanted to use stencils for the "Farmer's market" sign but didn't have the right size font. So I just wrote on it with a pencil, hence the chicken handwriting haha

I think it turned out divine. With the number of mistakes that I've made, this DIY wooden produce storage rack is so dear to my heart. I've learned a lot and planning to make something similar again in the future.

BEFORE AND AFTER PHOTO:

vegetable stand rack

I was planning to add small casters to the produce storage rack but then realized that my kids would have too much fun driving it around and decided not to use it. But if you would like to have a mobile DIY produce storage, these casters would be perfect for it.

diy vegetables stand

Download printable PDF plans and signs here


WE THOUGHT YOU MIGHT ALSO LIKE:

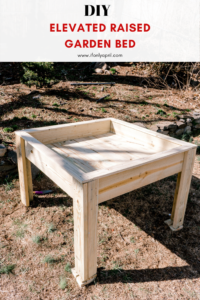
DIY ELEVATED RAISED GARDEN BED

VERTICAL ENTRYWAY ORGANIZER

ALEX DRAWERS UPDATE (IKEA HACK)

Follow me on Instagram and YouTube to see more DIY projects!

xoxo,

April

Featured on Hometalk.com

Share this:

  • Tweet
  • Print
« An ultimate guide to toy storage organization
THE LITERARY PRESCRIPTION {thoughtful way to gift books} »
FacebookPinPrintEmail

Reader Interactions

Comments

  1. Kavya

    April 17, 2021 at 9:38 pm

    Hi There-
    Thank you for posting this DIY, I lvoed it. I just bought some lumbar and plannin gto do this project. Could you tell me what size nails you used with the Brad Nailer?
    Thank you,
    -Kavya

    Reply
    • April

      April 18, 2021 at 10:39 am

      I’m so happy you loved the project ☺️ I think I used 1 1/4” Brad nails. 1 1/2” would also work! Don’t forget to use the glue with it!!🤗

      Reply
      • Kavya

        April 24, 2021 at 1:20 pm

        Thank you April! Another question, for the large jig - did you use a 1/2inch or 3/4 inch setting ? When I measured the lumber thickness it shows 1/2 inch but would like to make sure . Thank you!

        Reply

Leave a Reply Cancel reply

Your email address will not be published. Required fields are marked *

Primary Sidebar

Hi, I'm April! I love woodworking and making things! I hope you will stay for a while and get inspired to make something!

More about me →

Popular

  • Things to do with kids in Vermont in the fall
  • Sasha's bedroom makeover progress
  • Speakeasy library room reveal + budget breakdown
  • Little girl bedroom makeover inspired by spring

ifonlyapril

DIY single mom | 📍CT
Painting my heart away 😅 since we moved to this Painting my heart away 😅 since we moved to this house a year ago, it's been a journey, and tons of paint involved.

I wish I could say I love painting walls. I don't. I love a fabulous transformations though. So the pain is validated. 

Considering I'm a single mom of two kids and  a dog (that is heavier than my both kids combined and quite a handful), I'd say I'll need another 2 years to paint all the rooms as I planned. 

What's your estimate?

#diyprojects #diysinglemom #makersgonnamake #diyproject #diyhome #paintingroom #ifonlyapril_oldhouse #behr #swpaint
If anyone needs a reminder - you are still here af If anyone needs a reminder - you are still here after all the sh*t you had to go through, and it's worth celebrating! I'm proud of you! 

So often we look at people through social media, admiring them, admiring their life, without realizing what is actually going on behind the scenes. 

Last few years has been an emotional rollercoaster for me. After being in an abusive relationship for years, being constantly gaslighted  that made me question my sanity, I thought I was going crazy. I've found the truth. Truth can set you free. I wasn't the crazy one after all. I just didn't trust my gut and chose to ignore it while it was screaming at me that I'm being played. 

It taught me a lesson. I didn't know I was going to go through something like this, and oh my, I had very low scary points during all that. But now I have awareness. And the biggest lesson I've learnt is to trust my gut.

You are strong! You can get through whatever life (or some assholes throw at you) 😘 in case you didn't hear it from anyone today 😊

#narcawareness #narcabuse #narcissist #narcissiticabusesurvivor #youvegotthis #narcissisticabuse #narcissisticrelationship
Fall foliage, hayrides, and cozy cocoa sips—Verm Fall foliage, hayrides, and cozy cocoa sips—Vermont is the ultimate playground for autumn-loving kiddos! 🍁🚜🍫 
For more ideas, visit my blog where you can find all the links, locations and more fun activities to do with kids in Vermont in a fall besides hiking and enjoying nature.

https://ifonlyapril.com/things-to-do-with-kids-in-vermont-in-the-fall/

#VermontFamilyEscapades #FallFestivities #KidApproved #alpacaexperience #vermontwithkids #vermontteddybearfactory #applepicking #christmasshop #thingstodoinvermont
YouTube is def a Harvard for self taught individua YouTube is def a Harvard for self taught individuals 🤣 Don't want to pay someone to do the job? Look it up online😁

#makersgonnamake #diyrenovation #diyreno #diyrenovations #ifonlyapril_diy #diyhammerhood #diyprojects
One of my favorite DIY projects for kids! Why? I One of my favorite DIY projects for kids! Why? 
I made the same building blocks pyramid for my kids 4 years ago and they still play with it!!!

It's such a great open ending toy (my favorite kind) that can take kids imagination to the moon!

What are you waiting for? Your kids will thank you later!

Find all the details on the blog: https://ifonlyapril.com/diy-wooden-building-blocks/

#diykidstoys #diywoodentoys #diykids #diybuildingblocks #singlemoms #diysinglemom #kidstoysplay #ifonlyapril_diy
It's definitely has been a journey. Journey of sel It's definitely has been a journey. Journey of self discovery, healing childhood trauma, learning how to let go. 

The hardest part was to live in a fantasy world. Where I felt for years that something was off but my every concern was met with me being called crazy. 

I wasn't crazy after all. And truth can set you free. 
I'm in a happy place now. 

Finally. 

I remember who I am.

#narcawareness #narcabuse #narcissisticabuse #healingjourney
Little bunny's room transformation. Find all the Little bunny's room transformation. 
Find all the details and sources on www.ifonlyapril.com

And I'm working on a YouTube video. Need to push myself to find time to finally finish it 😁 it's been a long journey. I'm glad it's at the finish line🤗

#roomdesign #kidsbedroomdecor #kidsbedroomideas #diybedroommakeover
I made this sound diffuser almost a year ago. I fi I made this sound diffuser almost a year ago. I finally hung it up and added picture light to it. 

I call it "There will be light" as a reflection of a dark times I was going through at the moment.

What do you think guys? 

Watch full video on YouTube and find all the details at 
https://ifonlyapril.com/there-will-be-light-unique-diy-wood-sound-diffuser-wall-art/

#makersgonnamake #diyproject #diysounddiffuser
Load More... Follow on Instagram

Footer

↑ back to top

About

  • Disclaimer

Newsletter

  • Sign Up! for emails and updates

Contact

  • Contact
  • Media Kit

As an Amazon Associate, I earn from qualifying purchases.

Copyright © IfOnlyApril 2023

Share this ArticleLike this article? Email it to a friend!

Email sent!