
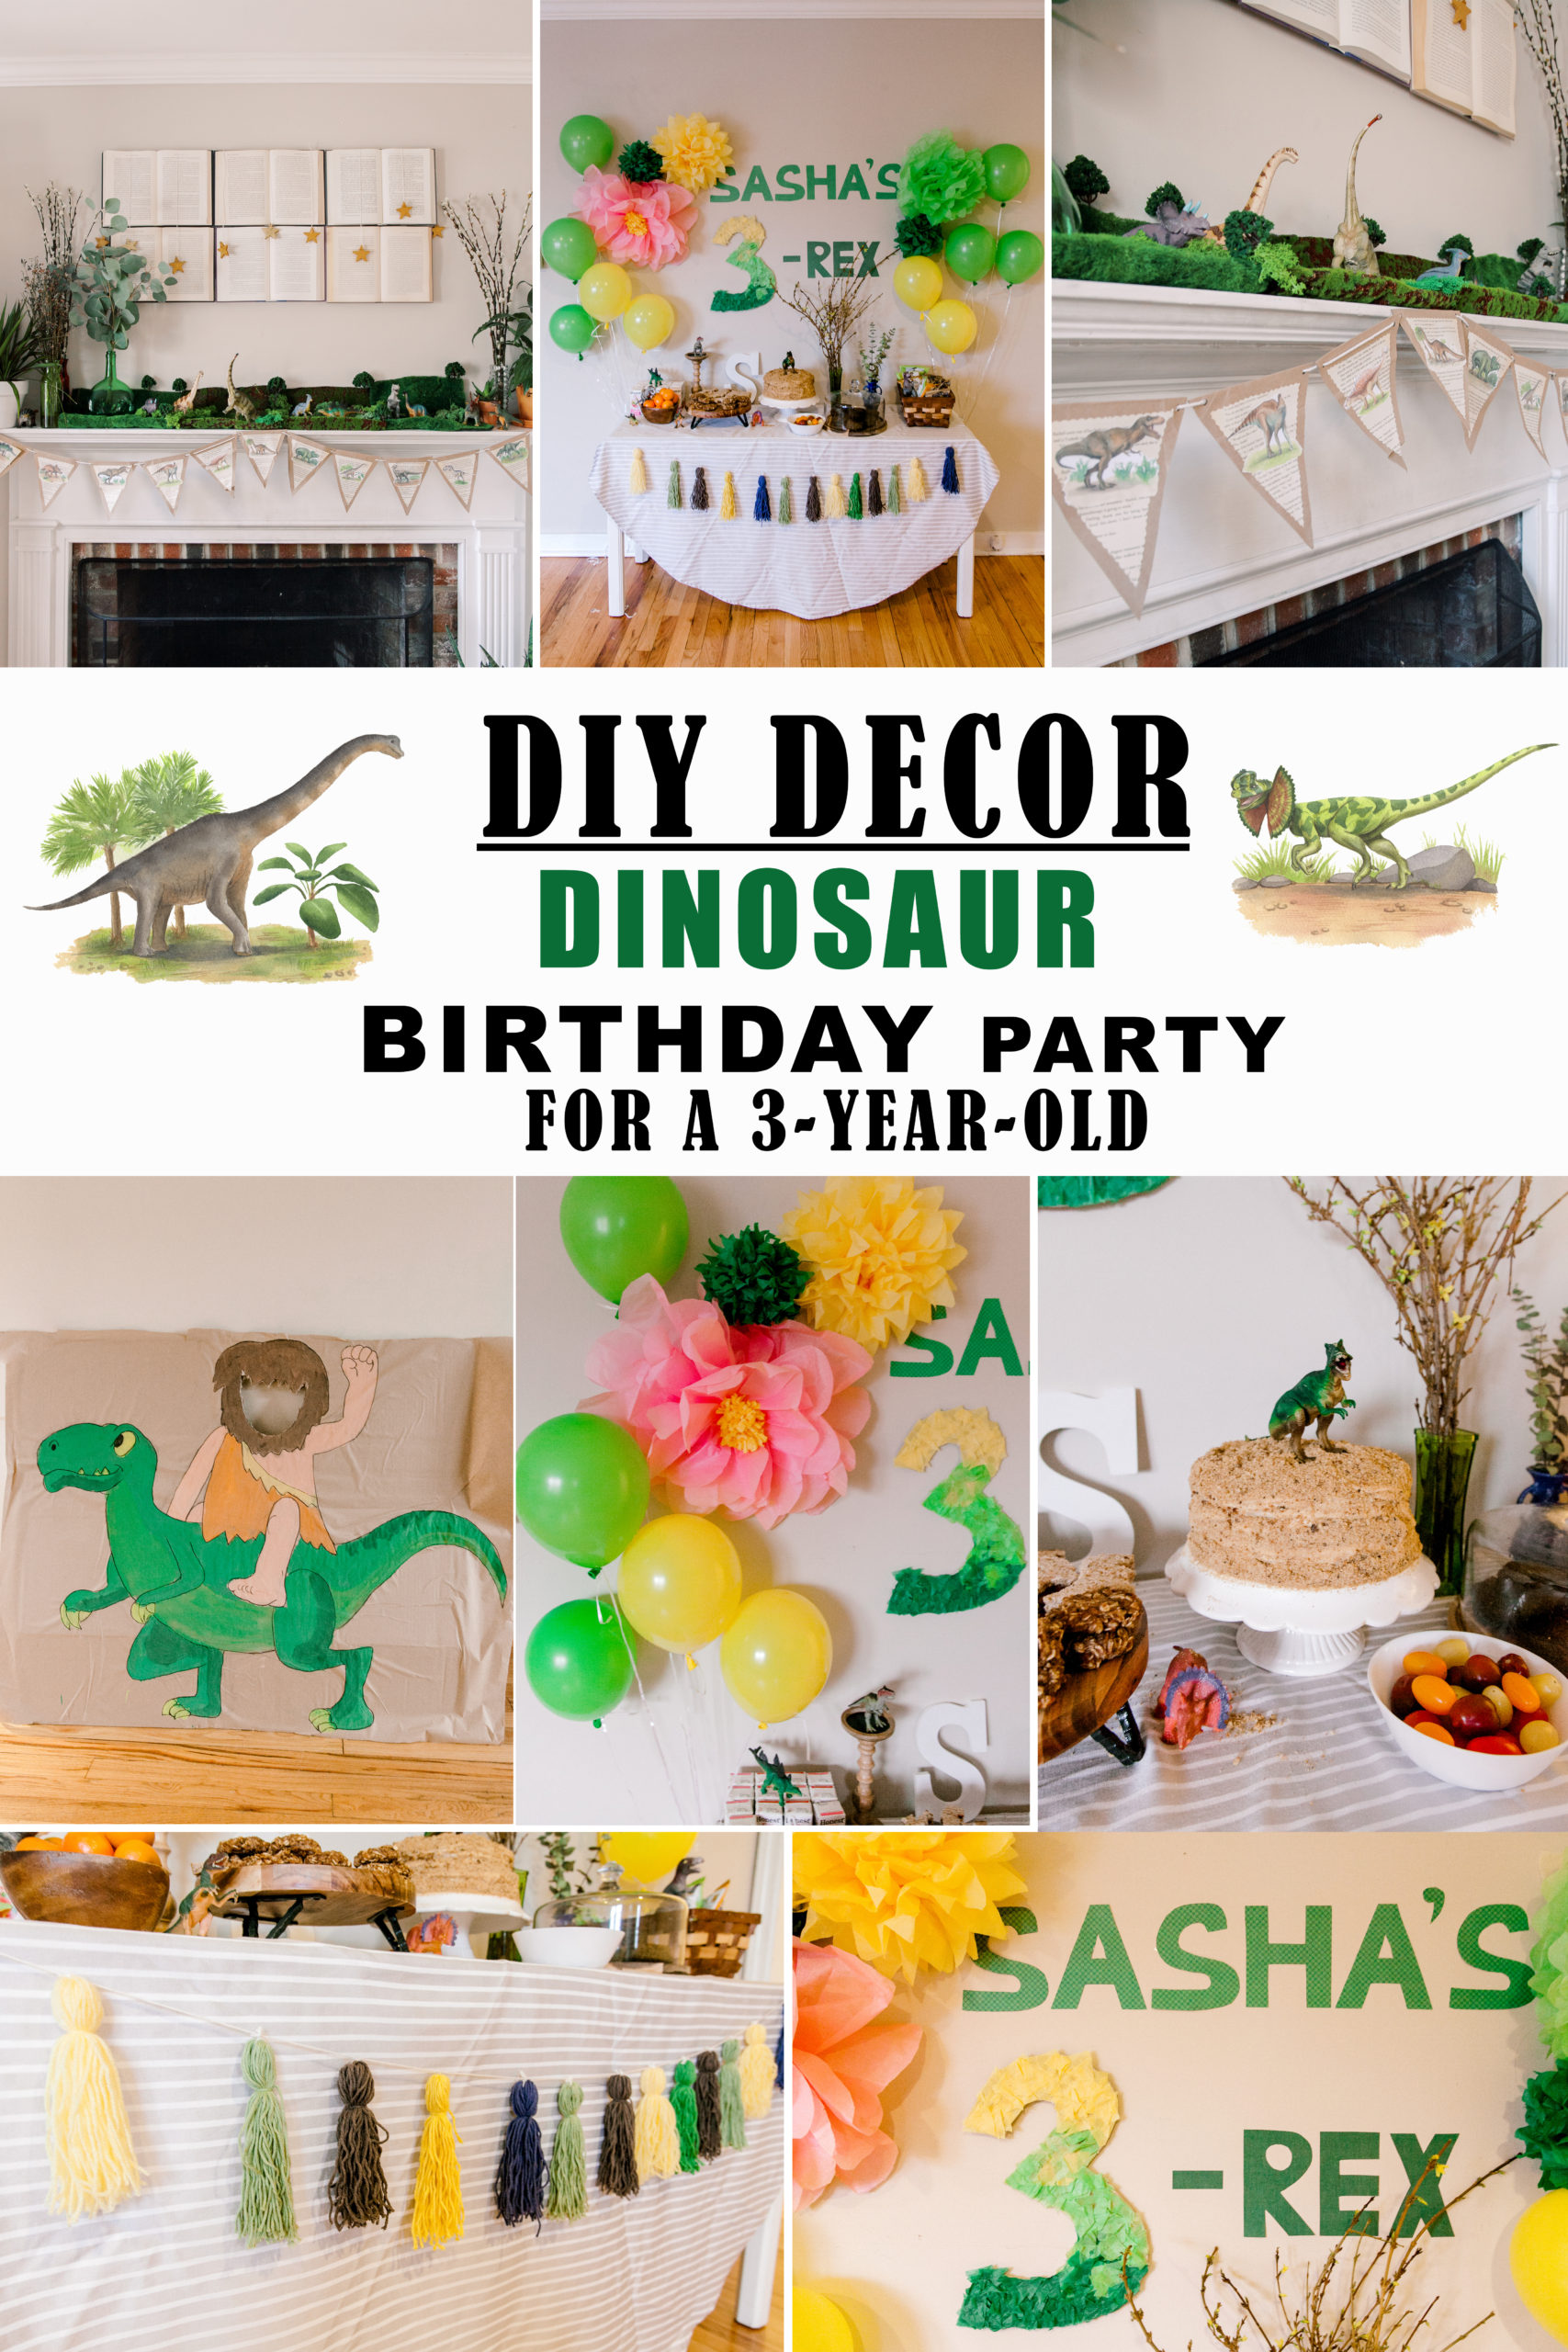
DIY dinosaur party decorations that are easy to make are a lifesaver. Not only you can unleash your creativity, make it the night before the party instead of running to the store, but also save money. I'll show you how much I spent on decorations and you will tell me in the end if it's worth it and if the store-bought is better ;D
I think you'd be also interested to read an ULTIMATE GUIDE TO A SUCCESSFUL DIY BIRTHDAY PARTY AT HOME FOR A 3-YEAR-OLD
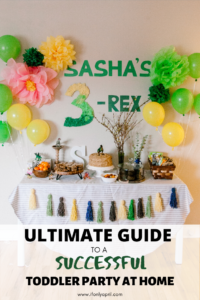
Also, check out my tips from a year before, when we hosted our first toddler birthday party at home.

DIY DINOSAUR PARTY DECORATIONS
Disclaimer: Please note, that some of the links below are affiliate links and I will ease a commission if you purchase through those links (at no additional cost to you). Thanks for your support this way.
Decorations below require limited skills and a few materials that you probably already have.
DIY FACE IN A HOLE of a CAVEMAN RIDING A DINOSAUR

When I saw this image online I had this idea how cool it would be to make it yourself with a hole in a cavemen face ;D
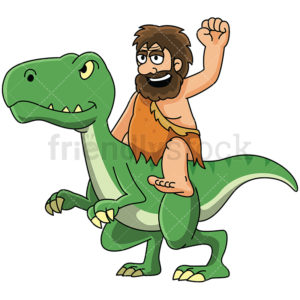
Image by friendlystock.com
You'll need:
- Paper (or paint directly on cardboard)
- Cardboard (I cut a large box from Amazon packaging)
- Paint
- Black marker for an outline
- Spray adhesive
- knife to cut the hole
I asked my husband to draw an outline and he did such an impressive job. We used a paper from a craft roll that I already had from the previous project. You can use any paper, or even paint directly on cardboard.
On the next day, when Sasha was in school I painted it with her Crayola Washable paint. When the paint dried, I glued it with spray glue to the cardboard.
TIP: If I did it again, I'd glue the paper first and then paint over it. Since this paper is very thin, it got wrinkled and when I glued it, it was uneven. It didn't bother me much since I wasn't going for perfection, haha. But if I could avoid it, I would.
Later we made a hole in the caveman's face.
It was a huge hit and kids loved taking pictures with it. After the birthday party, I brought it to Sasha's preschool and kids continued to have fun with it!
Cost of this decoration: $0 since I already had all the materials.
If you'd rather buy:
I was pleased to see later that there are few awesome options on Etsy if you can't draw or would prefer to buy.
CreativeChick shop has a wonderful selection of photo-ops for kids, not only dinosaur-themed but for any occasion. I particularly love this one with the dinosaurs ;D
Amazon also has a dinosaur "face in a hole" option.
DIY YARN TASSEL GARLAND
You'll need:
- yarn (3-4 colors of your party)
- scissors
- a small book or notebook to measure yarn


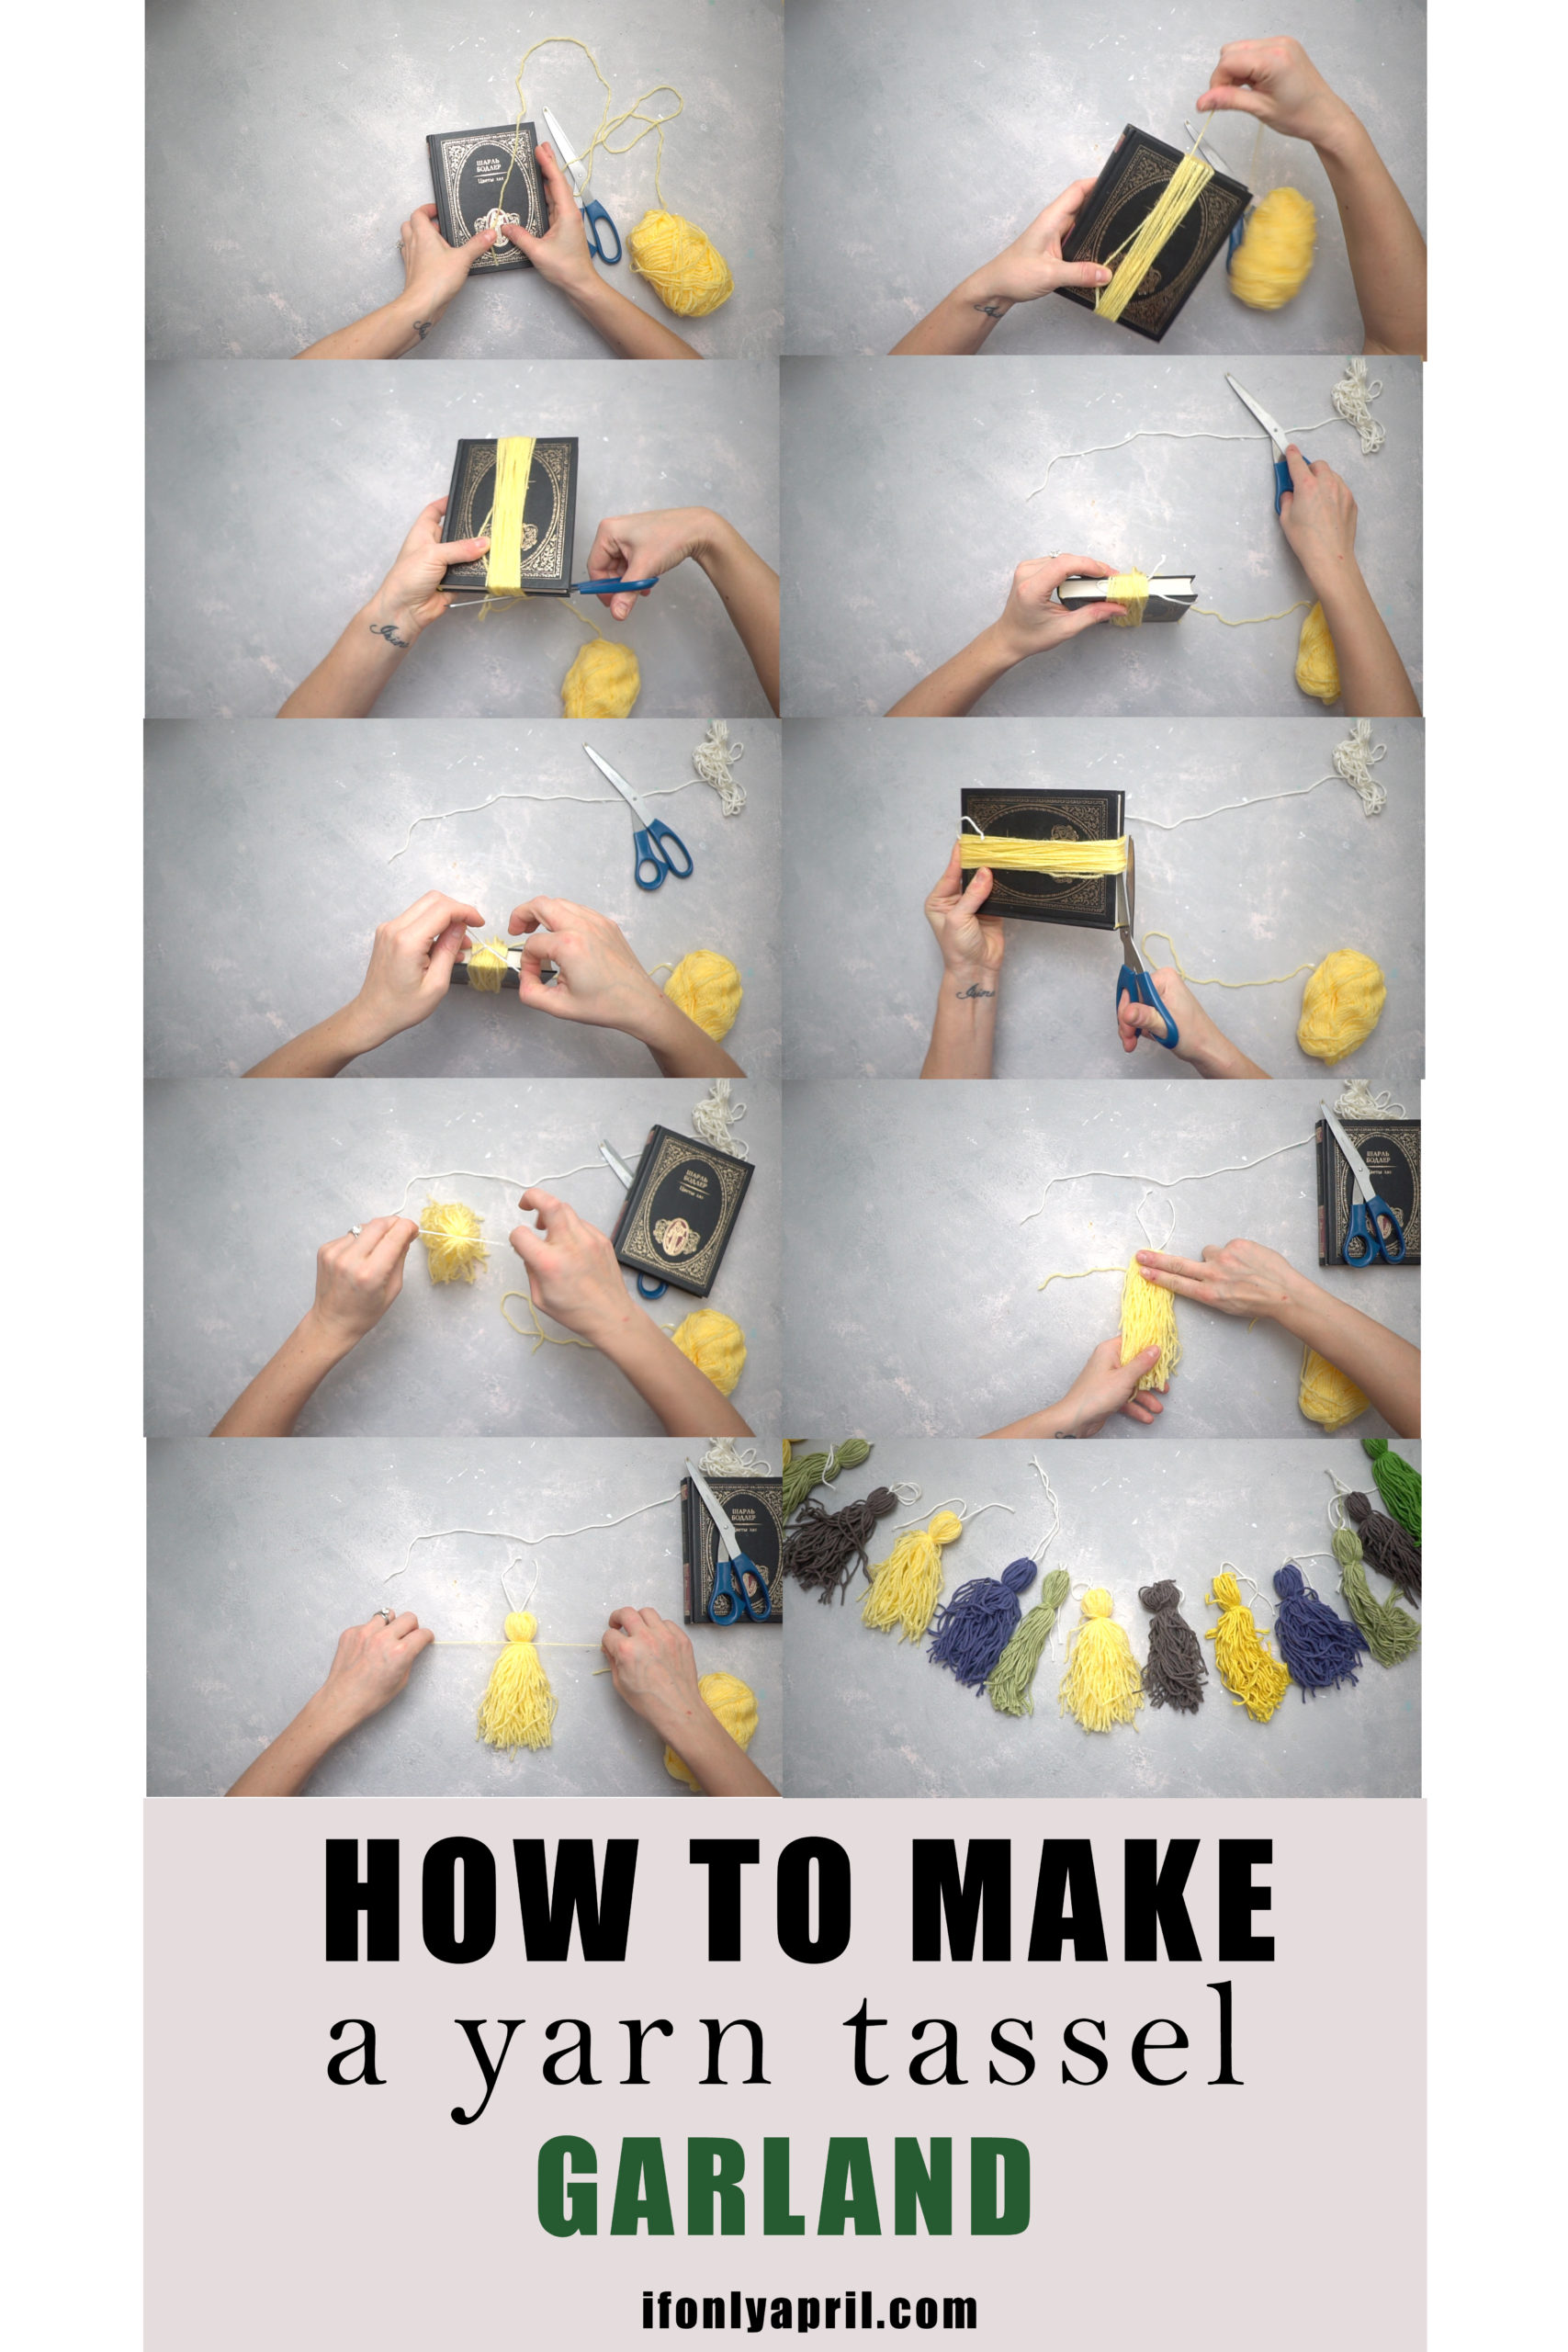
- take your book and wrap yarn around. Count how many full rounds you make, so the garland looks unified in size. I made 40 full rounds for each of the tassels.
- Take another yarn thread (I recommend the color of a thread that will hold them all). It was a white thread in my case. Bring it through the top of your wraps and slightly tie it.
- While holding it tight, cut from THE BOTTOM.
- Tie the white thread very tight.
- Take another thread (of the tassel color) and tie it 1 inch from the top.
- Repeat as many times as you want.
- Tie all tassels to the main white thread
Boom! You've got yourself a Pinterest-worthy garland.
Cost: $0 (since I had leftover yarn)
If you'd rather buy:
There are a lot of options for plastic tassel garlands, but I encourage you to stop and think before you buy it. You will use it one time, but it will end up in the landfill forever.
Etsy has SO MANY COOL options. I'm so happy to see there are so many creatives with such unique products! Amazing!
I love this classic one from Ramen Hands. And this boho tassel garland from SandHCrafthouse. I mean, there are so many options, that even the most peculiar customers will find something.
Amazon has very cute options, like this cotton garland here, or a unique-looking tassel with pom-poms.
DIY RECYCLED DINOSAUR GARLAND
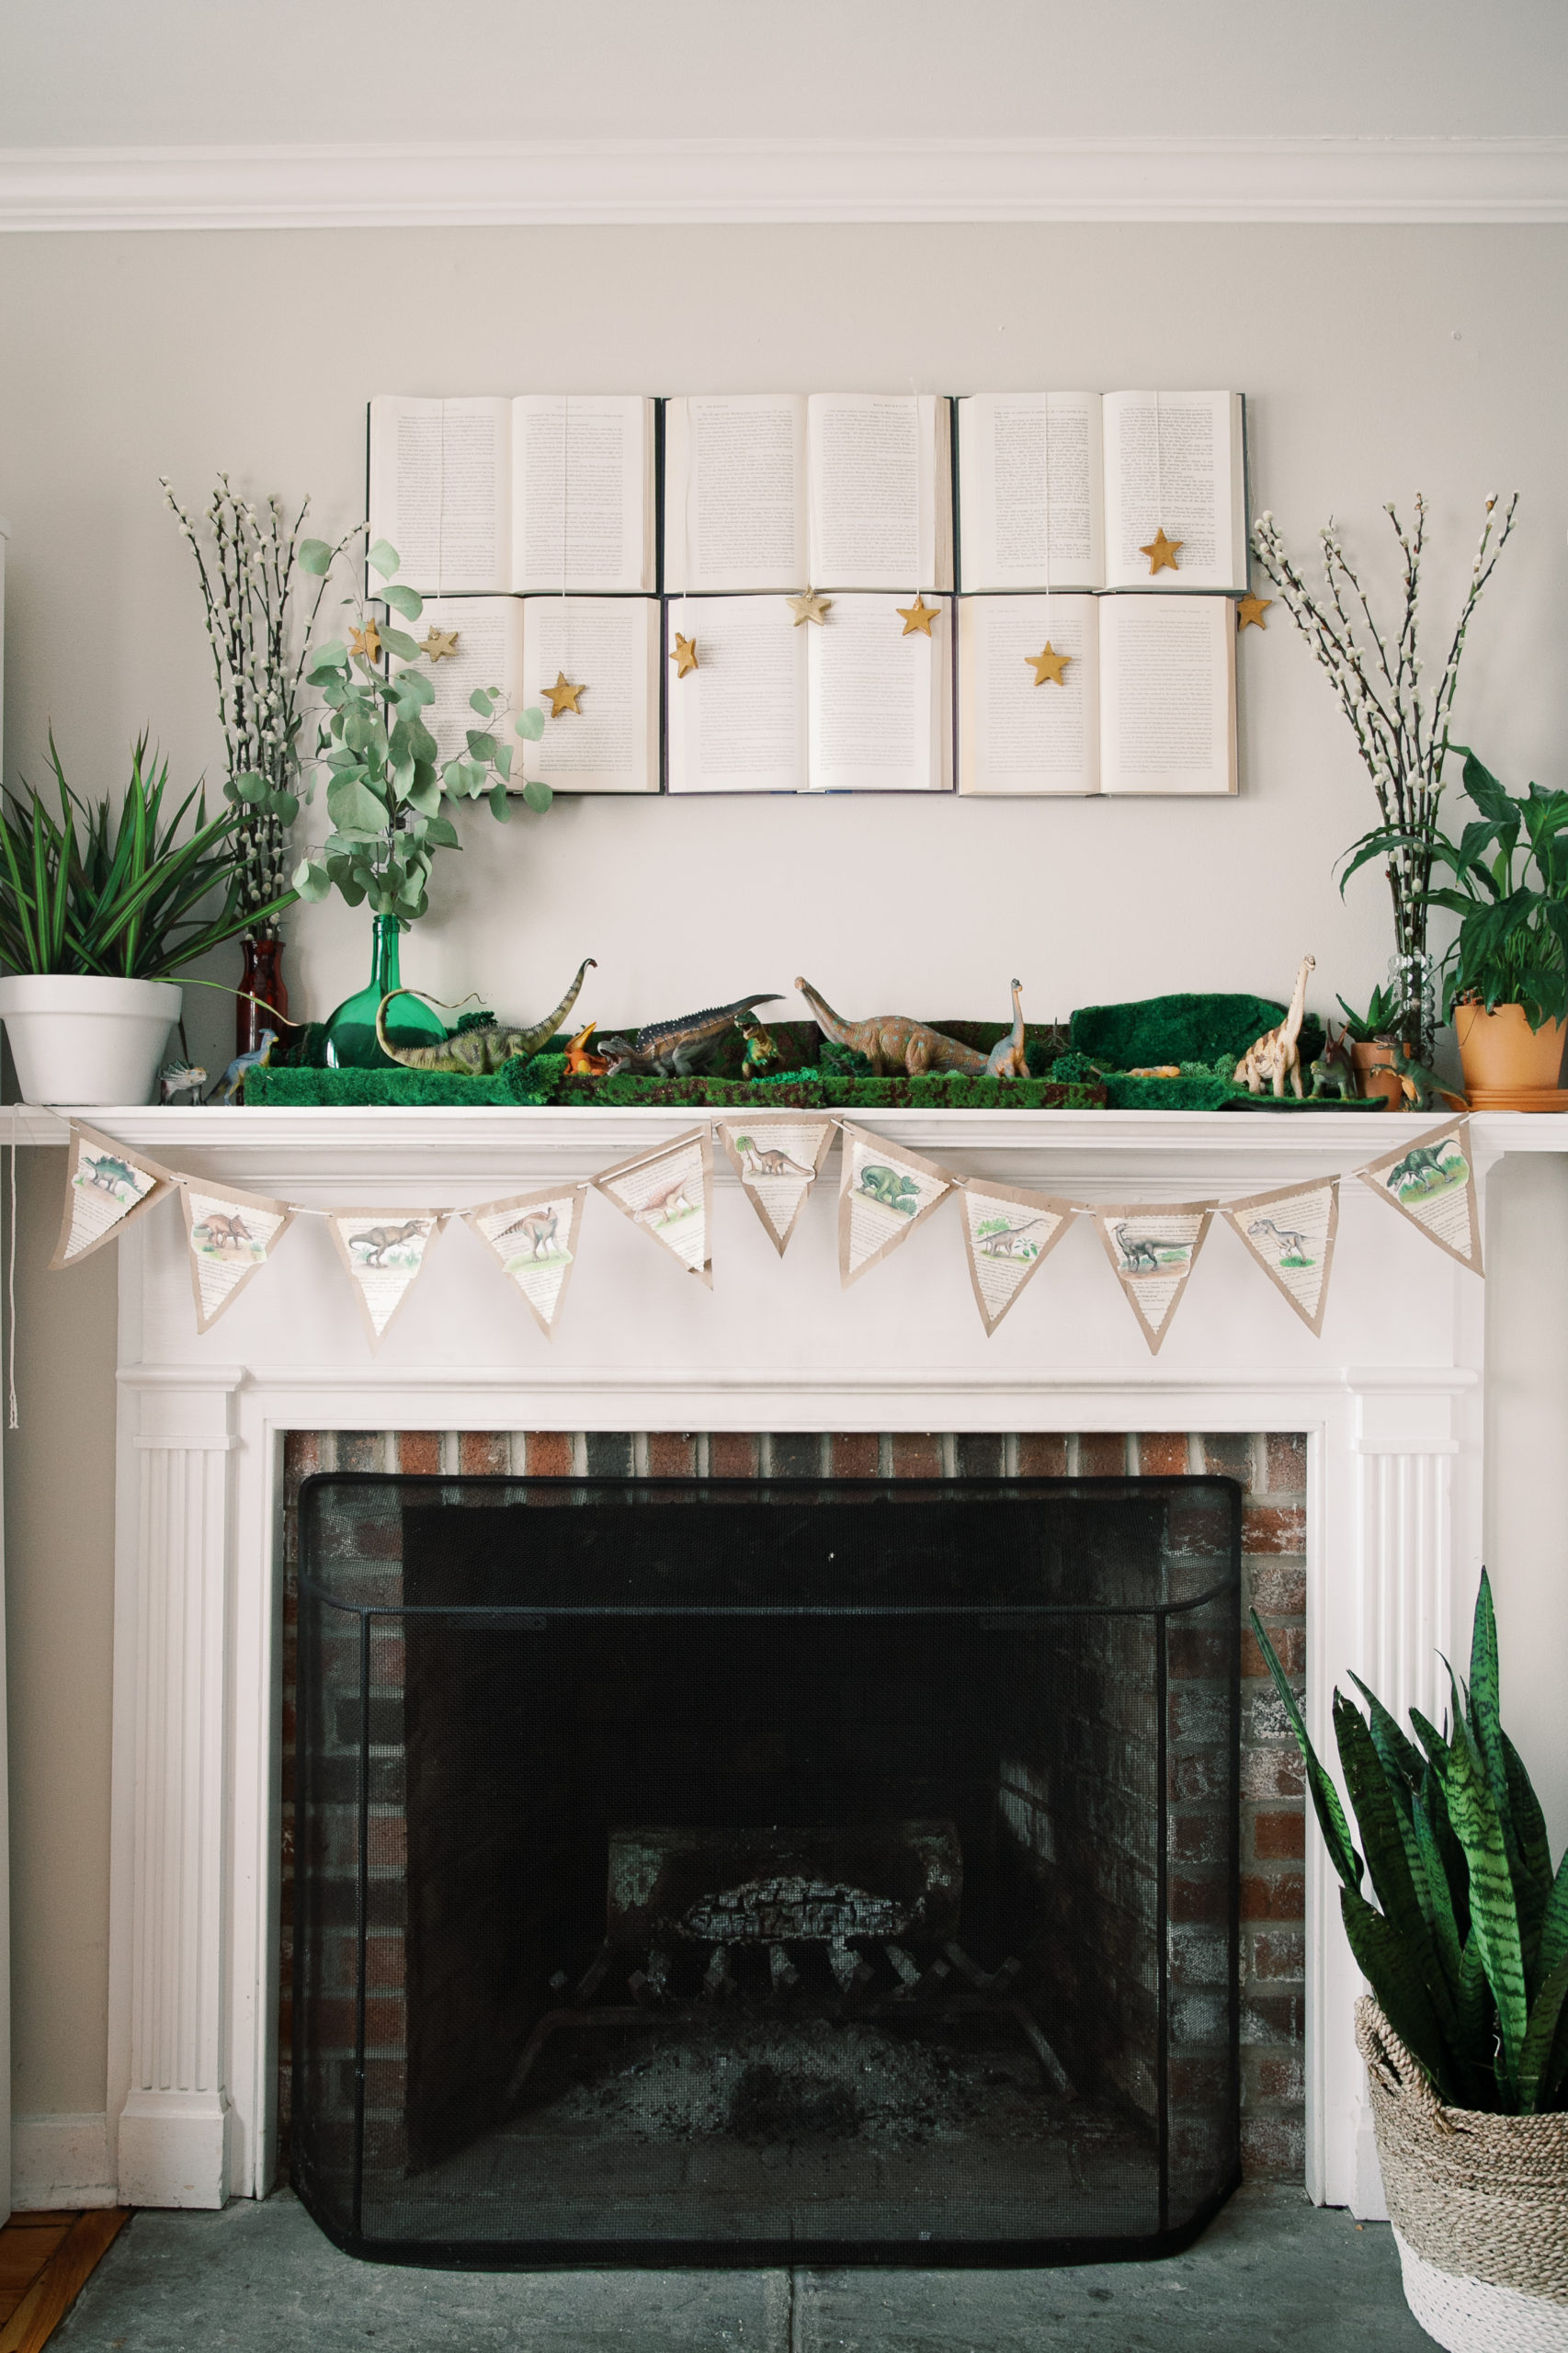
It's made out of Recycled brown bags. It's a super easy but rewarding project. I absolutely love the way it turned out! It's one of my favorite DIY dinosaur party decorations.
You'll need:
- brown bag
- old book
- scissors
- decorative paper scissors
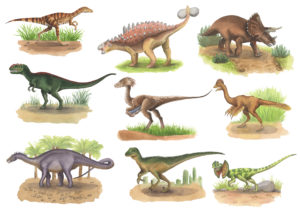
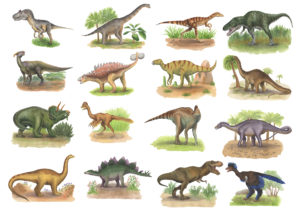
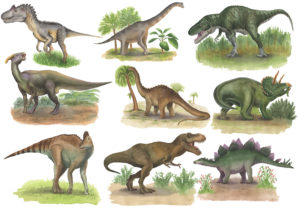
- images of dinosaurs (FREE DOWNLOAD BELOW)
- glue
- rope
- adhesive paper (optional)
- hole puncher
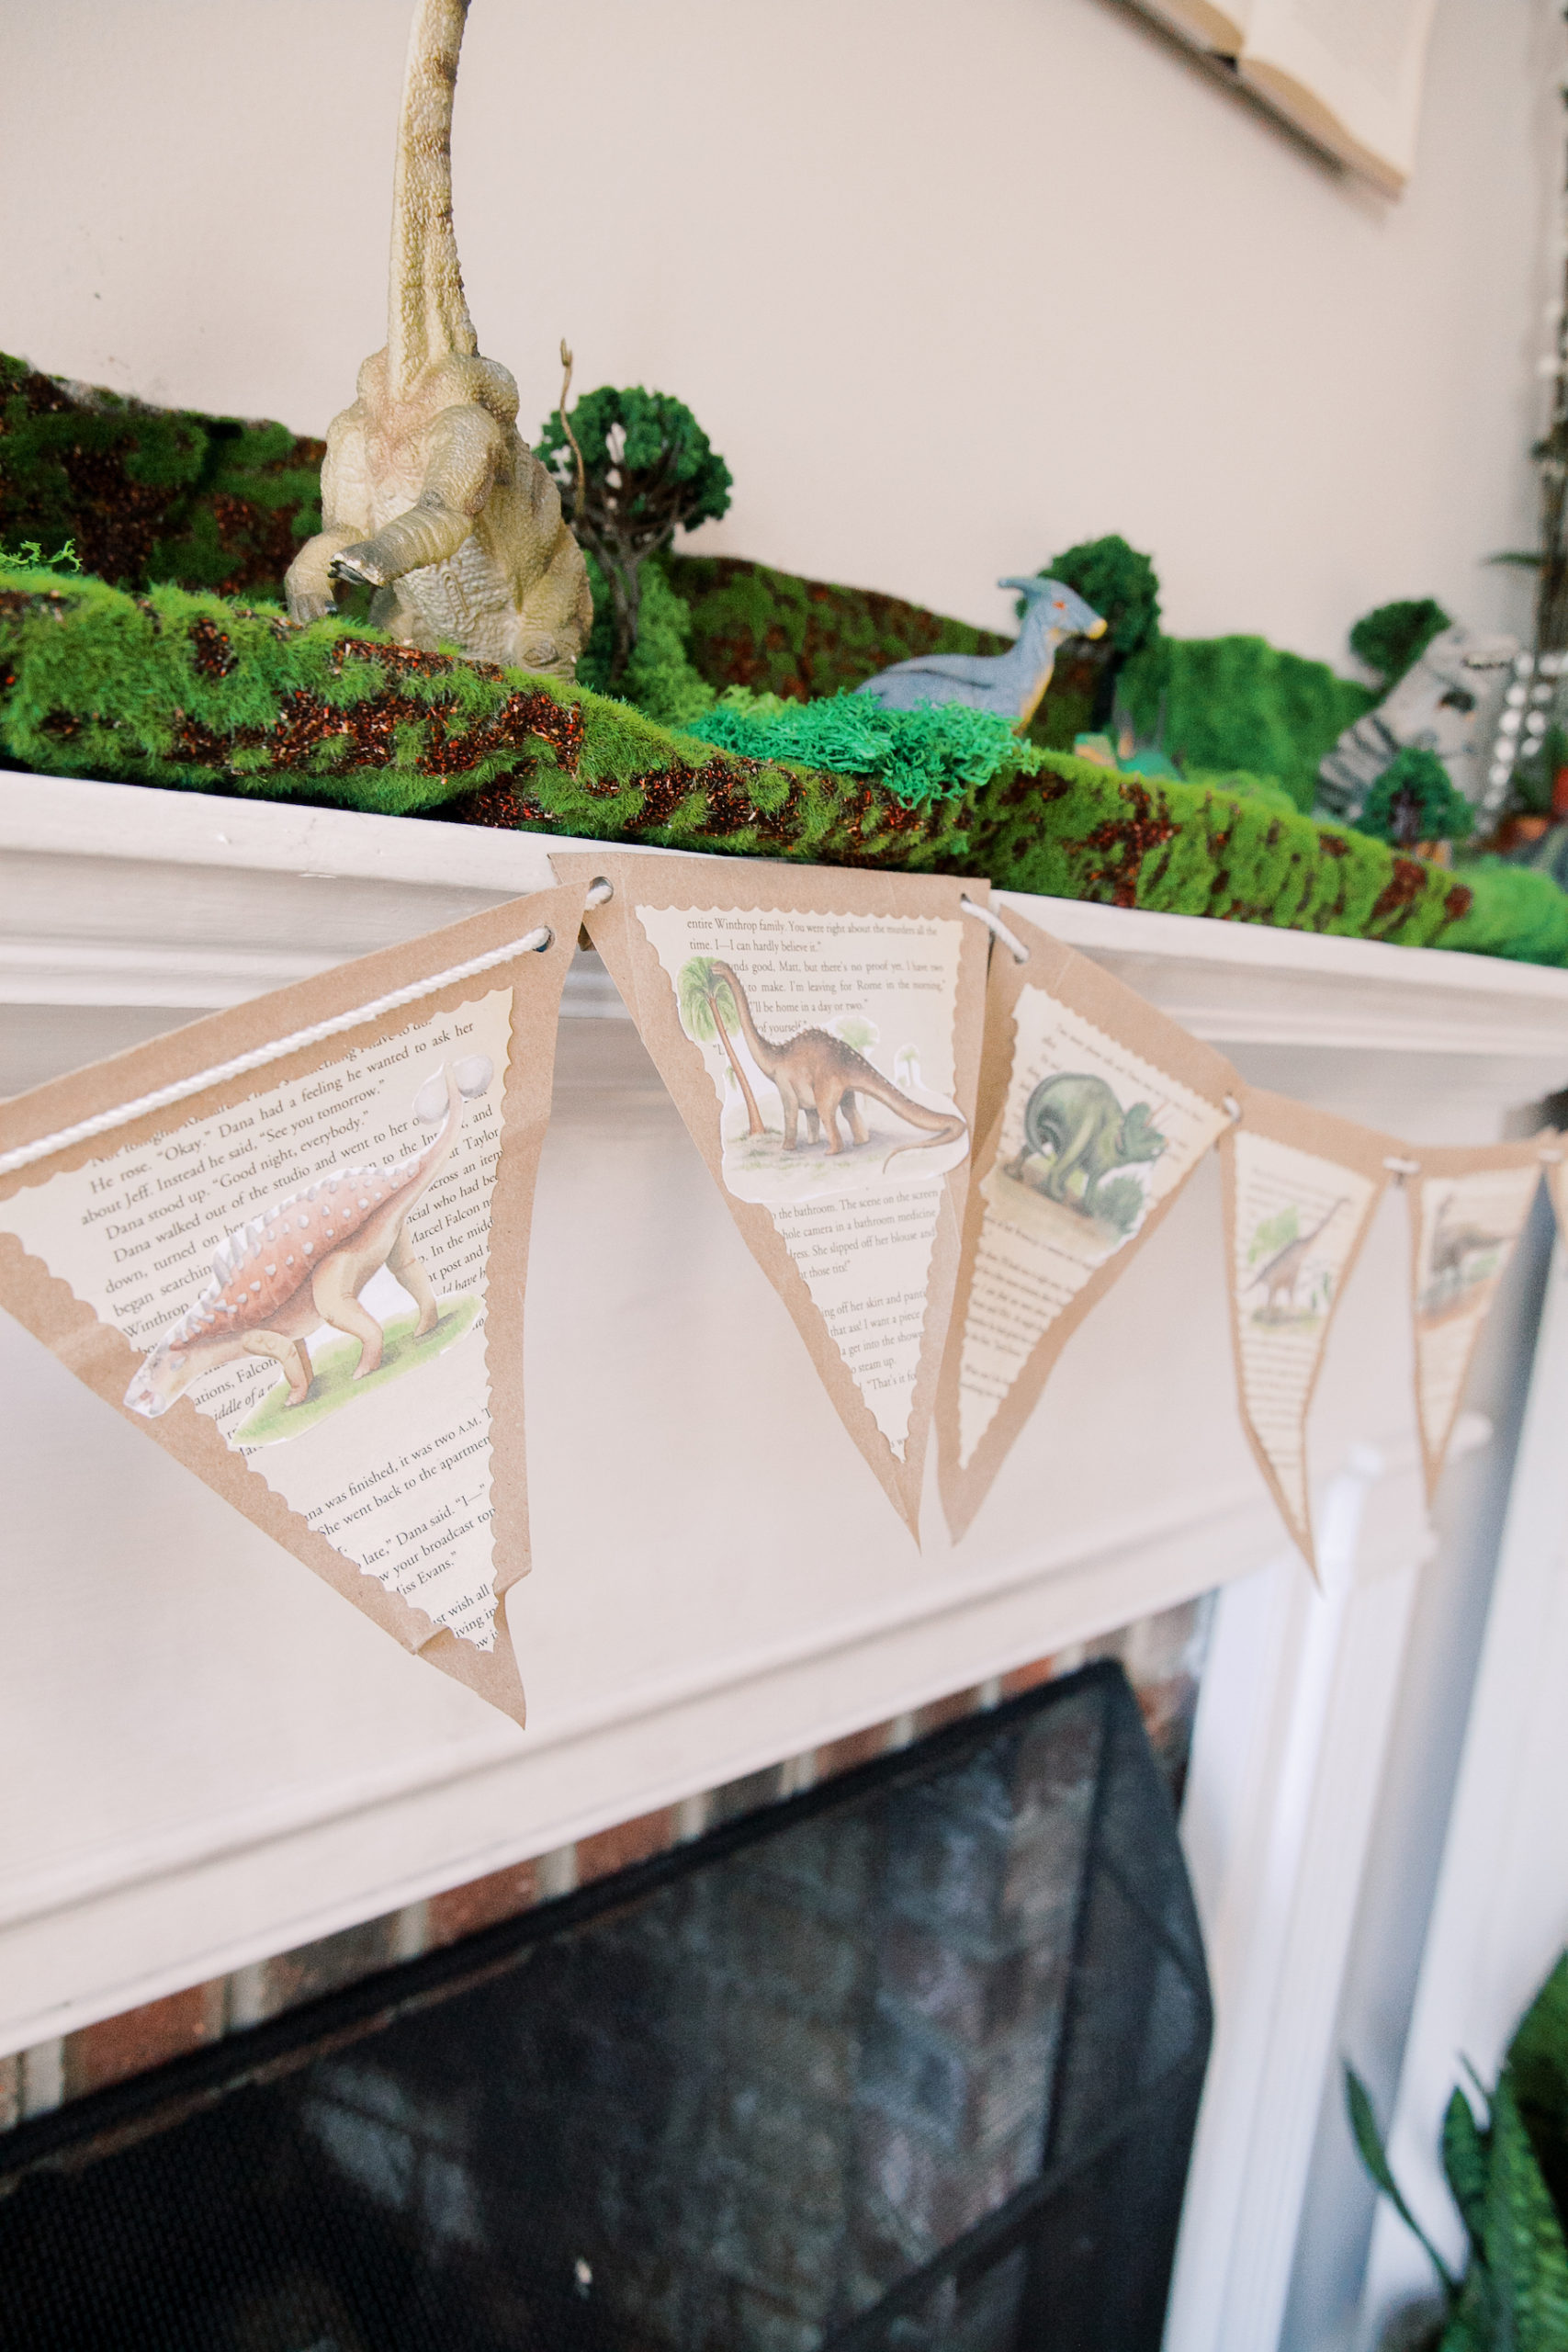
The dinosaurs are originally handpainted watercolors. Check out my Ifonlyaprilprints Etsy shop if you'd like to get a high-quality print for your kids' room.
I give you a 70% OFF any dinosaur prints from my Etsy store.
Use code BIRTHDAY70 at check out to get ANY dinosaur print from our collection!
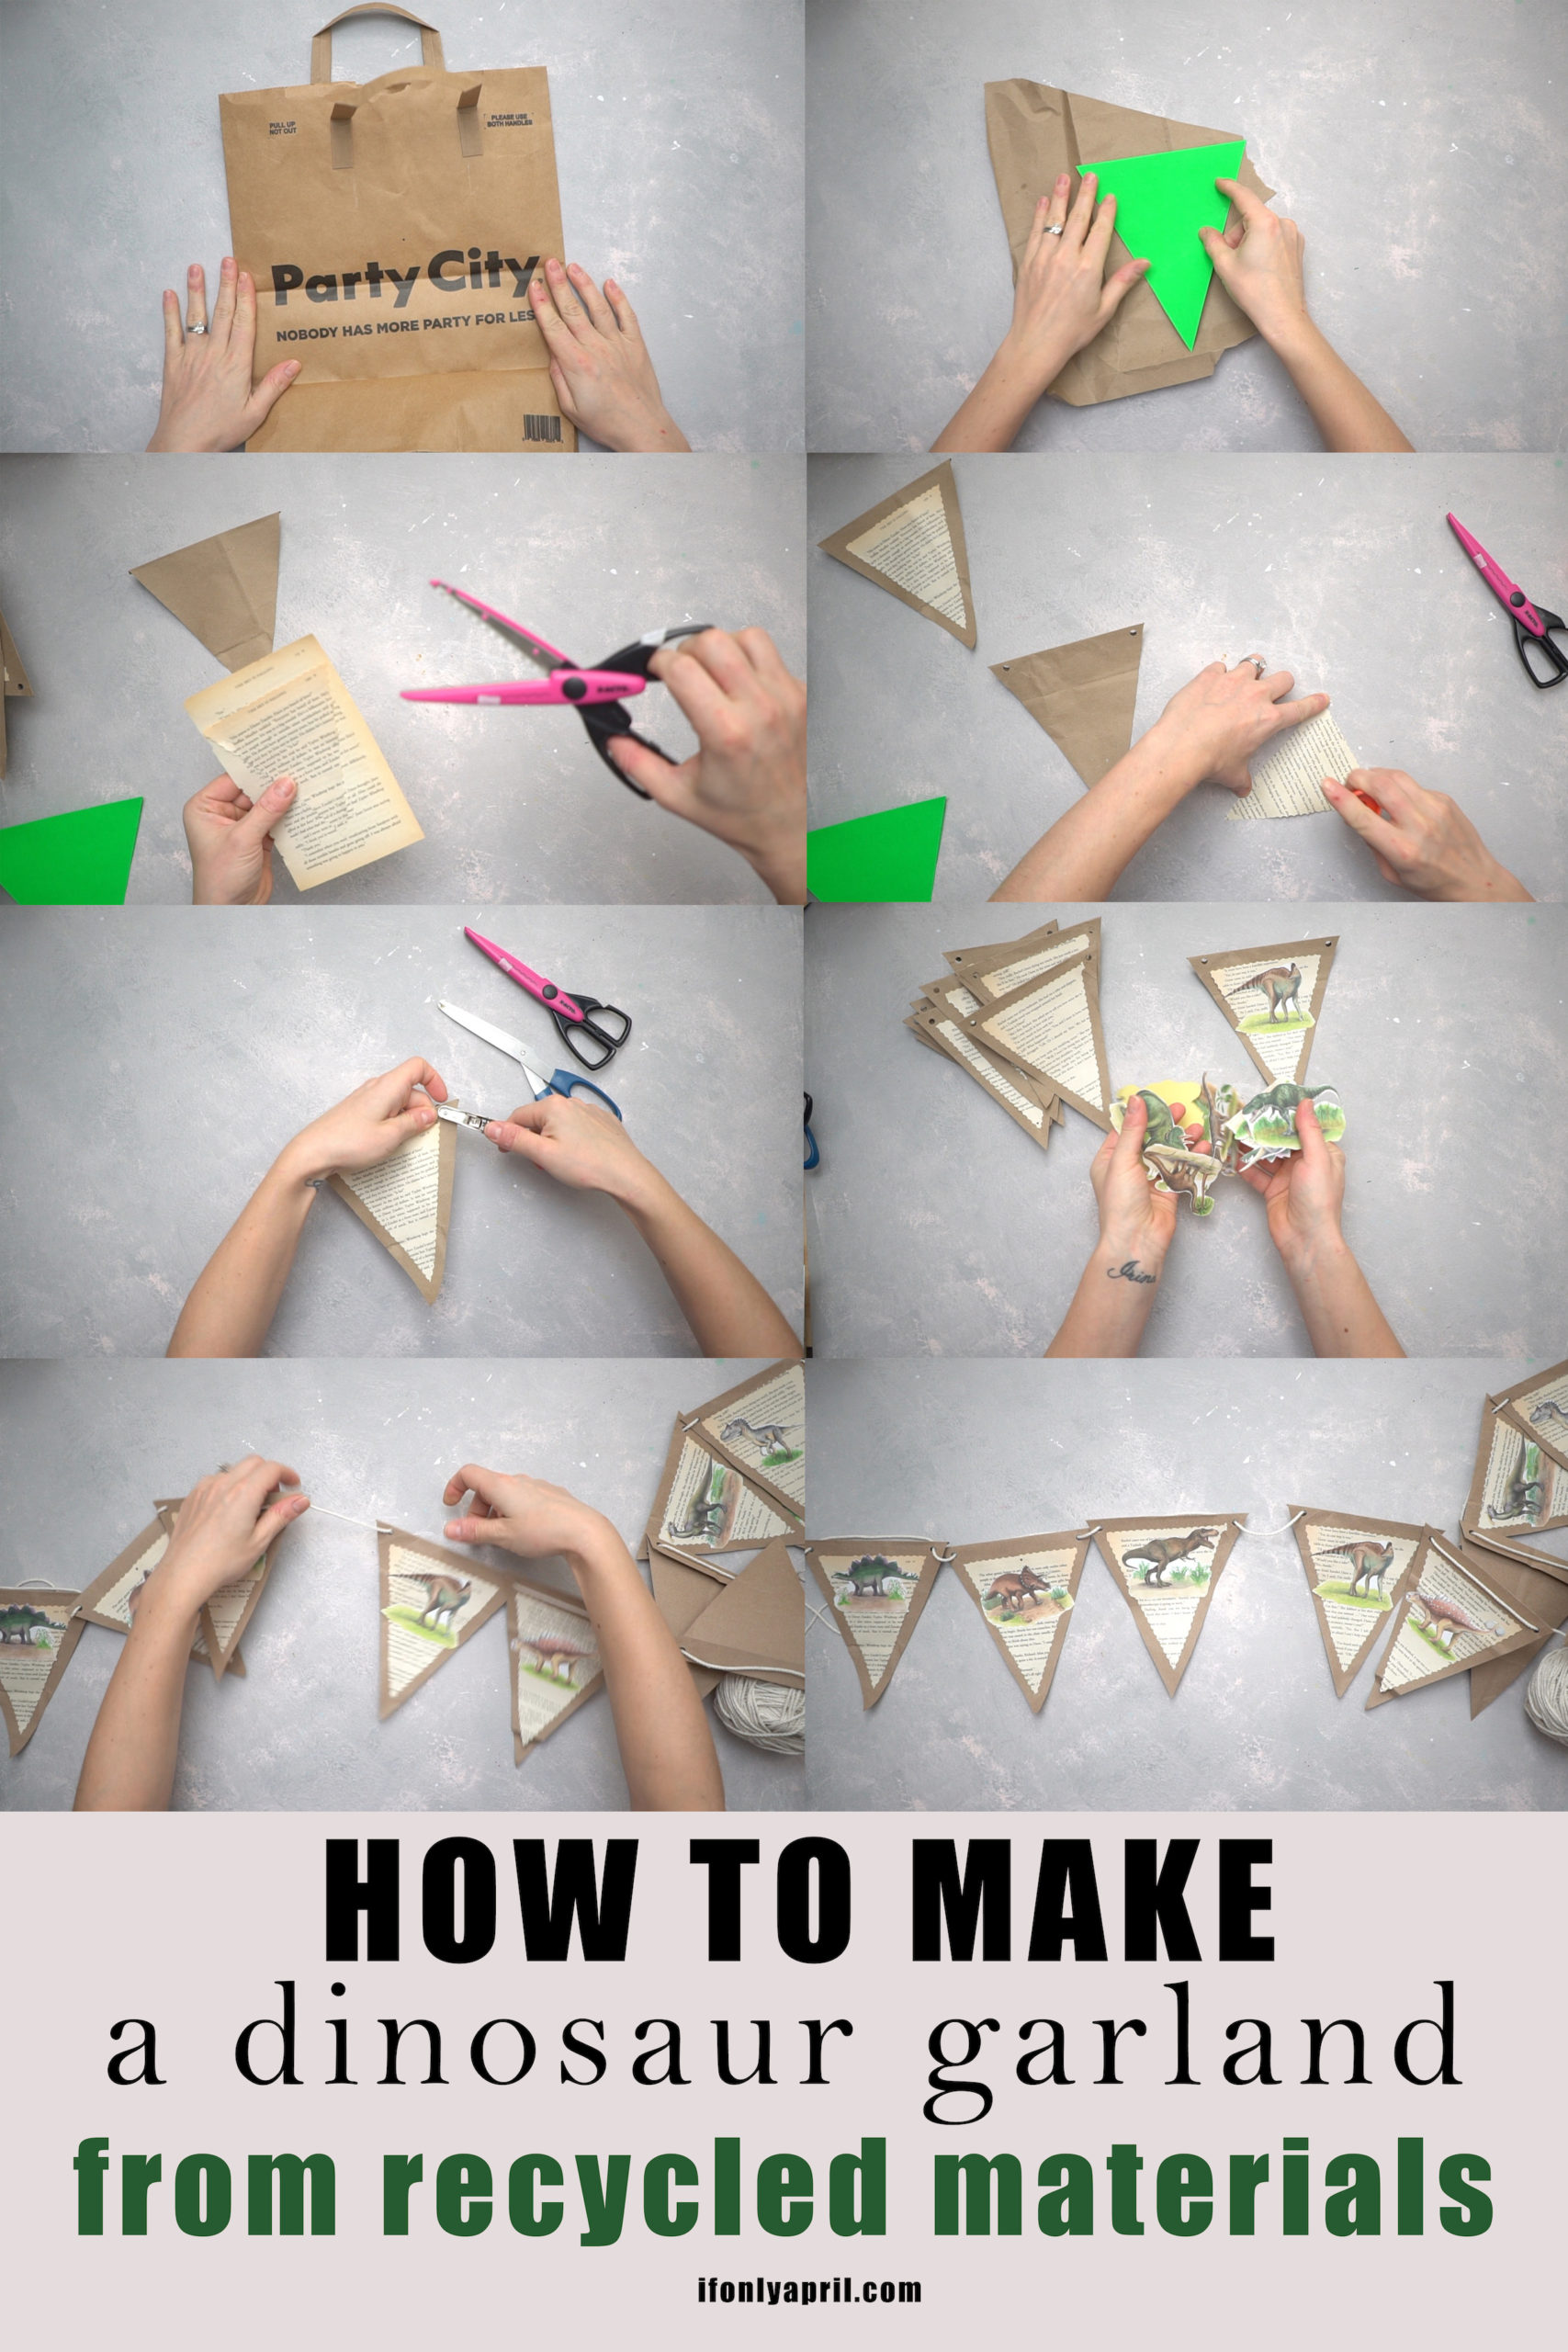
- Make a triangle (you will use it as an example to make them all triangles same size)
- Cut triangles from the brown bag (I made 11)
- Using decorative scissors, cut a smaller triangle from a book page.
- Glue it all together
- Print out a PDF with dinosaur images. To make your life easier, print it on the adhesive paper sheet, or simply cut the image and glue it to the garland. You can download your FREE PDF by following this link.
- With a hole puncher, make 2 holed and bring the rope through it.
FREE PDF of dinosaur images!
Cost: $0
Not possible to buy.
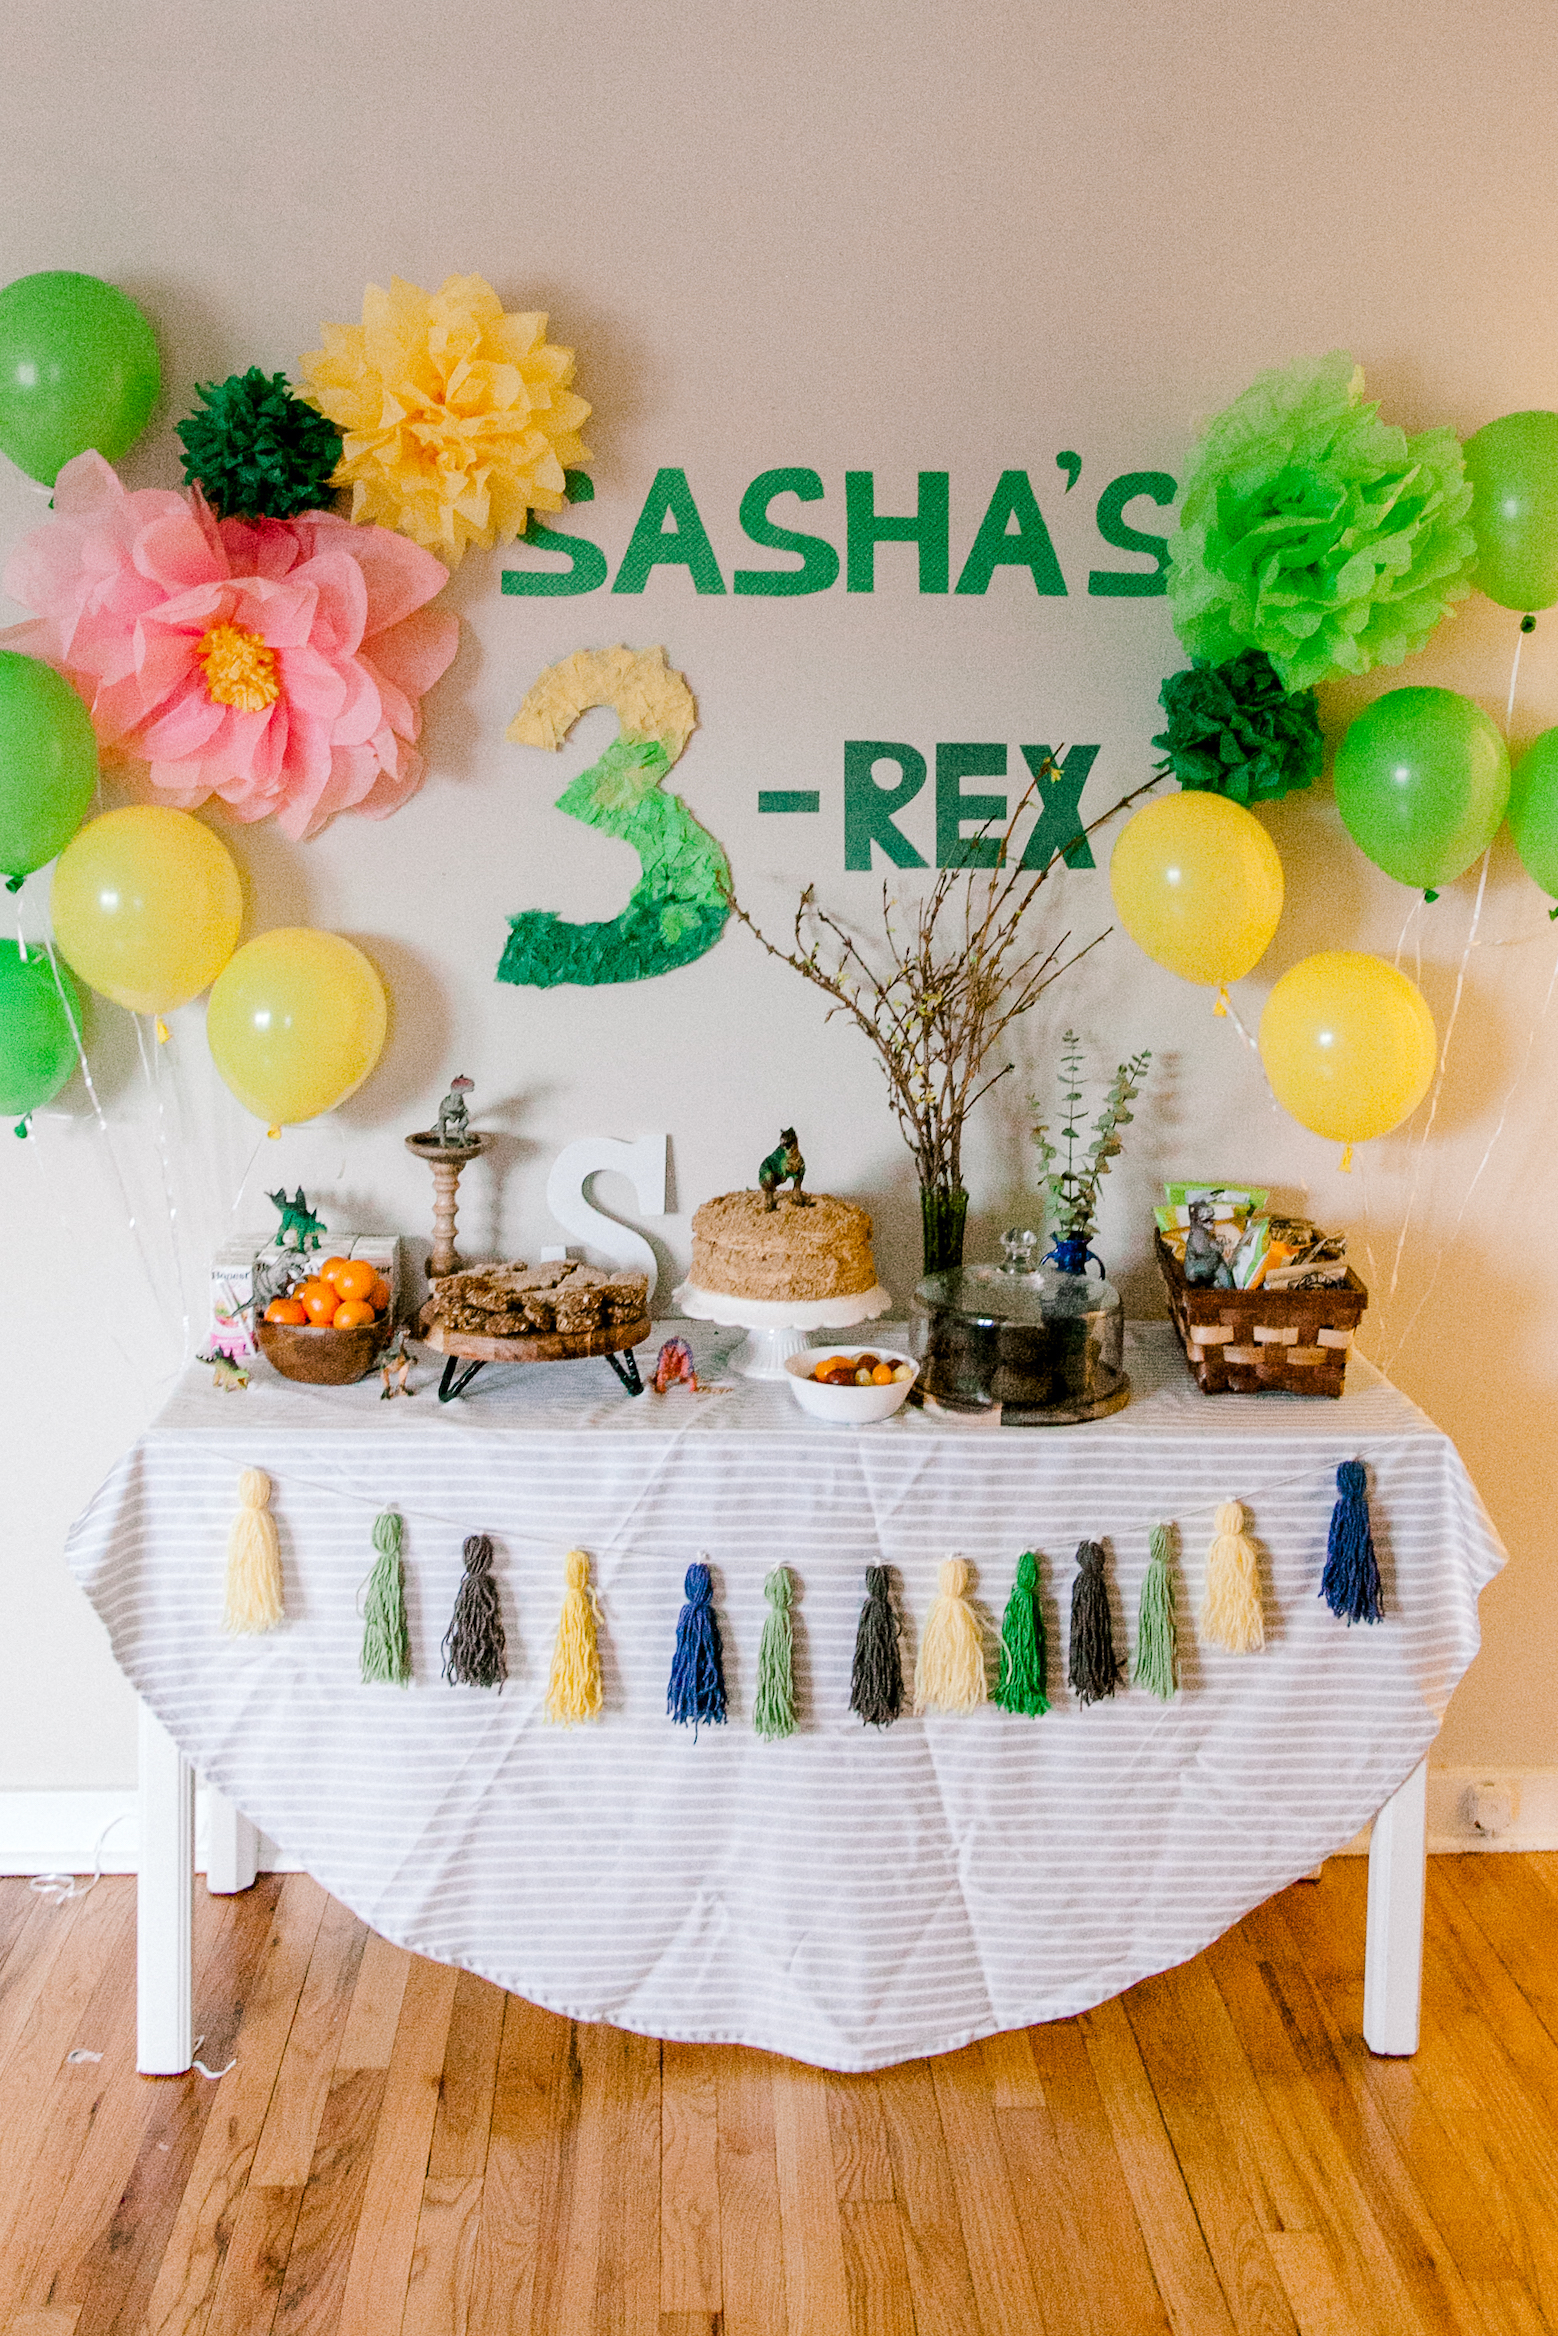
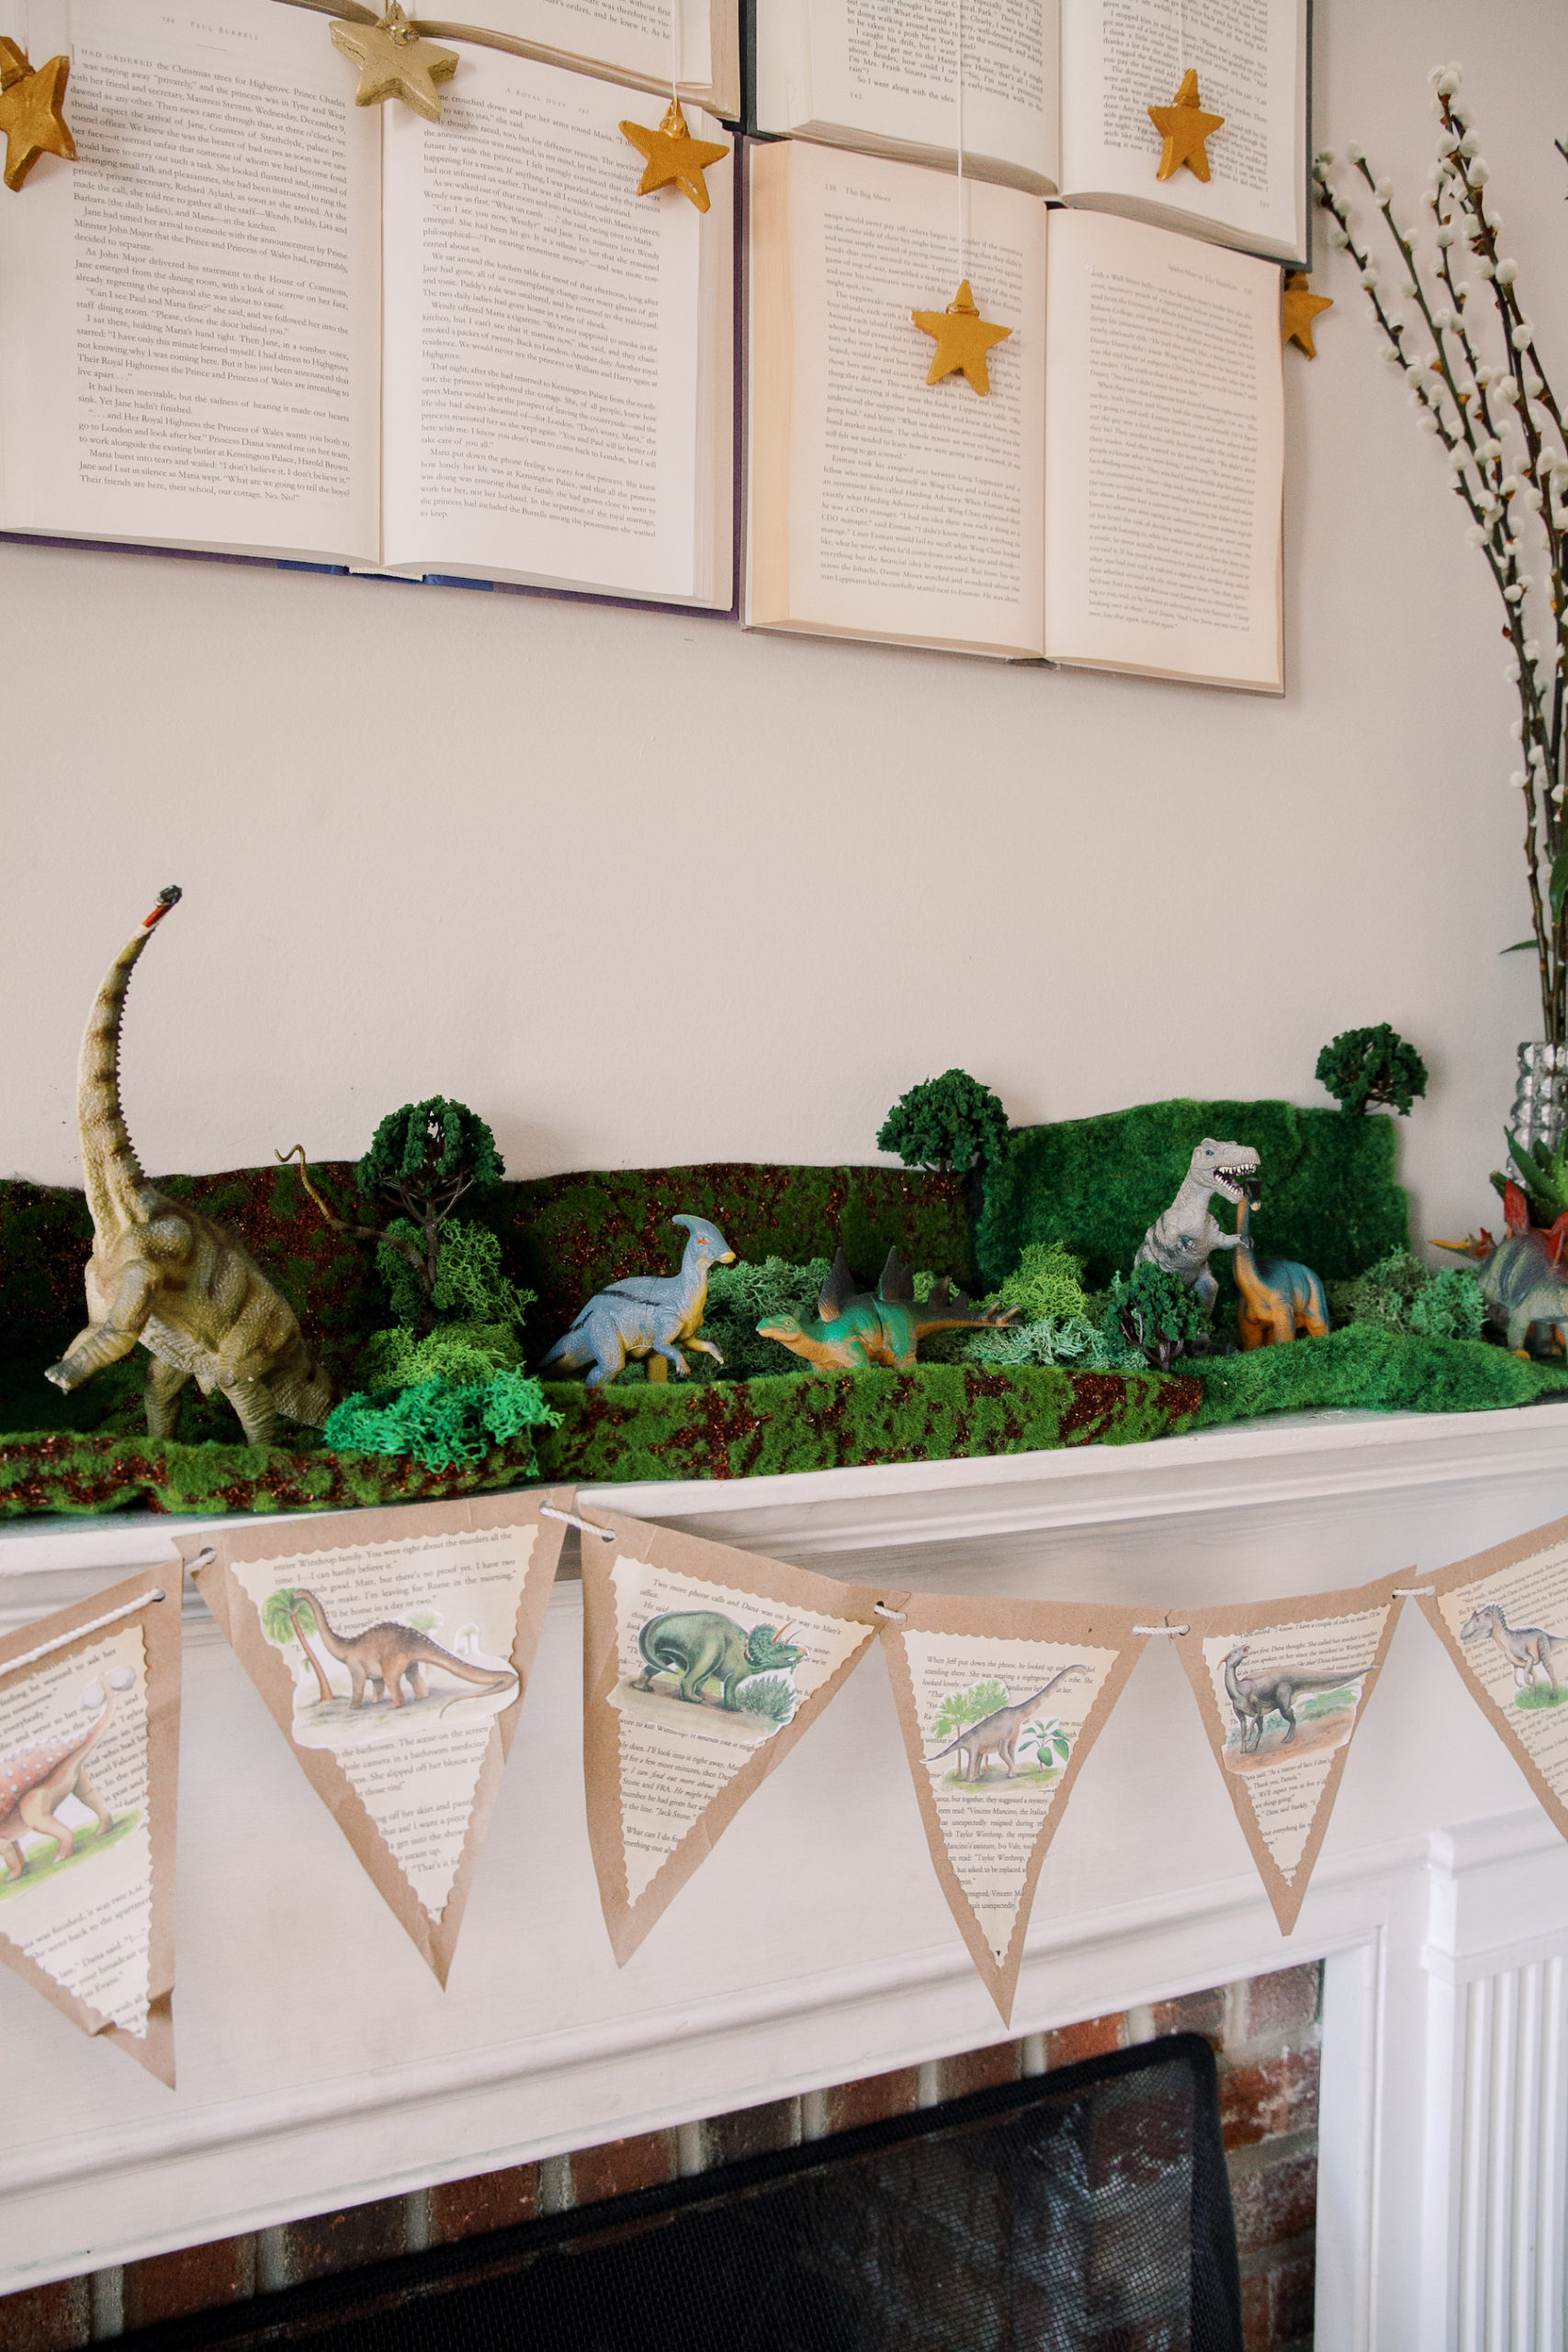
DINOSAUR LAND
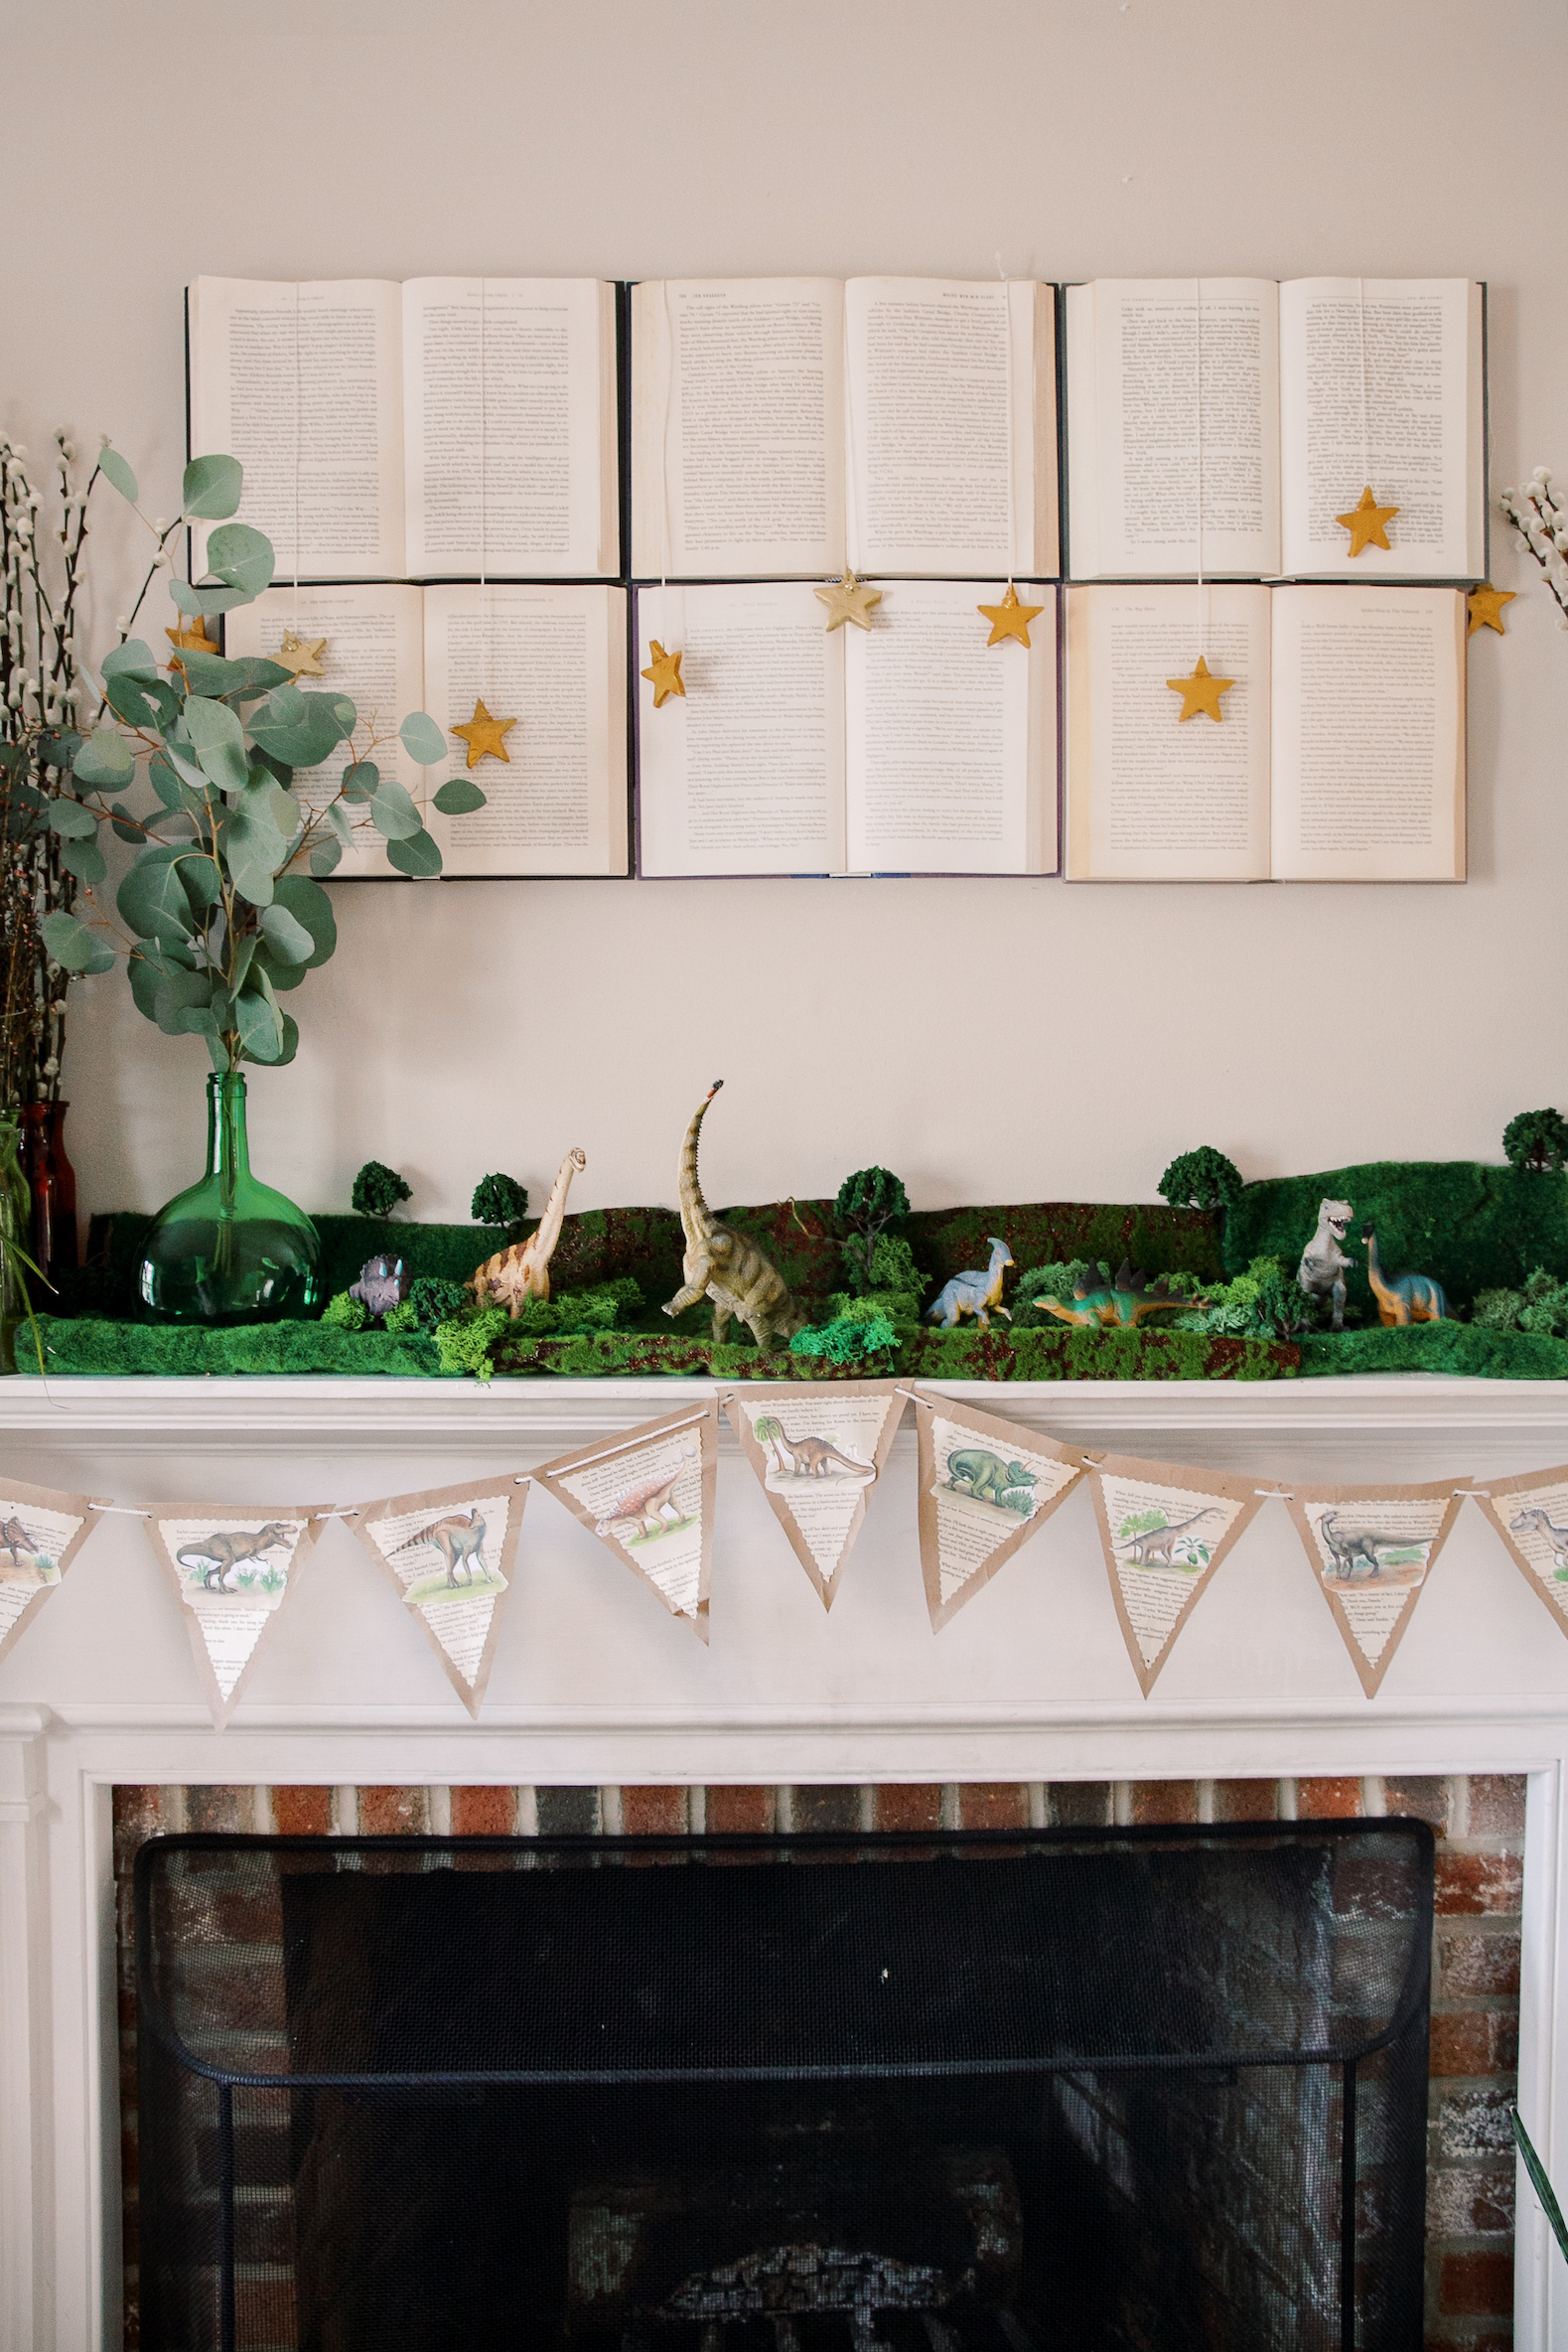
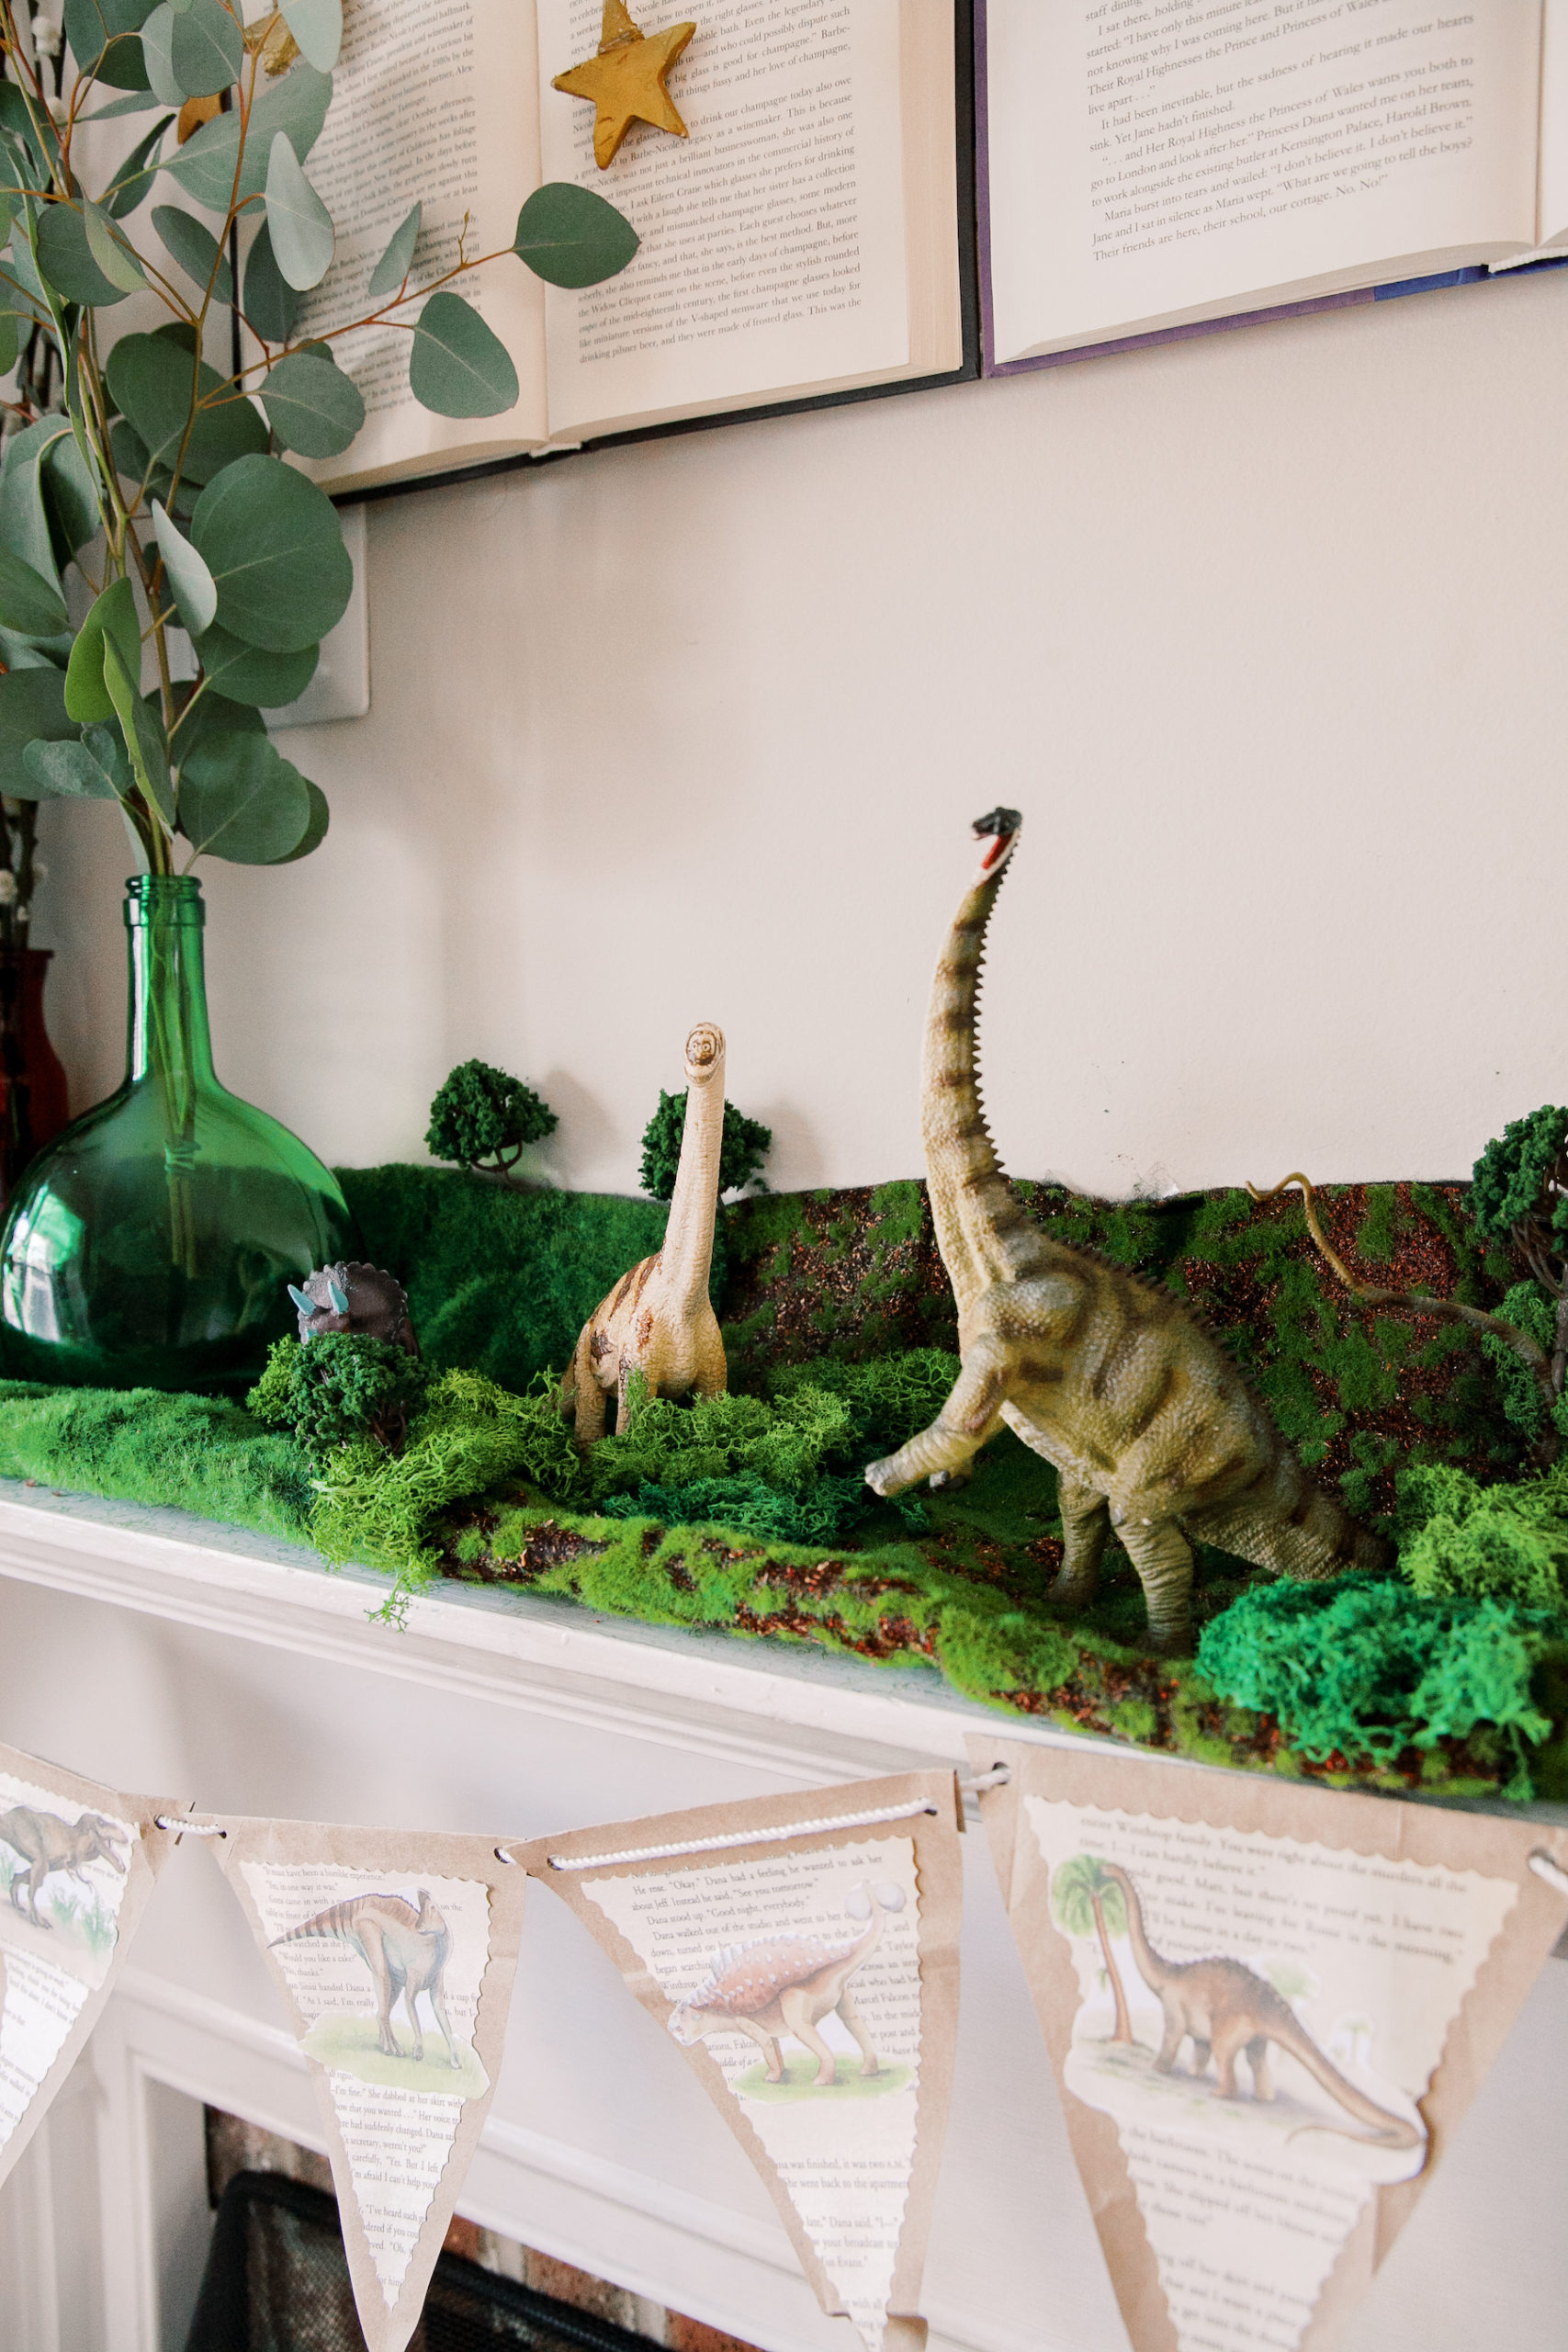
To assemble this land of dinosaurs, I used the faux moss from AliExpress, a lot of tall vases and green plants. The idea was to create something super green, with brownish tones, where dinosaurs potentially lived. Sasha also got this superb set of 4 JUMBO dinosaurs and I'm amazed by the quality and attention to detail.
DIY FLOWER FROM TISSUE PAPER
You'll need:
- tissue paper (1 pack)
- yellow tissue paper for the center
- scissors
- flower wire
- tape

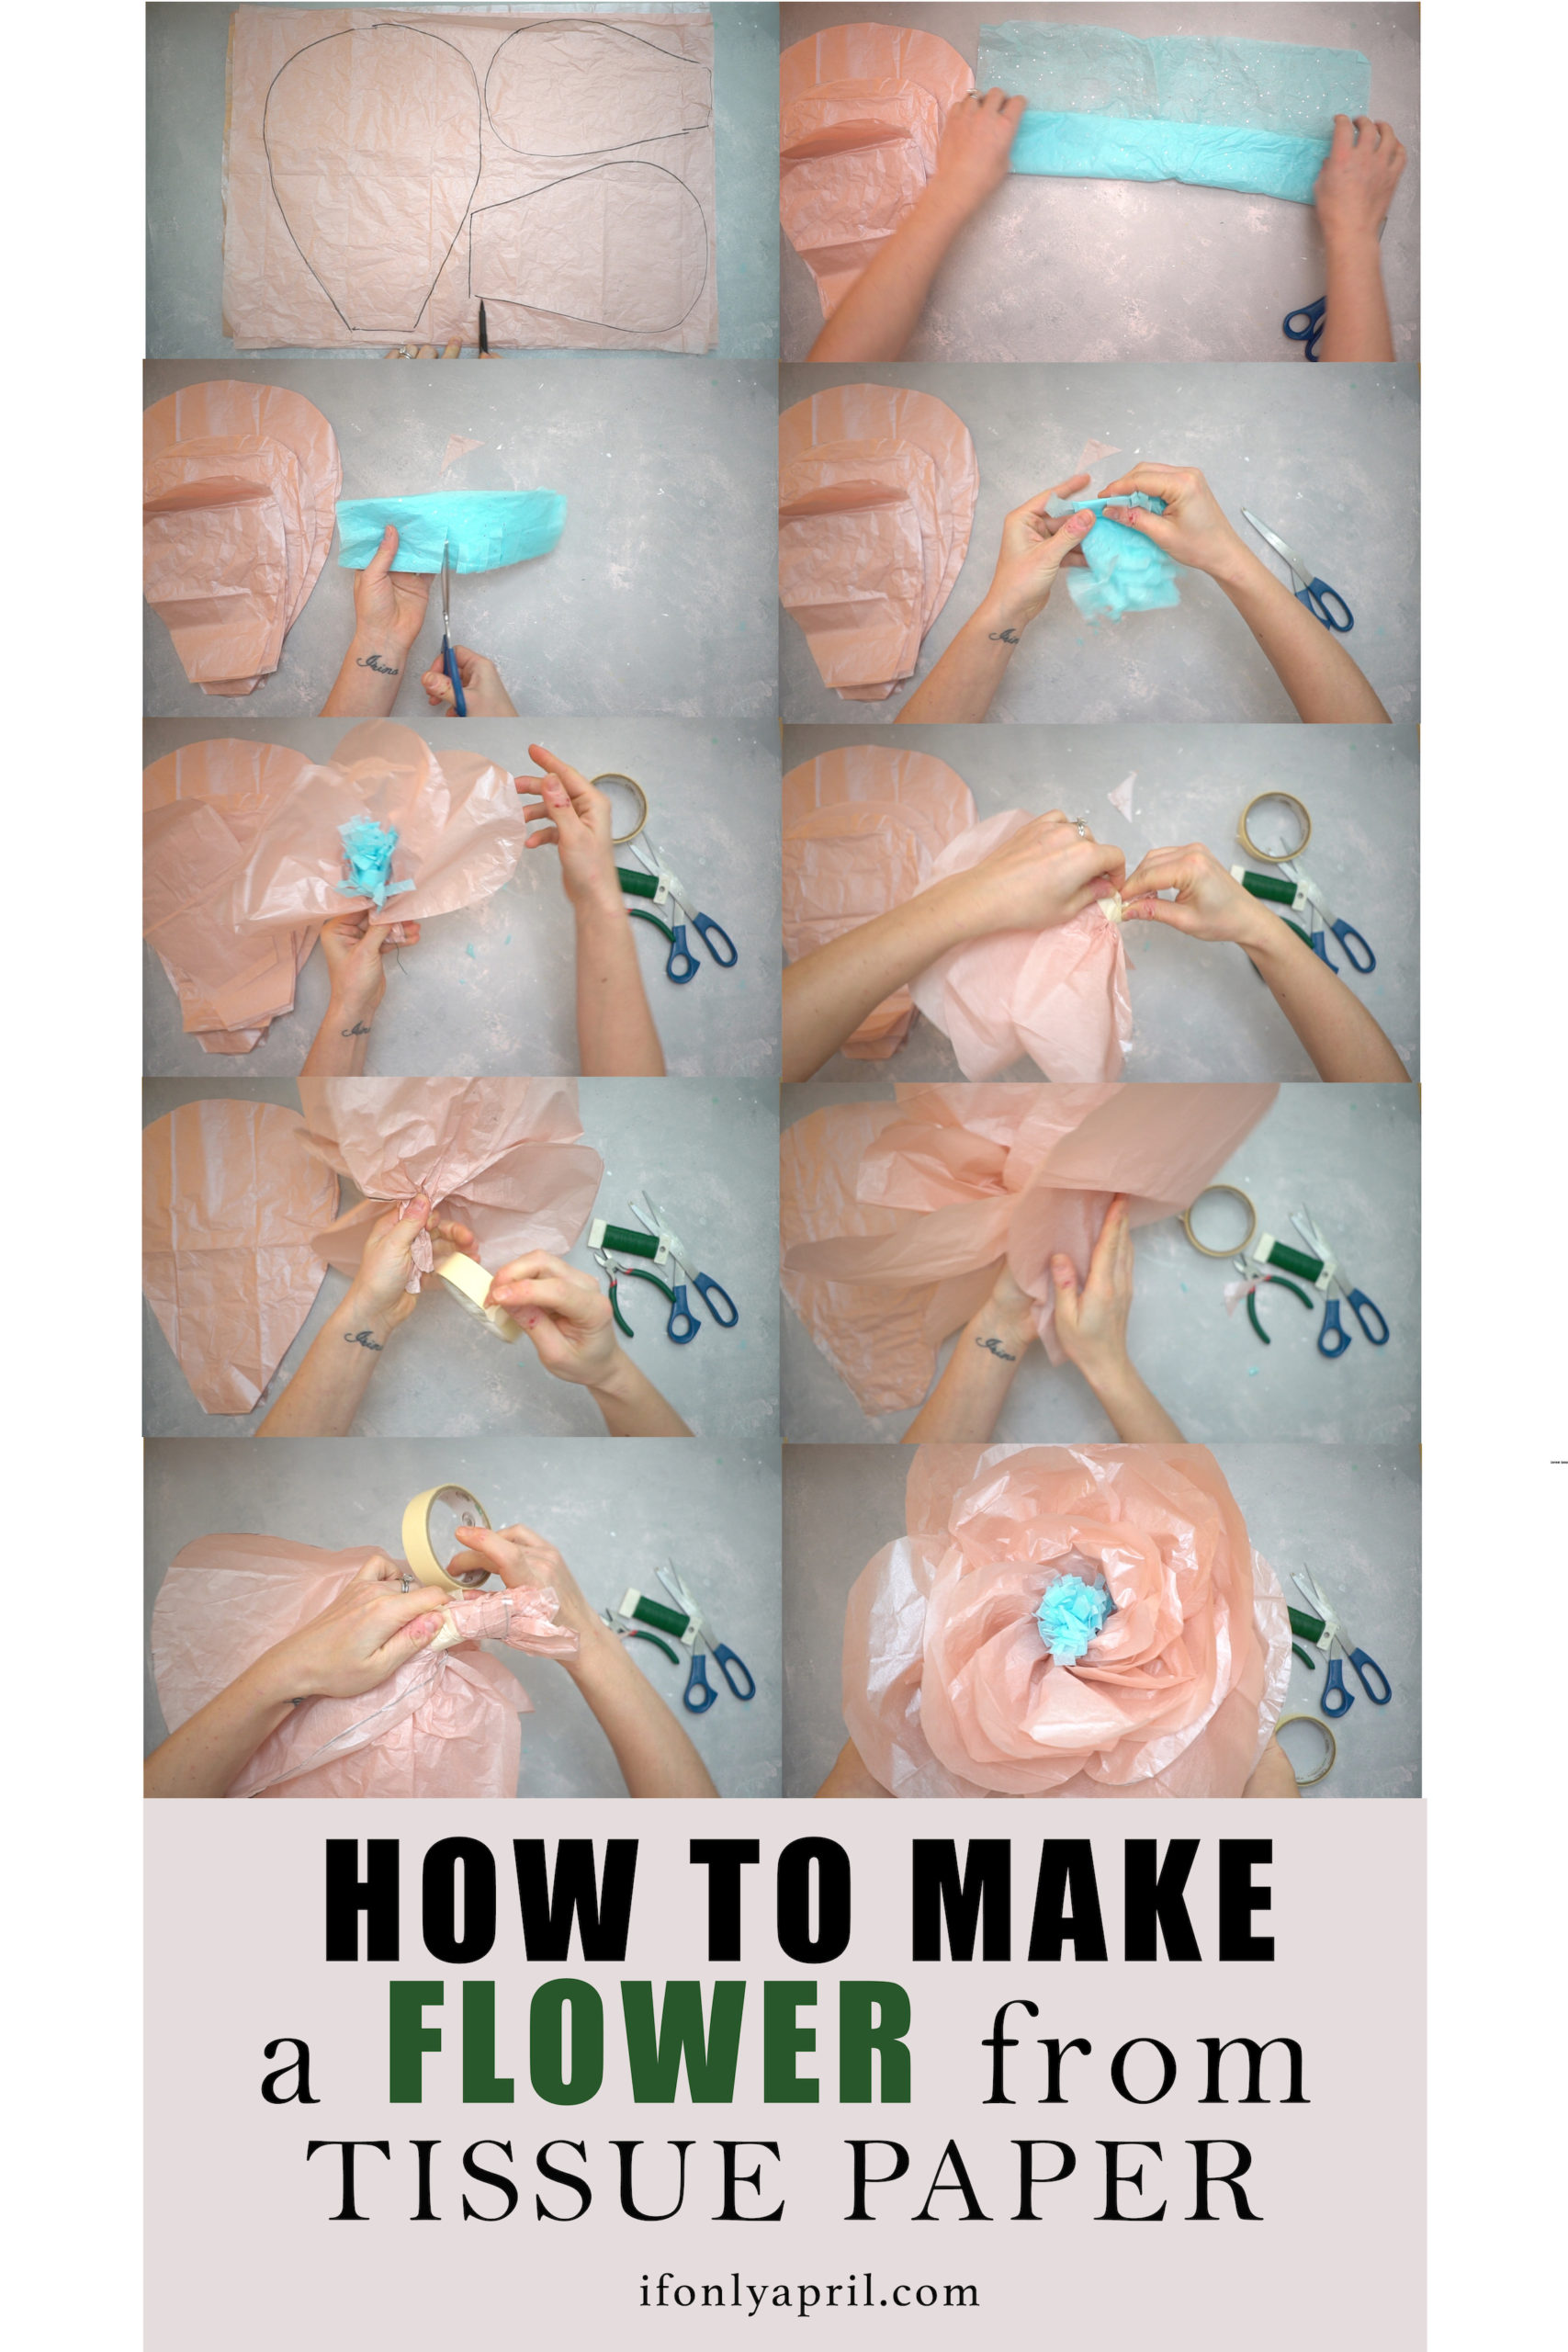
- Unfold your tissue paper.
- Draw 3 petals (in 3 different sizes)
- Fold together yellow tissue paper and cut it
- Wrap tissue paper with tape and flower wire on top
- Start assembling the flower from the center (smaller petals first)
- Work your way out. Secure all with tape and floral wire.
Cost: $3 for tissue paper
If you'd rather buy:
Amazon: I'm so glad I came across this store. They have the most gorgeous paper decorations. These flowers look so cute. Also, this set is super cute. Not as cute as my flower though, if you ask me ;D
Etsy: SO many gorgeous options. I like these flowers and this set!
This is the only DIY dinosaur party decoration that I actually spent money on ;D
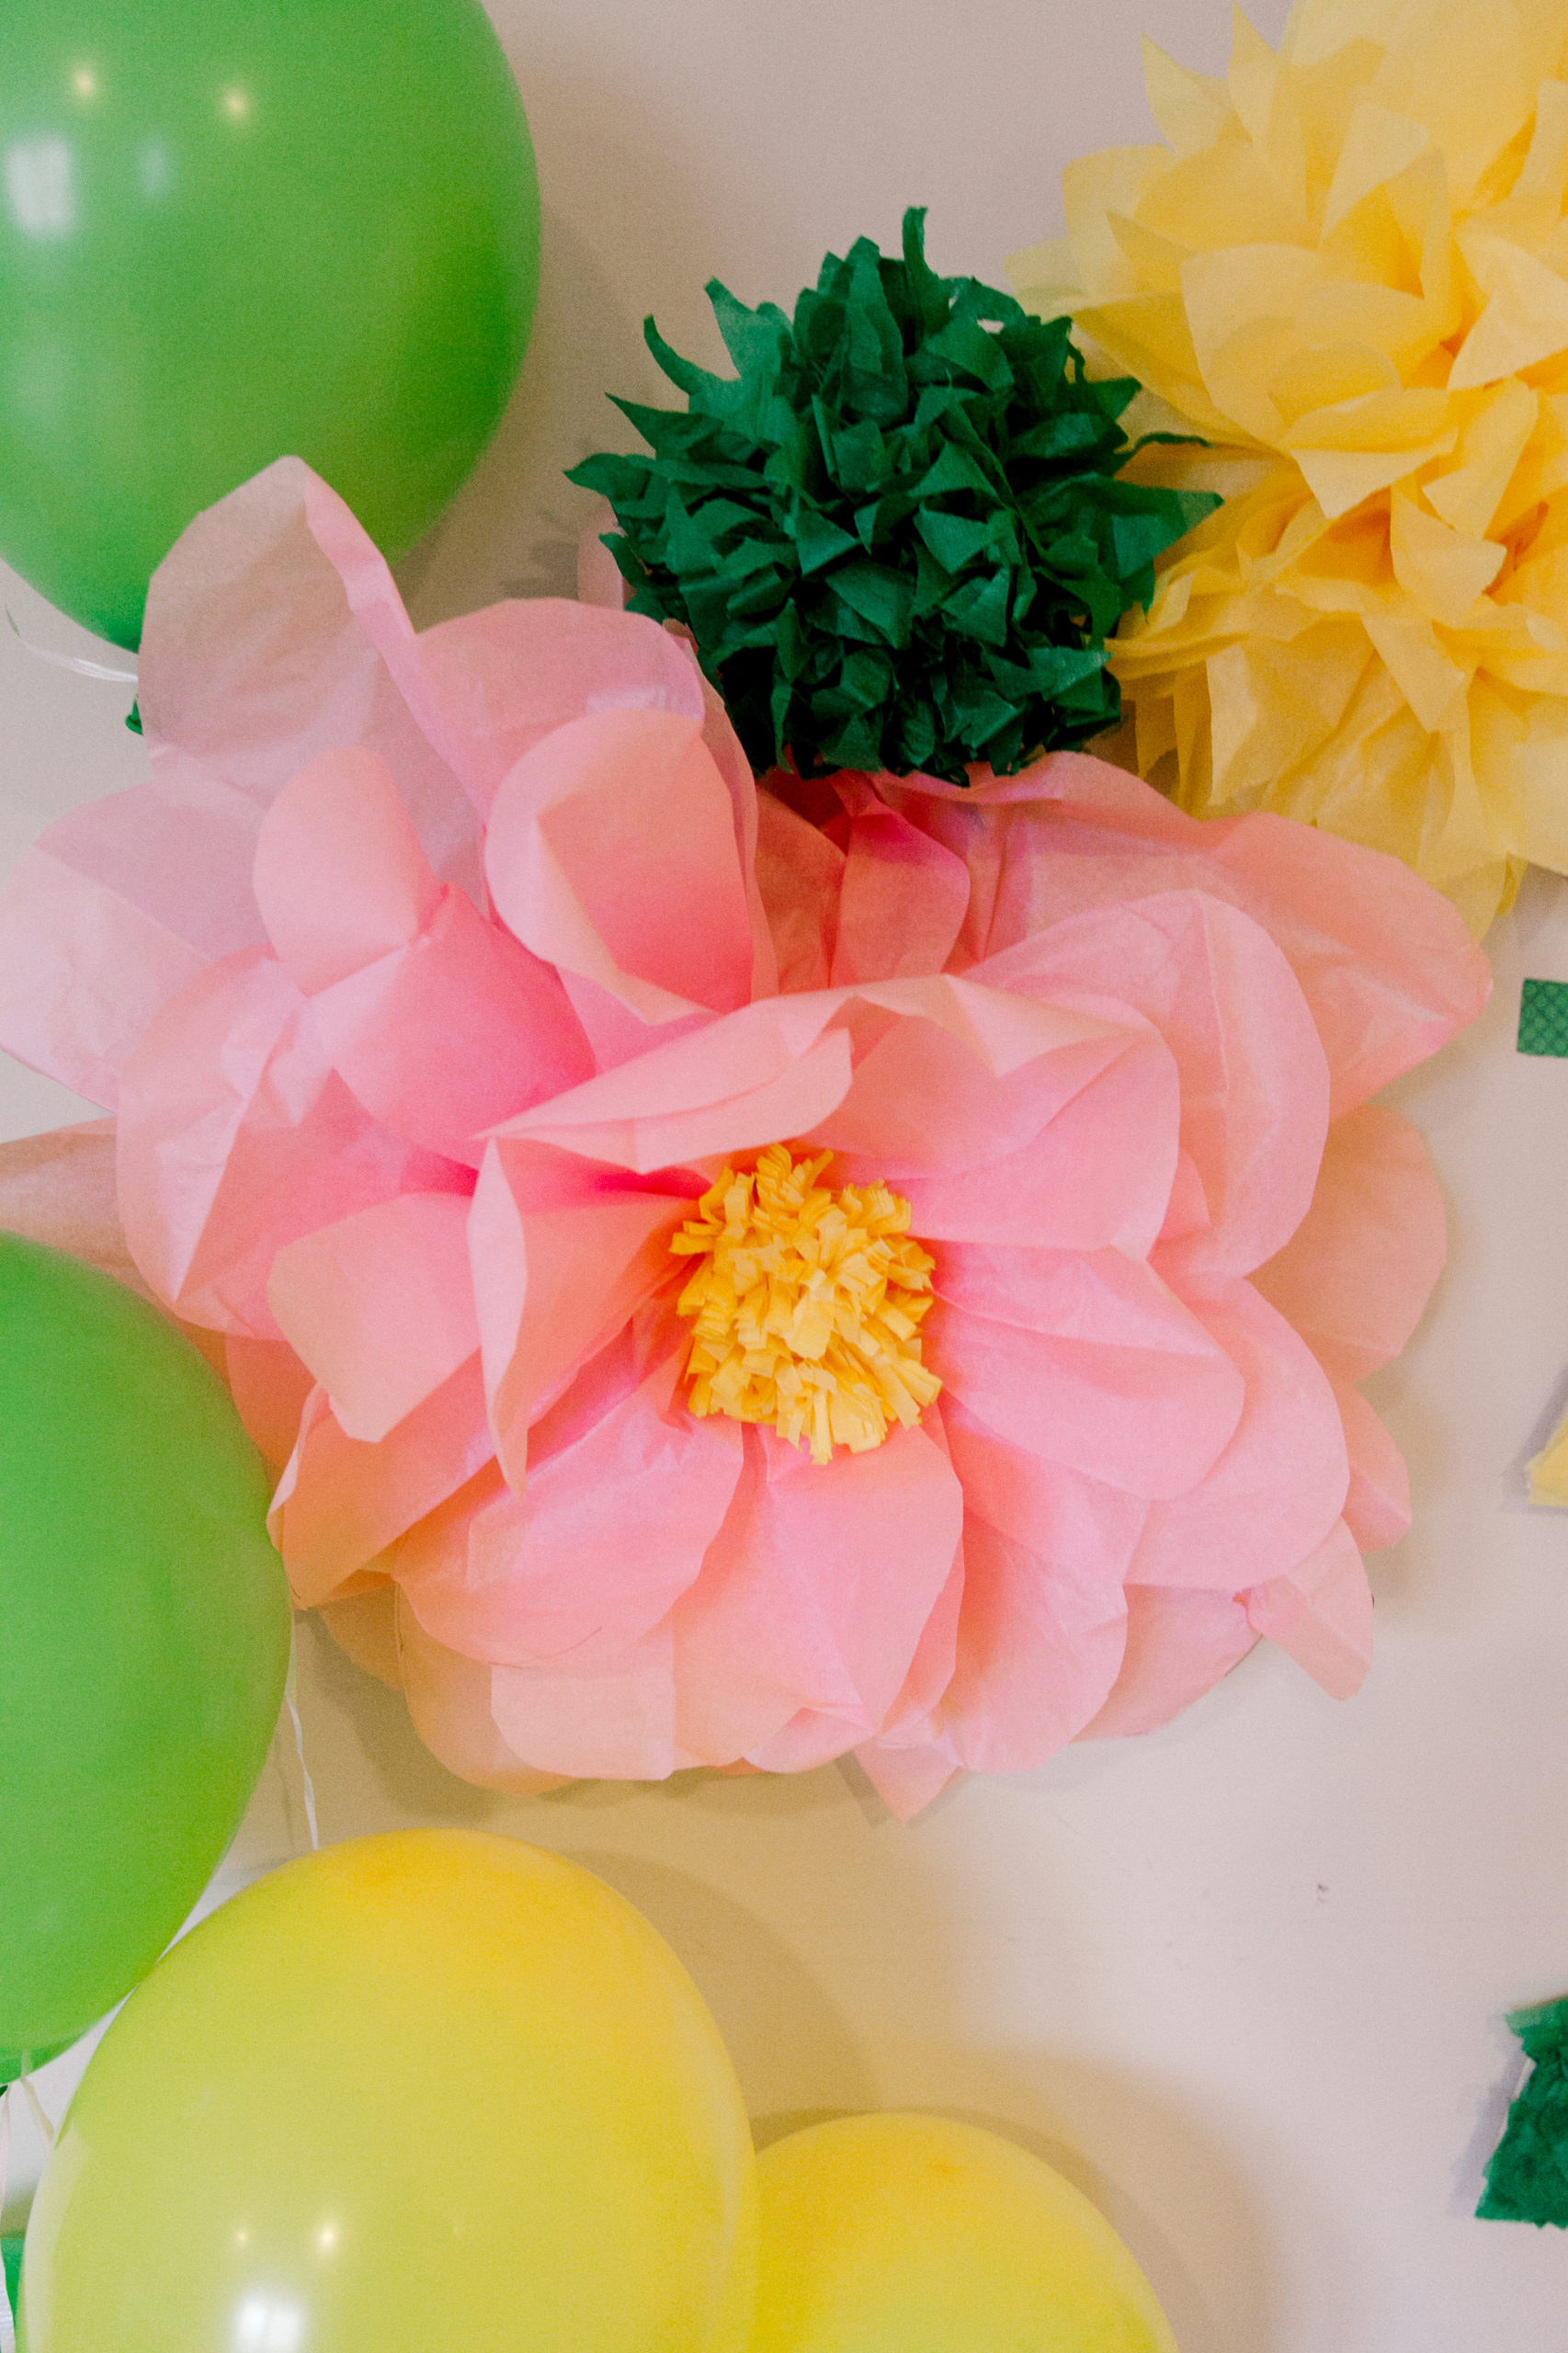
DIY TISSUE POM-POMS

You'll need:
- green and yellow tissue paper
- scissors
- fishing line
- Stick 8 tissue sheets together and make 1 ½-inch wide accordion folds, creasing with each fold.
- Fold a piece of fishing line (or flower wire) in half, and slip over center of folded tissue; tie it. With scissors, trim ends of tissue into rounded shapes. That cut will determine the shape of the flower
- Separate layers, pulling from center one at a time.
Cost: $1 each big pom-pom (I spent $2 total)
If you'd rather buy:
Amazon: this store has a lot of options in different colors. And this store offers different party packs.
Etsy: DecorInYourLife has tons of colors and affordable prices. Oh and this set from PartyPoms is an absolute winner!
"3-REX" SIGN

I made number 3 from the cardboard and leftover tissue, that I glued to the cardboard. Masking tape was used for the sides so the cardboard doesn't show through. I used three colors that gradually changed to create a more eye-pleasing effect.

The letters are from regular cardstock that I had on hand.
If you'd rather buy:
Etsy: Similar to mine here. I think I'll try this version next time.
That's all for DIY dinosaur party decorations. I hope you got some inspiration and will make some of them!
Birthday party decorations shouldn't be expensive. I spent $5 to make all of the things you see. The best part is when it's time to throw it away, I'll have zero regrets. But this probably won't happen for some time. My friend asked me to use it for her son's birthday, so it will have a longer life 😉 Win-win~!
Do you like scrolling through squares? I bet you do! Let's be friends on Instagram!
xoxo,
April
>>>>>>>>>PIN FOR LATER


Leave a Reply