

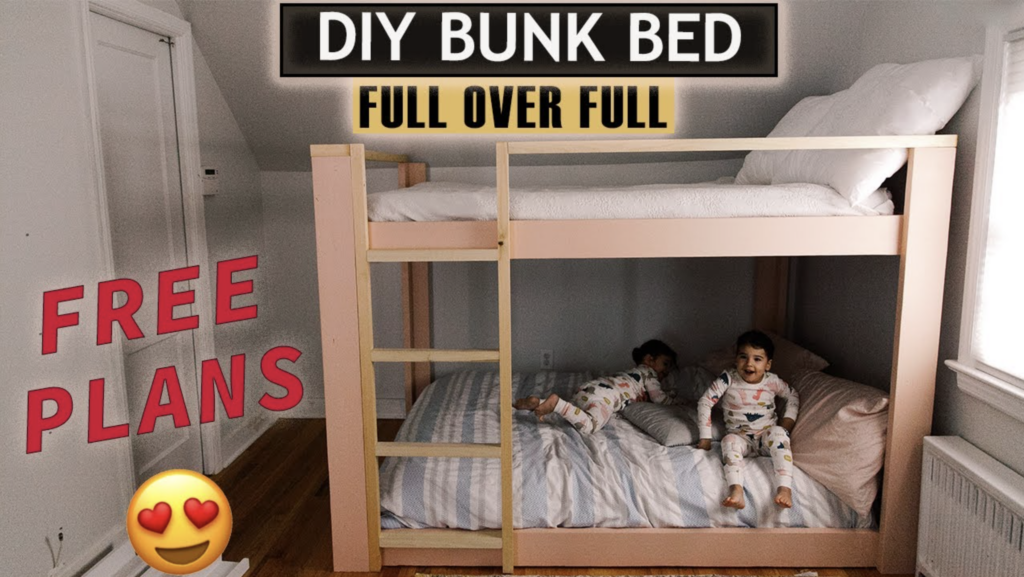
DIY full over full bunk bed is a popular choice not only among kids but also adults. It provides comfort, convenience (the perfect way to save some space) and so much fun to sleep on it.
We decided to move my two girls to the same room. Since the room isn't big, the bunk bed was an obvious choice. When I presented the idea of sleeping on the top bunk to my almost 4 years old, she was ecstatic!
She almost instantly forgot her dreamy Montessori floor house bed that I made her 2 years ago 😄 Well, that bed was truly amazing but didn't work for us anymore.
As it's a quite big build, my initial reaction was to find a free plan that I could use. To my surprise, there are not too many options of plans for DIY full over full bunk bed. Most of them are either twin or twin over full (which would be an obvious choice for kids).
As I wrote about it before, we decided to get our daughter a full-size mattress when she was transitioning from a crib to a big girl bed. Since we got a second kid, there is no way back and she also is going to get a full-size mattress 😄
So it was determined... I'm was going to build a full over full bunk bed with my plans.
If you are a visual learner and prefer to watch a video of how I made the bunk beds
Subscribe to get notifications!
Few words on design and initial steps
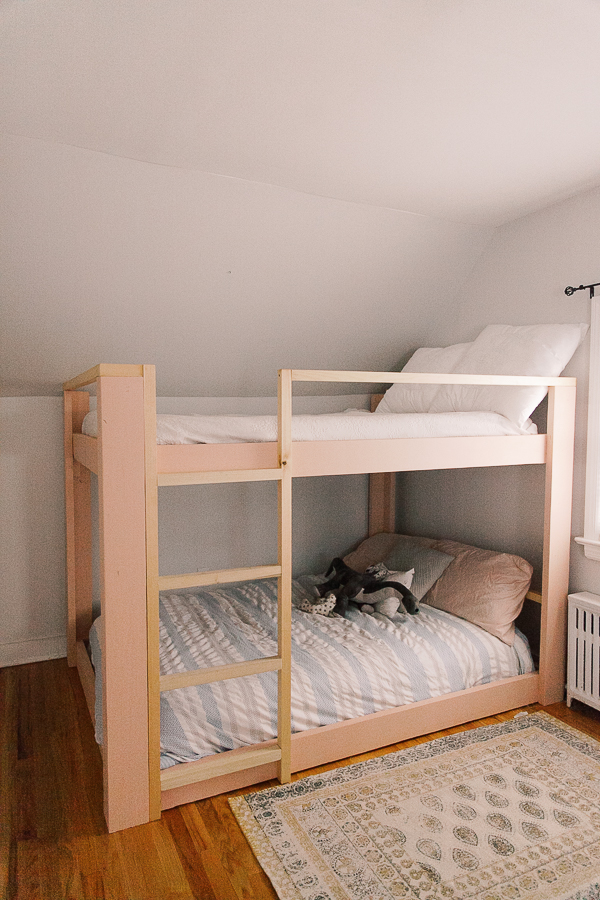
First, carefully take your measurements to make sure you've got the space for this full over full bunk bed. It's definitely not a tiny structure, but it's very sturdy and looks fantastic!
It was a bit easier for me since I already had a mattress and a bed that I could measure. But don't you worry, I've got a step-by-step tutorial and a detailed plan that you can get here.
In the end, the overall size of this bed came out to be 58"x83". It fits a full-size mattress 54"x75" and also has a few inches on the sides that make changing bed sheets easier.
Determine the height of your full over full bunk bed
We have an angled roof on the ceiling of the kids' bedroom so we had limitations, plus, I didn't want the second floor to be too high since my girl is still little. So I decided that the overall height is 59".
Since it's a full-size bed you also wouldn't want it to be too low, because it would be hard to sit on the bottom floor.

Lumber
- 6 - 2x4"x8'
- 4 - 2x6"x8'
- 4 - 2x6"x10'
- 5 - 2x2"x8
- ¾" birchwood plywood for sideboard and the roof
Materials
- wood filler
- pocket hole screws 2 ½"
- screws 2 ½"
Tools
- Miter saw (or circular saw)- for straight cuts
- table saw (in case you use construction lumber and want to cut off round edges for it to look more professional)
- drill
- Kreg Jig
- Right angle Kreg jig clamp
- Clamps
- Orbital sander
- Speed square
- Jigsaw if you would like to add a sideboard
- Level
- Spray painter (I sweat by this one)
Cost: around $150
Time: 15-24 hours
Level: Intermediate
Actual cuts
I have a detailed breakdown of actual cuts and a suggested diagram of how to use the wood in the most efficient way. You can find it in the plan here.
Instructions
Step 1. Build a bottom frame


Make pocket holes, I made 4 on each side of the shorter side of the frame. I used 2 ½" pocket holes screws. For additional security, you can also glue it together. I didn't want to do that since I made frames in the garage and wasn't sure if they fit on the staircase to the second floor (where the bedroom is).
Disclaimer: I was right in my predictions and the frame was too big to get through the stairs, so I had to partially disassemble it to get to the second floor. As you can imagine, I was very happy that I didn't glue it all together.
Attach precut sides to create a bottom frame for our full over full bunk bed. Don't forget to use a speed square to ensure a perfect 90-degree angle.
Step 2. Build a top bunk frame

Follow the first step to make an identical frame for the top bunk. When it's finished, attach the slat supports. I was debating rather add one 2x4" in the middle or two and I think it was the right choice to make 2 supports in the middle. I also added two 2x2"s on the sides to hold the slats for the mattress.
***I didn't add any slats on the bottom since our mattress for the bottom bunk is very thick -10" in height and I didn't want to take up extra space between two floors. If you are not short on the height of the ceilings (remember, I have that angled roof), then you could elevate the mattress and create slats for the bottom as well.
Step 3. Build legs

Take 2x4"s part of the leg and drill pocket holes throughout every 10". I think I made about 5-6 pocket hole screws on each leg. When you are done, attach it using pocket hole screws and glue to the 2x6"s part of the leg.
Step 4. Attach legs to the bottom frame

I used construction screws 2 ½" with a star drive head. On each leg from inside of both parts of the leg, I added about 5-6 screws. It's so sturdy, I think elephants could jump on it haha. I mean, there is no way for me to prove it but it's quite sturdy. Always check with a speed square for the right angle.

Step 5. Add scraps

Here is a fun trick. Before you position the top bunk frame onto its place, add scraps of 2x2"s to the leg to work as kind of "a stopper" for the top frame. At first, I added it 12" below the top, I set the top frame on and realized that it's too high and the mattress would be too much out. So I had to take off the frame and readjust the scraps to a 14" distance from the top.
Let me tell you, this little step saved me so much time and I did it completely by myself, no handy husband here lol Fine, to be fair my husband was watching the kids at the moment and I didn't want the whole crew coming to the room.
Step 6. Set the top bunk frame

When you are done attaching scraps, it will be a breeze to set the top bunk frame on the top. Make sure that everything is leveled and attach the frame to the legs, using construction screws. I used about 12 for each leg.
Ugh, the hardest part is over and your DIY full-over full bunk bed is almost ready, the finishing details are more of cosmetics, but the structure itself is done at this point.
Step 7. Add slats for the mattress

After you put the top bunk on top of the scraps, you need to add slats for the mattress on the top. I had wood from our Montessori floor house bed and used 2x3s that I ripped in half to make slats out of it.
I added 10 slats - 1x3s, approximately 7 inches apart from each other. If you want to save money, I think it would be cheaper to buy a plywood sheet and rip it to create slats. Or you can also just put a hole plywood sheet on top.
Step 8. Add ladder and rails
Can I admit you something? The designing process of this bunk bed took a while because I couldn't decide whether I want the ladder to be on the front or on the side. Yep, such a small detail was stopping me from starting. But I'm glad that I started making this bed. As soon as the structure was finished, I took a look at the bed and it was obvious that the ladder should go on the front. Phew! I feel that sometimes with any project you just need to start and then inspiration will come to you! lol, That never-ending debate of what comes first - inspiration or motivation! 😀

When the design was clear to me, I cut two 2x2"s @ 59" and created a ladder with 16" steps. To make the ladder, find a flat space on the floor next to the wall and assemble the ladder with screws and glue. Don't want to sound like a parrot, but don't forget to use a speed square to make a perfect 90-degree angle.
To attach the ladder, I used screws and drove them from the inside out.
When the ladder was ready, I measured the top of this full over full bunk bed and added 2x2"s around it. I didn't use a plank on the back since I didn't want the bed to be too far from the wall. The wall would stop my kid from falling off the bed anyway.
PIN IT FOR LATER

Step 9. Prep your DIY full over full bunk bed for painting
When the bed was done, I patched all visible holes with wood filler, here is my favorite wood filler.
I let it dry overnight. And honestly, I was too tired to continue anyway.
The next morning, I sanded the bed smoothly. If you can learn one thing from my experience is that try to sand all your precut wood in the garage before assembly. The room got so dusty, and it was really a nightmare. At some point I said - that's enough - even though it could use a bit more sanding. But oh well, we are not chasing perfectionism here.
I covered everything with plastic covers and spray-painted the bed. I chose "Warming peach" color by Sherwin Williams and wasn't disappointed. Their paint quality is very high. Spray painting indoors was quite an experience. This is another thing that I hopefully won't have to do again in the future.

Step 10. Adding a rainbow sideboard
When I was done with the structure I felt that I need to add some elements to it. I'm going to add a rainbow in the bottom and a house, or do you say "a roof" on the top bunk. I love this idea not only because it will look gorgeous and unique, but also since my kids go to bed very early and those decorations will create a shade from the light that comes from the window haha

It's still a work in progress, but I already finished painting a rainbow. Hopefully, it won't take me ages to add a headboard as well.
Update: it's been over a year and I still didn't get to the rainbow...


Download plans here
I created a very detailed printable plan with 3-D images and step-by-step instructions. You can download the plan here. Thank you for your support!
If you like these plans and looking for more fun furniture ideas for kids, you might like to see how I made this Sandbox picnic table, you can watch the video here.
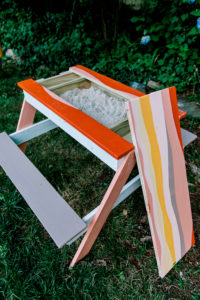
You might also like this DIY playground with a slide

You can also watch a video of how I made it HERE
Follow me on Instagram @ifonlyapril. I try to post in stories my progress and behind the scenes for all my projects.
I hope you enjoyed this blog with a tutorial on how to make a full-over full bunk bed for your kids. My kids love it! Now I need to find a way smoothly to make both of my kids sleep in the same room. haha So far it's been a constant party ;D Do you have any tips on how to transition your kids to the same room? Send it my way! 😀
xoxo, April


Have you completed a video on the remainder of the bunk beds. I was looking for the same thing...plans for full over full. I would like to make them for my grandsons and put a top on it that will allow me to make it like a canvas tent.
Hi Beth! Unfortunately, I got caught up on other projects and didn't finish the bunk beds roof yet 🙁 But I'm planning to do it in the next couple of months! I love the idea of a canvas tent!! 😉
Hi my name is Huelan
My wife wants build in full over full bunk beds with a staircase for our grandkids. Do you have any plans/blueprints for those? Thank you!
Hi Huelan! I don't have plans for that but I'll keep it in mind!
Any ballpark info on cost? Thanks! These are perfect for our girls room.
Hi Mel! I made them in the middle of pandemic when prices on wood skyrocketed. But if I'm not mistaken it was around $200 in materials
I know you didn't need them, but I think the 10 1x3s for slats should be in the lumber list. I am building my bunk bed tomorrow, so wish me luck.
Thank you for mentioning this! I added it to the plan! How's the bed turned out?
Hello, I am interested in building a bed like this but only with a twin on top, do you have any plans or idea of how to do that?
Thank you!
Hi Vanessa, I don't have plans for that but hopefully coming soon. I have a blog post 10 DIY bunk beds and there are links to other creators, including one with twin over full. I hope this helps
Ah ok, I saw that but none of them matched my style like yours did. Thanks anyways!
Any idea what the top bunk weight limit might be?
Hi Cindy, it would be hard for me to say, but it took two adults and it was fine