• Skip to primary navigation
  • Skip to main content
  • Skip to primary sidebar
If Only April
  • MEET APRIL
  • DIY PROJECTS
    • Kids projects
    • DIY furniture
    • Design plans
    • DIY holiday projects
    • Macrame
    • Transformations
    • Woodworking
  • VIDEOS
  • CONTACT
  • SHOP
    • Facebook
    • Instagram
    • Pinterest
    • YouTube
menu icon
go to homepage
search icon
Homepage link
  • MEET APRIL
  • DIY PROJECTS
    • Kids projects
    • DIY furniture
    • Design plans
    • DIY holiday projects
    • Macrame
    • Transformations
    • Woodworking
  • VIDEOS
  • CONTACT
  • SHOP
ร—

Simple DIY bohemian fall wreath

Please note, that some of the links below are affiliate links and I will earn a commission if you purchase through those links (at no additional cost to you). Thanks for your support this way.

FacebookPinPrintEmail

Did you know the origin of wreaths? While making my simple bohemian fall wreath it got me wondering where this tradition came from.

For Christians and particularly during Christmas time the wreath has a meaning of faith. Originally they were made for festive occasions and on holy days. Wikipedia says that " Wreaths originally were made for use with pagan rituals in Europe, and were associated with the changing seasons and fertility."

So let's celebrate the change of seasons and new beginnings and make a fall wreath!

I'm not a wreath expert and this is probably the third wreath I've ever made. But I feel that if you want to make an asymmetrical wreath you should stick to the rule of โ…“. Where โ…“ of the hoop is covered and 2 parts are left untouched.

That's just my personal take on it. Of course, you can do whatever you want ๐Ÿ˜

For this simple bohemian fall wreath, I used a mix of dried real grass (pampas, wheat) and some fake stems. I think if you make a wreath from all faux stems it will look fake. But this is my personal preference, so you do you๐Ÿ˜

I used the hoop from my advent calendar that I made last year and just couldn't leave behind the half-moon macrame that I made for it. If you'd like to make the same one, you can find it on my blog here or watch a video tutorial on my YouTube channel.

simple bohemian fall wreath

Materials

  • Dried pampas grass
  • Dried wheat stems
  • Faux stems
  • Faux pumpkins
  • Golden hoop
  • Flower wire

Cost: $10

Difficulty: beginner

Time: 30 minutes

Instructions

Step 1. Gather your materials

As I mentioned before, if I can't make a wreath from real flowers/grass, I like to mix it with some faux stems. So get together all your materials and see which stems you like. I went for dry pampas (that I picked up from the side of the highway๐Ÿ™ˆ๐Ÿ˜‚ - follow me on Instagram to see stories like that), dry wheat (I got it from Michaels - probably could find it in the field lol), and some faux small yellow flowers and faux pumpkins.

I like to use dry grass and faux florals

Step 2. Arrange the base

For the base, I like to lay down the bigger stems. In this case, it was pampas stems.

I found the center (which was the center of the half-moon macrame) and laid down pampas grass from both sides, going from largest to smaller.

Make your way from the center to both sides, laying down pampas grass. This will be the base that you'll be working with.

Attach them to the hoop using flower wire.

I used pampas grass for the base

Step 3. Add on smaller flower arrangements

Next in line was dry wheat stems that I picked up from Michaels.

I arranged them here and there and also attached them with the floral wire. At this point, I was attaching each stem with a wire separately.

Next, I moved to my faux yellow stems that in my opinion made this wreath more cheerful.

Cut a few stems and wrap them together with floral wire. Attach to the wreath.

At this point, you'll get a lot of long stems hanging out. Simply cut them with floral scissors and move on to the next step.

PIN IT TO MAKE LATER

simple bohemian fall wreath

Step 4. Cover the center

At this point, you have all the floral wires exposed in the center. You have a few options to cover them.

First, get another pampas grass and attach it to the middle.

Another one would be to add a ribbon.

Or, you can add embellishment. That's what I did and added small faux pumpkins in the middle. I think they look so cute and bring the cheer of fall!

I absolutely love the way it looks! What do you think about this simple bohemian fall wreath?

simple bohemian fall wreath

Watch a video tutorial how to make this simple fall wreath

Watch it here

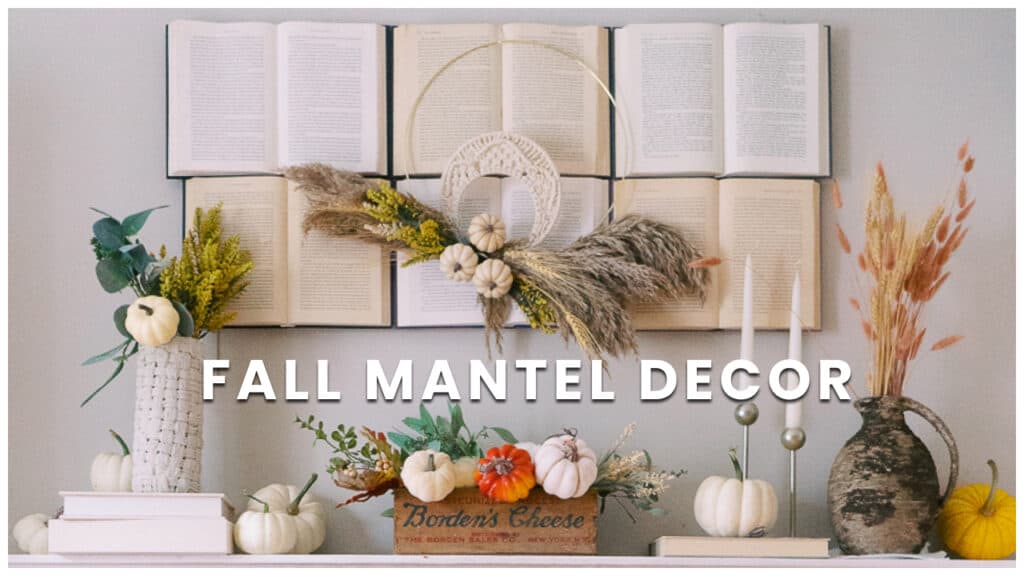
Here is my DIY fall mantel decor set up from the last year ๐Ÿ˜‰

Which one do you like better?

xoxo,

April

« Practical studio/office makeover on a budget
Trendy 2021 decor - DIY mud-covered vase that you need to try to make »
FacebookPinPrintEmail

Primary Sidebar

Hi, I'm April! I love woodworking and making things! I hope you will stay for a while and get inspired to make something!

More about me โ†’

Popular

  • 5 Simple Mistakes To Avoid Getting Into DIY
  • How to DIY a gold Parisian mirror frame
  • How to make a Montessori floor house bed (full size)
  • 12 IKEA Alex drawer hacks that will inspire you (must see)

ifonlyapril

DIY Lifestyle Mom | ๐Ÿ“CT
New week, new build๐Ÿ˜Š I was so excited to replic New week, new build๐Ÿ˜Š I was so excited to replicate my first build ever that I made 3 years ago for one wonderful girl this week.

Plans are available on my blog ๐Ÿ˜Š
#ifonlyapril_diy #diyfloorbed
A friend of mine today told me that as a "not a DI A friend of mine today told me that as a "not a DIYer" she can't fully appreciate what I did to this closet. To her it doesn't feel like this transformation is so magical. 

So my DIYer friends, let's take a moment and appreciate what I did with this closet!! 
Swipe to see the "before"๐Ÿ™ˆ
#diymakeover #diyclosetmakeover #ifonlyapril_diy #diyyoutuber
Christmas decor video is live on YouTube ๐ŸŽ„ Swi Christmas decor video is live on YouTube ๐ŸŽ„

Swipe to see my almost successful experiment with epoxy and wooden rounds๐Ÿ˜„ watch the video to see what went wrong and how I think you could fix it. 
Details are on the blog and YouTube.
#diychristmas #diychristmaswreath #diychristmasdecor #christmaswithapril
This year I decided to update our stocking holder This year I decided to update our stocking holder and create this beautiful village.

The problem occurred when I couldn't decide how to finish it - to leave the wood as is or paint cute details in traditional Christmas colors.

So I made both ๐Ÿ˜
Which one would you choose?

Find full tutorial on the blog and YouTube.

#diychristmasdecor #diychristmas #diyyoutuber #christmaswithapril
Guess what?๐Ÿ˜๐Ÿ”ฅ It only took me about 6 month Guess what?๐Ÿ˜๐Ÿ”ฅ

It only took me about 6 months but I finished the playroom! ๐ŸŽ‰๐ŸŽ‰๐ŸŽ‰

EVERY piece of furniture is made by me over the course of last 6 months๐Ÿ˜ and decor tooโ˜บ๏ธ are you excited to see it?

I'm so excited! There are no words to describe it! 
The reveal will be on YouTube tomorrow at 10am est. Subscribe and turn on notifications to not miss it!!! It's epic!๐Ÿ˜๐Ÿ”ฅ 
#diymakeover #playroommakeover #ifonlyapril_makeover
NEW video is live on YouTube ๐ŸŽ‰ Last week I mad NEW video is live on YouTube ๐ŸŽ‰

Last week I made this Pottery Barn inspired bulletin board and I'm in love๐Ÿ˜ it turned out so much better than I imagined๐Ÿ˜
Read about all the details and material list on the blog.

And now to the real question - should I put it in the kids playroom (as intended) or keep it to myself?๐Ÿ˜๐Ÿค”

#ifonlyapril_diy #makersgonnamake #makersofinstagram #diyhomedecor
Witch wears Louboutin ๐Ÿ˜‚๐Ÿ‘ป @louboutinworld #d Witch wears Louboutin ๐Ÿ˜‚๐Ÿ‘ป

@louboutinworld #diyhalloweendecor #diyhomedecor #diyhalloween
Oh my! If someone told me 2 years ago when I just Oh my! If someone told me 2 years ago when I just picked up some power tools that eventually I'll be able to make drawers I'd think they were joking!!
But here we are! This day came when I can proudly say that I built a desk with DRAWERS!!! 

I was so so intimidated by drawers that I felt I'd never be able to make them.

Well, here we are! I'm presenting my new furniture design - kids desk with flutted drawers โ˜บ๏ธ

Watch my kids reaction in stories :) and official video will come live to YouTube on Monday. ๐Ÿ˜Š

Plans will be available in 2 weeks on the blog. Since I'm traveling ๐Ÿ˜… watch stories for that too!
Kisses ๐Ÿ˜˜๐Ÿ˜˜๐Ÿ˜˜

#diydesk #diykidsdesk #diyprojects #ifonlyapril_diy #makersgonnamake #ryobitools #diyfurniture #trendyfurniture #girlsehobuild
Load More... Follow on Instagram

Footer

โ†‘ back to top

About

  • Disclaimer

Newsletter

  • Sign Up! for emails and updates

Contact

  • Contact
  • Media Kit

As an Amazon Associate, I earn from qualifying purchases.

Copyright ยฉ IfOnlyApril 2022

Share this ArticleLike this article? Email it to a friend!

Email sent!