

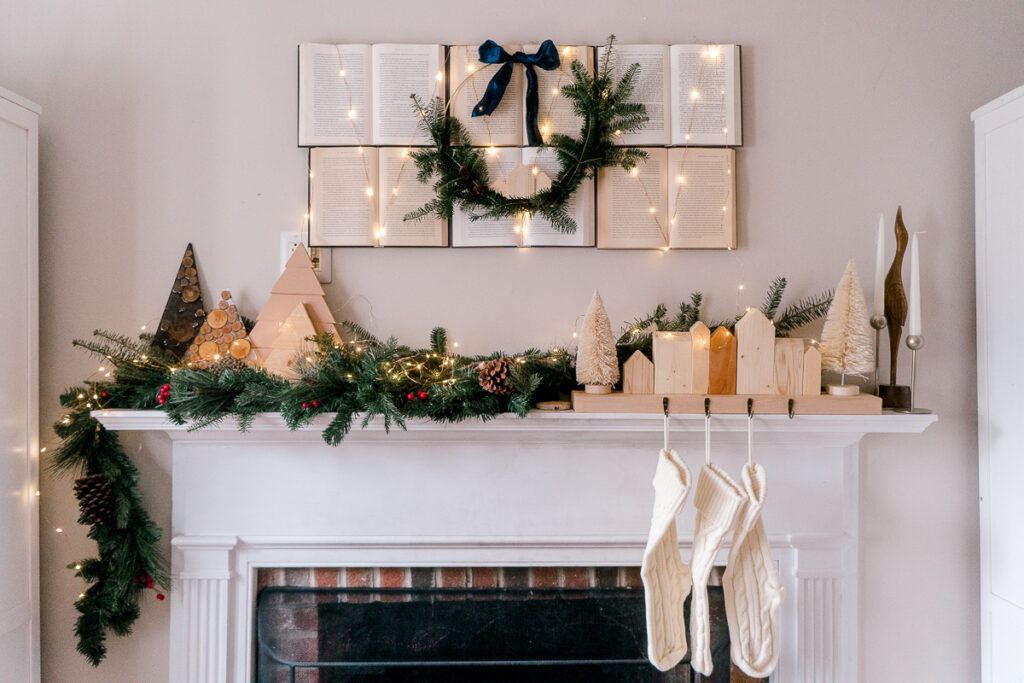
Few years back I made my first ever Christmas wreath. It was made completely from natural materials and even the base was made out of flexible twigs. For Christmas 2021 I decided to make a DIY asymmetrical Christmas wreath using a golden loop.

And I absolutely love how it turned out! It's simple yet beautiful!
I mixed up natural greenery with artificial and added small wooden houses to it. I think I'll keep it till next year but will paint the houses with details.
There are plenty of gorgeous Christmas wreaths on the market, but what's the point to spend all the money if you can make one for less than $10?
So let me show you how easy it is to make a DIY asymmetrical Christmas wreath.
Related:
Types of asymmetrical wreaths
Let's talk a bit about balance. Perhaps everyone read about the rule of thirds. Preferably you want your wreath to follow that rule. Either ⅓ or ⅔ of the loop should be covered if you are going for an asymmetrical type.
The center can be on either one side, on the bottom, or on the top if you feel adventurous enough.
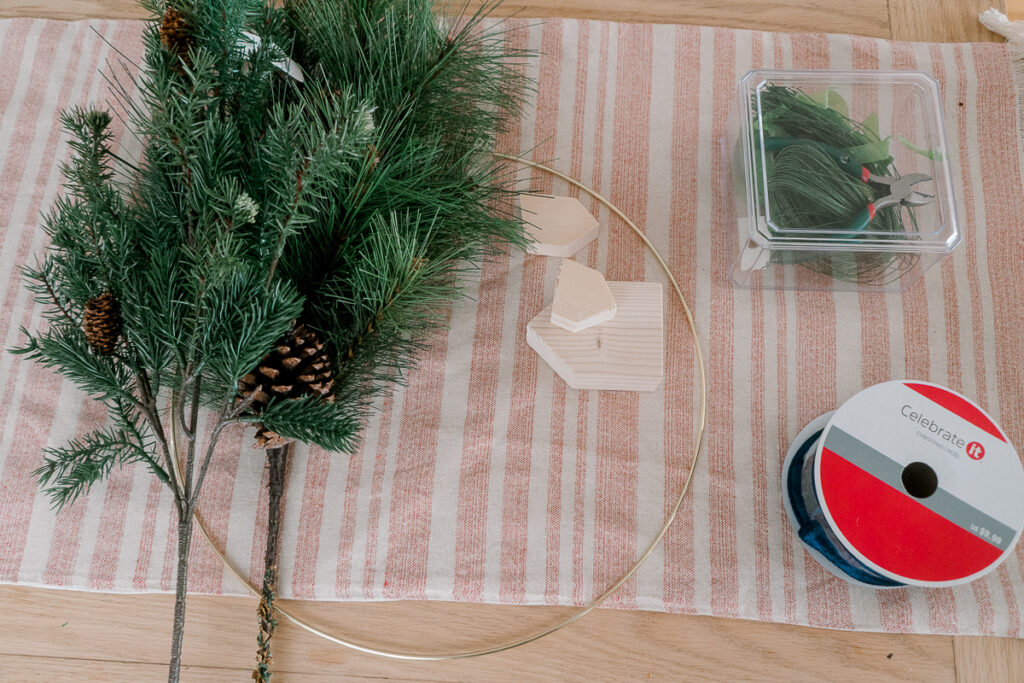
Materials
- Golden floral hoop
- Artificial evergreen
- Natural evergreen branch (you can use the bottom branches from the Christmas tree)
- Scrap wood
- Flower wire
- Hot glue gun
- Pretty bow (I chose velvet blue but you can make it more festive)
I have a video tutorial of this DIY project on my YouTube here, in case I won't explain it with words well enough haha

Instructions:
Step 1. Prepare materials
Take the real and faux branches and break them down into smaller ones.
An asymmetrical wreath means it is not covered all the way around, but only a part of the loop.
Find the visual center where the branches would meet. In my case, it is in the center on the bottom.
Then take a floral wire, and start adding branches to the loop going in one direction. I've written about that before - to make a wreath look more balanced, start with bigger branches and add smaller ones on top.
After you add larger branches to the loop, start going in a different direction. When you finish with the first layer, add smaller branches on top.
Try to cover a flower wire under the branches, but having a green wire would work in your favor in this case.
I find using different textured branches also helps to create an interesting visual effect.
PIN IT TO MAKE FOR CHRISTMAS

Step 2. Add houses
I used scraps from 1x3" and 1x2". The middle house has a straight bottom and goes in the middle. Houses next to it have a 30-degree angle on the bottom to help with the direction for the loop.
I simply cut it using my miter saw and attached it to the loop with a hot glue gun.
I didn't have much faith in it that it would work, but to my surprise it did. And I couldn't be happier. I clearly underestimated the power of a hot glue gun haha
Step 3. Finishing details

Make sure that there are no wires sticking around.
And attach a bow on the top. There are some fun tutorials on YouTube on how to make a perfect bow.
What do you think about this wreath? I think it looks fabulous and might keep it till next year. Of course, if the evergreen will survive.


If you'd still rather buy, here are some gorgeous wreaths I found online.


Leave a Reply