• Skip to primary navigation
  • Skip to main content
  • Skip to primary sidebar
If Only April
  • MEET APRIL
  • DIY PROJECTS
    • Kids projects
    • DIY furniture
    • Design plans
    • DIY holiday projects
    • Macrame
    • Transformations
    • Woodworking
  • Home improvement
  • VIDEOS
  • CONTACT
  • SHOP
    • Amazon
    • Etsy
    • Facebook
    • Instagram
    • Pinterest
    • YouTube
menu icon
go to homepage
search icon
Homepage link
  • MEET APRIL
  • DIY PROJECTS
    • Kids projects
    • DIY furniture
    • Design plans
    • DIY holiday projects
    • Macrame
    • Transformations
    • Woodworking
  • Home improvement
  • VIDEOS
  • CONTACT
  • SHOP
    • Amazon
    • Etsy
    • Facebook
    • Instagram
    • Pinterest
    • YouTube
×
Home » DIY ottoman for a sectional sofa

DIY ottoman for a sectional sofa

Please note, that some of the links below are affiliate links and I will earn a commission if you purchase through those links (at no additional cost to you). Thanks for your support this way.

FacebookPinPrintEmail

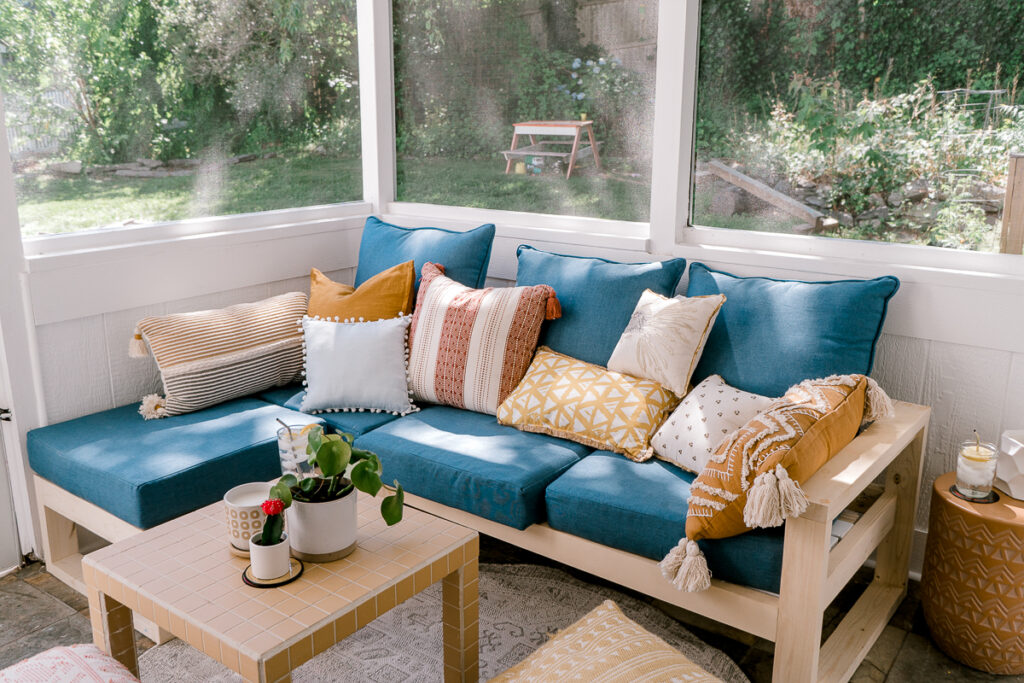
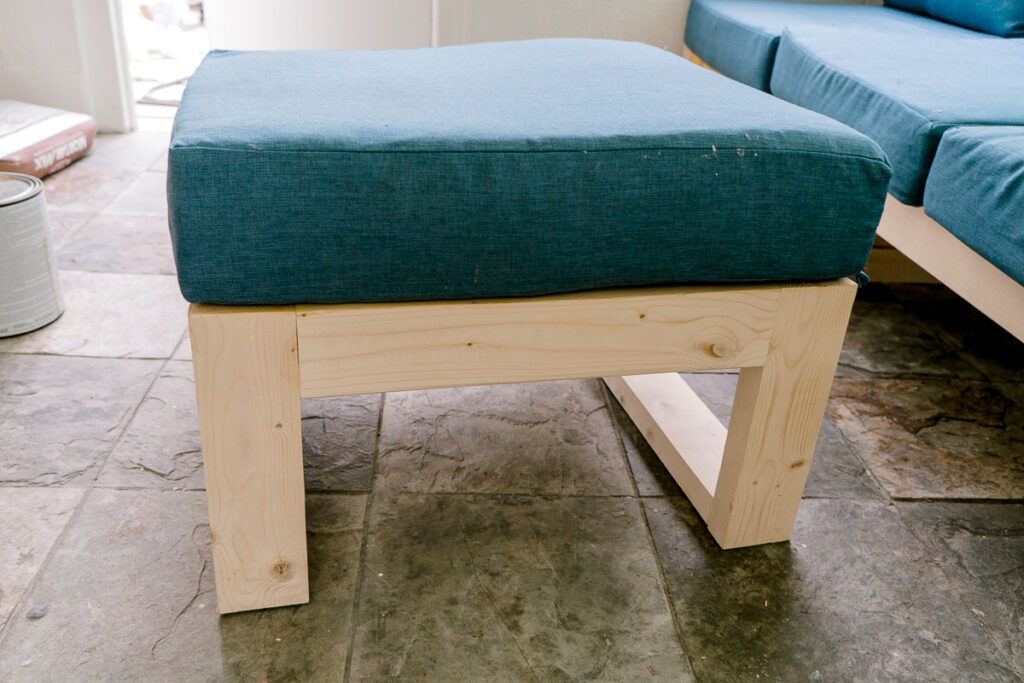
We already built a one-armed sofa and a corner unit for our outdoor sectional sofa and today I'll show you how to make the easiest and most straightforward from them all - a DIY ottoman.

If you are new here, you can read about my patio makeover here and about the outdoor sectional sofa.

Materials

  • 2 ½" galvanized screws
  • 2 ½" pocket hole screws
  • wood glue
  • sanding discs (80, 160, 220 grit)

Tools

  • Miter saw
  • Kreg jig (optional)
  • Power drill
  • Speed square
  • Sander
diy outdoor sectional sofa from 2x4s

How to make a DIY ottoman for a modular sofa

Step 1 - cut and assemble the sides

In this step, we need to make two identical sides for the ottoman.

Instructions for one side are below:

Cut two 2x4"s at 12", one at 21" and one at 24".

Attach them together using pocket holes. Use wood glue and make sure that it's square during assembly.

Step 2 - connect the sides

Cut two 2x4"s at 27 ½" and attach them to sides with Kreg jig pocket holes. As always, use wood glue to attach them together.

Step 3 - Add brackets for slats

Cut two 2x2"s at 21" and attach them to sides with wood glue and screws.

Step 4 - add slats

Lay down slats and attach them with screws. I used 2x3"s for the slats and covered the whole ottoman but you can leave spacing the same as on the one-armed sofa and corner unit. Up to you.

To see dimensions, cut list, and lumber list you can download a printable PDF plan from my shop.

xoxo,

April

Share this:

  • Tweet
  • Print

More Woodworking projects

  • 10 Beautiful DIY Montessori Floor House Beds That Your Kid Will Love {FREE Plans}
  • Fantastic DIY backyard playground {with FREE plans}
  • 10 diy ladder shelves with free plans
    10+ DIY Ladder Shelves to Enhance your Home Decor
  • How to make a stretcher for painting the easy way
FacebookPinPrintEmail

Primary Sidebar

Hi, I'm April! I love woodworking and making things! I hope you will stay and get inspired to create something!

More about me →

Popular

  • Sasha's Fabulous Bedroom Makeover Revealed! (+ budget breakdown)
  • Kid's play office mood board
  • How to make an Anthropologie "Enchanted" dresser dupe
  • How to shop an online auction successfully

Footer

↑ back to top

About

  • Disclaimer

Newsletter

  • Sign Up! for emails and updates

Contact

  • Contact
  • Media Kit

As an Amazon Associate, I earn from qualifying purchases.

Copyright © IfOnlyApril 2024