• Skip to primary navigation
  • Skip to main content
  • Skip to primary sidebar
If Only April
  • MEET APRIL
  • DIY PROJECTS
    • Kids projects
    • DIY furniture
    • Design plans
    • DIY holiday projects
    • Macrame
    • Transformations
    • Woodworking
  • VIDEOS
  • CONTACT
  • SHOP
    • Facebook
    • Instagram
    • Pinterest
    • YouTube
menu icon
go to homepage
search icon
Homepage link
  • MEET APRIL
  • DIY PROJECTS
    • Kids projects
    • DIY furniture
    • Design plans
    • DIY holiday projects
    • Macrame
    • Transformations
    • Woodworking
  • VIDEOS
  • CONTACT
  • SHOP
×

Entryway closet makeover with practical storage ideas. From basic to the walk-in closet

Please note, that some of the links below are affiliate links and I will earn a commission if you purchase through those links (at no additional cost to you). Thanks for your support this way.

FacebookPinPrintEmail

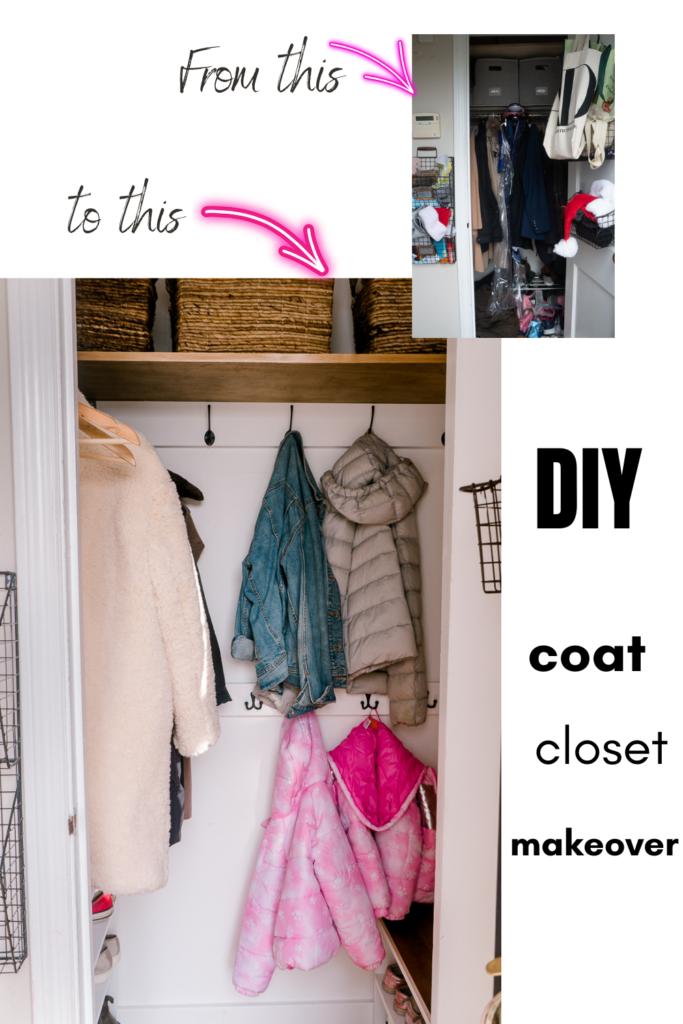
A few days before Thanksgiving I decided to make an entryway closet makeover. It was a fun process but it definitely took me longer than a few days to complete it. Haha what is it about setting unrealistic goals?

I think overall it took me 3-4 days to finish the whole closet, including waiting time on the paint between the coats. And it was so much fun to see my sketch-up plan come to life!

Related:

  • Entryway closet makeover plans
  • How to make shoe cubbies (with plans)

I already wrote about the plans for this entryway closet makeover and most of it actually went according to a plan. Besides the colors of the closet. The thing is, it's a rental house and I did this makeover for my landlady who is planning to sell the house soon. So she asked me to make it appeal to everyone. Hence the choice of white paint.

The paint I chose is the same color I painted the playroom - "whisper white" by Behr. I just love the tones, it's not too cool, not too yellow but a perfect amount of warmth.

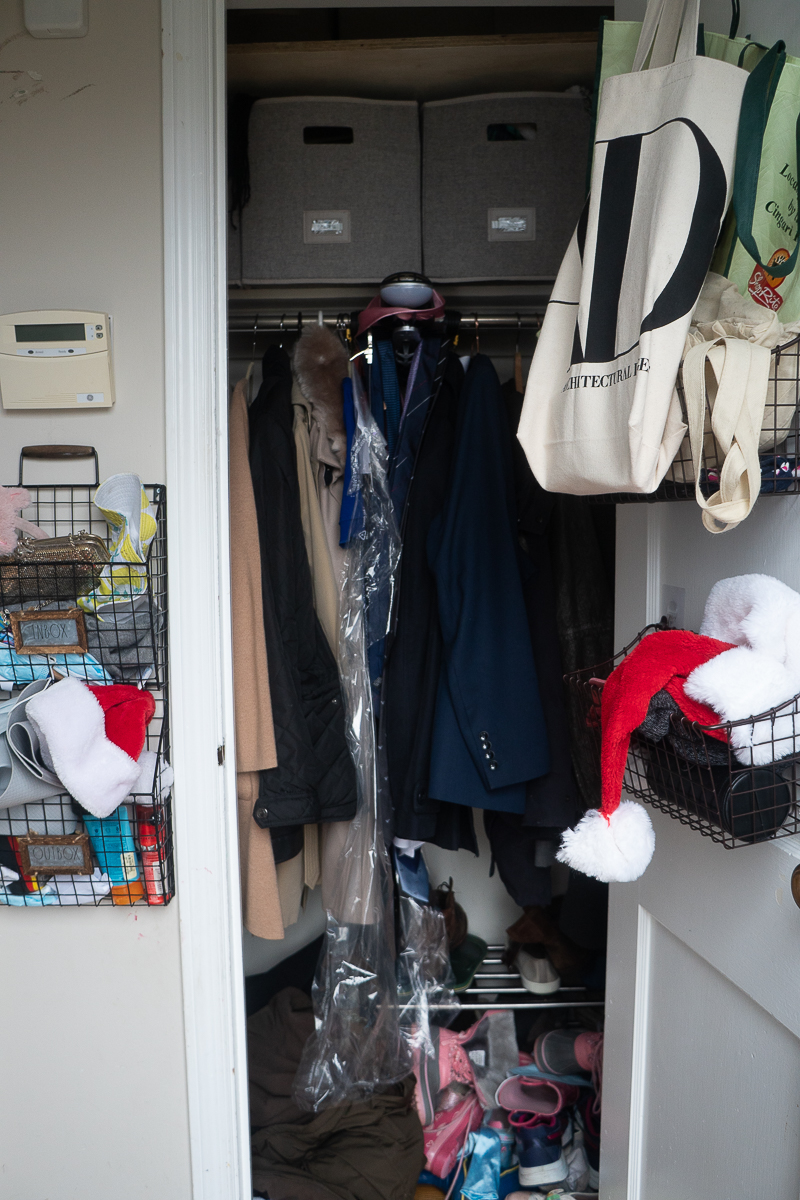
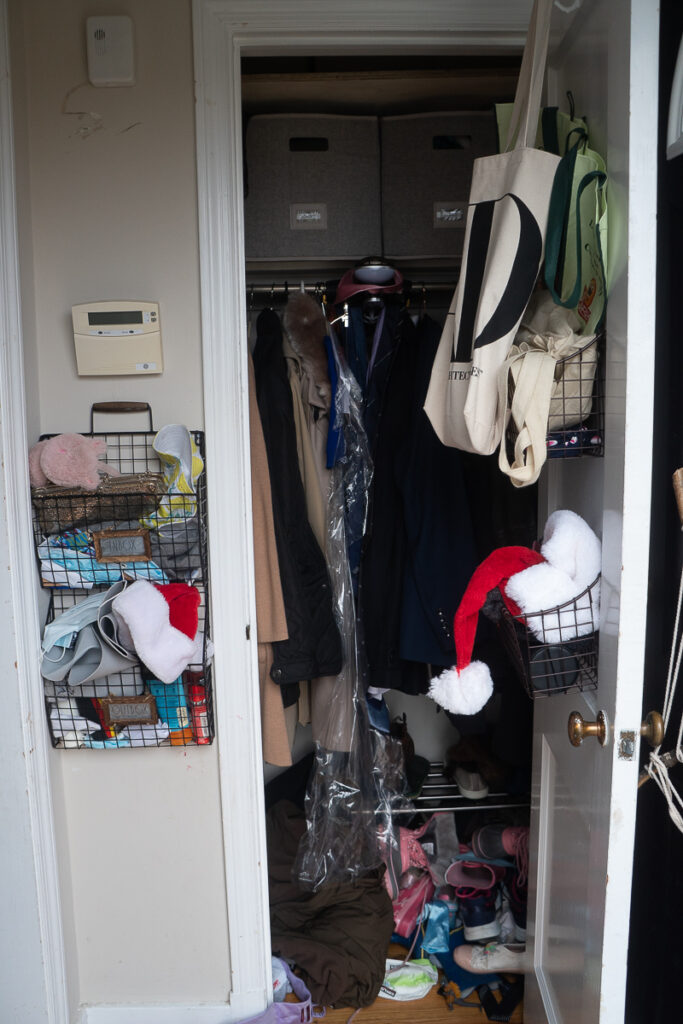
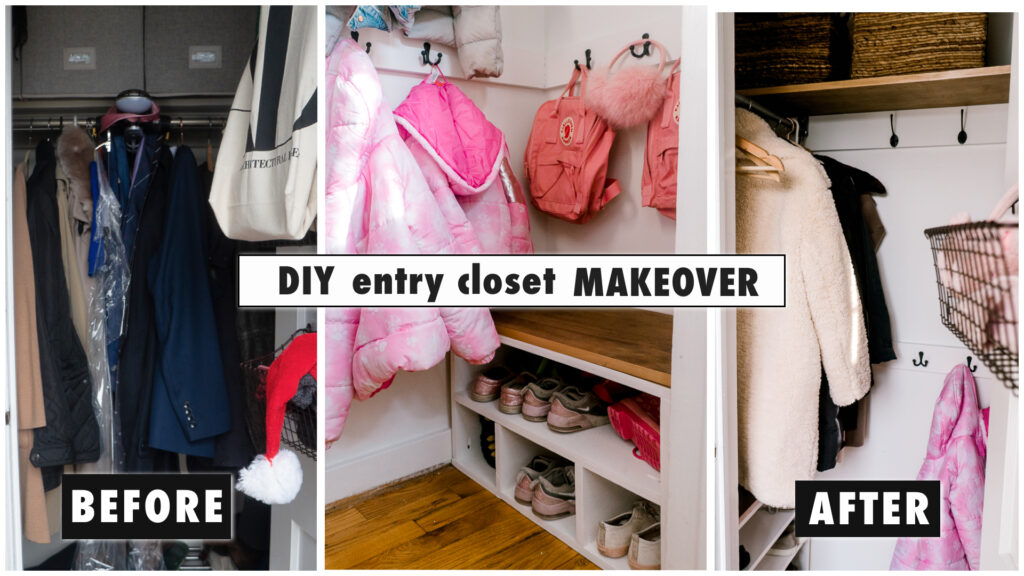
So let's see the not so pretty "before"

entryway closet makeover

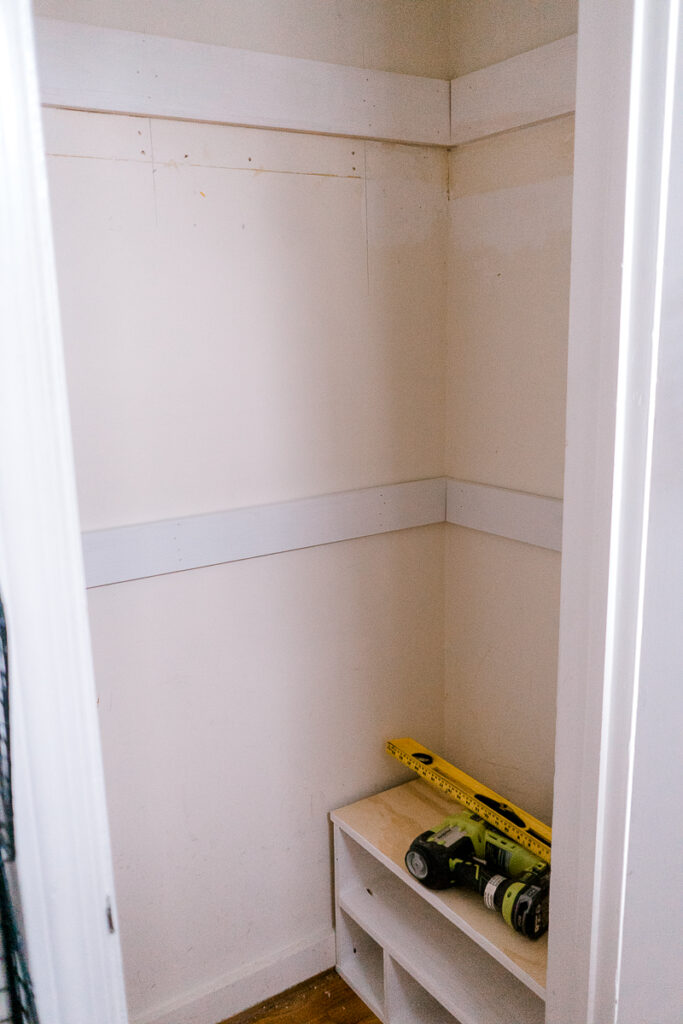
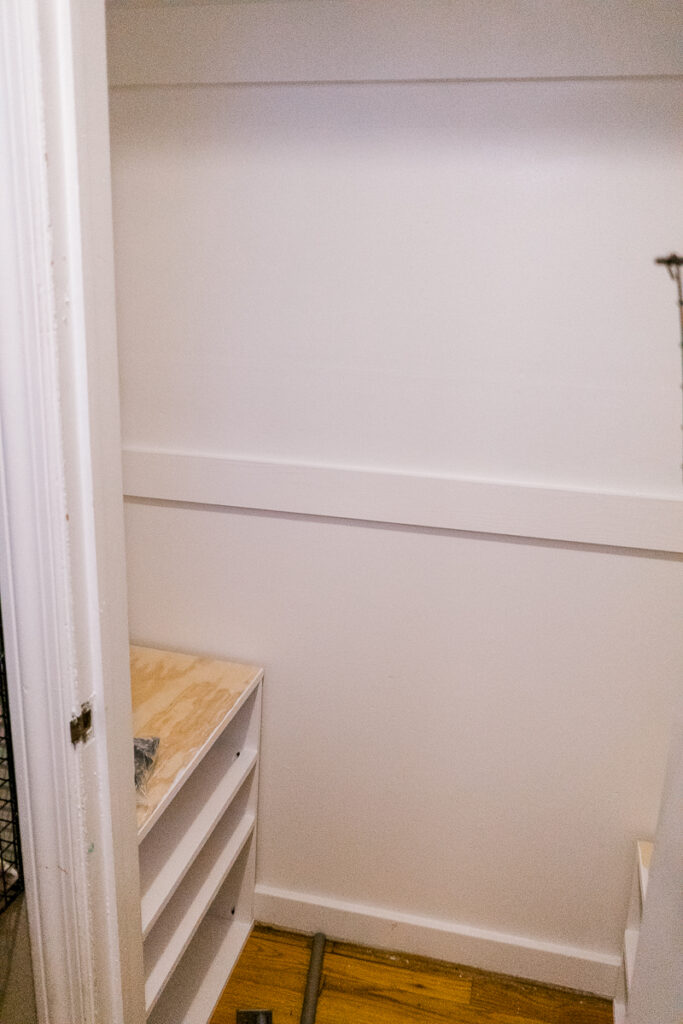
Here is how it looked during the process when I ripped off the old trim, put the shelf higher, and added a new trim for hooks.

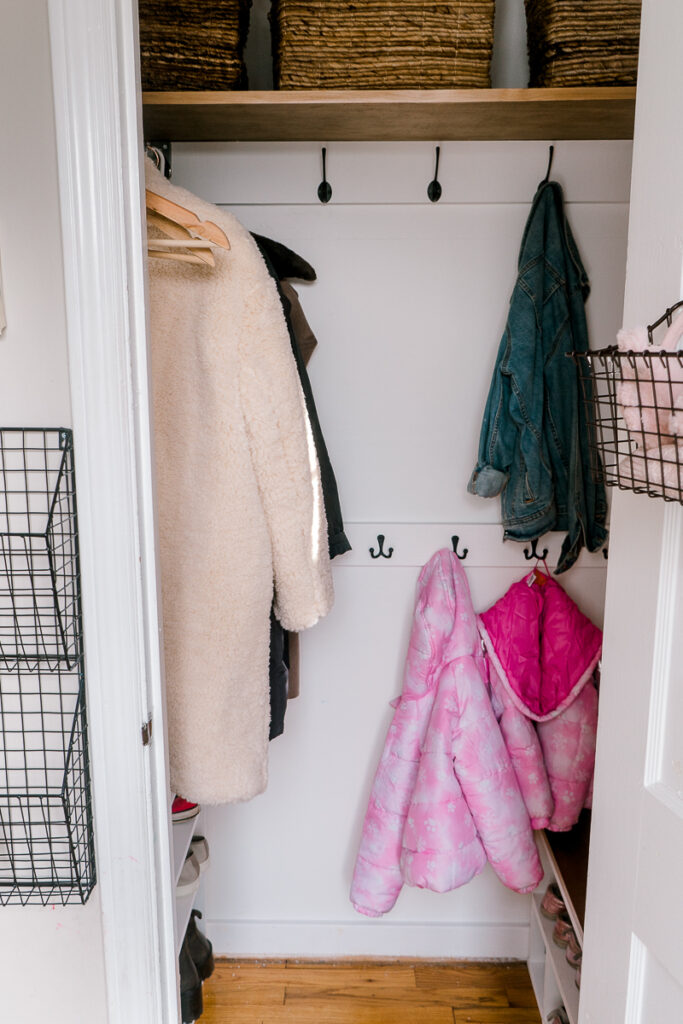
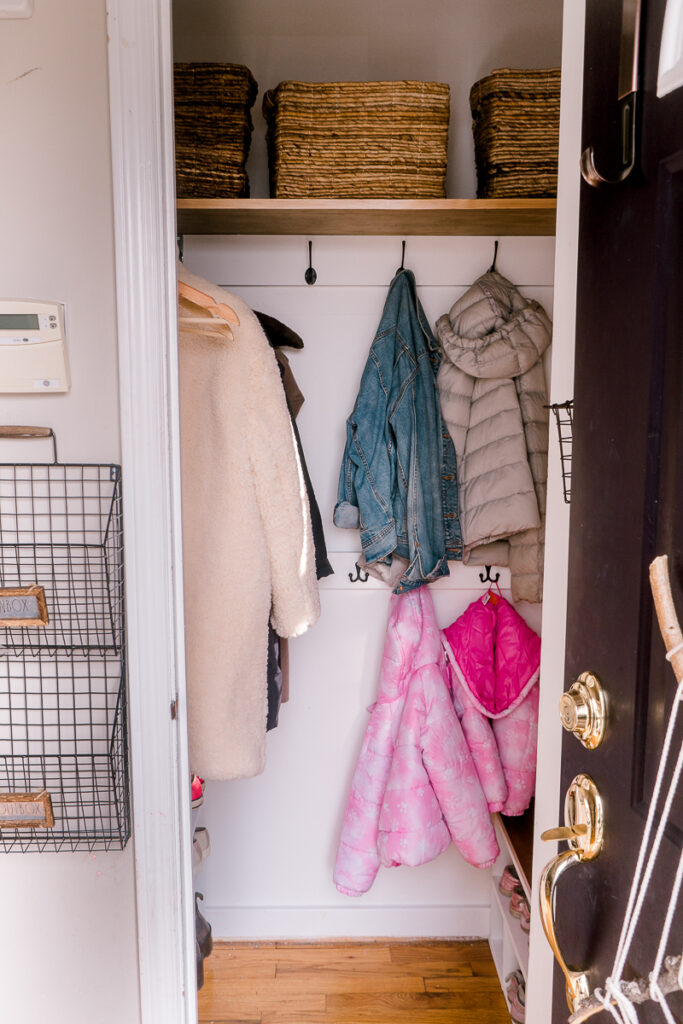
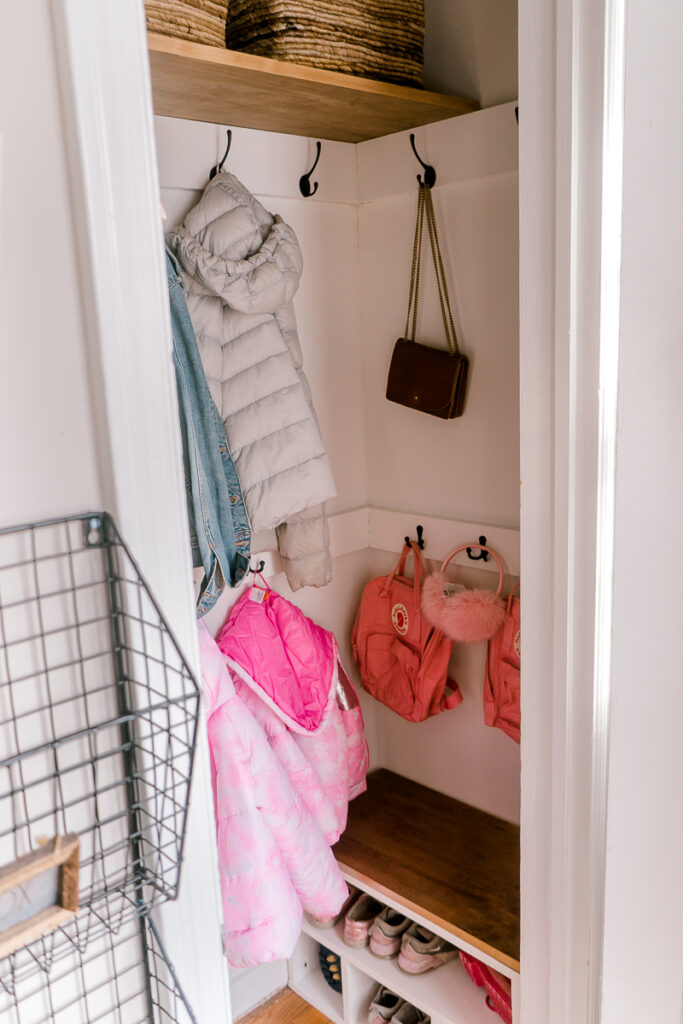
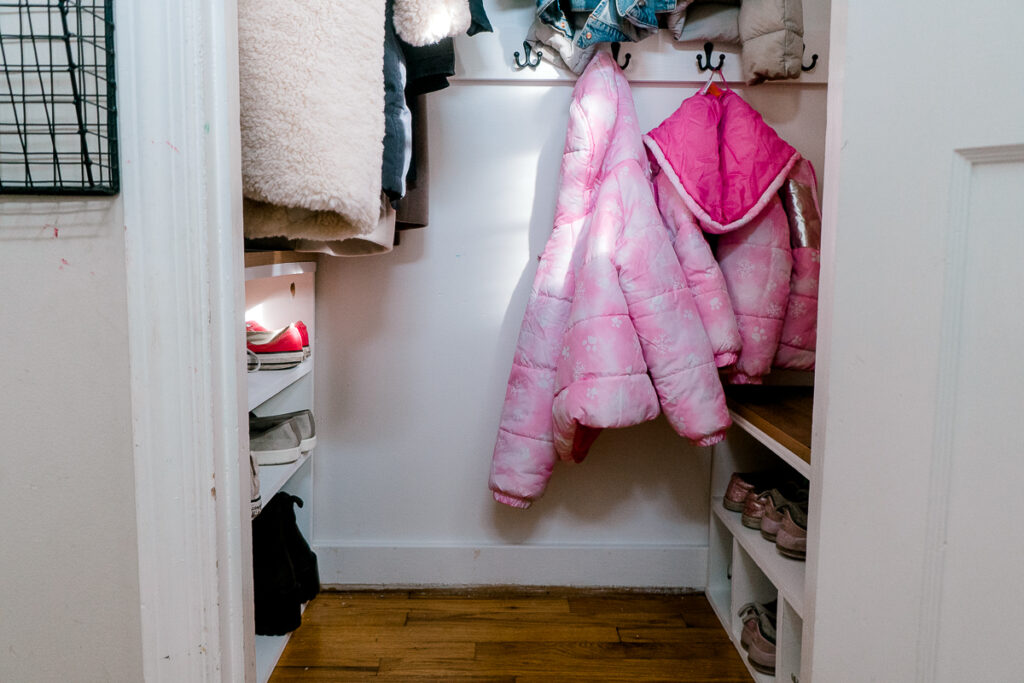
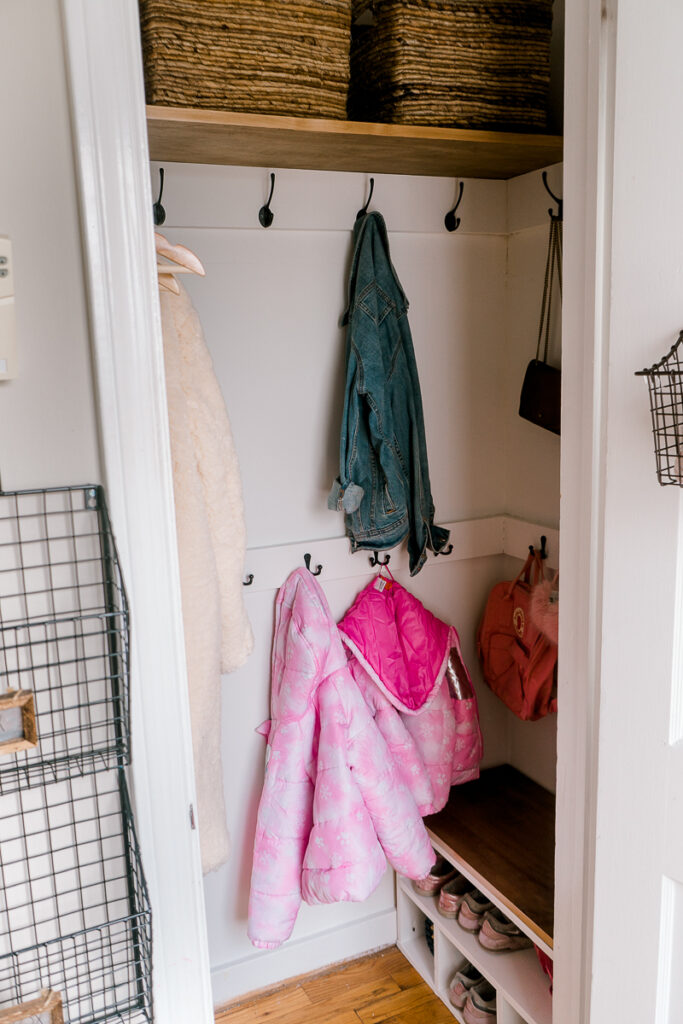
And here is a glorious "after"

entryway closet makeover

Details

For the trim, I used 1x4" as 1x5" pre-primed boards.

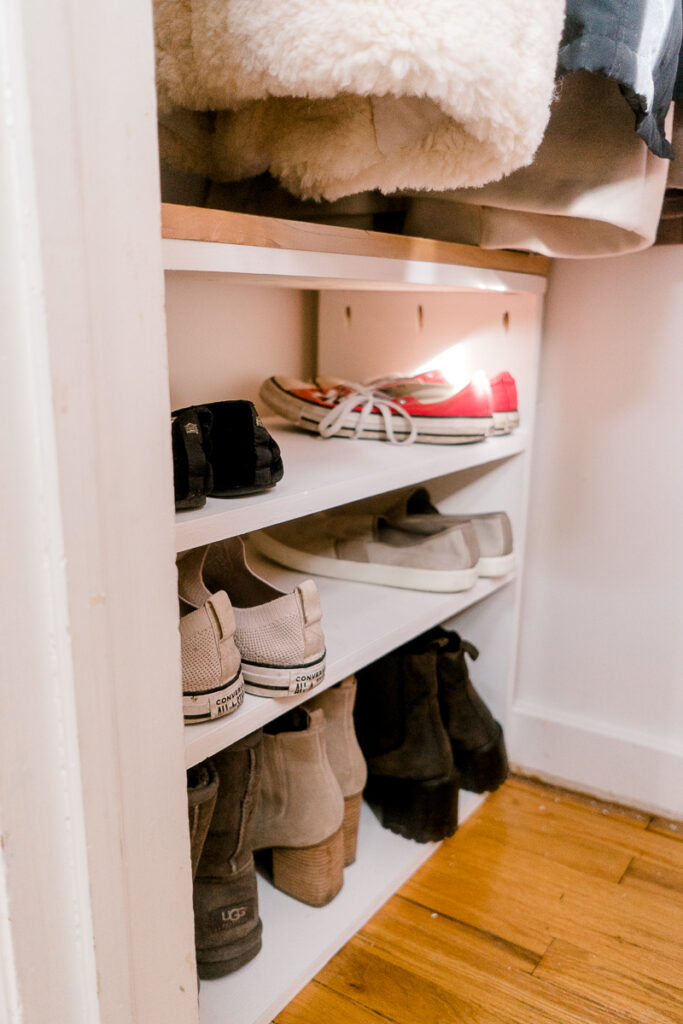
My favorite part of this closet renovation was to move shoe cubbies to the sides. I have a detailed tutorial on how to make shoe cubbies with plans. I feel this small change not only made the whole space more organized but also makes so much more sense. Now kids have a place for shoes, I have a place for my shoes but it doesn't seem to overcrowd the closet. On the contrary, it kind of gives it a look of a walk-in closet.

PIN IT FOR LATER

entryway closet makeover

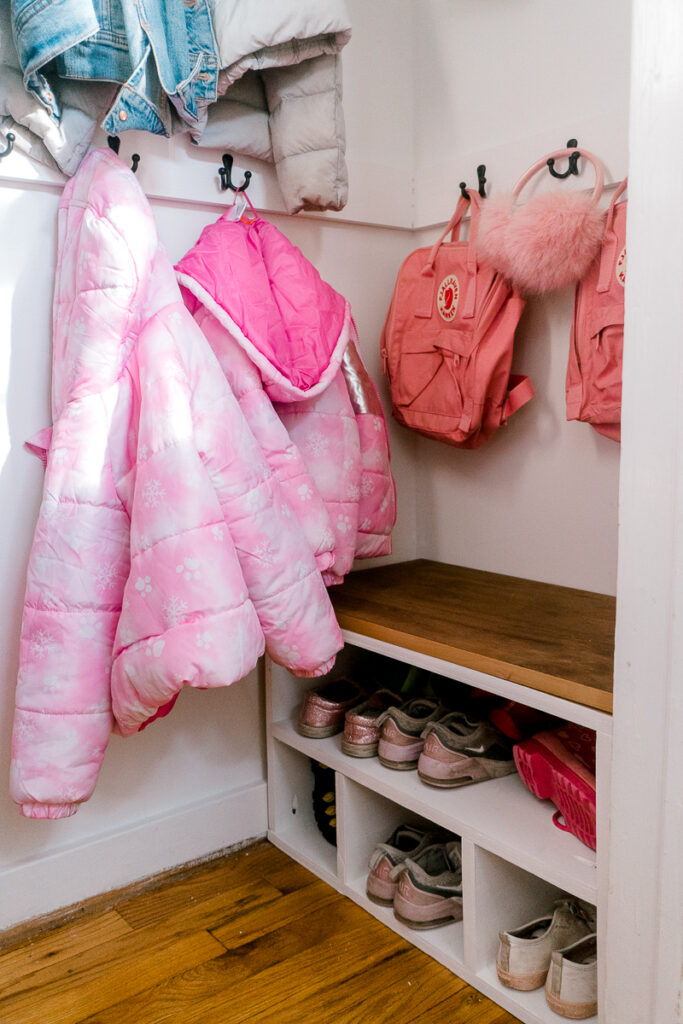
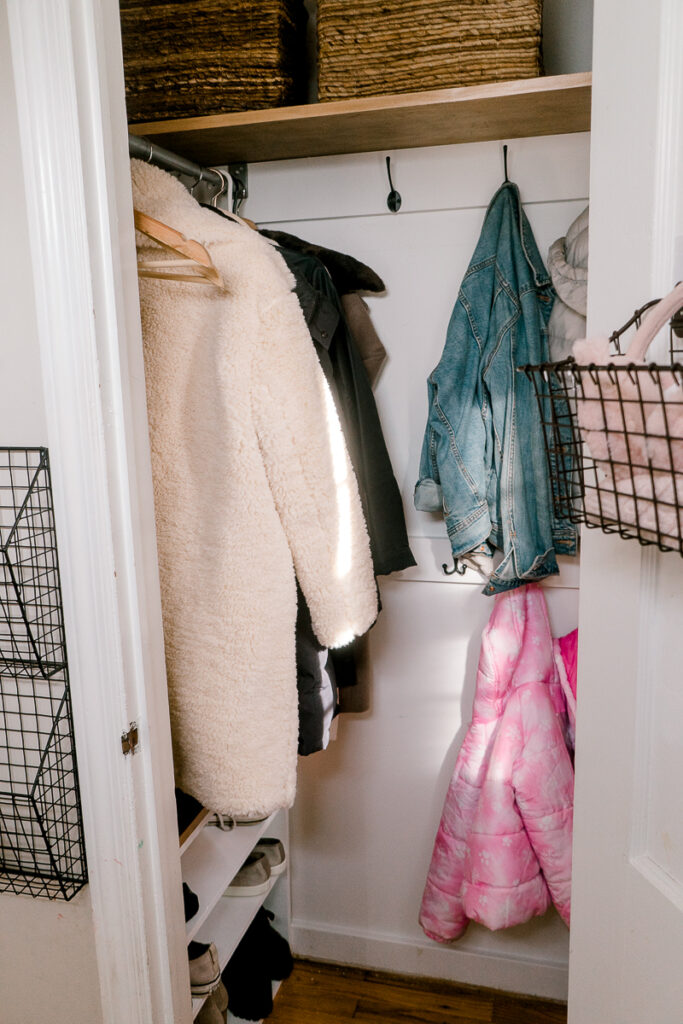
As I mentioned before, I went for a very classy look and chose to use warm wood tones, white colors, and black hooks for contrast.

Another thing that I absolutely love about this closet is that I removed the long coat rod and replaced it with a shorter one on the side. This one is 24" long but it serves the purpose perfectly.

entryway closet makeover

Sources:

  • Black hooks. got these and these from Amazon for $12 each
  • Pre-primed 1x4" boards
  • Pre-primed 1x5" boards
  • Baskets. I got mine from Home Goods but similar here
  • Coat rod. The very basic one that extends from 18-30", you can find it here.
  • materials for shoe cubbies here

What do you think about this coat entryway closet makeover? I absolutely love it. It's so much more functional, modern, and appealing.

If you'd like to watch a video version of this closet makeover and to see what went wrong during the process and how I fixed it, you can watch a video on my YouTube channel.

There are also plenty of other fun DIY videos. So take a look and don't forget to subscribe.

If you have any questions, you can always DM me on my Instagram @ifonlyapril.

Xoxo,

April

Share this:

  • Tweet
  • Print
« DIY toddler learning tower kitchen stool. IKEA hack
Minimalist contemporary art from "faux pebbles" »
FacebookPinPrintEmail

Reader Interactions

Leave a Reply Cancel reply

Your email address will not be published. Required fields are marked *

Primary Sidebar

Hi, I'm April! I love woodworking and making things! I hope you will stay for a while and get inspired to make something!

More about me →

Popular

  • Sasha's bedroom makeover progress
  • Speakeasy library room reveal + budget breakdown
  • Little girl bedroom makeover inspired by spring
  • The progress of Sia's bedroom and my favorite finds for her room

ifonlyapril

DIY single mom | 📍CT
One of my favorite DIY projects for kids! Why? I One of my favorite DIY projects for kids! Why? 
I made the same building blocks pyramid for my kids 4 years ago and they still play with it!!!

It's such a great open ending toy (my favorite kind) that can take kids imagination to the moon!

What are you waiting for? Your kids will thank you later!

Find all the details on the blog: https://ifonlyapril.com/diy-wooden-building-blocks/

#diykidstoys #diywoodentoys #diykids #diybuildingblocks #singlemoms #diysinglemom #kidstoysplay #ifonlyapril_diy
It's definitely has been a journey. Journey of sel It's definitely has been a journey. Journey of self discovery, healing childhood trauma, learning how to let go. 

The hardest part was to live in a fantasy world. Where I felt for years that something was off but my every concern was met with me being called crazy. 

I wasn't crazy after all. And truth can set you free. 
I'm in a happy place now. 

Finally. 

I remember who I am.

#narcawareness #narcabuse #narcissisticabuse #healingjourney
Little bunny's room transformation. Find all the Little bunny's room transformation. 
Find all the details and sources on www.ifonlyapril.com

And I'm working on a YouTube video. Need to push myself to find time to finally finish it 😁 it's been a long journey. I'm glad it's at the finish line🤗

#roomdesign #kidsbedroomdecor #kidsbedroomideas #diybedroommakeover
I made this sound diffuser almost a year ago. I fi I made this sound diffuser almost a year ago. I finally hung it up and added picture light to it. 

I call it "There will be light" as a reflection of a dark times I was going through at the moment.

What do you think guys? 

Watch full video on YouTube and find all the details at 
https://ifonlyapril.com/there-will-be-light-unique-diy-wood-sound-diffuser-wall-art/

#makersgonnamake #diyproject #diysounddiffuser
I hosted my first party for @newcanaannewcomers In I hosted my first party for @newcanaannewcomers International club last night and it was such a success🤩✨ 
Thank you all for coming! 

If you want to recreate the magic, all you need is PVC pipes, some cement, few buckets and string lights. 
Easy peasy 😄

Would you try it at home?

#easydiy #diyoutdoors #diystringlightpoles #ifonlyapril_diy #newcanaannewcomers
Nothing can beat a $1 find that looks so good 🤩 Nothing can beat a $1 find that looks so good 🤩 what do you think?

#rubnbuff #diy #diyonthebudget #simplediy #letsmakeitfabulous
I think this little bunny bedroom makeover deserve I think this little bunny bedroom makeover deserves a permanent place on my feed☺️ scroll to the end to see "the before"🥺 

#littlegirlmakeover #bunnyroom #littlebunnyroom #moodypinkroom #crateandbarrel #potterybarnkids #smallable #diyroommakeover #spoonflower
Do you see a resemblance?😅 #dogsofinstagram #dr Do you see a resemblance?😅
#dogsofinstagram #drogodog #germansheppard #germansheppardpuppy #germanshepherdsofinstagram #longcoatgermanshepherd
Load More... Follow on Instagram

Footer

↑ back to top

About

  • Disclaimer

Newsletter

  • Sign Up! for emails and updates

Contact

  • Contact
  • Media Kit

As an Amazon Associate, I earn from qualifying purchases.

Copyright © IfOnlyApril 2023

Share this ArticleLike this article? Email it to a friend!

Email sent!