
A few years ago, while I was pregnant with my second daughter, I picked up some power tools and determined to make her a house bed frame. That was my first ever build, and it turned out fabulous. That bed survived a move and lasted for three years before we replaced it with a bunk bed (oh, I made that one, too haha)
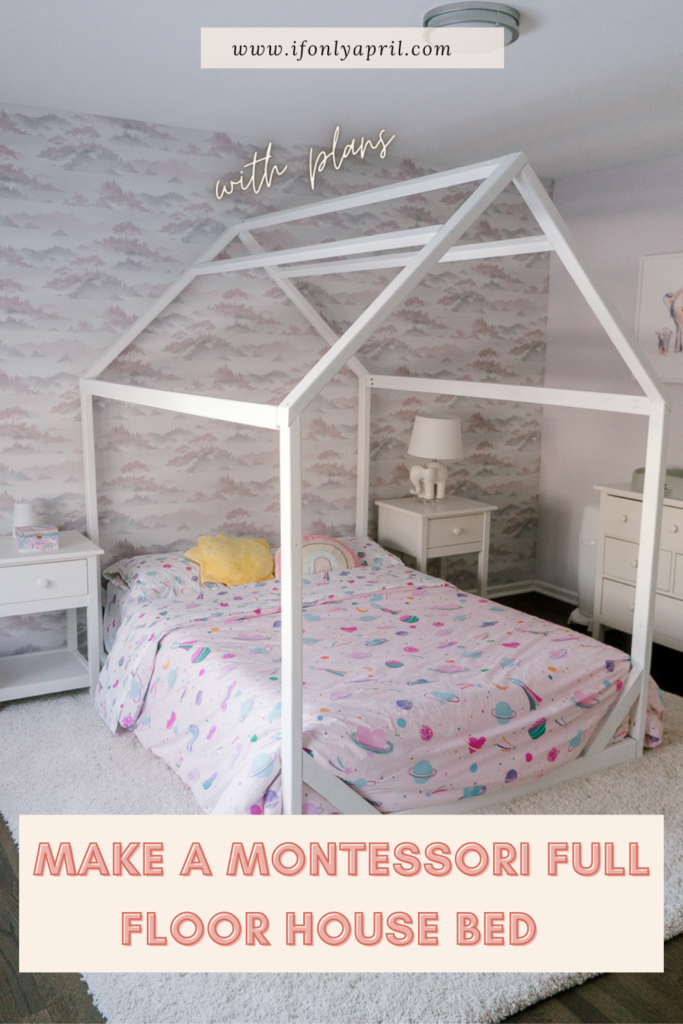
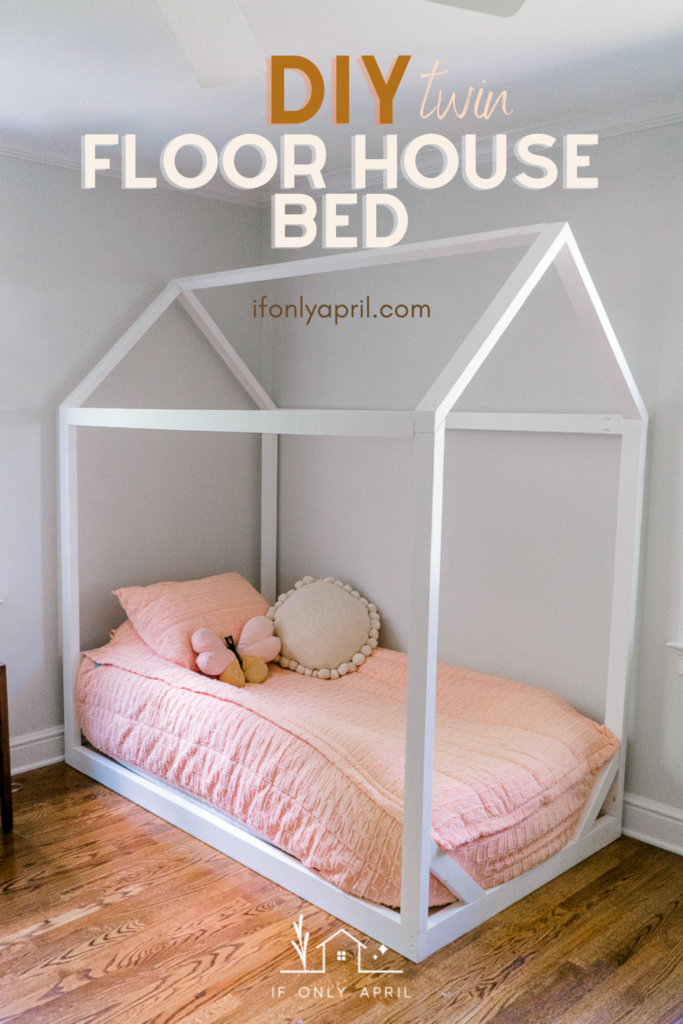
Since that bed, I’ve done a lot of projects, but that’s how it all started. This year I decided to take on a few projects for other people and got an order for a twin floor house bed, floor bed with rails, and a Montessori house bed frame in full size that you can see here.

This time around I made step-by-step plans on how to build this bed and you can download them from my store. I appreciate your small support of my business.
So let’s get started!
As usual, a video tutorial is available on YouTube.
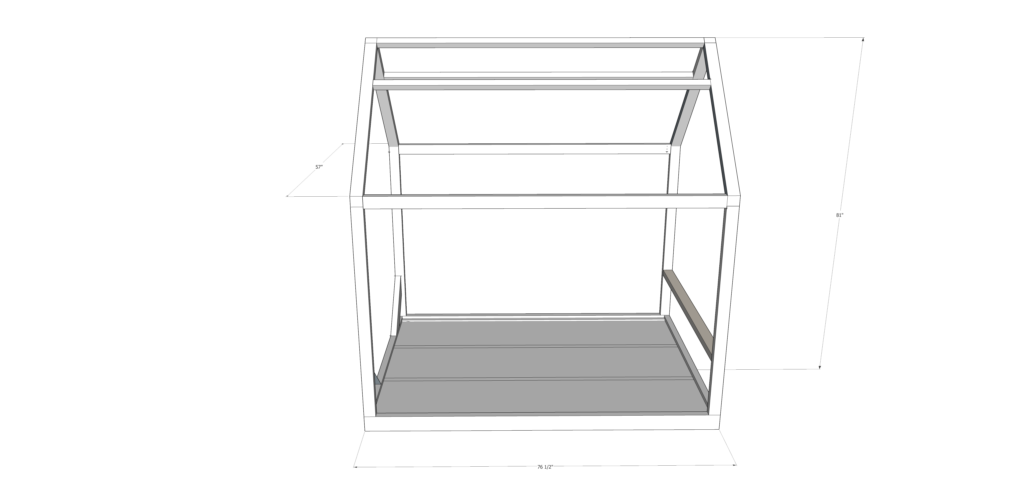
Lumber needed for the DIY Montessori bed
- (10) - 2x3" x 8'
- (2) - 2x4" x 8'
- (2) - 2x4" x6'
- (3) - 2x2"x 6'
- (7) - 1×4 x 10′ – you can sub for 1 sheet of ¾" MDF
Tools
- Table saw (optional)
- miter saw
- safety gear
- sander
- power drill
- kreg jig
- right-angled clamp
- Speed square
- countersink bit (optional)
Materials
- Wood glue
- 2 ½" pocket hole screws
- 2 ½" constraction screws
- 1 ¼" screws
- paint (optional)
- wood filler
- Sanding disks
Step by step on how to make Montessori floor house bed
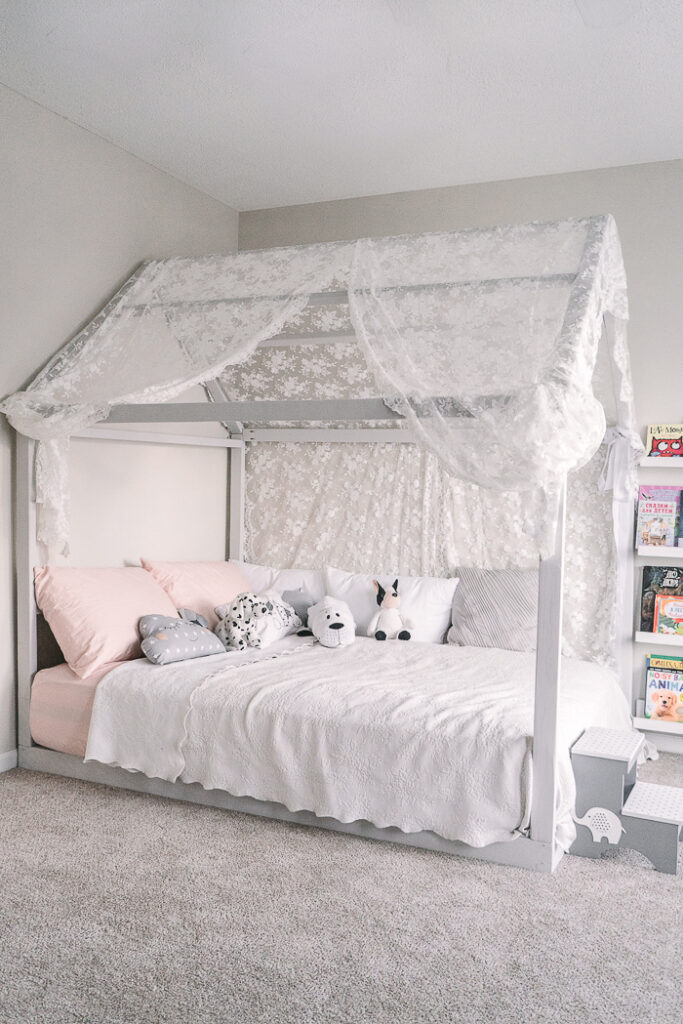
Step 1 - Assemble the sides of the bed
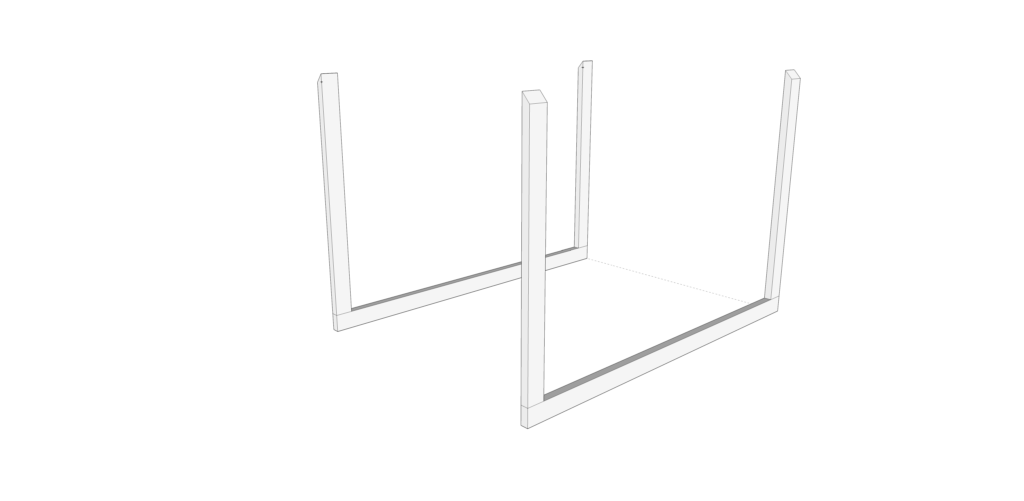
Cut one 2x4" at 76 ½" and two 2x3" at 48".
2x3"s are the posts and you need to do a bevel cut at a 45-degree angle with a taller side going inwards. Taller side is 48". You could use a table saw but a miter saw is a better fit for this.
Using Kreg jig, 2 ½” pocket holes screws, and my favorite right-angled clamp, attach polls to the side. Don't forget to use wood glue for stability. But if you plan to disassemble it while moving then don't use the glue.
Make two of them.
Step 2 - assemble the base of the bed
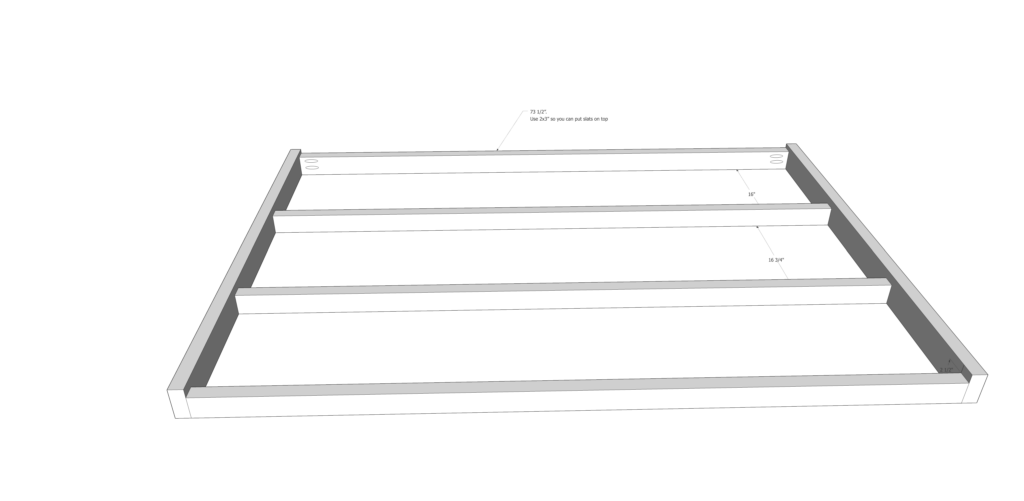
Cut two 2x4" at 54" long. Cut four 2x3"s at 73 ½".
Make pocket holes from both sides of 2x3"s. Attach them to the 2x4”s together using Kreg jig and 2 ½” screws.
That will be the base for the slats.
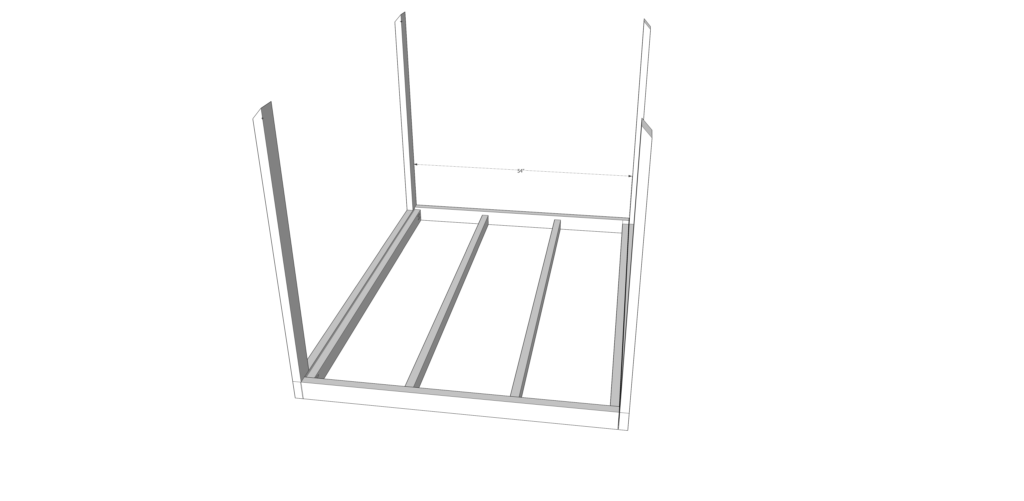
Attach sides to the base using 2 ½" screws. I like to also use a countersink bit to make sure that screws are flush with the sides.
PIN IT TO MAKE LATER
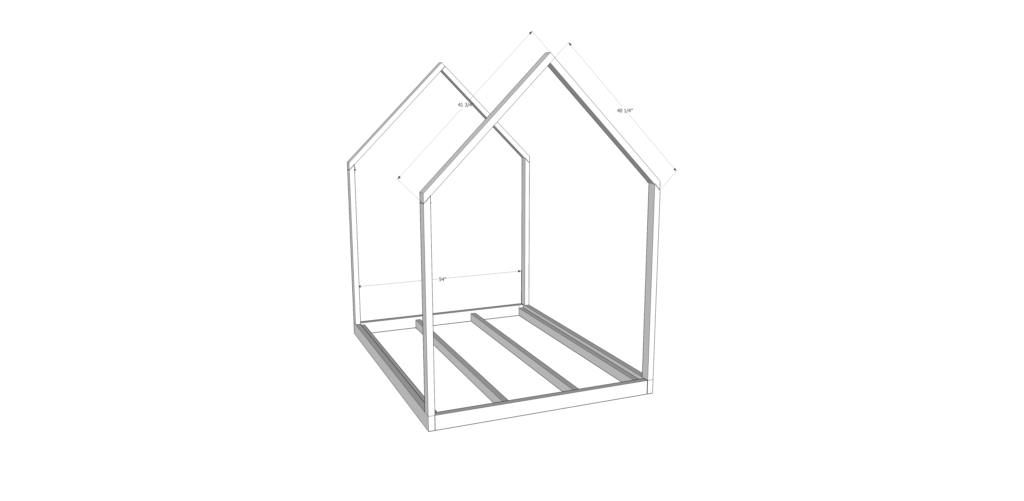
Step 3 - make a roof
Cut four boards from 2x3” to make a roof. Two at 41 ¾" and two at 40 ¼".
Pay attention to those quarters of an inch.
Make a bevel 45-degree cut on one side of each board.
Place the taller board over the shorter one and attach it at a 90-degree angle. To attach it, I used wood glue and self-tapping 2 ½" screws. Use a countersink bit to make sure screws aren't popping out. And always check with a speed square to ensure it’s at a perfect 90-degree angle.
Repeat this twice to make another side of the roof.
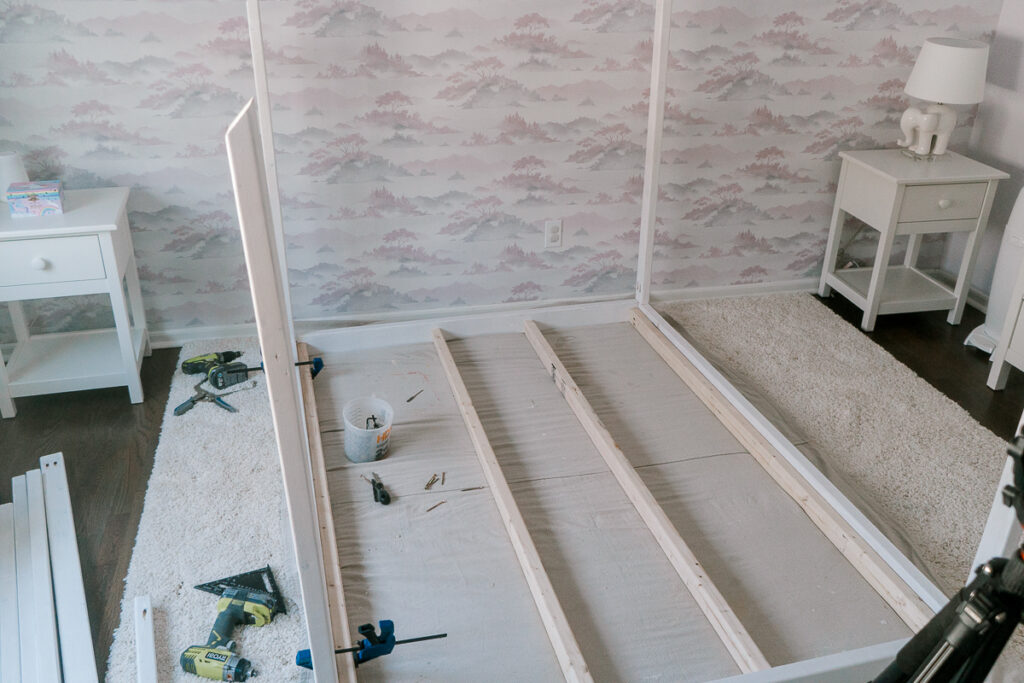
Step 4 - attach the roof to the polls
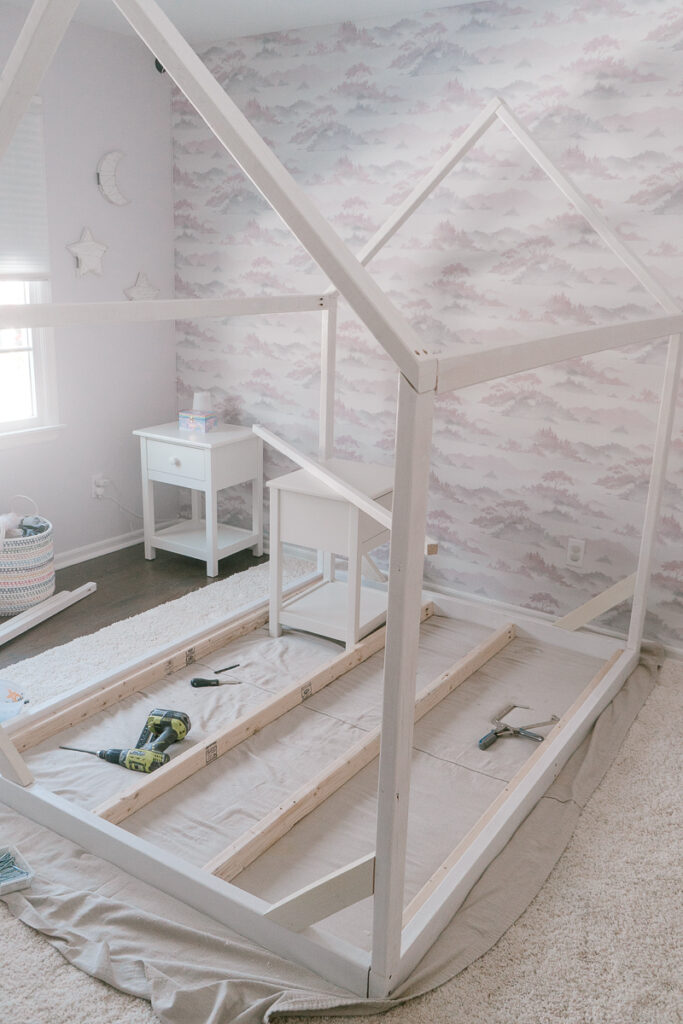
This is probably the most challenging part of this build if you do it yourself without help. It wasn’t easy to assemble since the bed is quite wide and it's hard to hold both parts together. I used clamps to help me hold one side during assembly, but it didn’t quite work.
If you can get a helping hand, that would be a perfect time!
Place the roof over the polls. Use the countersink bit, make a pilot hole, and drive screws from the top to the bottom.
Do the same thing on the other side. Then, attach the second part of the roof with the same method.
Step 5 - attach top rails and sideboards
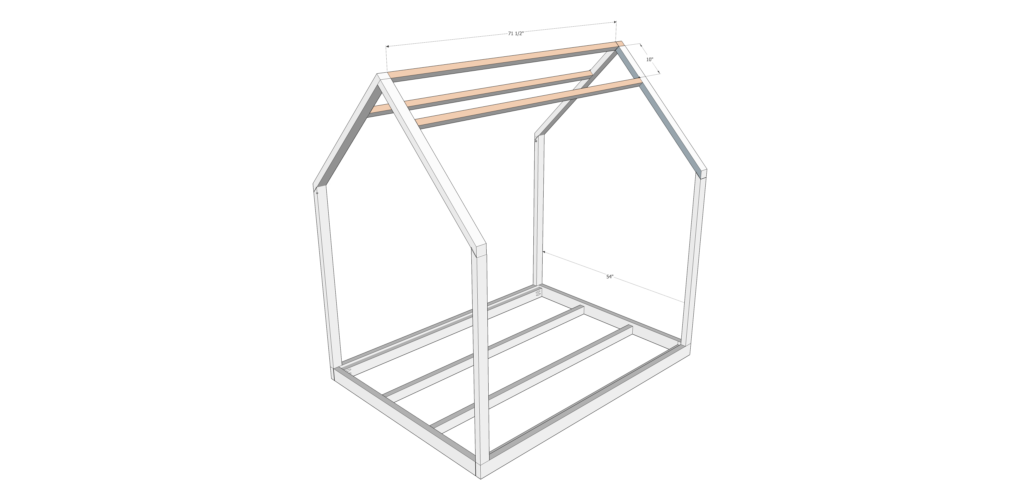
Cut three 2x2" at 71 ½". Make pocket holes on both ends using a Kreg jig. Using wood glue and pocket holes screws attach the first one to the highest point of the sides of the roof.
Measure 10” from the highest point of the roof (or it could be less; that’s optional). Attach two 2x2” on each side from the top center to make top rails.
If you place the bed by the wall, make sure to attach pocket holes on the side that are not visible to you.
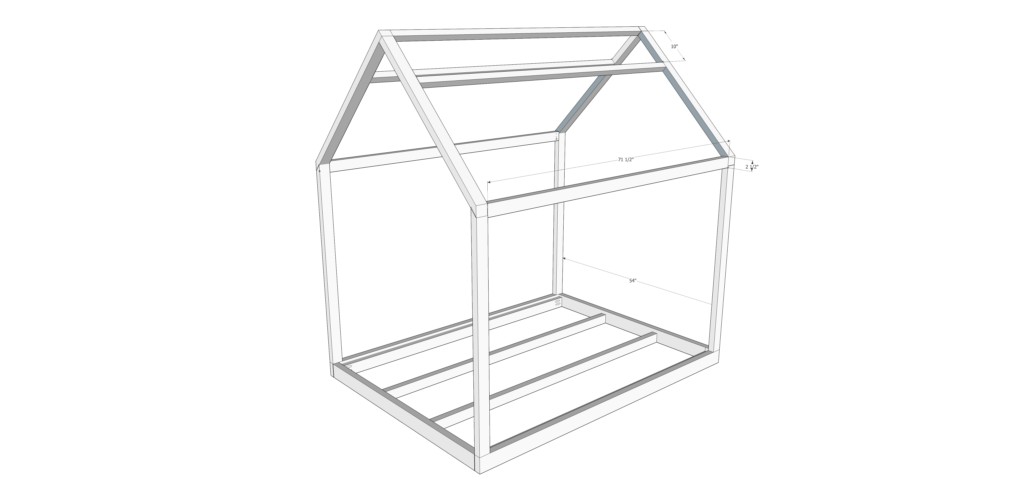
Attach sideboards. Cut two 2x3"s at 71 ½" and make pocket holes from both sides. Attach it to the bottom of the roof. Make sure it's leveled. Use the level for that.
Step 6 - attach brackets
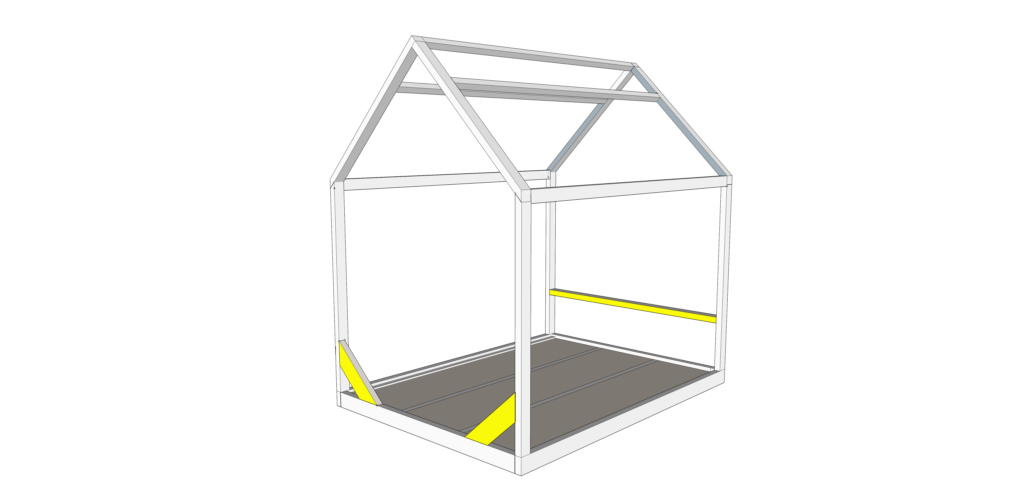
We'll add brackets to add support to the bed and make it less shaky and more stable.
First, measure your mattress to ensure the brackets won't stick out from the mattress's height.
Cut 2x3" at 16" and make 45-degree cuts on both sides. To attach them, I used 2 ½" screws and wooden glue. To have a nice finish, use a countersink bit.
Adding brackets in 4 corners would add stability to the bed and it will be structurally more sound. ( I show only two on the plan, but in fact, I said four of them)
You can also add a board in the header from 2x3" that would help with stability and could be used to keep bottles on it.
Step 7 - add slats
For the slats, I ripped the ¾" plywood sheet to size and attached them using 1 ¼" screws.
As I mentioned, you could also use 1x4"s or an MDF board if you want the space fully closed off.
Step 8 - finish as desired.
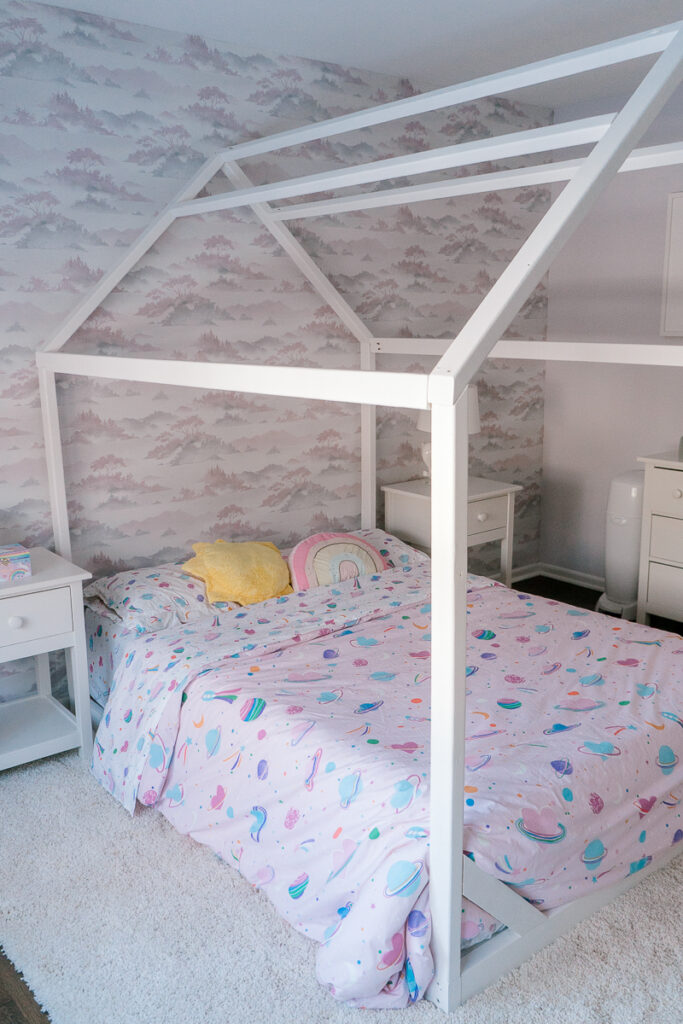
First, I used a layer of white primer to finish this bed. When the primer had dried, I used wood filler to fill out some knots.
Then, I applied two coats of "Whisper white" paint by Behr.
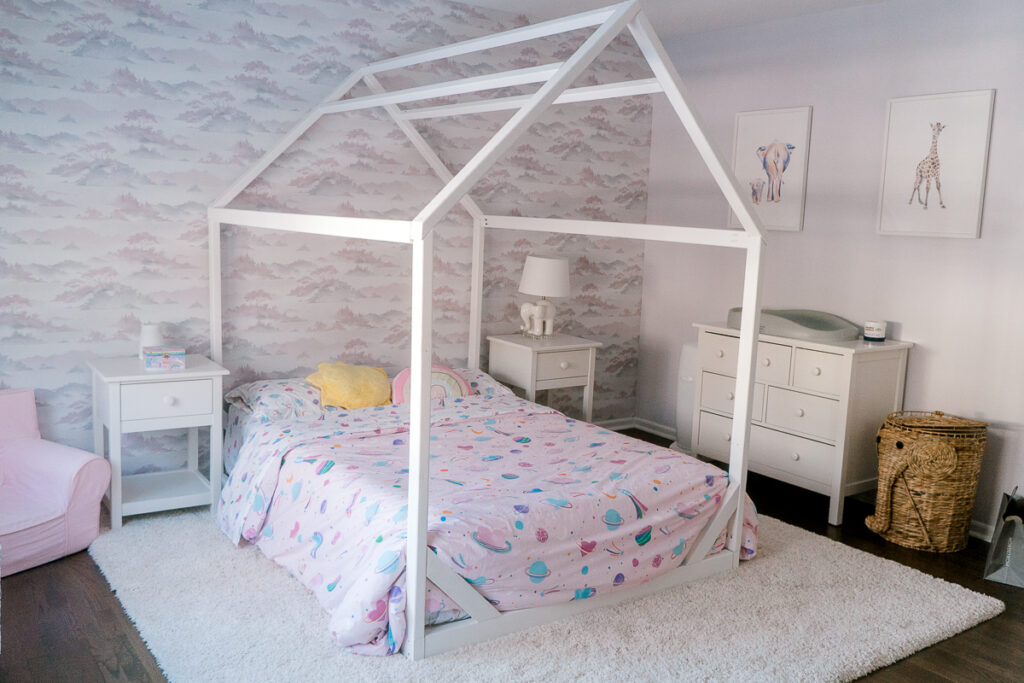
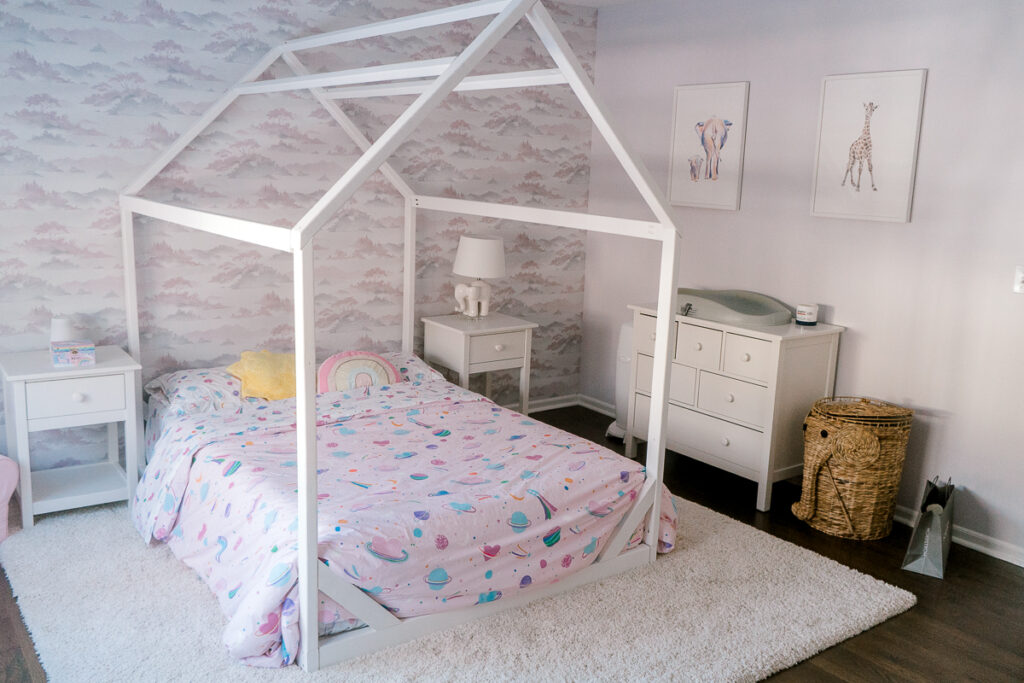
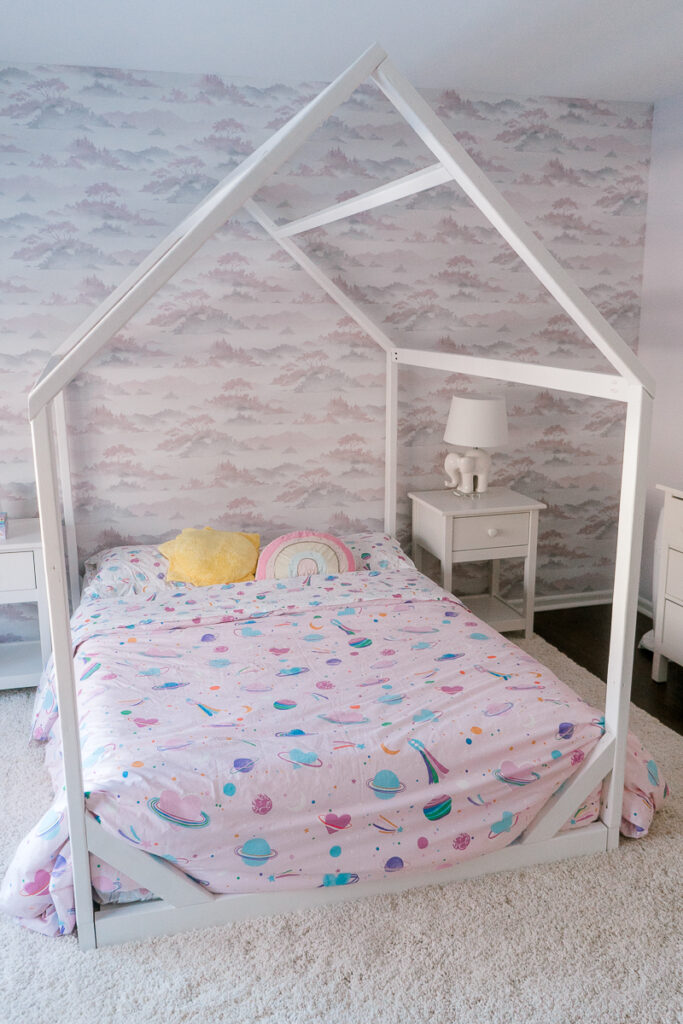
I love the way this Montessori floor house bed turned out! What do you think?

You can find step-by-step plans with dimensions, cut lists, and a list of materials in my shop here.
If you want inspiration on decorating this bed, here are 10 Montessori floor house beds with free plans. I have some suggestions on cute decor from small businesses including a super fun drapery that you can put on top to take this bed on a whole new level.
Check my Instagram @ifonlyapril where I post behind the scenes of what's happening in the If Only April world 🙂
If a full-size bed is too big for your kids, check out the twin-size Montessori floor house bed. Or watch me make it on my YouTube channel here
xoxo,
April


Leave a Reply