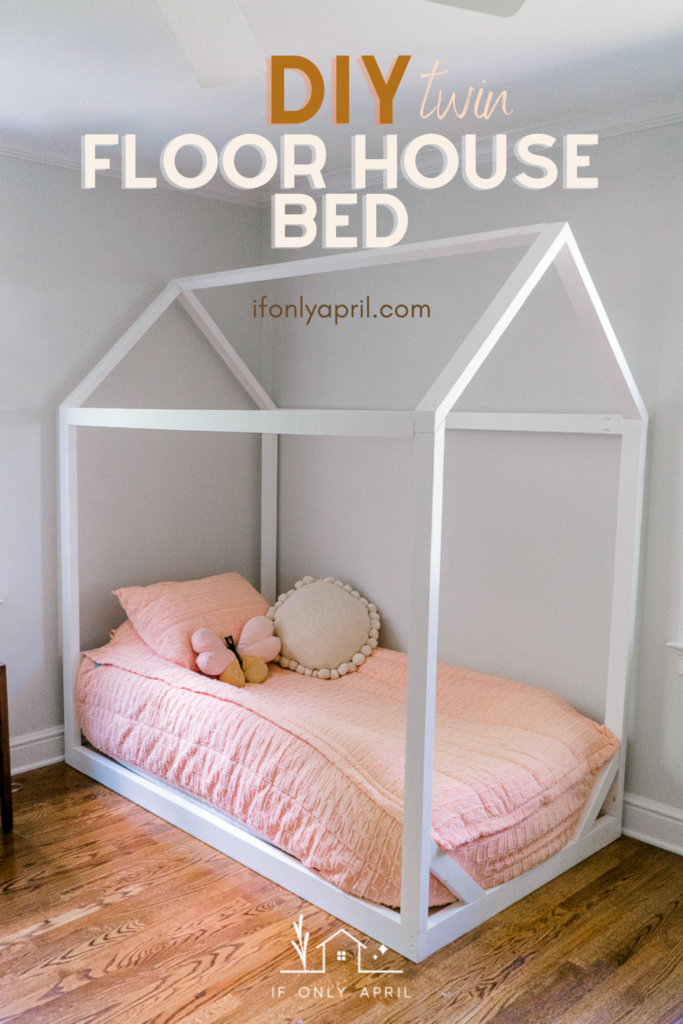
A while back I made a Montessori floor house bed for my daughter. It was such a show stopper that everyone was asking me where I got it. Haha, I was so pleased to say that I actually made it myself. Three years later and I got a customer that asked me to make a twin version of the bed. So today I'll show you how to make a DIY twin Montessori floor house bed.

It's pretty much the same concept but the dimensions are a bit different. To fit a standard twin-size mattress (38” X 75”) we need to make the bed accordingly.
I made plans and if you would like to purchase them I have them available at my shop. Thank you for your support!
To prepare the wood I used my table saw to make square edges and to get rid of rounded edges of construction lumber.
I couldn't find decent 2x3s in my Home Depot (most of them were very knotty and required too much sanding). Instead, I used 2x6" and ripped them in half using my table saw. This is totally optional and you should see what works better for you.
After I ripped the edges, I sanded it throughout with 80, 150, and 220 grit paper. As I like to mention with all of my builds, the preparation of wood is the key in this process. Unless of course, you are working with hardwoods, but even those need to be prepped for a smooth finish.

The first plan that I made for a DIY twin floor house bed was with polls at 36". The total height of the bed was 61" tall. The lady for whom I was making the bed wanted it to be taller, so I adjusted the length of the polls and made the whole bed 78" tall.
I like this plan because it has support on the bottom since I wouldn't want the mattress just laying on the floor.
I have both plans available. So do whatever works for you 🙂
Materials
Lumber
- (3) - 2x4" x 8'
- (5) - 2x3" x8'
- (5) - 2x3" x 6' (or sub all 2x3"s with (5)- 2x6"x8)
- (1) - 2x2" x 6'
- (7) - 1×4 x 10′ – you can sub for 1 sheet of ½" MDF
Tools
- Table saw (optional)
- mitre saw
- safety gear
- sander
- power drill
- kreg jig
- right-angled clamp
- countersink bit (optional)
PIN IT TO MAKE LATER
Instructions
Step 1 - Cut and assemble the sides

Cut one 2x4" at 75" and two 2x3" at 53".
2x3"s are the posts and you need to do a bevel cut at a 45-degree angle with a taller side going inwards. Taller side is 53". You can use a table saw but I find it easier to use a miter saw for this.
Using Kreg jig and my favorite right-angled clamp, attach polls to the side. Don't forget to use wood glue for stability. But if you plan to disassemble it while moving then don't use the glue.

Step 2 - Cut and assemble the bottom of the floor house bed

Cut two 2x4" at 39" long. Cut three 2x3"s at 72".
Make pocket holes from both sides of 2x3"s. Attach them all together using Kreg jig.
That's going to be a base.

Attach the base to the sides using 2 ½" screws. I like to also use a countersink bit to make sure that screws are flush with the sides.
Step 3 - Make a roof

For the roof you'd need to cut 4 boards from 2x3". Two of them at 29 ¾" and two at 31 ¼".
Make a bevel 45 degree cut on one side of each board. Let me show you visuals. Just like this.


Put the taller board over the shorter and attach it at a 90-degree angle. To attach it I used wood glue and self-tapping 2 ½" screws. Use a countersink bit to make sure screws aren't popping out.
Do the same for the second part of the roof.

Step 4 - Attach parts of the roof to the polls

This part might get a bit tricky and if you have a second hand, that would be great! If you don't, practice a few ninja moves to make it happen😅.
I was holding one part with my back while attaching one side.
Place the roof over the polls. Use the countersink bit, make a pilot hole, and drive 2 ½" screws from the top to the bottom. Make sure to measure where it will go so it doesn't come out from the side.
Do the same thing on the other side. And then attach the second part of the roof with the same method.
Cut 2x2" at 70". Make pocket holes on both ends. Using wood glue and pocket holes screws attach it to the sides of the roof on the top.
At this point, you already know which side is the front one. So make sure to attach it towards the wall, so pocket holes are not visible from the outside.
Attach sideboards. Cut two 2x3"s at 70" and make pocket holes from both sides. Attach it to the roof. Make sure it's leveled. Use the level for that.

Step 5 - Add support brackets

Here is the fun part that will make the bed less wobbly and more stable.
Measure your mattress. The mattress I was working with was 10" tall. I wanted to make sure that brackets won't stick out from the mattress.
Cut 2x3" at 12" and make 45-degree bevel cuts on both sides. Make sure to make it from the "thicker side of the board". This way it won't get in a way of the mattress.
To attach it I used 2 ½" screws and wooden glue.
Do the same thing on the other side.
Adding brackets in 4 counters would add stability to the bed and it will be structurally more sound.
I also like to add the board on the head of the bed. My kids loved to have it since they could put their water bottle there or a long row of toys 😂
I cut 2x3" at 39" and attached it with pocket holes screws in the head of the bed. This part is totally up to you. I think mine is about 12" from the bottom.


Step 7 - Add the under layer for the mattrass
I used the MDF board from the previous bed and simply used a Brad nailer to hold it in place. The size was 39x72". You could also use 1x4" @ 39" slats for the bottom.
Step 8 (optional) - Paint the floor house bed
I used "Simply white" by Behr paint color and put 2 coats on the bed. I really love the way it looks. It's also nice to have it in natural color but if you have any imperfections the paint can smooth it out. I also used a wood filler to fill the holes.


I think this DIY twin floor house bed turned out lovely! My first consignment project was a huge success!!! Haha but read here what I've learned from my first consignment project and some tips for you in case you want to hire someone for a custom project.
Watch me make it
In case you prefer visuals, watch me making it on my YouTube channel here. Subscribe to get notifications!

In case you missed it, here are 10 Montessori floor house beds with free plans. Give it a read!
If you ever have any questions, please, don't hesitate to reach out! I'm always here to help!
And make sure to check my Instagram @ifonlyapril where I post behind the scenes and everything that goes on in this crazy spectacular fun world of If Only April DIY 🙂
Xoxo,
April