
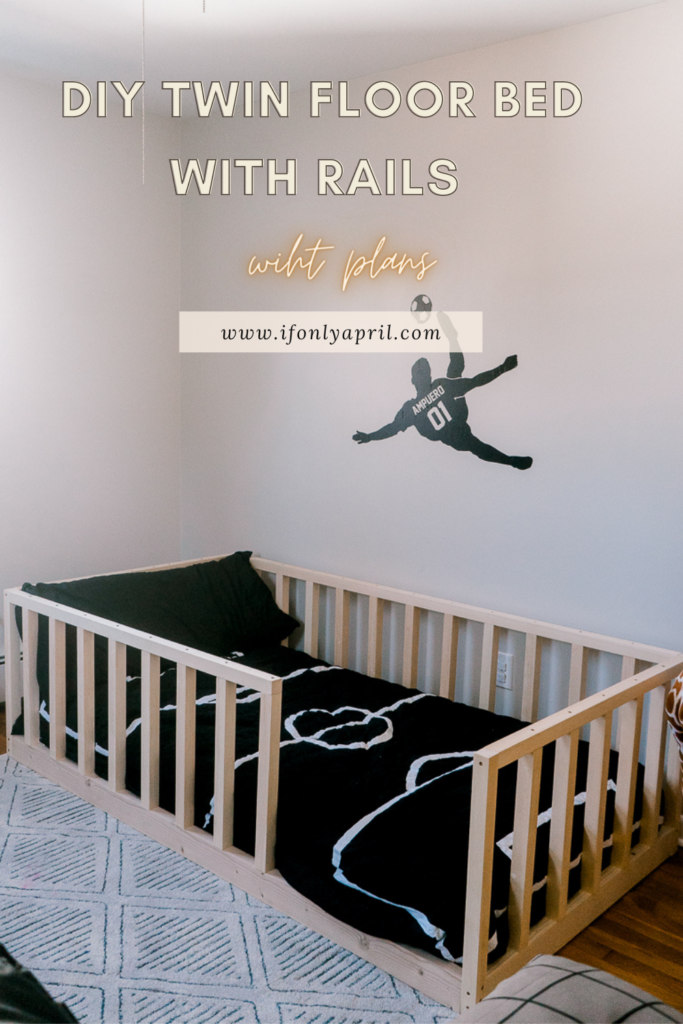
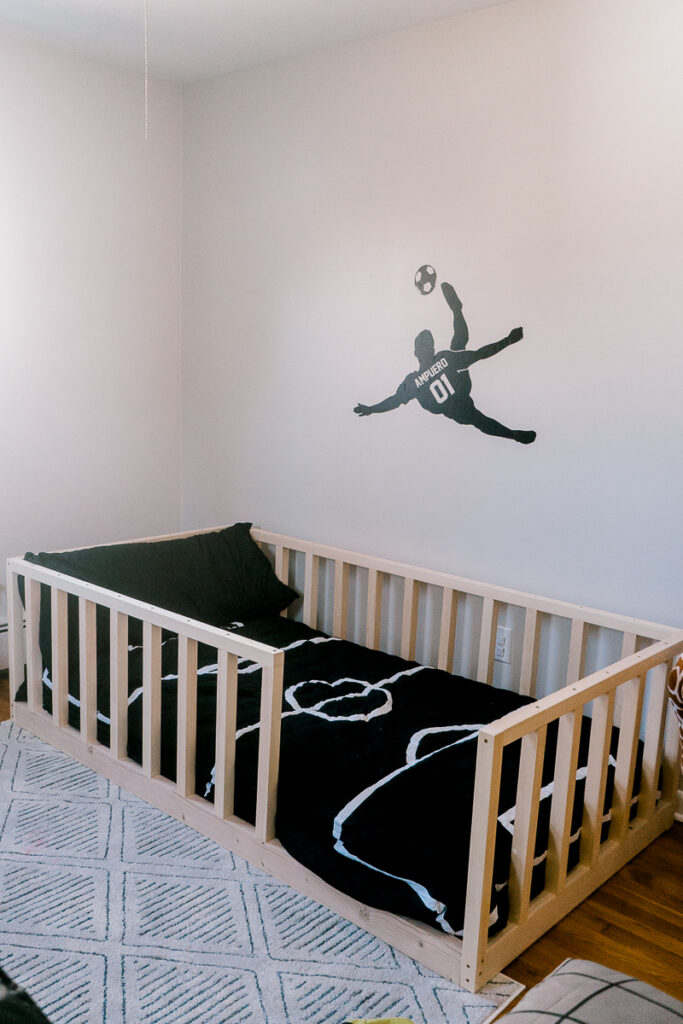
I recently got a custom order for a DIY twin floor bed with rails. I was quite excited to take on this project since I love how the bed looks. My kids already have a bunk bed so they don't need it. To be fair, they have already outgrown the rails thing. So with a lot of enthusiasm, I took on this project, and oh my, I had so much fun!
It is a relatively easy project to make and could be done by beginners. Since the bed is on the floor, it makes it so much easier to build.
Overall it took me about 3 hours to build and assemble it and about 4 hours to cut and sand all the wood. Sanding took the longest time but it's a necessary evil when comes to furniture building.
The challenge was also in the weather. Since I don't have a heated garage I had to brave the cold. I definitely had to take more breaks for hot tea than I'd like. But the end result is fabulous and now one very happy boy has a bed to sleep on.
I have printable plans for this build with a step by step instructions, a cut list, etc. That would make building this bed a breeze.
Thank you for your small support of my business.
Related:
DIY twin Montessori floor house bed
DIY full Montessori floor house bed
Preparing the wood
As I mentioned before, preparing the wood took the longest time of this project. When I was done, the assembly didn't take long.
When making furniture I like to cut off the edges of construction lumber and square them. I did it using my table saw. Set the table saw on ⅛" less than the board and cut it off.
This way furniture will look more professional.
If you want to make this project cheaper, then get 2x2"s from construction lumber. It would take you longer to prepare and sand it and you probably would have to cut off the edges too, unless you like the rounded edges.
I went the easier route and purchased 2x2"x8' in select pine. The crispy squares edges of the boards saved me so much time and made it look super nice but they are pricey. At the moment 2x2" costs over $13 in CT. Since we needed 10 of them, it added up being more expensive than I anticipated.
So what will we need to make a DIY twin floor bed with rails?
Related:
Tips on making custom furniture
Lumber
- (10) 2x2”x8’ select pine
- (3) 2x4”x8
- (3) 2x2”x8’ for the slats support - could be not good quality since it’s inside
- (6) 1x3"x8' or a plywood sheet for the slats
Materials
- 2 ½” pocket hole screws
- 2 ½” screws (I like these with star head)
- Wood glue
- Orbital sander disks (80, 150, 220 grit)
Tools
- Table saw (optional)
- Miter saw
- Keg jig
- Power dril
- Countersink bit
- Orbital sander
Instructions
Step 1. Cut and prepare the wood
Cut the wood according to a plan. Sand it thoroughly using 80,120 and 220 grit sandpaper. Always make your way up in numbers to archive the smoothest finish possible.
You'd need to make a lot of the same cuts for this project (like rails, for example). To make sure that they all are exactly the same length, create this simple stop block on your miter saw. As a result, you'll get perfectly cut boards.

Ugh, that took a while.

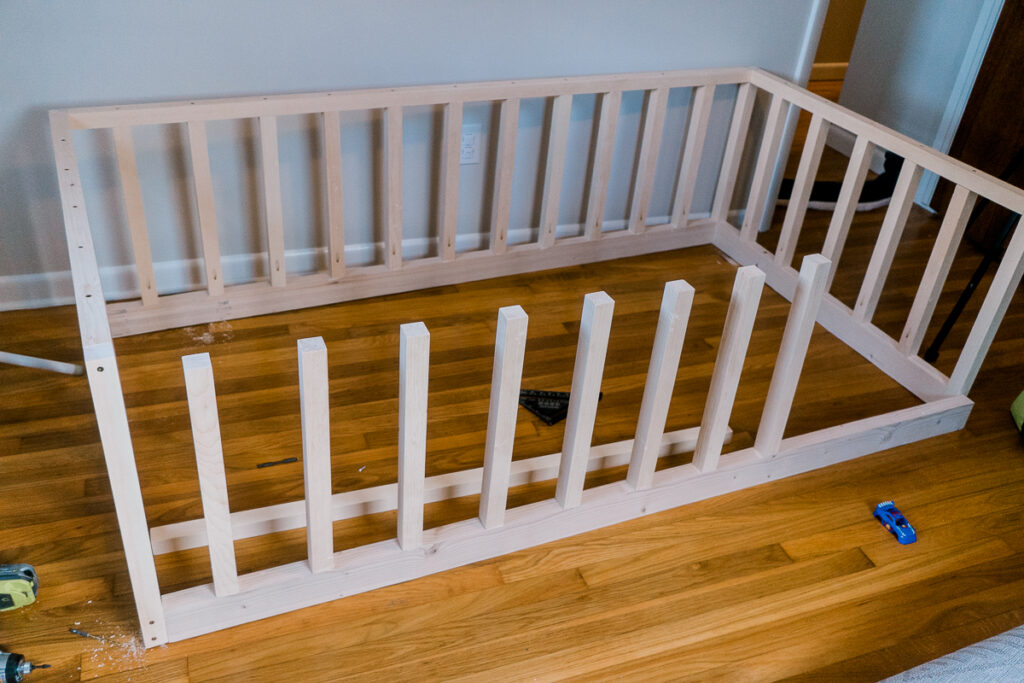
Step 2. Assemble the sides

When all wood was prepped and ready, I made two identical sides.

I used a Kreg jig to make pocket holes on the bottom, since it will be covered with the mattress they won't be visible. As an alternative, you could use 4" screws and drive them through the 2x4"s.
Take 2x4x39" and attach rails to it. Make a block to have exact spacing between the rails. Use wood glue and 2 ½" pocket hole screws to attach rails to the bottom.
Add two 2x2x24" boards on the ends of the sides. I used 2 ½" screws for that and simply drove them through the sides.
It's worth mentioning that I used a countersink bit so the screws are flush with the board.

Attach 2x2x39" on the top of the rails. Also, use a countersink bit so the screws are flush.


Step 3. Assemble the back side

Take 2x4x76" and following the same steps as making side rails, attach rails to it. Use Kreg Jig to make pocket holes.
To assemble the side it was easier for me to keep it on the plywood sheet since I didn’t have enough space on my workbench.

If you are following my plan, pay special attention to the distance between the rails. It’s slightly different from the sides.

Attach 2x2x76" On the top using 2 ½” screws and countersink bit. Make a pilot hole before using a screw.

Step 4. Assemble the front side
Take another 2x4x76" and attach rails to it following exact same steps as before.
When assembling the front side pay attention to what side the entrance will be on. Originally I had planned to make the entrance on the left side but I made a mistake. I realized it was the wrong side only after I already attached the rails.
Sadly, it was too late to fix it, unless I’d start over again. Luckily, my client didn’t mind and I could leave it this way. But make sure to pay attention.
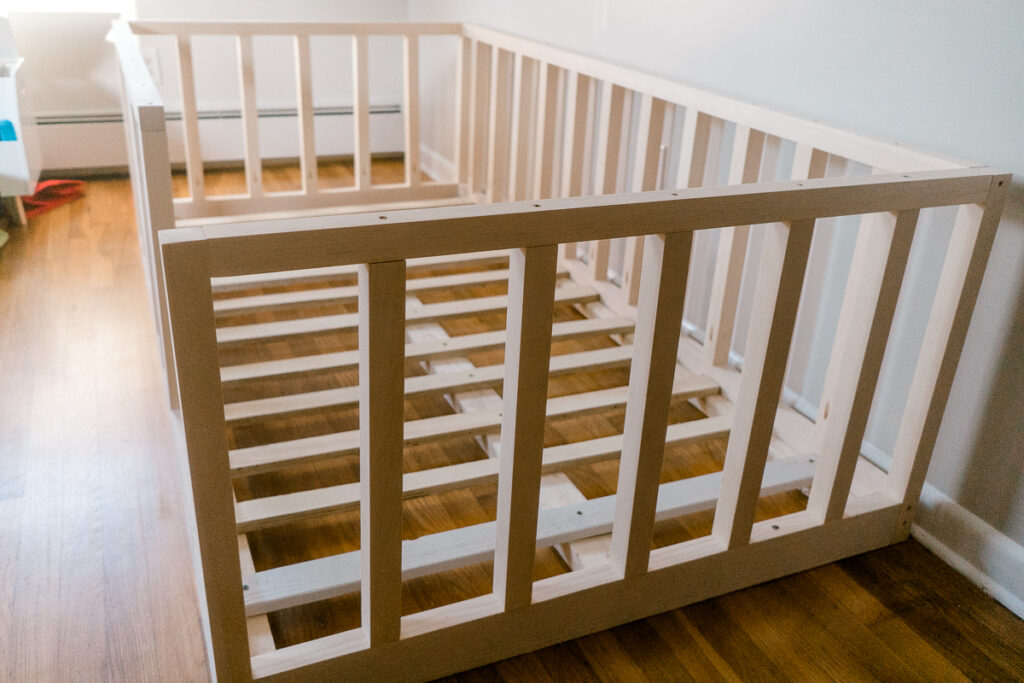
Step 5. Attach all the sides together

Sand all the sides again with 220 grit paper.
Until the assembly of all the sides, I could use a garage, but it would be best to put it all together inside.
This part is very straightforward - use 2 ½” screws to attach all the sides. Pay attention to where you drive the screws on this DIY twin floor bed with rails so they won’t cross.

PIN IT TO MAKE LATER
Step 6. Add slats support and slats

Attach 2x2x76" to the bottom sides of 2x4”s. Use screws to do it. Attach either 2x4” or 2x2” in the middle.
I cut the plywood sheet @39” strips to make the slats. If you won’t put a plank in the middle the slats might break, so they need additional support.
Attach the slats to supports using 1 ¼” screws.


For slats, you could also use 1x3”s or a full sheet of plywood. Whatever you have on hand.
And this is it! This adorable DIY twin floor bed with rails is ready!


If you’d like to watch a video tutorial you can watch it on my YouTube channel.
Subscribe to get notifications to all the new content.

Download the plan
You can download the printable plan with a cut list, step-by-step instructions, and 3D images of the build.
Are you planning to make one for your kids? If you do, tag me on Instagram @ifonlyapril so I can brag about your build. As always, if you have any questions don’t hesitate to contact me.
xoxo,
April


Matt says
I made this! Wish I could put a picture here, but it came out great!
Thanks!
April says
That's amazing, Matt! You can send me a photo to my Instagram and I'll post it 🙂 would love to see it!
Sydney says
Great plans! I’m just seeing one conflicting measurement that I could see confusing people. The cut list calls for two 42” 2x4 cuts for the sides; however, on the elevations, it shows those 2x4 side pieces to be 39”. Then add the 2x2’s (1 1/2”x1 1/2”) to get 42” total.
Just want to make sure I’m reading it right!
April says
Hi Sydney! Thank you so much for letting me know! I just confirmed with the plan and you are right, there is a miscalculation in the cut list. I really appreciate you sending me this. I fixed the misunderstanding and sending an updated version to everyone who purchased the plan. Once again, thank you for noticing this and letting me know!
Katelynn says
Can you / should you stain in?
April says
Hi! You certainly can! It would look beautiful!
Chanel says
Hi! What age range is this for? Could a 1 year old safely sleep in this?
April says
If your one year old wouldn't crawl out of it, but I don't see a reason how it could be not safe
Whitney S says
Do you have one with a gate?
April says
Hi! I don't but it's the same concept to make, just make railing and attach them with hinges
Briana Byers says
Hi april! We just bought this plan for the twin bed and made one for our older son and wanted to see if you had the dimensions for a toddler mattress in the same concept!
April says
Hi Briana, unfortunately I have plans only in twin for this bed