
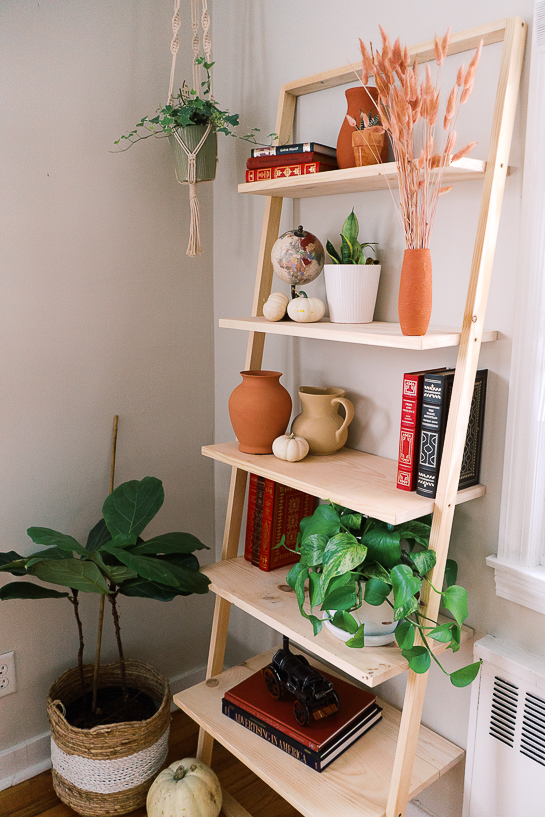
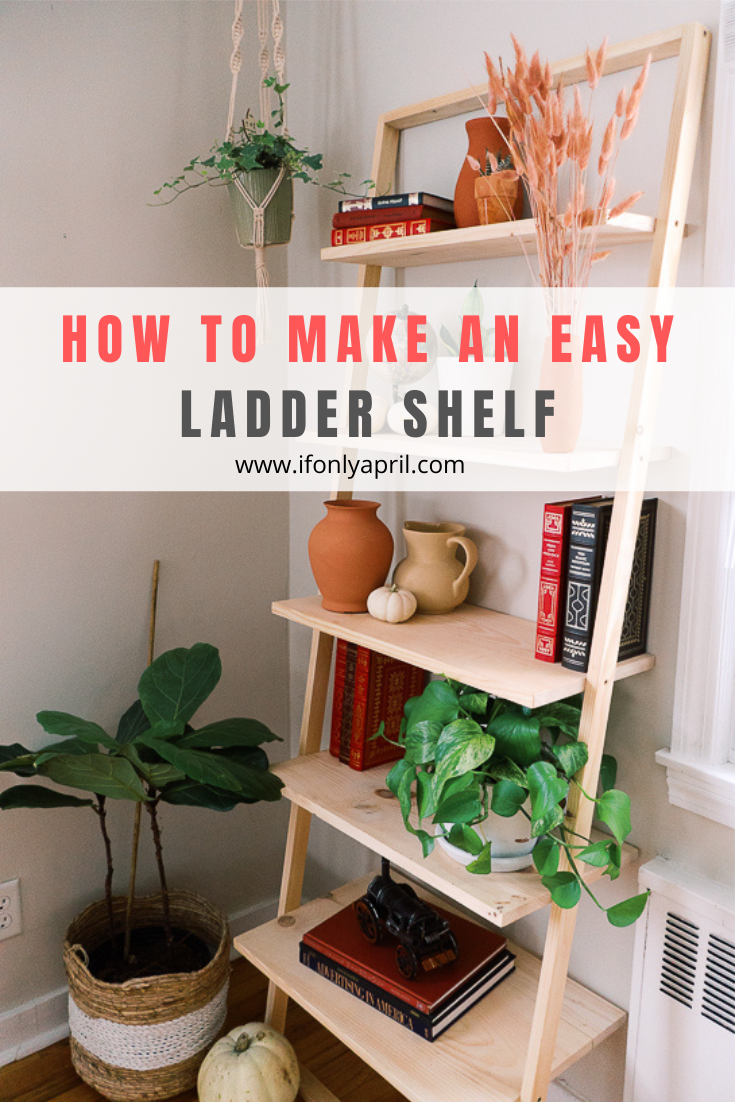
I recently started renovating my office/craft studio and wanted to have a nice display ladder shelf in the corner, to showcase my favorite thrift finds. I couldn't find anything used that I could redo so I decided to make my own DIY modern ladder shelf. And oh boy, it was such a fun project to make, so today I'll show you how to make a simple ladder shelf.
Ladder shelves became popular in recent years and I just love the simplicity of it.
It took me about 3 hours to build it, but it's mainly because I didn't use plywood for shelves and had to figure out how to make a 16" bottom shelf from wood. After some manipulation with wood glue, I turn to Kreg jig for help and wish I did it from the beginning. But let's see how to make this shelf so here is a step-by-step guide on how to build a DIY Modern ladder shelf.
I already made one ladder before, it was a DIY blanket ladder inspired by Anthropologie, but it was a simple design and took way less time.
If you want to watch me making it, with all the fails and things that went wrong, you can watch it HERE
Subscribe to get a notification!
Let's talk about the cost of this ladder shelf DIY
I calculated the cost of lumber based on how much lumber I used, but keep in mind that most of the boards aren't sold in 4' so you'd have to get it at 6' and leave the remaining wood for later projects.
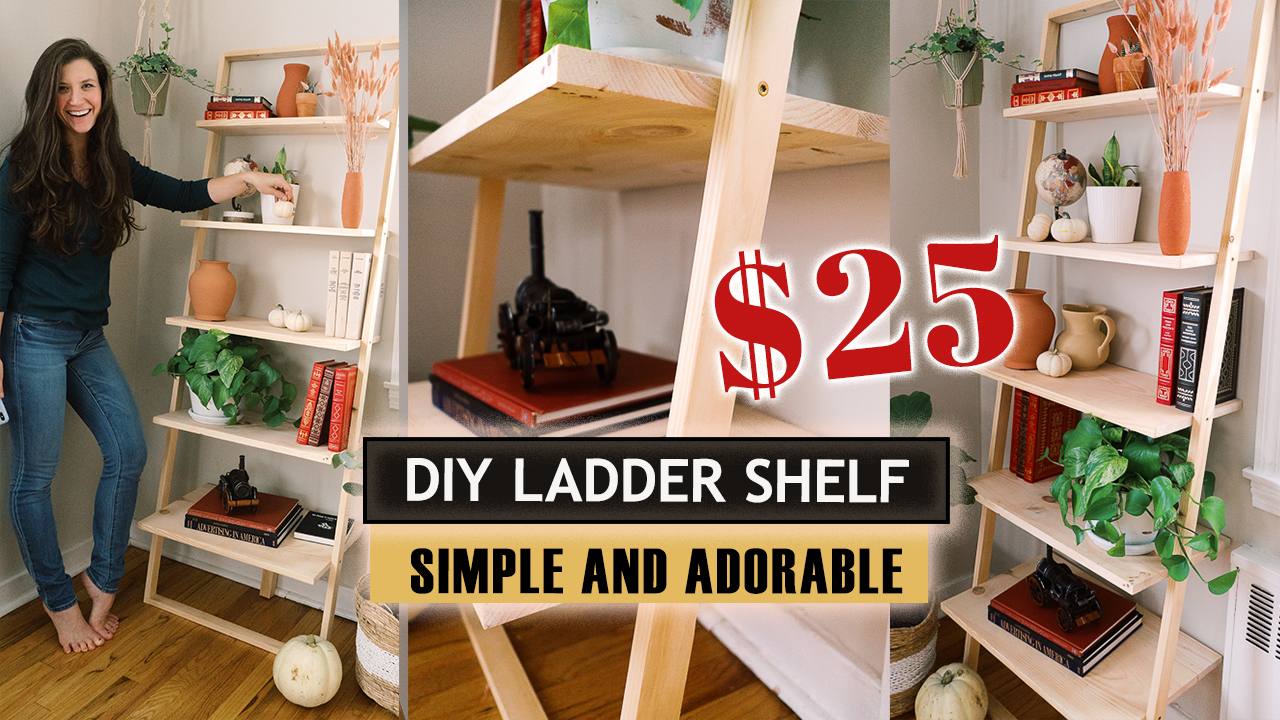
Cost: aprox $25
Time: 3 hours
Level: intermediate
Materials
- 2" screws
- Wood glue
- Level
- Square layout tool
- Drill
- Kreg jig
- Pocket holes screws
- Wood filler
Lumber
1x4 @ 4'
1x10 @ 4'
1x12 @ 4'
(2) 1x2 @ 6'
1x2 @ 4'
Cuts
(1) - 1x8x24"- shelf 1 (from the top
(2)- 1x10x24" - shelf 2 and 4
(2) -1x12x24" - shelf 3 and 5
(2) -1x4x24" - shelf 4 and 5
(2)- 1x2x72" - sides for base
(2) - 1x2x24 - top and bottom for the base
Instructions
Step 1 - Make shelves
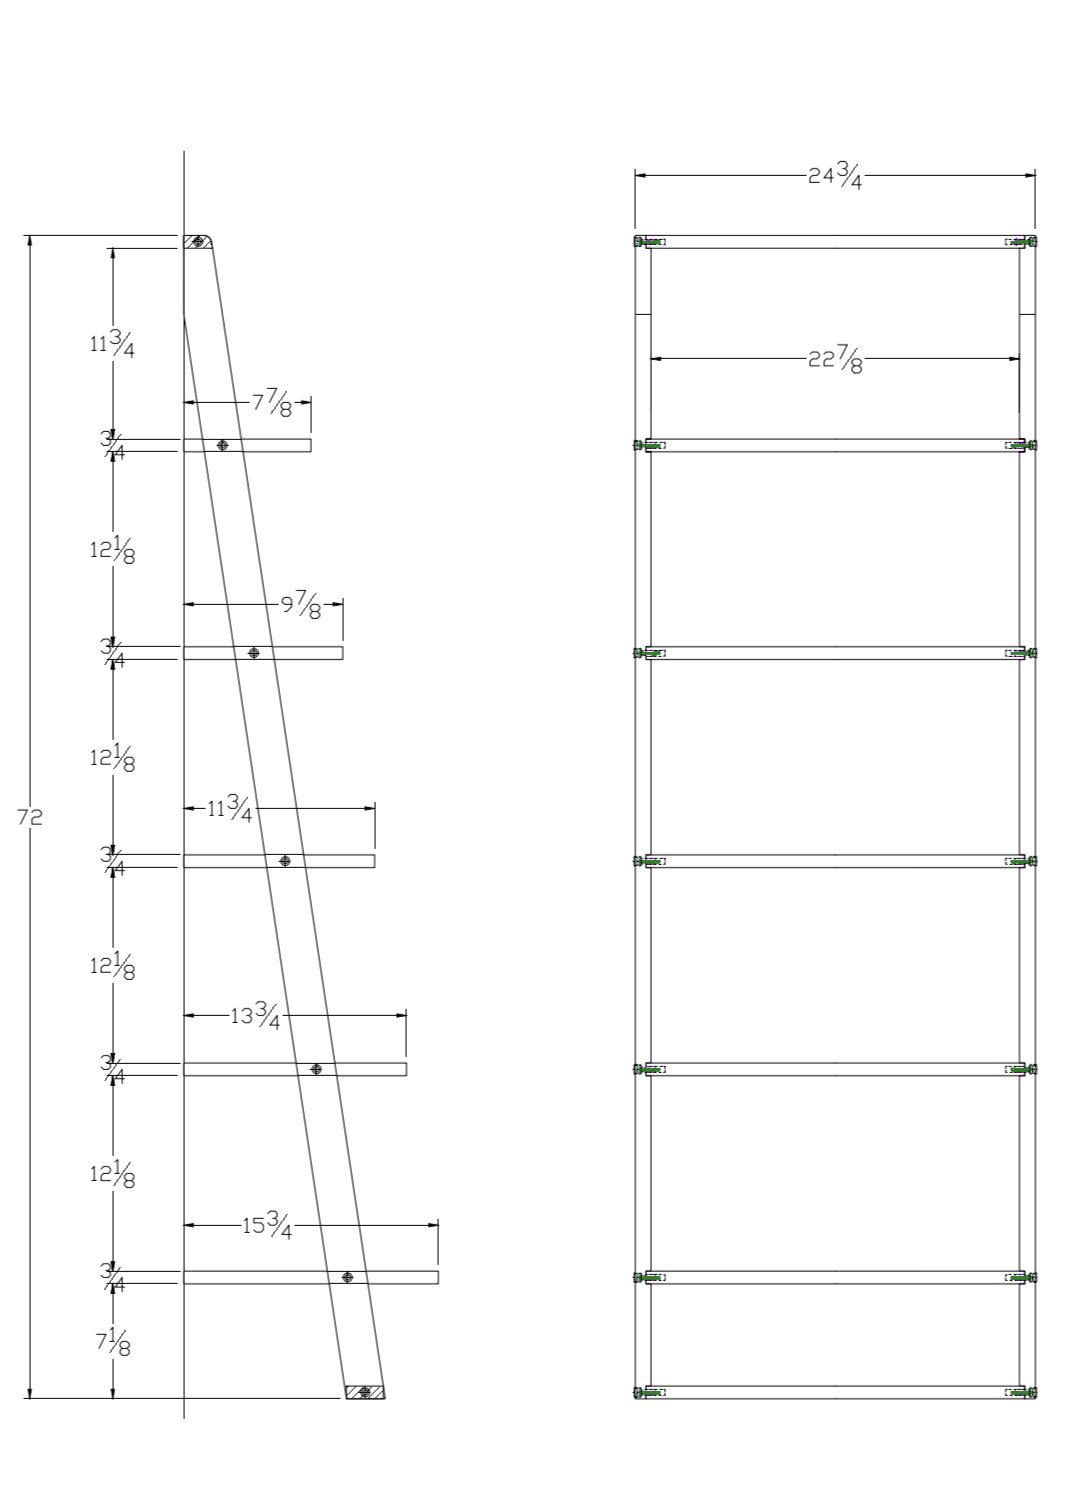
Determine the height of your ladder shelf and the sizes of the shelves that will go on top of it. I just found a nice shelf online that I liked, measured my space and I took their dimensions.
Here is a photo of the dimensions that are close to mine. I didn't fuzz about making it exact and just went the way that was easier.
Cut your shelves.
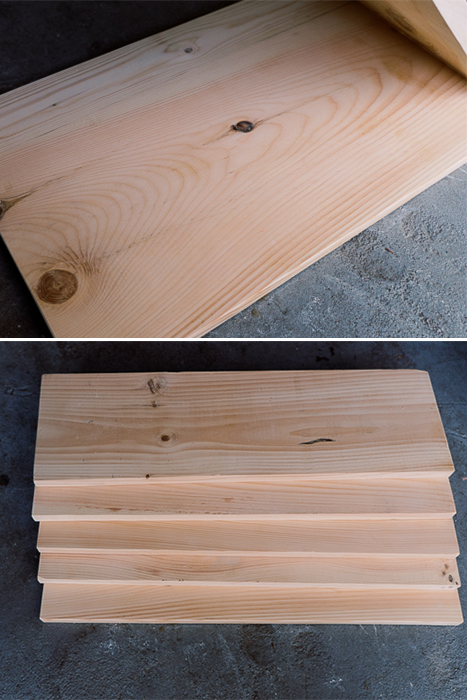
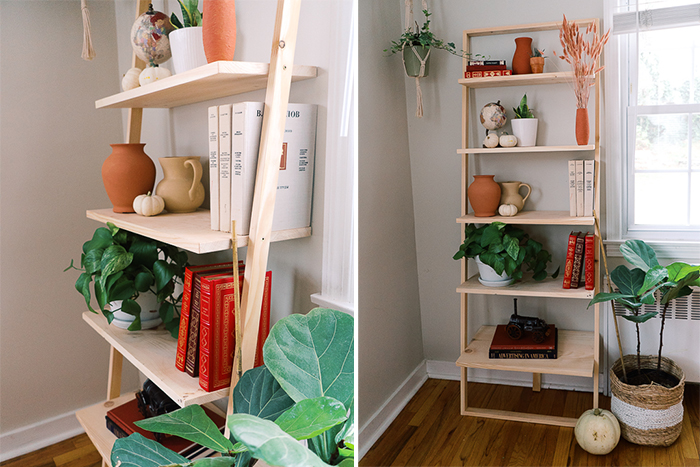
Skip this step if you are using plywood, but if you are going for solid wood shelves that I made in my case, then you'd need to attach a few boards to make 2 wider bottom shelves.
My largest shelf was the bottom one (16"x24") so I had to attach a 12" board and 4" board. And for the one above it, I attached 10" and 4" boards.
At first, I thought I could get away with just glue, but when it didn't work out I used a Kreg jig to secure the two boards together. It wasn't a perfect job so I had to fix a little crack in between, which I successfully did by using a wood filler.
Sand all the shelves so they are super smooth.
Step 2 - Make a base
Cut sides for the base
Determine how tall you want the shelf to be. Mine is 6 feet.
Take 2 boards 1x2x72" and cut them on one side at a 10-degree angle. This will go on the bottom and ensure the balance of the DIY leaning shelf, so it can actually lean onto the wall.

Cut (2) 1x2" boards at 24" to go on top and the bottom of the base.
Attach them to the sideboards using glue and 2" screws.
Make sure to use a triangle to make a perfect 90-degree angle. It's important for the balance of the shelf.
On the bottom, attach the 24" plank at an angle. It might come out a bit but you can sand it later.
PIN IT FOR LATER>>>>>>>>>
Step 3 - Assemble the ladder bookcase
Make spacers.
Even if you have a helping hand, spacers are so important for a faster assembly. I bet you wouldn't want to spend time measuring the distance between every shelf.
The space between shelves in my case is 11 ½". I already had precut scrap wood that I used as spacers (got so lucky haha).
Place spacers on the floor and start assembling the DIY ladder shelf from the bottom.
Take a level to be precise with shelf placement. And don't forget to level not only horizontally but vertically too.
Make pilot holes with a drill (to prevent wood splitting) and use 2" screws to attach shelves to the sides of the base.
Work your way up to the last shelf.
And it's ready!
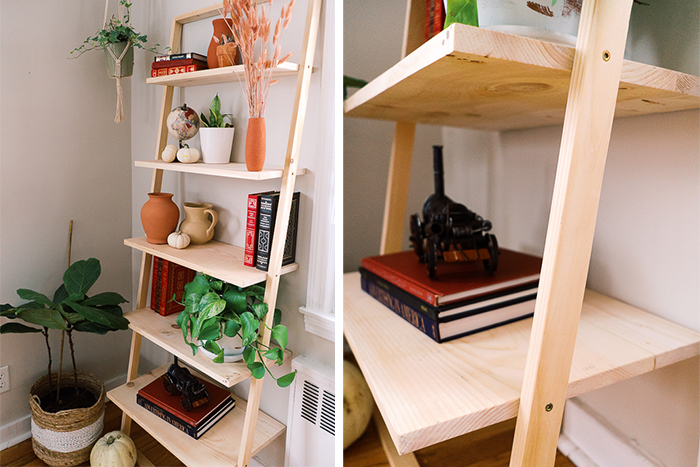
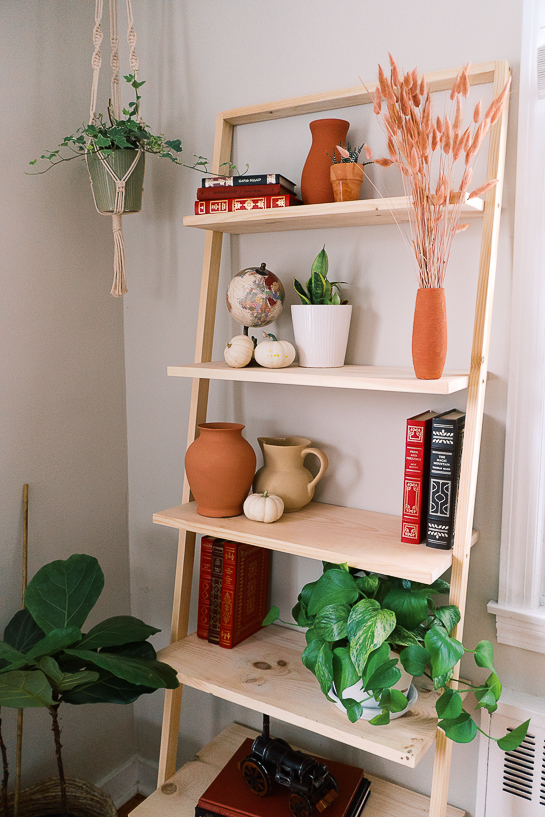
You can finish it with the stain or leave it bare. I left it as it is for now since it will go to my office and I want to see how it will look together with other furniture.
But let your inner designer take over and play with different wood tones!
It is so rewarding to be able to build a piece of furniture that you need, instead of simply buying it.
You do not only save money but actually create something with your hands! And it's an incredible feeling.
Plus, looking at the furniture at the store, it isn't cheap, but usually is such bad quality. Unless you go for something super expensive. So what's the point?
I encourage you to go and build a custom DIY ladder shelf that suits your needs, which will be perfect for YOUR home and I bet you will be satisfied with the process.
It doesn't even have to be perfect, mine certainly isn't, but I absolutely love it!
So go build something! And if you get any questions along the way, feel free to contact me and I'll help you along the way!
You can find me on Instagram @ifonlyapril. Don't be a stranger, let's be friends!
Happy building!
We thought you might also like:
xoxo,
April


Nathalia Basso says
Love ladder shelves. Thanks for the detailed instructions!
Nathalia | NathaliaFit - Fitness & Wellness Blog
http://www.nathaliafit.com
April says
Thank you so much Nathalia! I hope you will make one for yourself 🙂
sandy says
Hi! Love this! But have a question - I have been looking all over the internet for a ladder bookshelf with shelves (atleast the middle thru the bottom) at least 15" in depth - is there a reason I couldn't make your 11.75" level and the two below it the 15" depth? Does it mess with the balance or something? I need it to fit a record player measuring 14.7”l x 14.15”w x 3.84”h -- I've seen these ladder shelves which are actual desks so guess it SHOULD work but curious if you have tried or heard of anyone else doing so -- THANKS!
April says
Hi Sandy! I’m so excited you like this shelf! Thank you 🙂 To be honest, I’m not sure about the balance. It feels if you have 3 bottom shelves the same size then the balance will be off. But... if you attach the shelf to the wall I think it could fix the problem of balance. (I didn’t attach mine anyhow).
But I haven’t seen the design you are talking about anywhere. So maybe there is a reason for it😬