• Skip to primary navigation
  • Skip to main content
  • Skip to primary sidebar
If Only April
  • MEET APRIL
  • DIY PROJECTS
    • Kids projects
    • DIY furniture
    • Design plans
    • DIY holiday projects
    • Macrame
    • Transformations
    • Woodworking
  • VIDEOS
  • CONTACT
  • SHOP
    • Facebook
    • Instagram
    • Pinterest
    • YouTube
menu icon
go to homepage
search icon
Homepage link
  • MEET APRIL
  • DIY PROJECTS
    • Kids projects
    • DIY furniture
    • Design plans
    • DIY holiday projects
    • Macrame
    • Transformations
    • Woodworking
  • VIDEOS
  • CONTACT
  • SHOP
ร—

An ultimate guide to toy storage organization

Please note, that some of the links below are affiliate links and I will earn a commission if you purchase through those links (at no additional cost to you). Thanks for your support this way.

FacebookPinPrintEmail

The idea to write about the ultimate guide for toy storage organization was born out of necessity. I showed you before how we store our toys and the rotation system that we use.

I like to rotate toys every now and then and never have everything out. When toys are waiting for their turn, they are stored in a toy closet in my daughter's bedroom.

But the way we stored toys in the toy closet wasn't ideal. So I did a bit of organizing and completely changed it.

PIN FOR LATER>>>>>>>>>>

Steps to toy storage organization:

1. Gather all the toys.

Bring all the toys from everywhere to one room.

Take a laundry basket and walk around the house picking up toys. And I mean ALL of them, even that broken car that always turns up everywhere. And pieces of puzzles that you have no idea the original source of it.

That's probably the most daunting part of the process.

Try to do it while your kids are not around, otherwise,  it will become so much more difficult. You can maybe lock inside one room or do it when the kids are not home.

I promise the process will be worth it.

IF YOU PREFER VISUALS, WATCH THE VIDEO VERSION ON MY YOUTUBE CHANNEL

2. Sort the toys

The next step would be to go through all the toys and separate them into 3 categories: to throw, to donate, to keep.

Throw away all the broken toys, missing parts, everything that can't be fixed.

Whatever doesn't spark joy anymore in your child, you can either donate or sell. I'm looking at you, noisy activity cube that plays on my nerve every time someone touches it!

To be fair, I got rid of almost all of the singing toys a while ago and only left one activity cube with buttons. I'm trying to get rid of it but somehow it always comes back haha

=The next pile (and I bet it's still big) is to keep.

3. Categorize the toys

While the first two categories are relatively easy to do, the last one "to keep" will take some time to organize. We need to tackle this pile as well. Bare with me, the end is almost near. This is the most fun part of the process - to separate toys that you keep in categories.

Categories could be different for everyone. For us it was by skills: we've got

  • logical games
  • math
  • sorting
  • puzzles (separate category since we have so many)
  • animals (divided into the farm, wild, sea animals, and dinosaurs)
  • baby and toddler toys (things that my 1yo doesn't need anymore but still could serve me in the future)

Whatever works for you, make it happen. If you have tons of cars, make it a separate category, or art supplies (I'd recommend keeping them separately from the mix. I keep most of our art supplies in my craft room/office). 

4. Storage

As much as I'd prefer to have a more eco-friendly solution, I love clear plastic containers. If you think about it, I invested once and I'm going to use those containers forever, so maybe it's not a bad eco solution. I got these Hefty containers from Loew's. They are a bit pricey but I got them on sale, and I also used Rakuten (former Ebates) when they had %15 cashback. If you don't use Rakuten yet, you need to jump on it right now! Registration is for FREE but you get cashback while shopping online. Follow this link to register today!

The reason behind plastic containers is obvious -  I like to see what's inside the container to be able to get it quickly.

Whatever works for you, you can keep toys even in card boxes, that could be nicely decorated if you want to.

Find a place where you will store containers. Since we don't have a dedicated playroom, we keep it in my oldest daughter's closet. It didn't have a hook before but I changed my mind fairly quickly after someone (eye roll) got to the closet without me. The way I store containers is not ideal since while they are stuck on top of each other, it's more difficult to get to ones on the bottom. Ideally, you'd have each container standing separately.

These are my few tips on how to organize your kid's toys. It takes some time but it so well worth it. It's one of those things that you need to do once and then just need to maintain it. This system works for us. Let me know what's your tips and tricks to store neverending children's toys.

Check out my Etsy Digital Watercolor Prints shop and get a 30%OFF with a code IFONLY30.

YOU MIGHT ALSO LIKE:

Montessori-inspired shelf for toys that we had for a few years and I'd never go back.
Lazy Suzan pencil holder

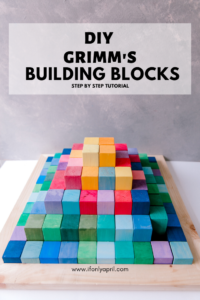
DIY Wooden building blocks

Are you a fan of little squares? Follow me @ifonlyapril.

Do you want to see video versions of my projects? Check my  YOUTUBE channel.

Also, check me on Pinterest, where I create inspiration boards for my next projects.

Till next time!

xoxo,

April

« DIY ball storage to keep balls in one place
Learn how to DIY a wooden produce storage rack for $10 »
FacebookPinPrintEmail

Reader Interactions

Leave a Reply Cancel reply

Your email address will not be published. Required fields are marked *

Primary Sidebar

Hi, I'm April! I love woodworking and making things! I hope you will stay for a while and get inspired to make something!

More about me โ†’

Popular

  • 5 Simple Mistakes To Avoid Getting Into DIY
  • How to DIY a gold Parisian mirror frame
  • How to make a Montessori floor house bed (full size)
  • 12 IKEA Alex drawer hacks that will inspire you (must see)

ifonlyapril

DIY Lifestyle Mom | ๐Ÿ“CT
New week, new build๐Ÿ˜Š I was so excited to replic New week, new build๐Ÿ˜Š I was so excited to replicate my first build ever that I made 3 years ago for one wonderful girl this week.

Plans are available on my blog ๐Ÿ˜Š
#ifonlyapril_diy #diyfloorbed
A friend of mine today told me that as a "not a DI A friend of mine today told me that as a "not a DIYer" she can't fully appreciate what I did to this closet. To her it doesn't feel like this transformation is so magical. 

So my DIYer friends, let's take a moment and appreciate what I did with this closet!! 
Swipe to see the "before"๐Ÿ™ˆ
#diymakeover #diyclosetmakeover #ifonlyapril_diy #diyyoutuber
Christmas decor video is live on YouTube ๐ŸŽ„ Swi Christmas decor video is live on YouTube ๐ŸŽ„

Swipe to see my almost successful experiment with epoxy and wooden rounds๐Ÿ˜„ watch the video to see what went wrong and how I think you could fix it. 
Details are on the blog and YouTube.
#diychristmas #diychristmaswreath #diychristmasdecor #christmaswithapril
This year I decided to update our stocking holder This year I decided to update our stocking holder and create this beautiful village.

The problem occurred when I couldn't decide how to finish it - to leave the wood as is or paint cute details in traditional Christmas colors.

So I made both ๐Ÿ˜
Which one would you choose?

Find full tutorial on the blog and YouTube.

#diychristmasdecor #diychristmas #diyyoutuber #christmaswithapril
Guess what?๐Ÿ˜๐Ÿ”ฅ It only took me about 6 month Guess what?๐Ÿ˜๐Ÿ”ฅ

It only took me about 6 months but I finished the playroom! ๐ŸŽ‰๐ŸŽ‰๐ŸŽ‰

EVERY piece of furniture is made by me over the course of last 6 months๐Ÿ˜ and decor tooโ˜บ๏ธ are you excited to see it?

I'm so excited! There are no words to describe it! 
The reveal will be on YouTube tomorrow at 10am est. Subscribe and turn on notifications to not miss it!!! It's epic!๐Ÿ˜๐Ÿ”ฅ 
#diymakeover #playroommakeover #ifonlyapril_makeover
NEW video is live on YouTube ๐ŸŽ‰ Last week I mad NEW video is live on YouTube ๐ŸŽ‰

Last week I made this Pottery Barn inspired bulletin board and I'm in love๐Ÿ˜ it turned out so much better than I imagined๐Ÿ˜
Read about all the details and material list on the blog.

And now to the real question - should I put it in the kids playroom (as intended) or keep it to myself?๐Ÿ˜๐Ÿค”

#ifonlyapril_diy #makersgonnamake #makersofinstagram #diyhomedecor
Witch wears Louboutin ๐Ÿ˜‚๐Ÿ‘ป @louboutinworld #d Witch wears Louboutin ๐Ÿ˜‚๐Ÿ‘ป

@louboutinworld #diyhalloweendecor #diyhomedecor #diyhalloween
Oh my! If someone told me 2 years ago when I just Oh my! If someone told me 2 years ago when I just picked up some power tools that eventually I'll be able to make drawers I'd think they were joking!!
But here we are! This day came when I can proudly say that I built a desk with DRAWERS!!! 

I was so so intimidated by drawers that I felt I'd never be able to make them.

Well, here we are! I'm presenting my new furniture design - kids desk with flutted drawers โ˜บ๏ธ

Watch my kids reaction in stories :) and official video will come live to YouTube on Monday. ๐Ÿ˜Š

Plans will be available in 2 weeks on the blog. Since I'm traveling ๐Ÿ˜… watch stories for that too!
Kisses ๐Ÿ˜˜๐Ÿ˜˜๐Ÿ˜˜

#diydesk #diykidsdesk #diyprojects #ifonlyapril_diy #makersgonnamake #ryobitools #diyfurniture #trendyfurniture #girlsehobuild
Load More... Follow on Instagram

Footer

โ†‘ back to top

About

  • Disclaimer

Newsletter

  • Sign Up! for emails and updates

Contact

  • Contact
  • Media Kit

As an Amazon Associate, I earn from qualifying purchases.

Copyright ยฉ IfOnlyApril 2022

Share this ArticleLike this article? Email it to a friend!

Email sent!