Kids grow so fast. You can barely soak all their cuteness in. It feels like yesterday my kids couldn't even walk and today they talk me back and argue with me.
Growing up we had a ruler on the doorway where my parents measured me and my sister every year. It was so much fun to see how much taller we've got over the summer. As much as I wanted to catch up, I was never taller than my sister 🙂
VIDEO VERSION OF THIS BLOG ON MY YOUTUBE CHANNEL
The house we live in now isn't my dream home - the one where you live forever. I know we will move out from here in a couple of years. If I start to make measurements of my kids on the door, it will be hard to take with us when we move. Do you think our landlord agrees to this? 😉
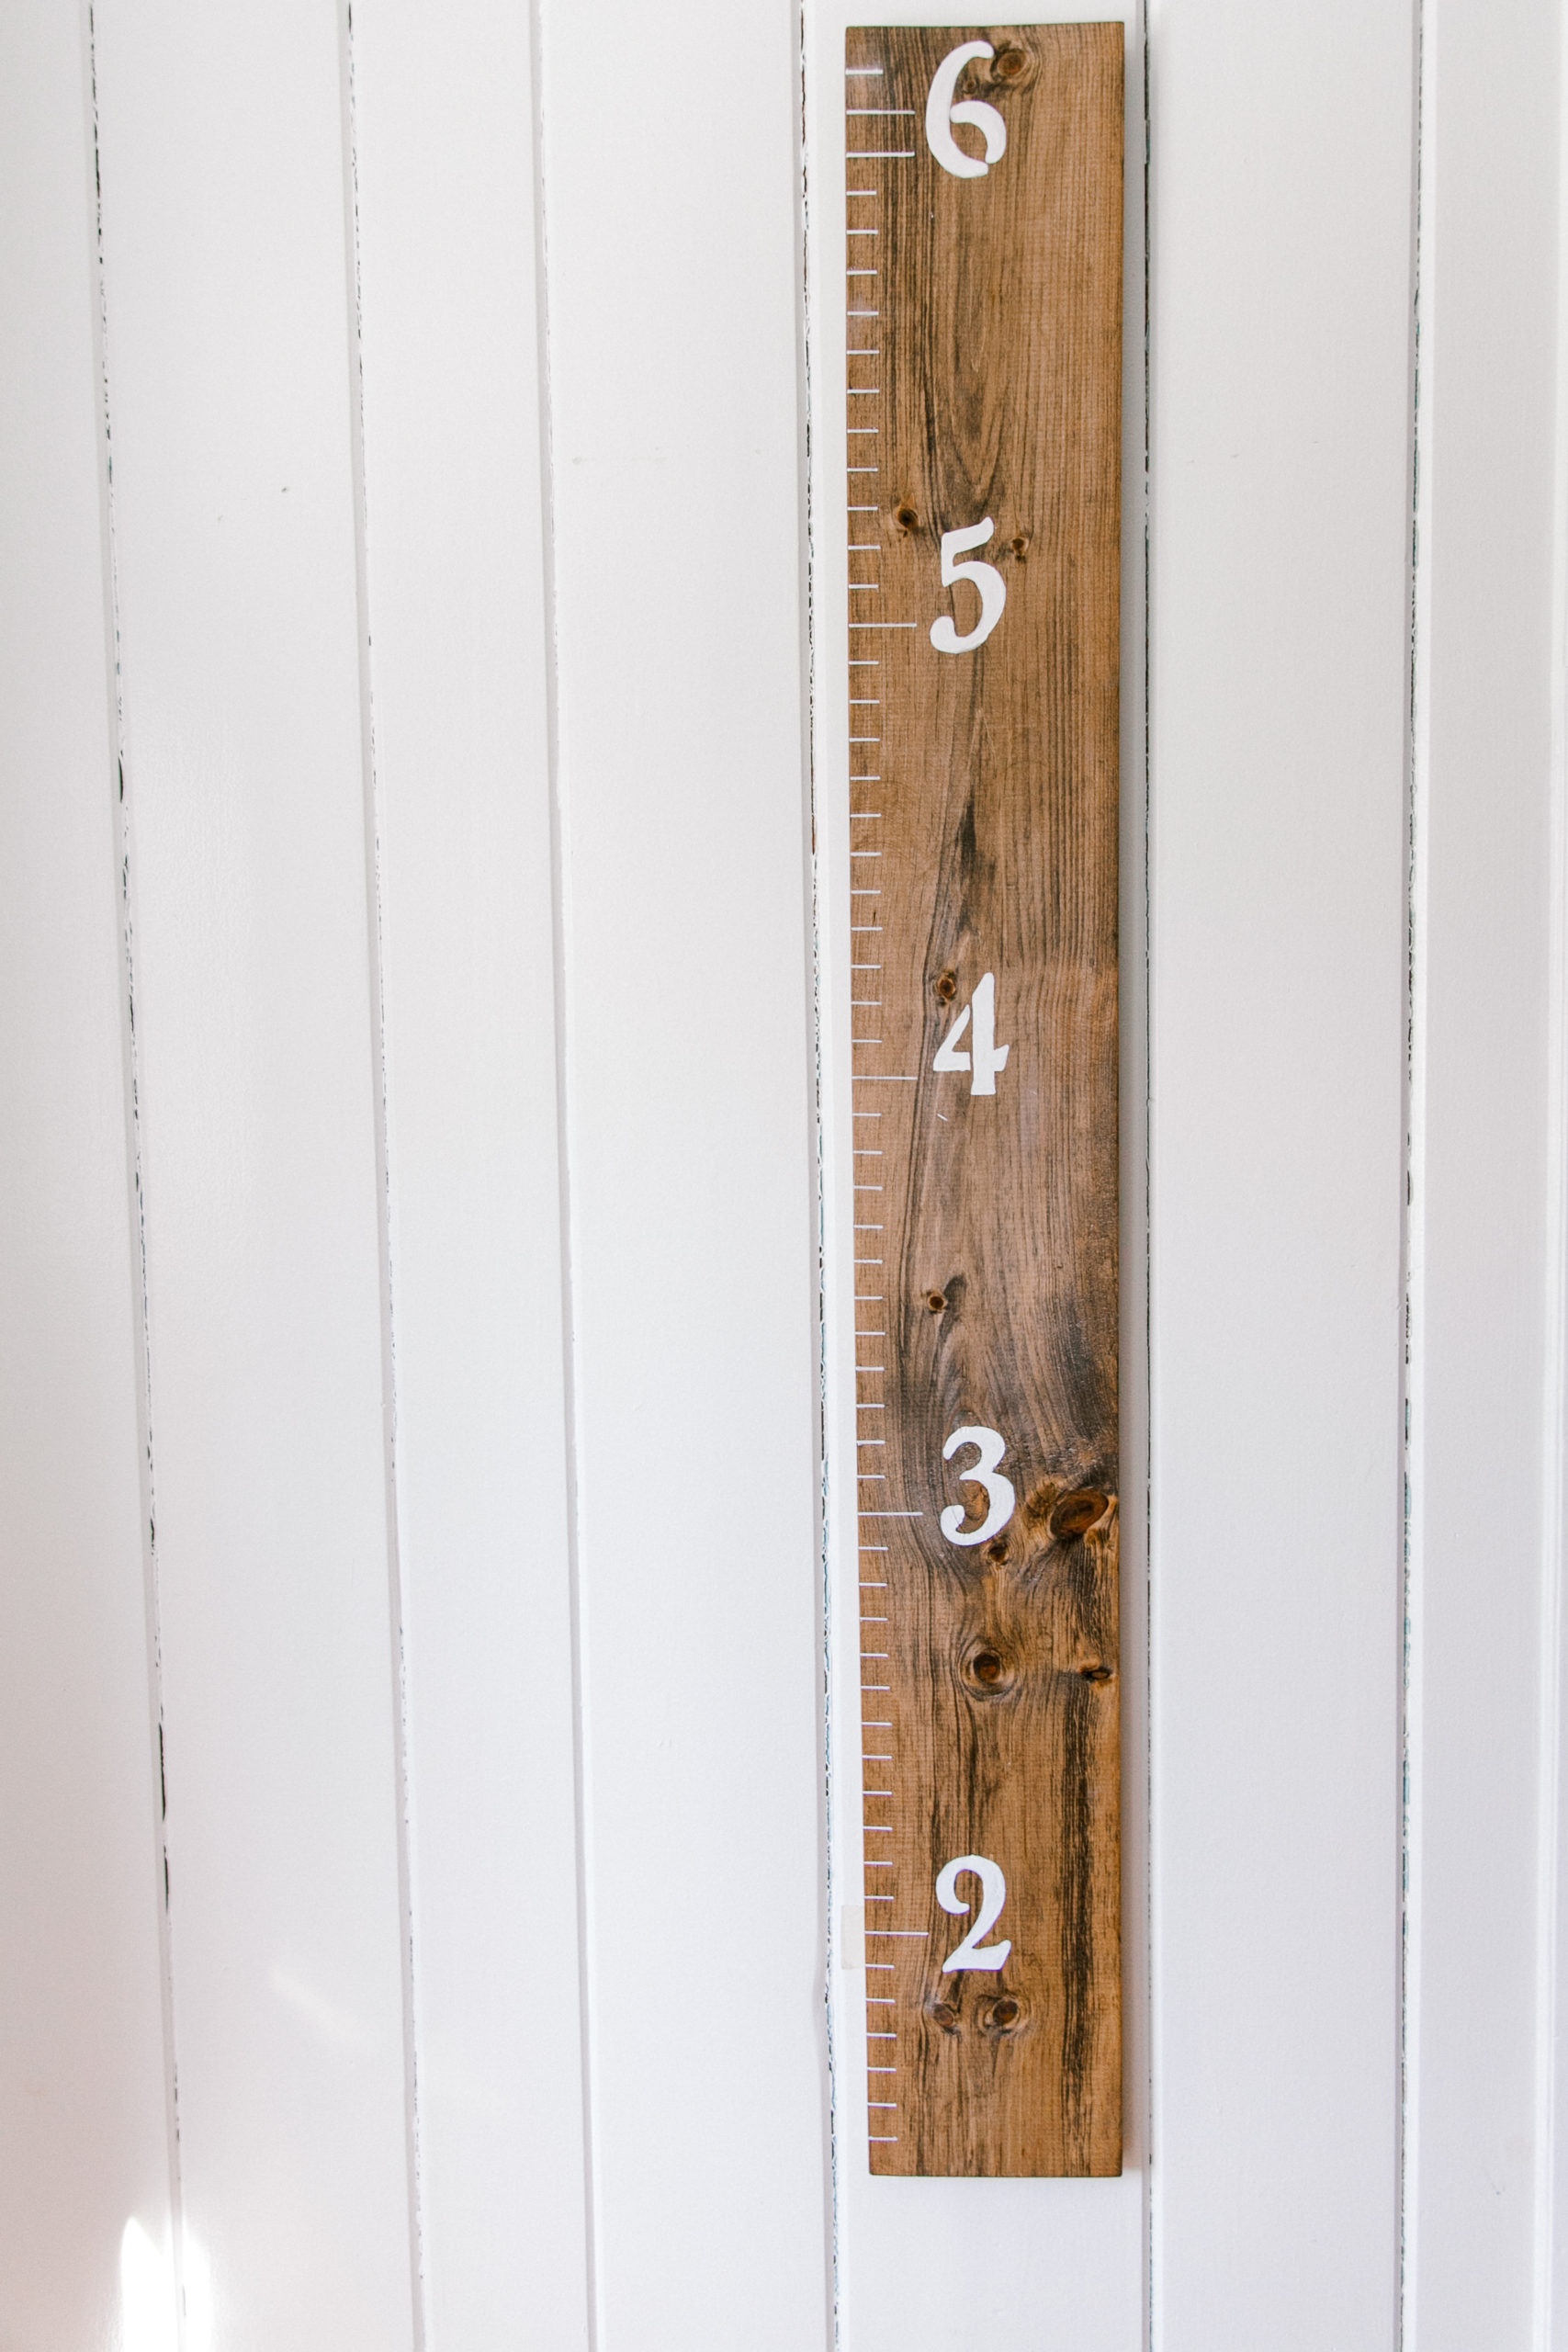
A DIY wooden growth chart is a perfect solution for such a little bump. Make it. Hang it. Measure your kids. Take it with you as you go.
It also perfect for parents who move around a lot. And makes a great housewarming or Christmas gift.
Since it's handmade, it could be done for under $10.
So what will you need to make your own DIY wooden growth chart for kids?
MATERIALS:
Disclaimer: Please note, that some of the links below are affiliate links and I will ease a commission if you purchase through those links (at no additional cost to you). Thanks for your support this way.
- wooden plank (1x8x6)
- wood stain (optional)
- white paint pen
- stencils(optional), you could also print out numbers and trace them
- white acrylic paint
- a ruler
INSTRUCTIONS:
1. Prepare your wood. I lightly sanded mine and stained it with my favorite mix - dark walnut and classic gray.
2. Wait till the stain dries.
3. Measure the ruler's side. My original plan was to make inches from one side and centimeters from the other since we use both.
I quickly realized that it's too much work and chose to do only inches since they are wider and I'd need to draw less.
Who is lazy? Me?!
I call it a short cut 😀

5. Originally I wanted to use paint for the inches lines. I tried it and realized that unless you have a hand of a surgeon, you'll get uneven lines and it won't look nice.
I wanted to get a white paint sharpie but read tons of negative reviews about it and purchased the Amazon choice - these paint pens.
Pens didn't disappoint and did the job at the best they could. I outlined the liner with it twice.
Originally I wanted to print out numbers and trace them down to the board. This is a cheap and quick solution. Unfortunately, my printer decided that it doesn't want to work anymore.
Then I got from Amazon stencils with numbers. I figured that I'll need it anyways in the future.
It made the job much easier. I tried to cover whole numbers with a paint pen, but it didn't work. They were too thin to fill it all and cover numbers evenly. So I had to pull out my acrylic paint.
From there the process went faster but you need to be very careful with paint not to smudge it.

To put it on I measured 2 ft from the bottom and aligned it with the mark on the DIY growth chart.
>>>>>>>> PIN FOR LATER
That's how you make the DIY growth chart. It's super easy and could be done under $5 if you don't buy paint pens and number stencils.
As always, if you prefer to buy instead of DIY, there are plenty of options on the market. Amazon has a few, as well as Etsy.
There are some cool ones with signs and a slightly different design. I planned to paint the tree or write something on mine, but after working with paint, decided against it:D
The minimalist DIY growth chart will stay with us for a long time and if I decide to paint it, I can do it later.
Now I just need to figure out how to mark the actual height on the dark stained wood 🙂 Probably with a sharpie 🙂
WE THOUGHT YOU MIGHT ALSO LIKE
DIY WOODEN BABY GYM AND TOYS
DIY PLAYSILKS FOR OPEN-ENDED PLAY
TOY TREE HOUSE FOR A PRETEND PLAY
Are you a fan of little squares? Follow me @ifonlyapril.
Also, check me on Pinterest, where I create inspiration boards for my next projects.
Till next time!
xoxo,
April


Leave a Reply