

You've probably seen already this absolutely gorgeous FELA Anthropologie chandelier. It's been all over Pinterest and I can understand why! But the price is quite high, in my humble opinion, so today I'll show you how to make a FELA chandelier dupe, spending way less money. My DIY tassel chandelier is inspired by the original one, but as always I like to put my personal spin on it. So let me introduce you to my version. It's fun, cheeky, and exciting!
I was debating at first and wanted to make this DIY chandelier using the same neutral colors but since it will be handing in my kid's playroom, I felt it needs more color.
I chose this yarn from KnitPicks for a few reasons.
First, if I need to knit something, I ALWAYS choose their store. They have a great variety of yarns at a great price. I've made this newborn flower band with it before and various clothes for my kids that I never showed here.
Second, The quality of the yarn is amazing. And third, they have a great variety of colors to choose from. This was probably the determining factor for me to choose their yarn.
If you want to see a video version of this tutorial, you can watch it on my YouTube Channel.
Subscribe to get a notification!

Cost: $45
Time: 7-8 hours
Difficulty: beginner

Materials
- yarn (my colors are Canary, Copper, and Clementine)
- scissors
- #16 single jack chain
- a small book
- Metal ring 14"
- Ring 10"
- Metal ring 7"
- Binder ring 1"
- pendant light (I used the one from a broken lamp, but here is similar)
Instructions
1. Take your book and make a tassel. I like to use a book since it's easier to cut the yarn. You'd probably want to test a few times the length and thickness of your tassels. Don't be discouraged, the first one probably won't look as good, but with practice and after you make a hundred, you'll be a pro 😄
It took me a few tries until I came to my perfect tassel. I'll share with you the exact dimensions and thickness that I made for mine.
How to make a perfect tassel
1. Get your book and hold a thread with your left finger. Make sure the end of it is on the side where you will cut the tassel.
2. Wrap the yarn around 30 times (that was my perfect number, but see for yourself what you like better)
3. Using scissors, cut the end of the thread on the same side of the book where you started.
4. Cut another thread (about 7"), and put it through the top of the tassel. Make a knot. Make sure you make that knot very tight, so use a finger to hold it down.
5. Then go ahead and cut the bottom. That's where the book comes in handy because it's easier to put scissors through.
6. Carefully gather the tassel. Take another thread (about 12") and make a loop knot. If you are not familiar with a loop knot, I explained how to make it when I made the simple macrame planter.

2. When you get one tassel ready, make about a hundred more😄
I made 83 tassels for the 14" ring, 52 for 10" and 41 tassels for the 7" ring.
3. The rings that I got were in silver color and I thought it won't go too well with the warm colors of the DIY tassel chandelier so I spray painted it with satin bronze paint to give it a more cohesive look.
Here is a beauty about DIY! You can customize anything! And don't be discouraged if the color isn't right, you can always paint it over!
4. Lay down all the tassels and start to tie them to the hoops. I figured that doing it while tassels are hanging is the best approach. Repeat with all the rings.
5. Take a 1" ring and the chain, I used these rings for binders and put them on the pendant light.
PIN IT FOR LATER

Chain break down
8 - 3" chains
4 - 8" chains

6. Break the chain and make eight 3" chains to connect the loops and four 8" chains to connect it with the 1" ring.
Select the middle ring and attach 4 chains to the smaller ring. Try to keep the same distance between them.
I tried at first to make chains 4" each but had to redo it since I didn't like how low under each other the layers were hanging.
7. Move on to the large, 14" ring after you finish the small ring. Starting with the middle ring, attach 4 chains to the large ring in the same places as the small one.

When you are done attaching layers for this DIY tassel chandelier, take 8" chains and attach them in 4 places to the 1" ring. That 1" ring will go on the top of the pendant light and will hold the DIY tassel chandelier together.
Don't be afraid to experiment. At first, the chains seemed too long, so I shortened them till I got to the perfect 8" length.
8. Add the pendant light and hang your DIY tassel chandelier.

Trim the extra thread on the top. I tied an extra knot so it's more secure.
9. Cut bottoms of tassels to give it an even and aesthetic look!!

Your beautiful DIY tassel chandelier is ready!
Not going to lie, it took me about 8-9 hours to finish it but it was so worth it! This chandelier is so gorgeous and will be hanging in my kid's playroom, brightening up space!
I'm very happy with the choice of colors and a choice of yarn! It looks so beautiful! It's probably my most favorite project that I did recently and I also saved money, since the overall cost is only $45.

We thought you might also like
Pottery-barn inspired DIY pinboard with butterflies

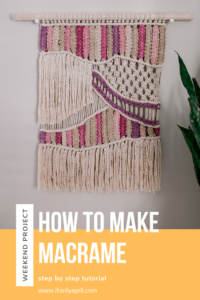
Macrame wall hanging with a naturally dyed thread, this one was a lot of fun to make!
Simple macrame plant hanger, it's so easy, you can make it in 30 minutes!

Trash to terracotta vases or how to make any ugly vase look beautiful

What do you think about this DIY Tassel chandelier? Do you like my version? Leave me a comment below, don't be a stranger 😀
Follow me on Instagram @ifonlyapril. I try to post in stories my progress and behind the scenes for all my projects.
xoxo,
April


Leave a Reply