
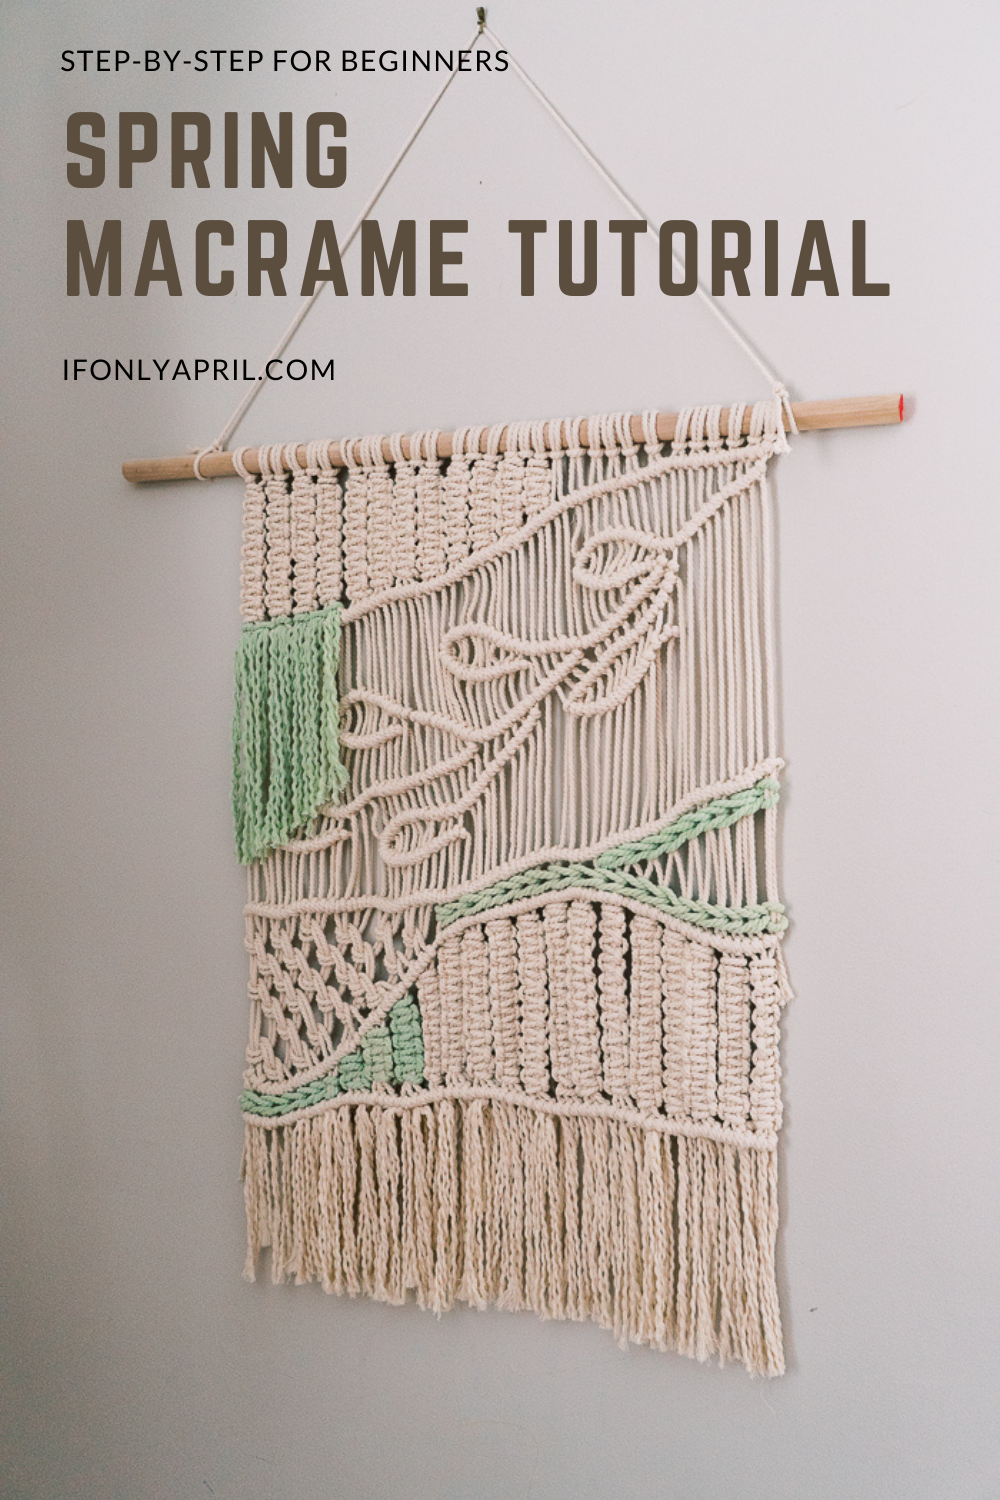
I've tried macrame a few months ago for the first time and I just fell in love. It's such a therapeutic thing to do. My first macrame still brings me joy every day, so I decided to make another one. This macrame wall hanging is inspired by spring and the trees, the branches, and the awakening of nature. I'll walk you through this easy tutorial so you can make one for yourself as well.
Tips on dying macrame rope with natural ingredients
If you watched how I made my first macrame, you know that I enjoyed playing with natural dyes to create a colorful cobra weave. Last time I experimented with brown, pink, and blue colors.
For this spring macrame wall hanging, I wanted to try to get the green color. And what kind of adventure it has been!
After dying macrame rope the first time, I've learned a thing or two. The most important lesson was that natural dye fades over time. The macrame still looks lovely but the colors faded a bit over the last 6 months.
After doing research, I've learned an important step that I missed.
Preparation.
It seems that for color to stay on you need to prep it first and use some sort of mordant or dye fixative that will let color stick to the fabric and stay this way. More about it later.
Materials
- 3mm cotton rope
- scissors
- wooden dowel
PIN IT TO MAKE LATER
How to macrame wall hanging
Making the base
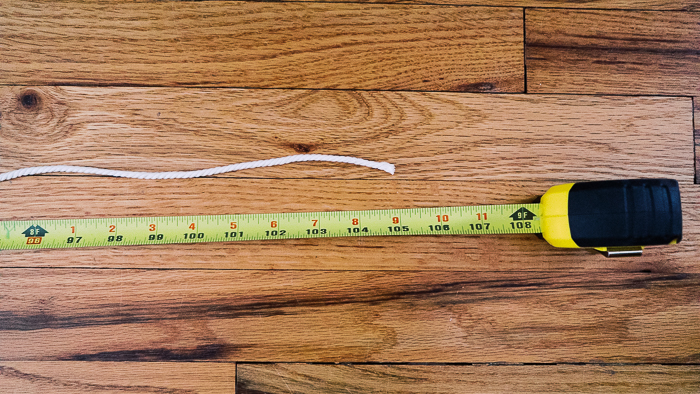
I started with cutting 30 ropes into approximately 9 feet long each.
Make lark’s head knots all the way through.
Row #1
Make horizontal double half hitch knots from right to left, slowly making a wave down.
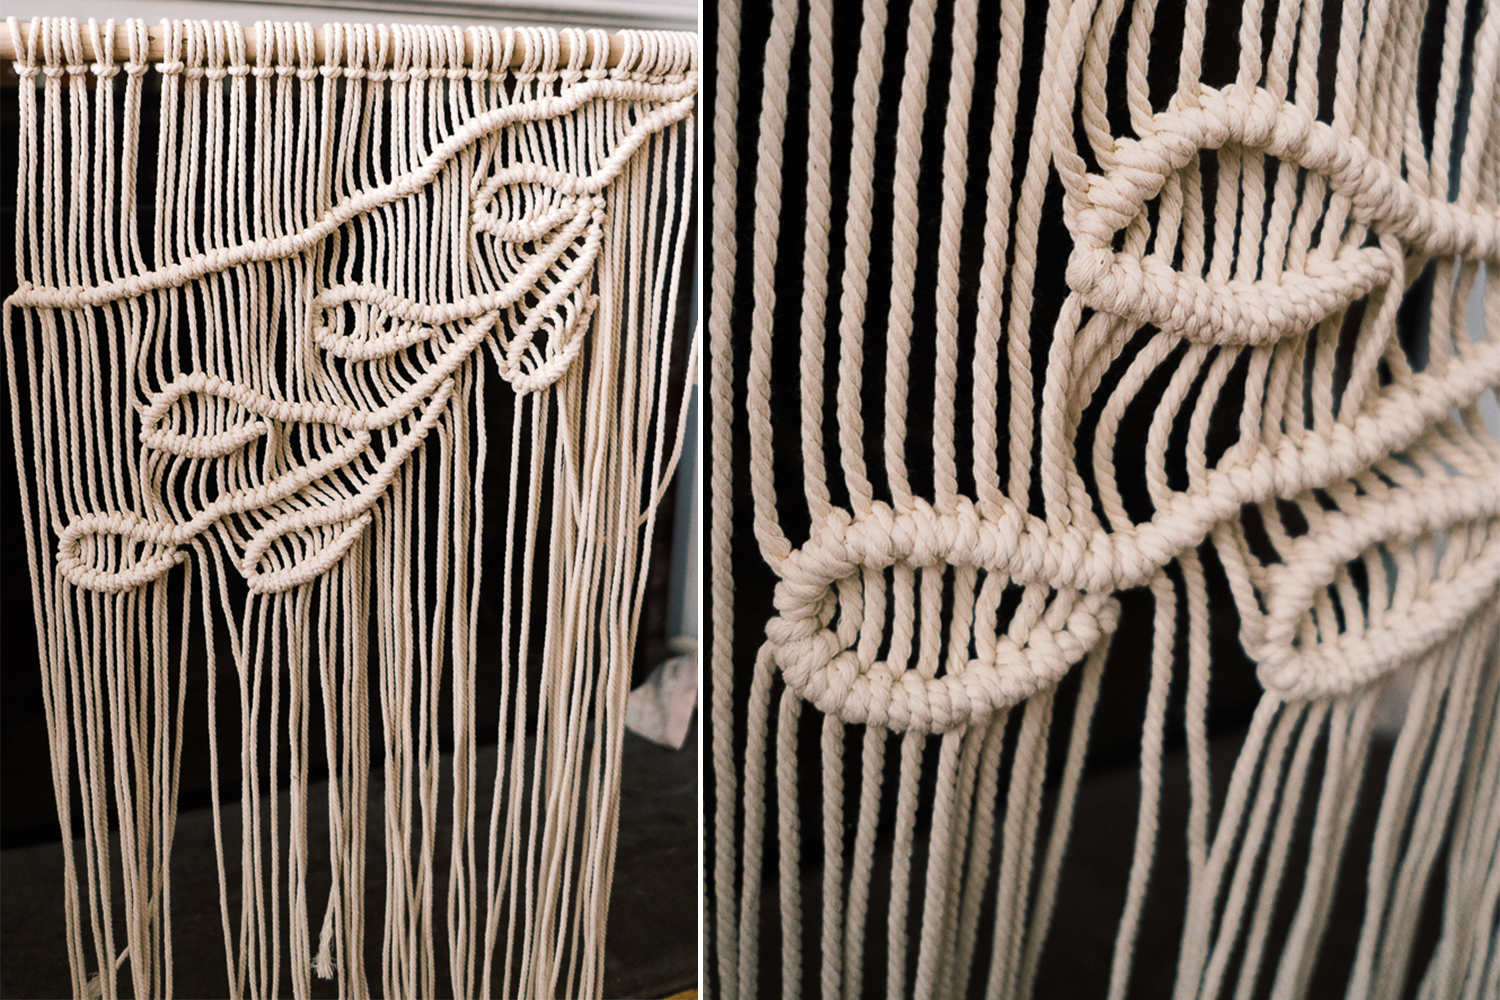
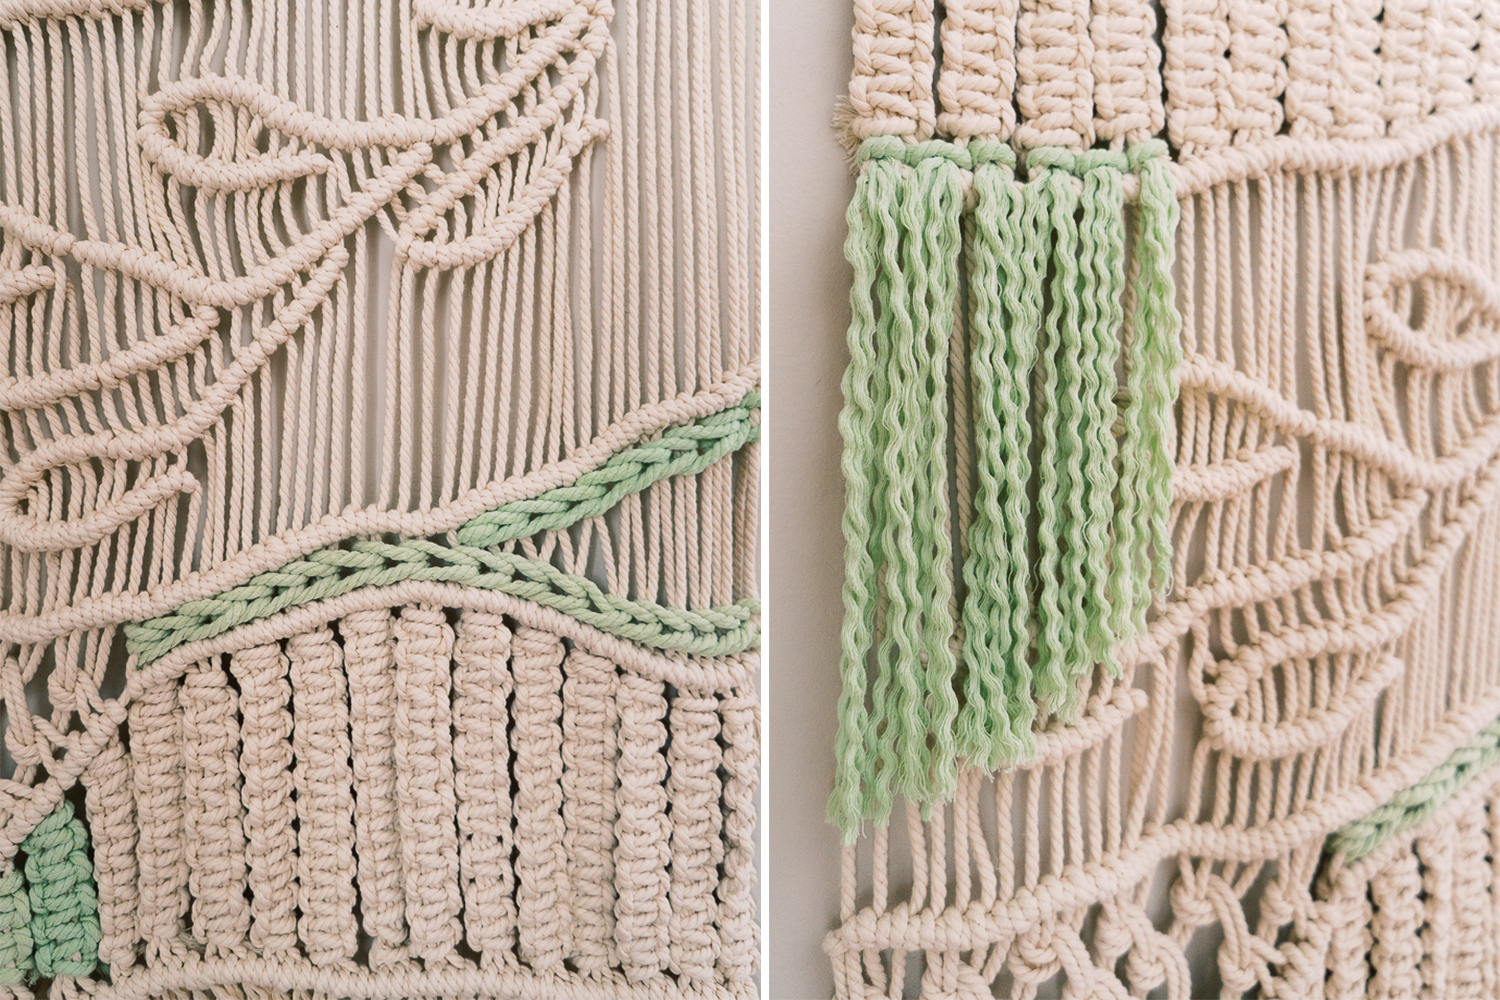
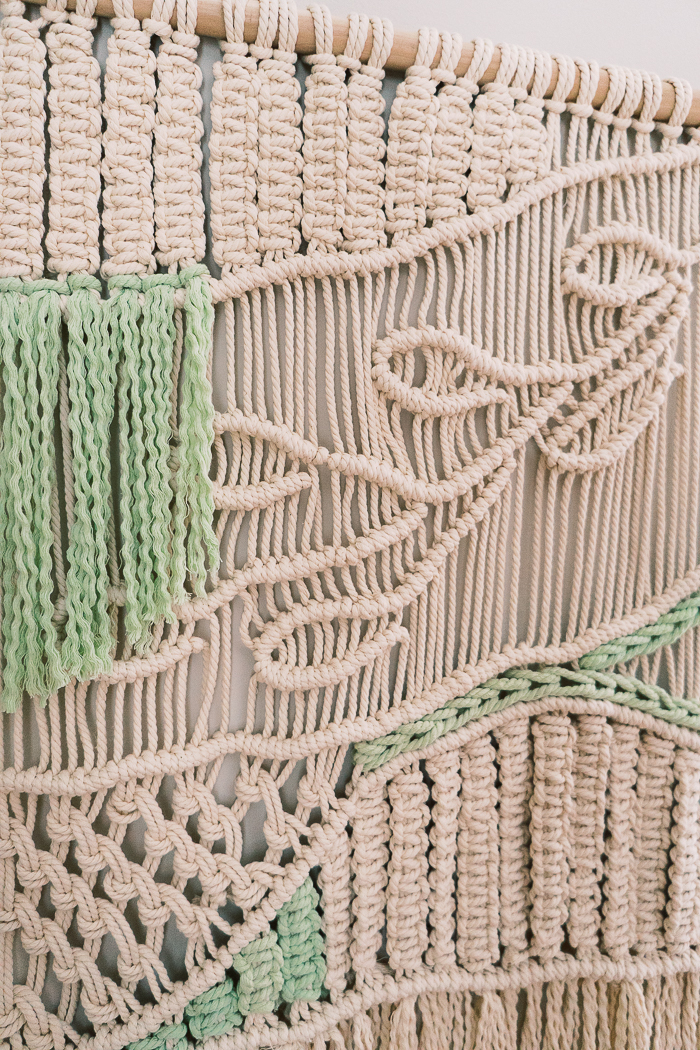
Making a vine and leaf
Start from the right side and make double half hitch knots slowly moving down. After approximately 3 inches start working on a leaf. Slowly start moving left and up still making double half hitch knots and creating a shape of a leaf. When you get to the end, use the same thread that you used for your last knot and make another one right under it in the direction to the right.
When you finish the leaf, pick up a near thread and continue making the branch to your left.
Haha I really wish I could explain it better but it's hard😄 that's why I made the video so you can learn from watching it.
But let's continue. Expand the branch and add more leaves as you go. I had to redo a few leaves since they got a bit tied up and were changing the lines to the side.
You can change the shape of the leaves till you make another row. So don't be shy and try it a few times.
Row #2&3
Make double half hitch knots throughout your macrame and then add another row a bit under.
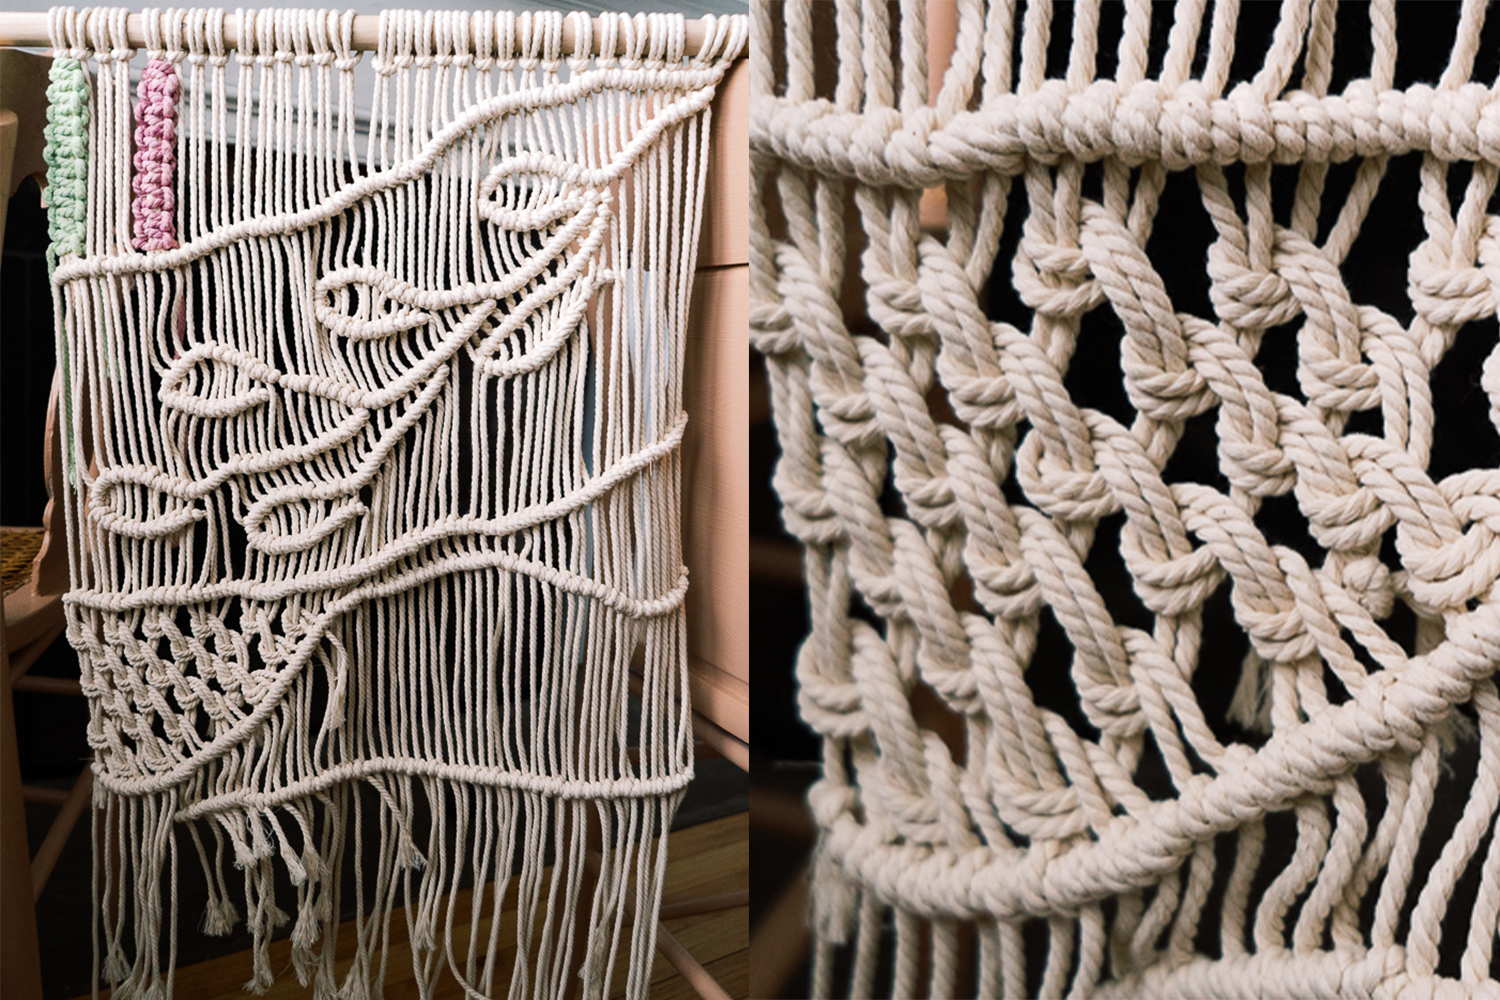
Row #4
This was a new type of knots that I tried. It's effortless to make but looks interesting and reminded me of swirls on the sky. NB: If you know the name of the knot, please let me know in a comment and I'll edit the post.
Dying macrame rope with natural dyes (and food coloring)
Getting green color from spinach
I desperately needed to get green haha
And since I set my mind on it, it was hard to stop thinking about it.
After some research, the most approachable option was to get the color from spinach. It's the middle of the winter and I don't have carrot stems or camomile leaves handy. Or even grass for that matter (🤔 I think I should try it again in the summer)
I decided to use spinach for my experiment. Good thing I had 1lb of it. Long story short, I ended up using the whole pound of spinach!! But the color was so dull and muddy, and not the green I was looking for.
I used it per all instructions that I found online which were:
- boil ropes in mordant for an hour (I used salt and vinegar)
- boil spinach for an hour
- soak ropes overnight to get the rich color.
And it DID NOT work!!
Sadly, the color itself from spinach boiling for an hour wasn't great. I'm not sure what I did wrong, maybe you have some suggestions?
The color of the water after spinach was muddy green and on the rope, it became just slightly visible and dirty looking.
Coloring macrame ropes with food dye
So I decided to turn to food coloring. Last year I dyed play silks for my kids in food dye, and it turned out amazing. So I thought to give it a try on the rope as well.
I'm not calling it quits, just took another route🤪 Remember? I HAD to have green no matter what.
Food coloring turned out to be so much better!
You can find a full tutorial on my blog about DIY play silks, but here is a summary.
- boil 3-4 liters of water
- add 2 cups of vinegar
- add food coloring
- soak ropes in it for some time (till you are satisfied with the color)
- take it out and rinse under cold water
- let it dry
To get the green color that you see on my macrame I used this food coloring. I added green and yellow to soften the emerald green food coloring. I think it turned out lovely!!
On a side note.
Always compare your color to the original. Now looking back I think I made the mistake of not comparing my spinach-colored ropes with the original. And maybe it didn't seem like a good color but it actually was compared to a macrame rope. We'll never know!
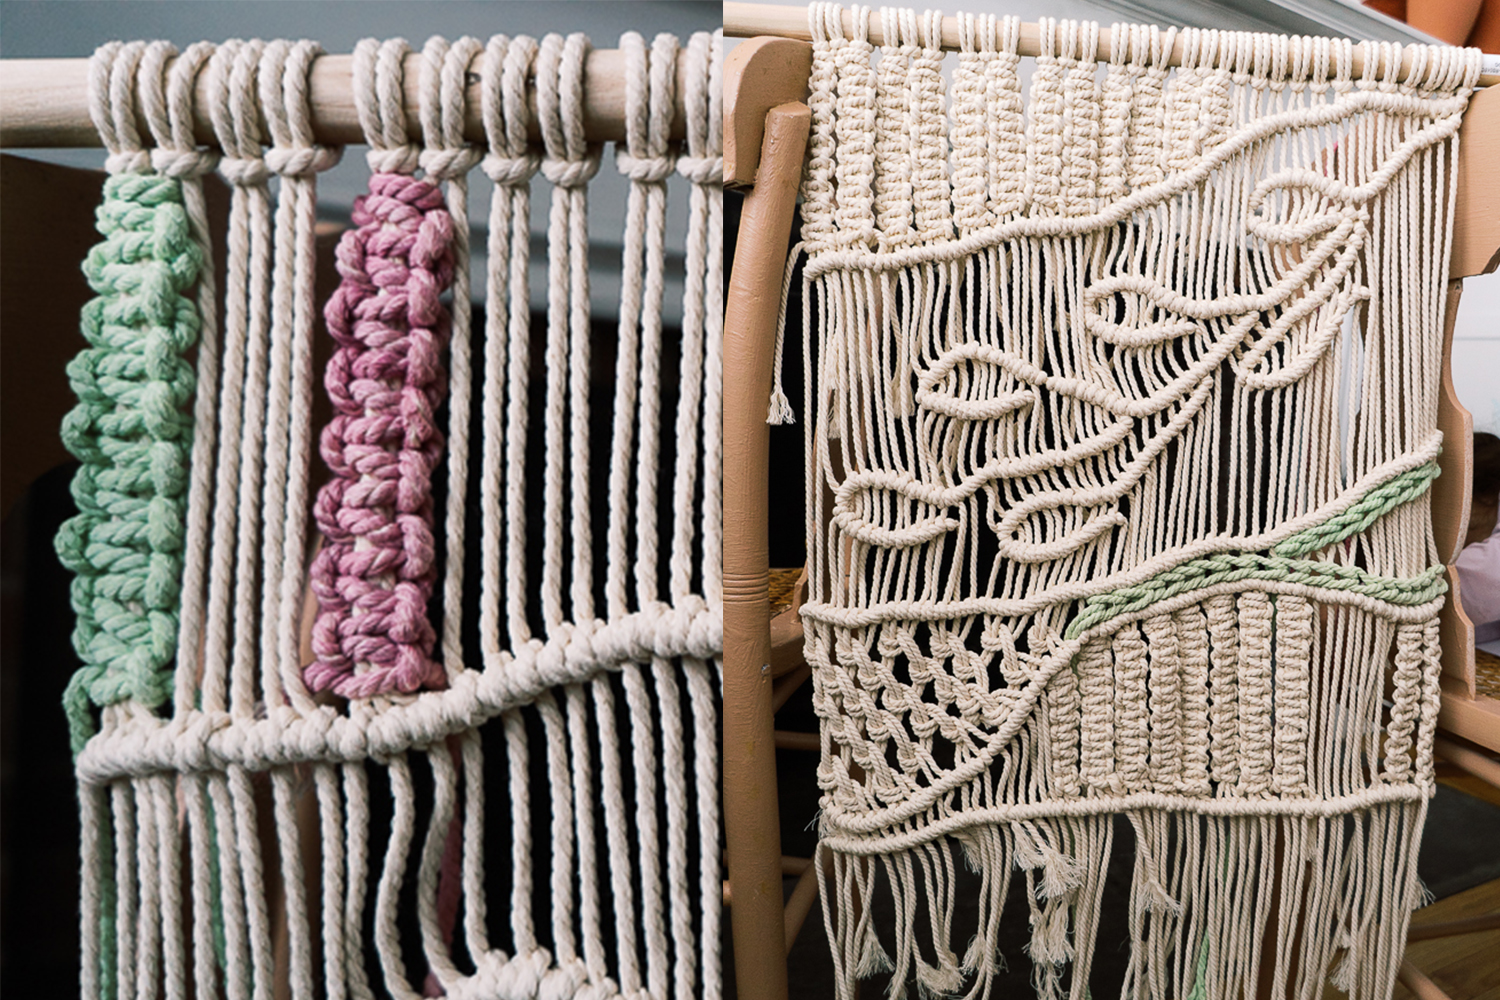
Cobra weaving
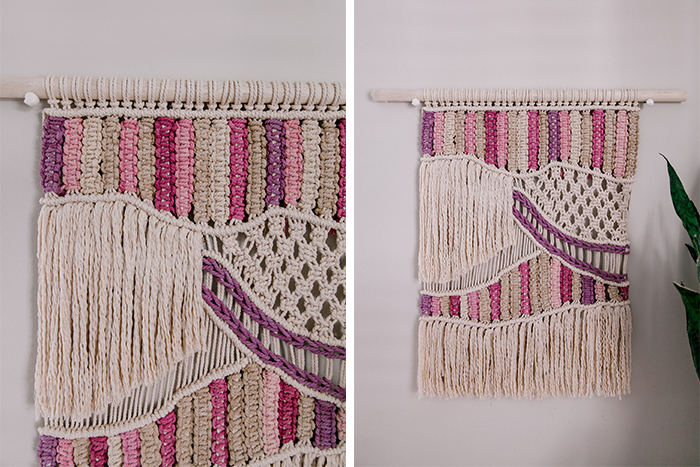
At first, I planned to use pink and green, but when I made pink and was playing around with different cobra weaving, I realized that it's probably better to use only one color. I made a cobra weaving with natural rope and I think it looks divine!
To get the pink color I did the same thing as last time, I used Hibiscus tea and the result didn't disappoint. I wanted to be sure that the color won't fade over time so added vinegar to hibiscus tea when it was ready. For more details on how to dye with hibiscus tea, check how I made my previous macrame. I hope this will help the color to stay longer but I guess the time will show☺️
Above the cobra weaving, I added soumak weaving in green color. I think it adds that needed pop of color.
I finished off the macrame with a fringe and added a green to the left and made fringe on the bottom.
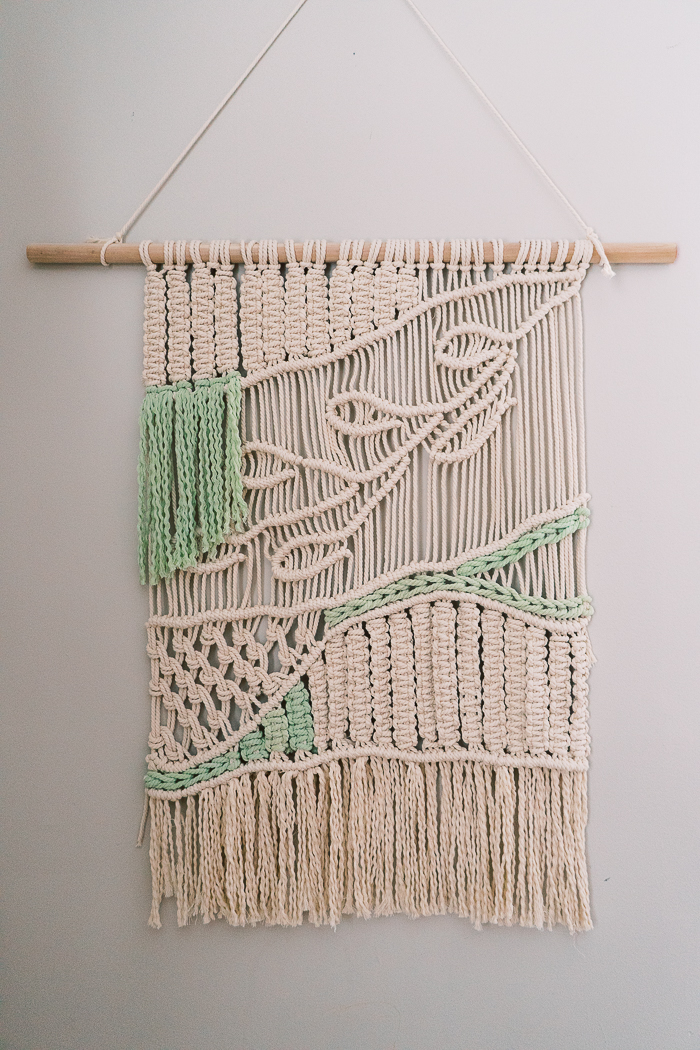
I love the way it turned out! It's been quite a journey with this macrame but the result was so worth it! I call it "Spring" since it's inspired by nature and that macrame branch gives me all the chills!
I hope you found this macrame wall hanging tutorial useful and it inspired you to make one for yourself! What do you think?
Watch me make spring macrame
I made a video tutorial for this spring macrame wall hanging.
Check it out and subscribe to my new YouTube channel if you haven't yet! 🙂
You can find it here.
If you'd like to see my first ever macrame, you can find a tutorial here or watch me make it step by step.
xoxo,
April
We thought that you might also like
How to paint on fabric (DIY pillow throws) or you can watch me make it here.
How to make an entryway organizer

How to build a raised garden bed or watch me make it here


Synthia Teaff says
The tapestry can be created into the shelf or worked around the side based on how it's designed. Macrame tapestries can be created into patterns.