
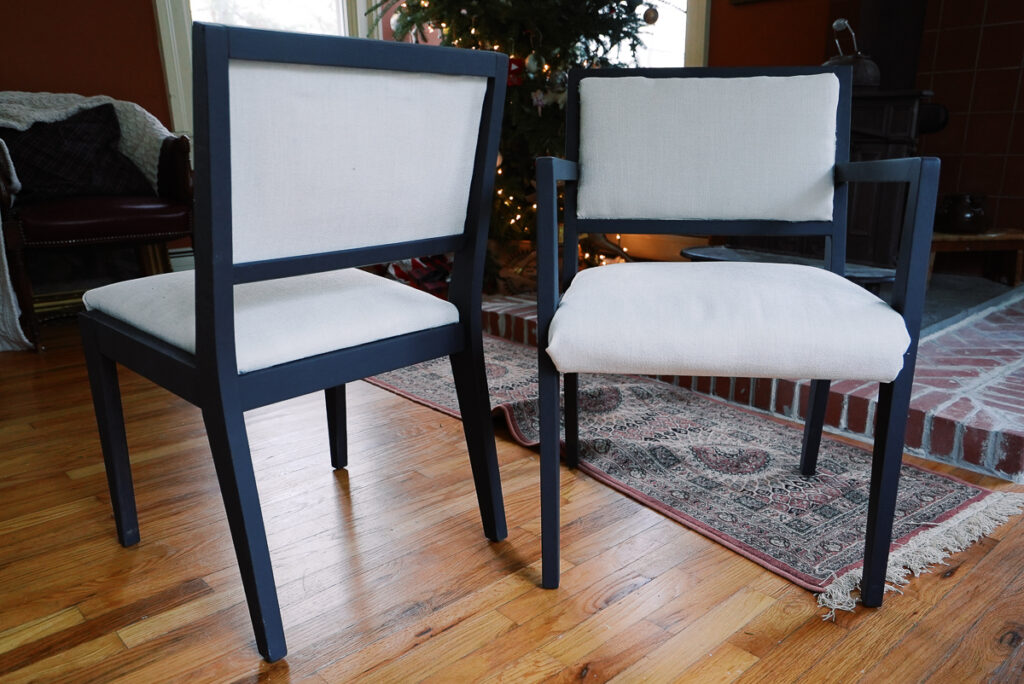
I recently got these 2 simple chairs from the auction for a whopping $1 for both. I was intimidated to start this project, but it's not as hard as it might look. Today I'll share a step-by-step tutorial on how to upholster a chair.

There are a few essential tips to mention before you start.
Take as many photos or videos as you possibly can! The chairs that I'm upholstering are pretty simple, so I didn't have to memorize where why goes, but if you have a more complicated project, taking detailed photos and videos would help you put it back together.
I'm writing this tutorial on reupholstering the chair if it has good bones. My chairs were in decent shape structurally, but I wanted to refresh the look of the wood. So I used black chalk paint after I took off the upholstery.
I applied 3 coats and sealed them with Polyurethane to protect the paint.
Can I reupholster a chair myself?
It might feel intimidating, but as soon as the bones of the chair are in great shape, with a bit of fabric and a stapler, you can give it a whole new look in a matter of hours.
That's considering that the chair is not too complicated. For example, I'm still intimidated to get on a wingback chair, so today, I'll show you how I reupholstered simple dining chairs that don't require sewing or cording.

Materials
- A chair
- upholstery fabric
- foam stuffing
- staples
Tools
- Stapler
- fabric cutter wheel
- Scissors
What fabric to use for upholstery?
You should choose special heavy upholstery fabric. I'd recommend getting a performance fabric - it was designed for easier clean-ups in case of spills and dirt. I will let you know how mine holds up
Instructions
Step 1. - take apart the old upholstery

First, you need to disassemble the chair. I started by removing screws from the bottom of the chair and on the back.
Take off the seat of the chair. I first started working on the seat.
Take apart the old upholstery for a replacement. You'll need something to remove the small brad nails. I used scissors, but it wasn't ideal, and I'm sure there is a better tool for the job.
Let me know in the comments if you know which one!
It took a while to take it apart. The nails were rusty and Didn't want to cooperate. But after almost an hour, I got rid of all the pins.
Also, if your chair is ancient, it wouldn't hurt to wear gloves to protect your fingers from all the dirt. I didn't do it for the most part, but it's not a bad idea.
When you take your upholstery apart, remember where everything goes. It was easy with my chairs but if it's something more complicated then definitely take as many photos as you can.
Step 2 - cut new fabric and foam filler

Take an old upholstery and a fabric cutting tool, and trace it on the new fabric, leaving about 3 inches from all sides.
Things to keep in mind when you cut it are to leave enough space on all the sides. It's easy to cut off the access later.
At the same time, cut the filler to the correct length. I decided to leave the padding where it was and add extra padding.
In theory, you could change everything, but I thought the old one was good enough.
PIN IT TO DO LATER

Step 3 - attach the new fabric.
The next step is to attach the new fabric. First, put the new fabric face down, add padding on the top and then add the base.
Start stapling the new fabric from the middle on the sides of every inch, ensuring it's tight all the time.
When you get to the corners, fold it once, staple it, then fold it again and staple it again. It might not sound very easy, but I promise you, it's not.
After the first corner, you'll get the hang of it. Mine doesn't look perfect, but I still like the way they look.
Cut off access fabric when you are done.
Step 4 - reupholster the back of the chair

Repeat all the steps from above for the back of the chair.
What is important to remember here is to ensure that your staples are precisely where the previous brad nails were. After I put the back of the seat in its position, I noticed some pins coming out.
It added an extra step of adjusting staples. Avoid this by making sure your staples are very close to the edge.
Step 5 - put the parts back.
I used new screws to attach reupholstered seat and back to the chair since the previous ones were rusty and in bad shape.
That's it!


Sure, it's not perfect, but I've learned much during the process and am ready to start working on more "valuable" pairs.
This project cost me around $30, mainly for the fabric. Not too bad for new-looking chairs.
I put them in the kitchen to compliment the kitchen nook table I made a few weeks ago. That probably was overly ambitious for me. Let's see how long chairs will last after my kids start using them 😁
Follow the process of renovations and projects on my Instagram @ifonlyapril to see behind the scenes.
xoxo,
April


Leave a Reply