
We usually go crazy about Christmas here, and by "we", I mean yours truly! 😁 Every year I make not only an advent calendar for my husband but also a separate one for my kids. This year I decided to make a DIY advent village calendar from cardboard that would have 24 small houses 🤗 So exciting, right
I usually don't like to repeat myself so do a different kind every year.
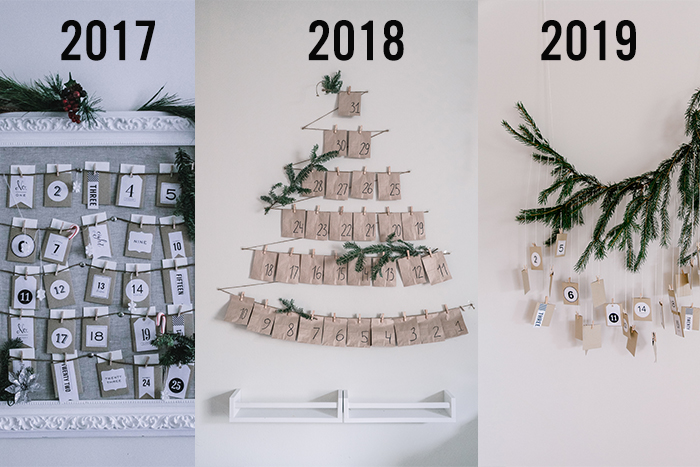
Here is an advent calendar from 2017, when I went all the way to make my husband's Christmas absolutely special! I came up with the 24 date night ideas that we did in the countdown to Christmas.
This advent calendar I made in 2018 for my daughter and it's gorgeous in its simplicity!
2019 was also a year of clean, natural, and simple look and I loved the way it turned out! Just keep in mind if you leave the natural breach in the house next to the heater it won't have a long life.
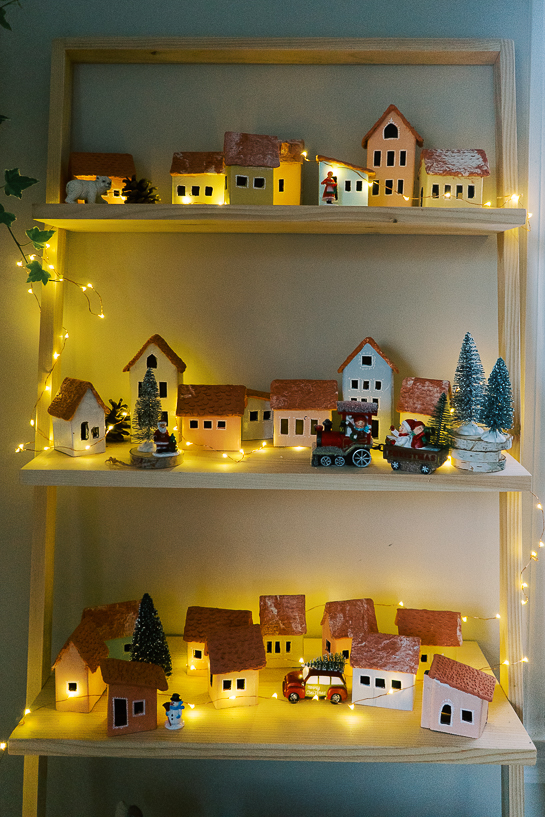
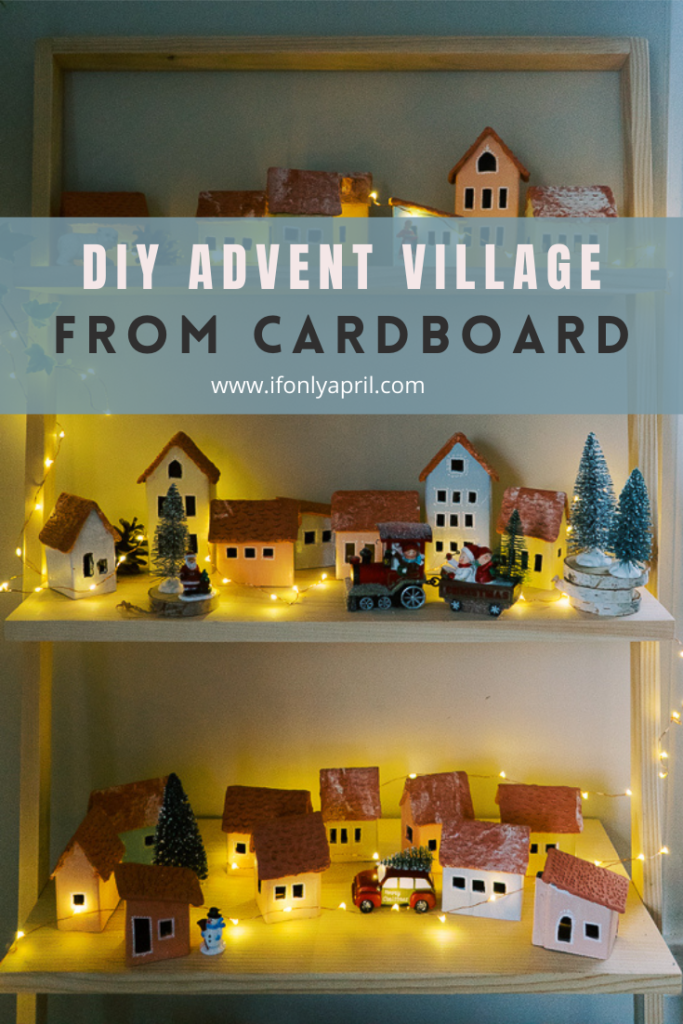
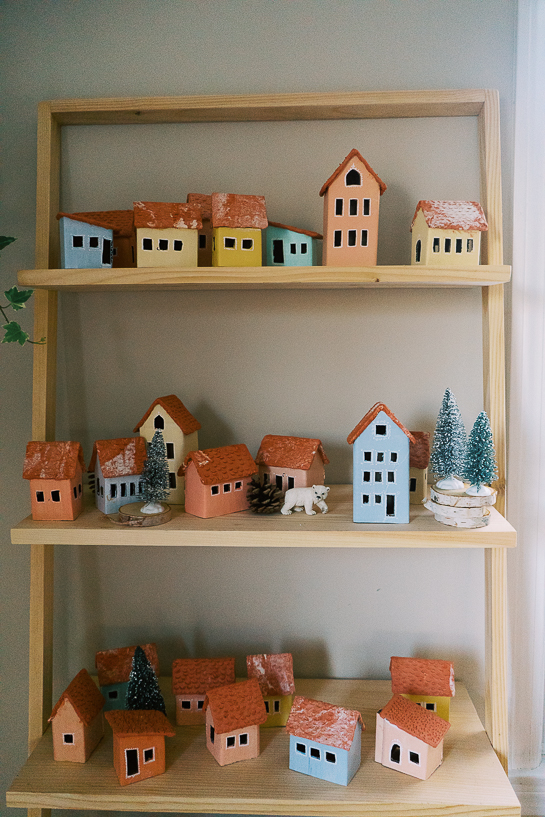
This year I decided to make a village full of putz style houses for my kids. At first, I wanted to make it from wood but then decided that corrugated cardboard is probably a better idea since it won't take up as much space to store. And oh my, it turned out so much more lovely than I expected!
Another thought was to make it from poster board but I figured they won't be very stable and my kids probably destroy it faster than we count down till 25 😅
It's super cheap to make. I got a box made of corrugated cardboard but a regular card box from Amazon packages would work just fine!
Overall it took me about 8 hours to make it, paint it, make roofs, and style it... but it was so worth it! The time-consuming factor was to come up with the different models for the houses. I made your life easier and my templates are available for FREE download here.
Not having to come up with designs would save you a couple of hours. The assembly was a bit time consuming but a perfect activity for a light movie night.
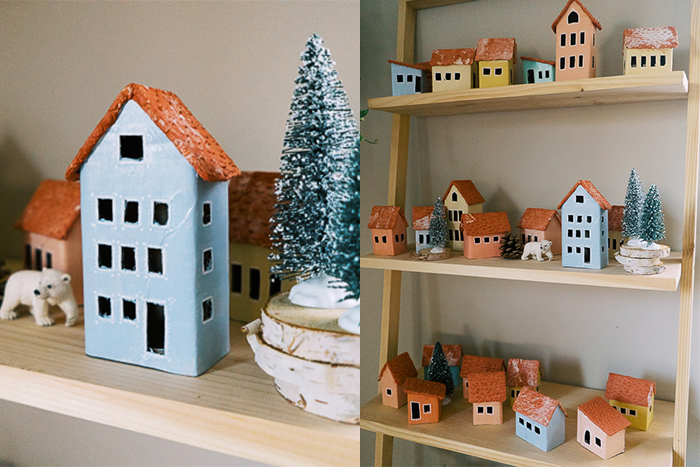
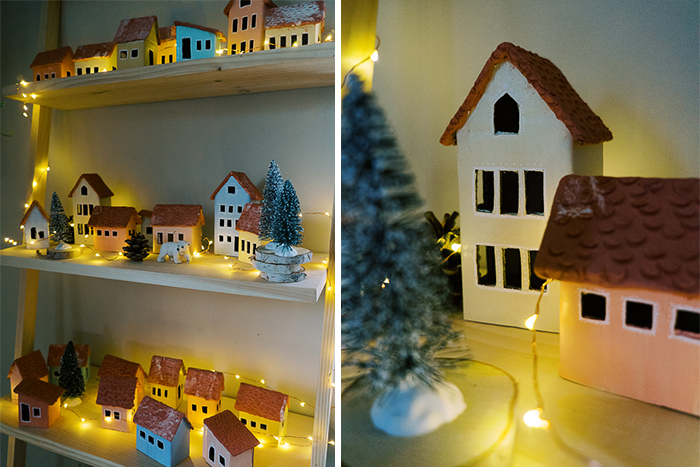
There are 4 styles of houses, each of them could be customized if you shrink it a bit or make it larger.
The great thing about these cardboard houses is that you can decorate it as you wish! They are super customizable and could be part of any theme!
We went for a snowy candy-like DIY advent village.
If you want to see a video version of this tutorial, you can find it HERE
Subscribe to get notifications!

Cost: $5
Time: 7-8 hours
Difficulty: easy
Materials:
- corrugated cardboard
- red clay for the roof
- hot glue gun
- Sharp craft knife
- Scissors
- white paint pen
- fairy lights
- Acrylic paint (I used Arteza, love the colors!)
Instructions:
1. Take a template and trace it over your cardboard. I found that making them "against the grain" would make it easier to assemble later.
Cut out the main piece and a roof. They are all marked in the template. Use a craft knife since it will give you cleaner edges. But scissors would work too.
During the process, I've learned that you can take a ruler and use it while cutting with a craft knife. It will make edges cleaner and even.
2. When the "base" for the house is ready, take a craft knife and make windows, by simply cutting through. This will add some character to the DIY advent calendar village. I added different window sizes, different shapes of doors. It gives a different look at all the houses so they don't look like "cookie-cutters".
I just did it freehand and wasn't worried much about it to be even, but if you are a perfectionist than probably spend a bit more time to cut windows precise 😁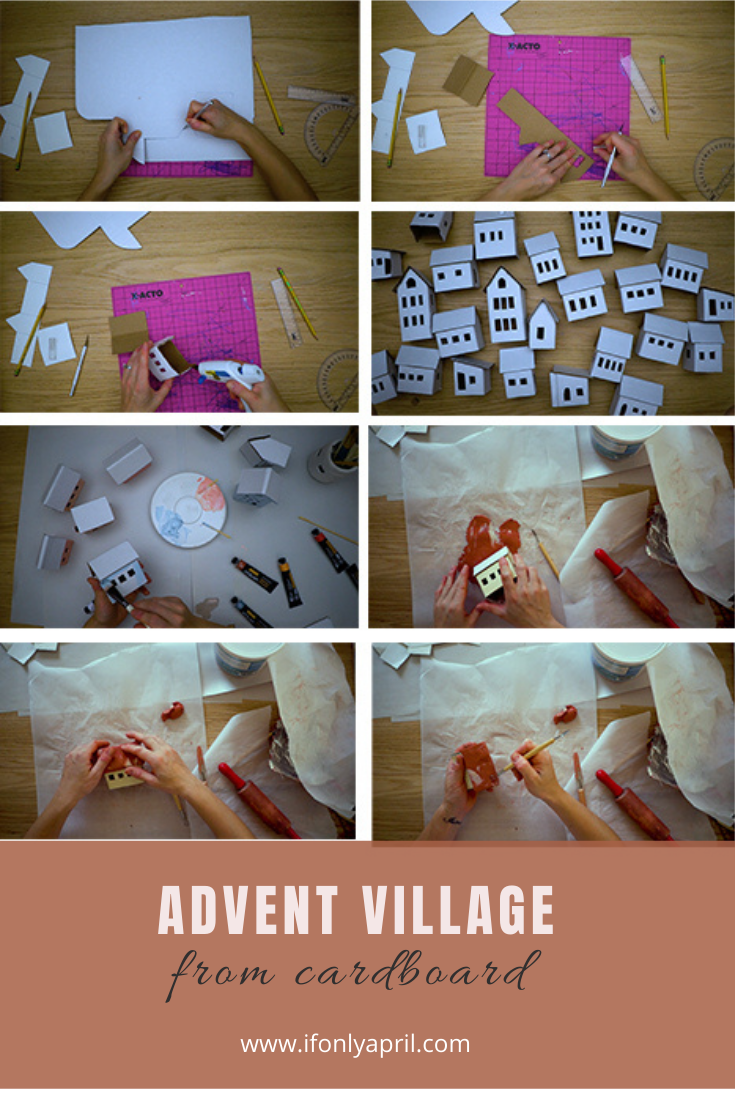
It's kind of tedious to make these windows so I only made it one 2 sides and didn't bother about the back of the house.
When making windows also keep in mind which side will be the front one, you'd want to attach a side to be on the back.
3. Fold houses on the lines and using a hot glue gun, attach it on the side.
Glue the roof to the top. When attaching the roof, glue one side first, wait for it to harden, and then get to another side.
PIN IT TO MAKE LATER>>>>>>>
4. Make 24 of them😁
Yes, it's a bit time-consuming. I think it took me about 4 hours to assemble them.
Note: To save time, precut all the houses before assembly and glue a bunch of them, not just one by one. Working in batches like that will certainly make work go faster.
5. The most fun part is to place them and decorate them. My kids gladly helped me with that part and it was such a fun activity to do with them.
We painted them in candy village colors. I took a bunch of acrylic paints that I recently got from Arteza (oh, how much I love their paints!) and painted the vases of the houses.
You'd need to mix up white acrylic paint and add a drop of color to create these tender shades. I used orange Mars, cold gray, and light peach.
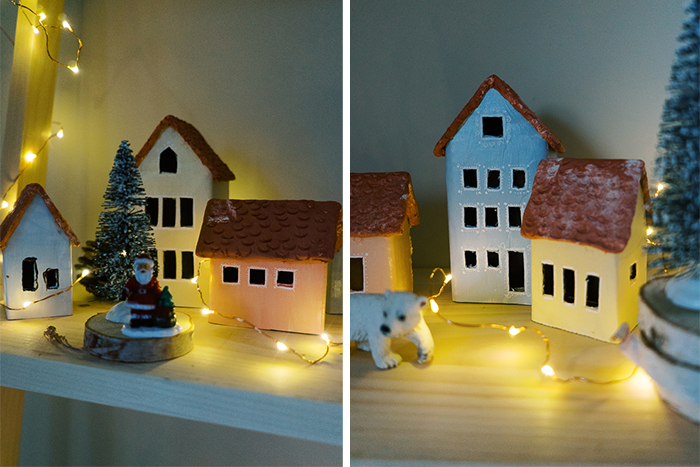
At that point, I had to figure out what to do with a roof. There were a few options. To paint it white, leave as it is, or add some snow but it all didn't feel right. So I got this idea to go an extra step and add clay to the roof! Whoa! A whole game changer!
6. Roll out the clay and cut the rectangular to fit the roof of your house. It doesn't have to be perfect since you'll smooth out clay later. Cover cardboard roof with the clay and fold the ends inside. To make it looks like roof tiles, take a rounded edge cutting tool for clay and from top to bottom, leave some marks.
At first, I was making roofs from red clay. My daughter was helping me out, *khe-khe-sitting-next-to-me-playing-with-clay*. She was mixing up her white clay and red and when I saw the effect it creates, I liked it so much that started making roofs with mixed colors. It gives an effect of a bit aged roofs for our DIY advent village and I absolutely love it! This is what I call a "happy accident". So don't be afraid to experiment.
Leave the clay to dry.
7. Decorate windows. I didn't like the way windows looks and that cardboard was showing. I thought of taping it with washi tape but it seemed like so much work that I decided just to use a white paint pen and draw some ornaments around the windows. It added a bit of a cleaner look, but I'm still on the lookout on how to cover the cardboard edge on the windows.
8. When I was finished with the trim on the windows, I used mod podge and Epsom salt to add some snow on the roofs. And the most fun part... to arrange everything and create a village!
It was such a fun project to make and my kids are over the moon about this DIY advent village! They constantly want to rearrange things and I hope it will survive till Christmas haha
I was so excited to arrange it and photograph that completely forgot to put numbers on the houses 😀
And I also can't decide which version I like better: with fairy lights or without. What do you think?
If you need ideas on what to fill your advent calendar with besides candy, I have a few posts about the fun activity/craft/small gifts ideas for kids and adults.

Read here what I made for my 2-year-old daughter a few years ago
Last year practical fillers for my 3-year-old
Also this fun date nights advent calendar for my husband
And 30 practical Christmas gift ideas for bankers.
I have exciting news! I teamed up with Top Shelf DIY and we are doing a Christmas craft challenge. We will choose different materials every week till Christmas and make something with it. This week's material is clay.
Stay tuned to see what we will do with clay as a part of this project!
Are you planning to make an advent calendar for your kids this year? What will it look like? Comment below, I would love to hear all your ideas!
Happy holidays,
April


Natasha says
Oh what a lovely Idea. It looks magical! I am definitely going to make this! But I cannot see where to download the template 😃!
Happy holidays!
April says
Hi Natasha! I’ll make sure to fix it! In the meantime you can send me an email and I’ll send it over to you 😉
Natasha says
Dear April i found a similar one and already made it. I just painted the rooftops . I put candlelights on the inside and some trees and it looks so beautiful...It creates a cozy atmosphere.
Thanks for the great Idea!!
It was a chance to make something lovely and creative with my 4 year old daughter.
❤️
April says
Natasha! I'm so happy to hear that😍