
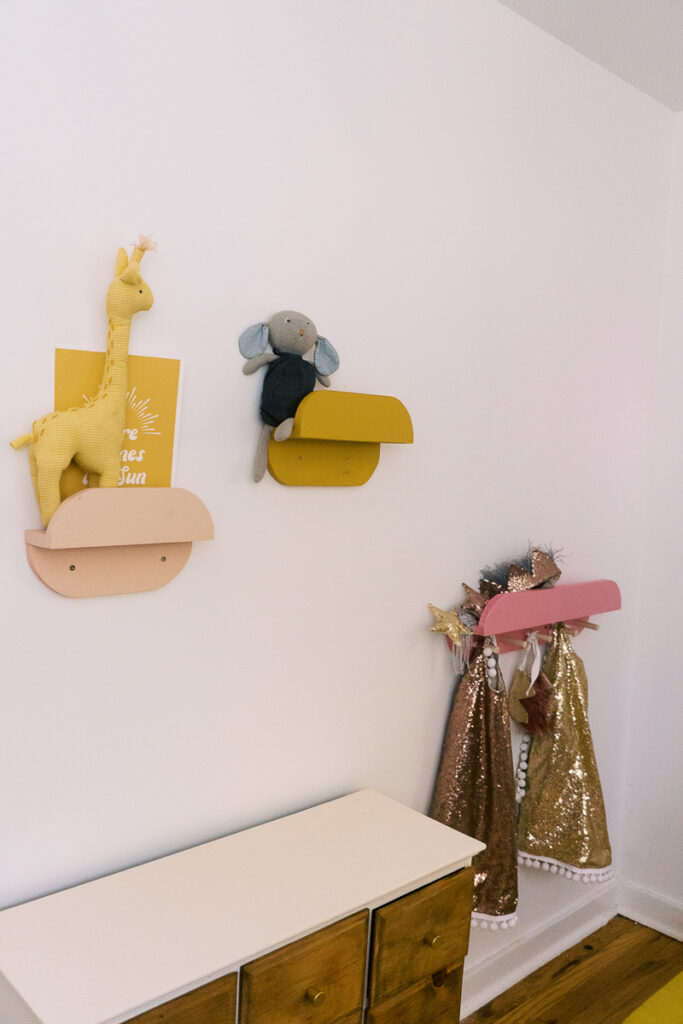
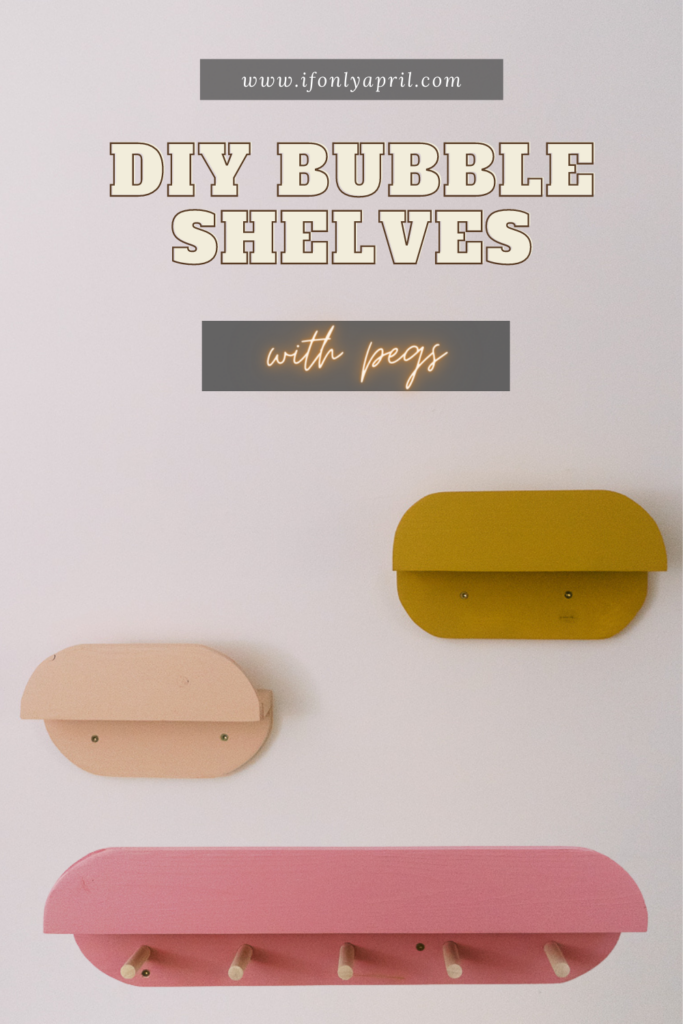
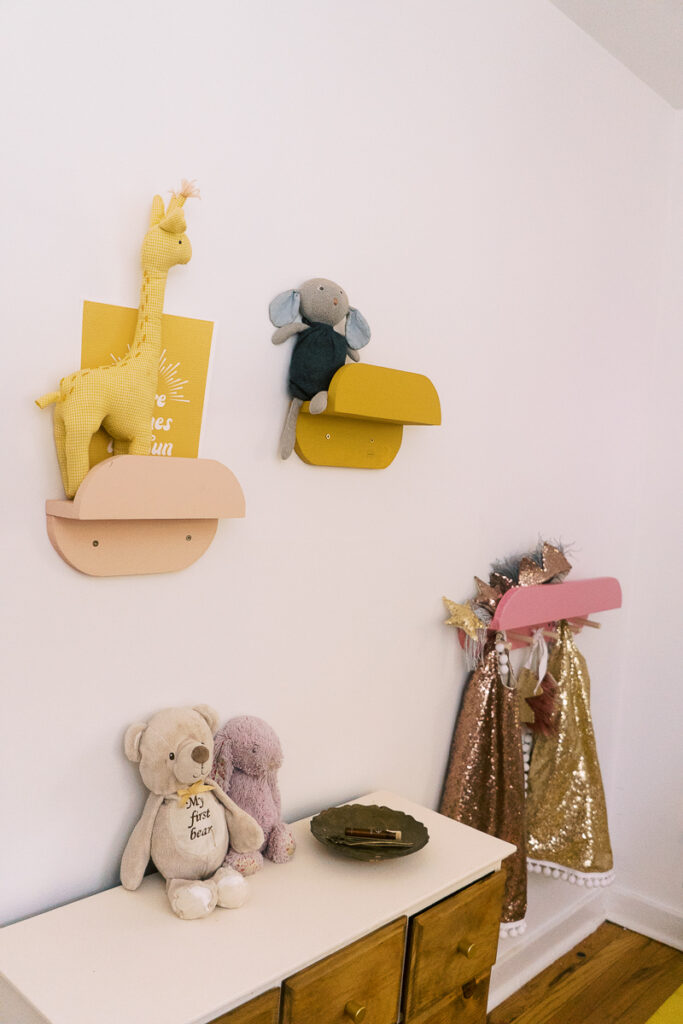
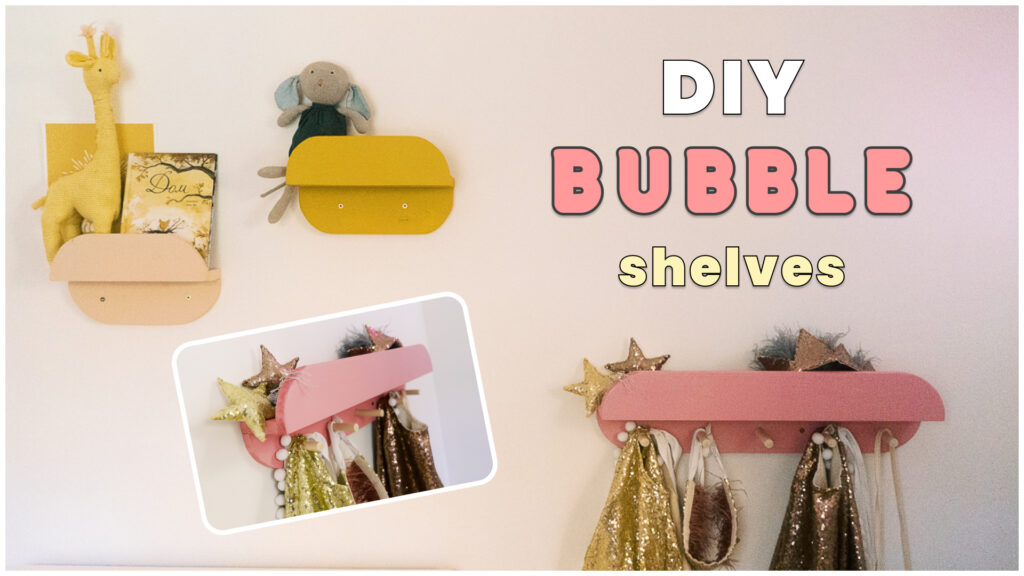
My epic saga of a playroom makeover continues. Last week I made this beautiful butterfly pinboard. To complete the playroom I only had to cross one item off the list - shelves. I designed these fun bubble shelves and will show you how to make them.
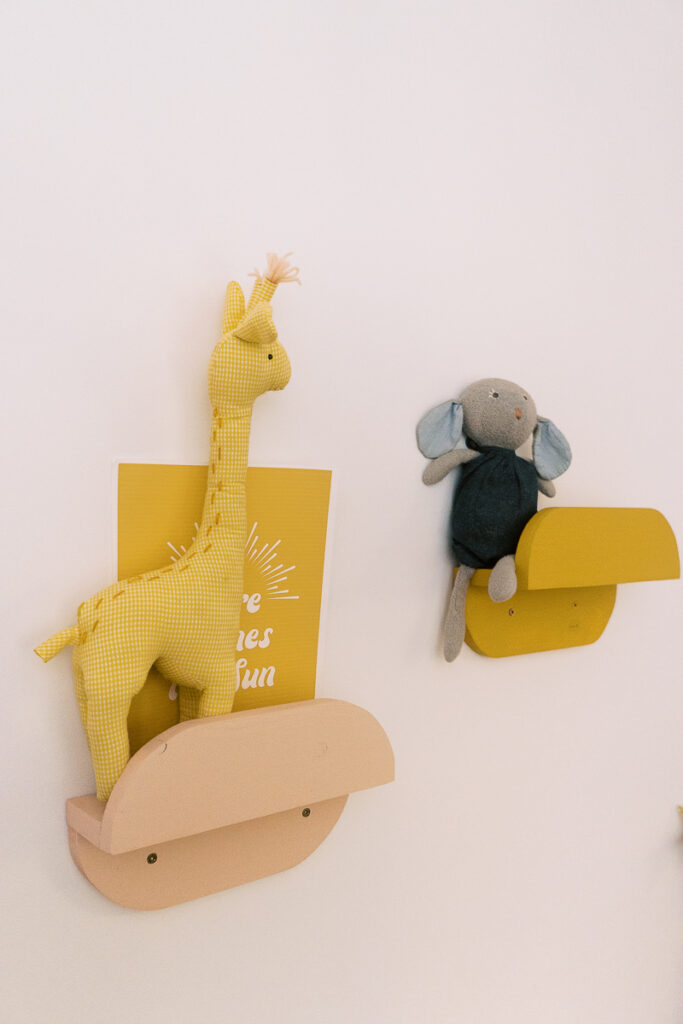
I think they look so cool and also very functional. The top of the peg shelf can serve as an extra shelf for items. And I love how shelves look like bubbles if you look at them from the right angle. See for yourself!
RELATED:
- Moodboard for kids playroom
- DIY bookcase
- IKEA hack toy shelf
- DIY mi-century modern bookcase
- DIY desk with drawers
- From trash to trasure dresser
- DIY tassel chandelier
- DIY pinboard with butterflies
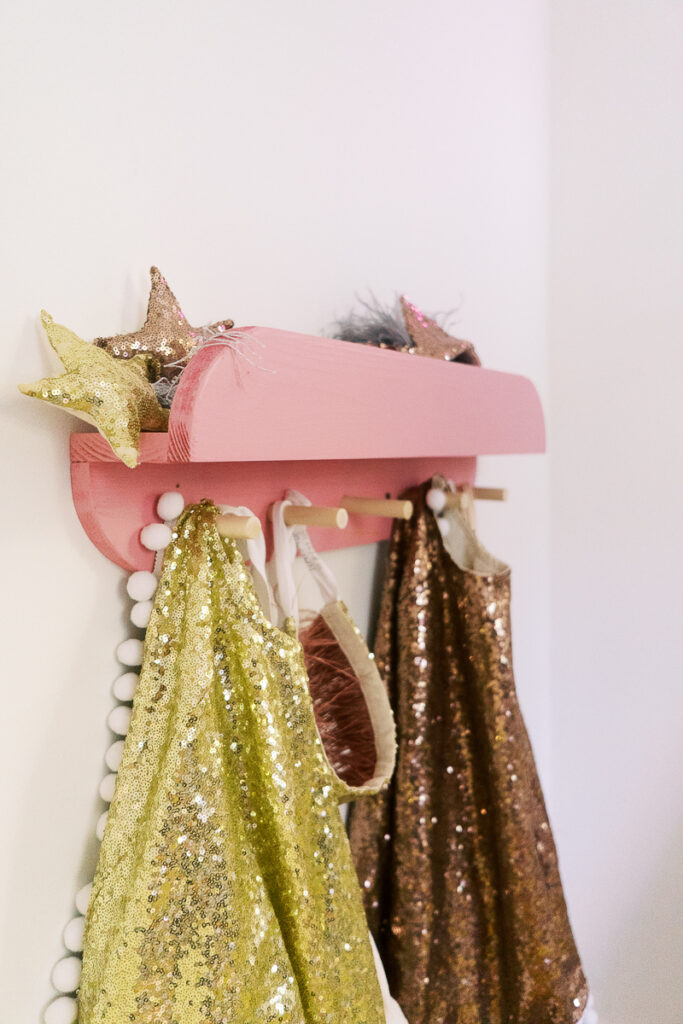
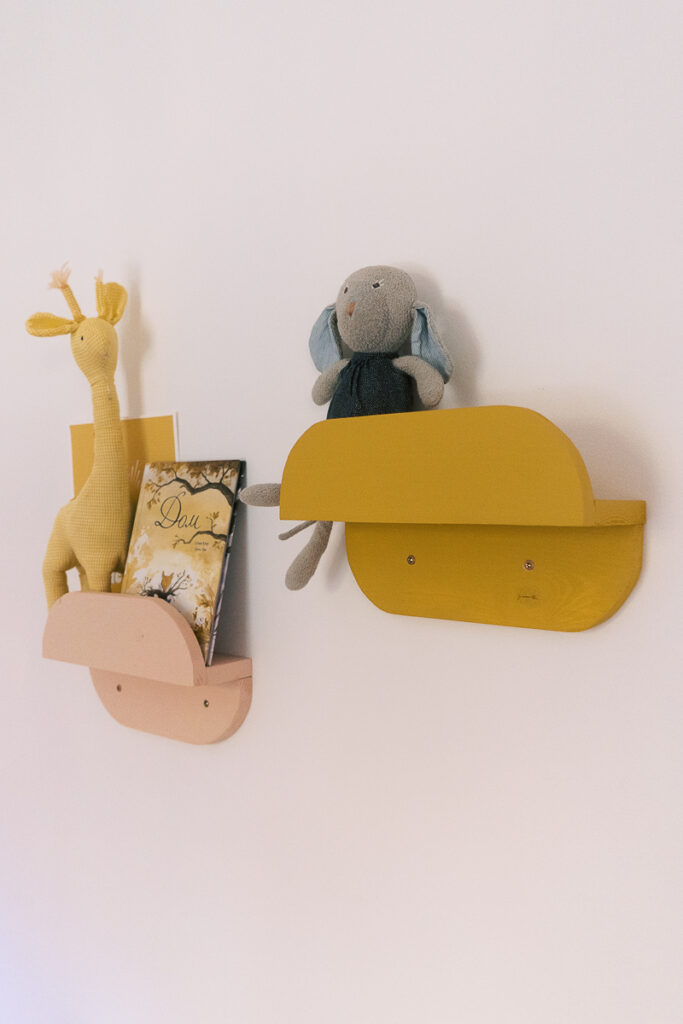
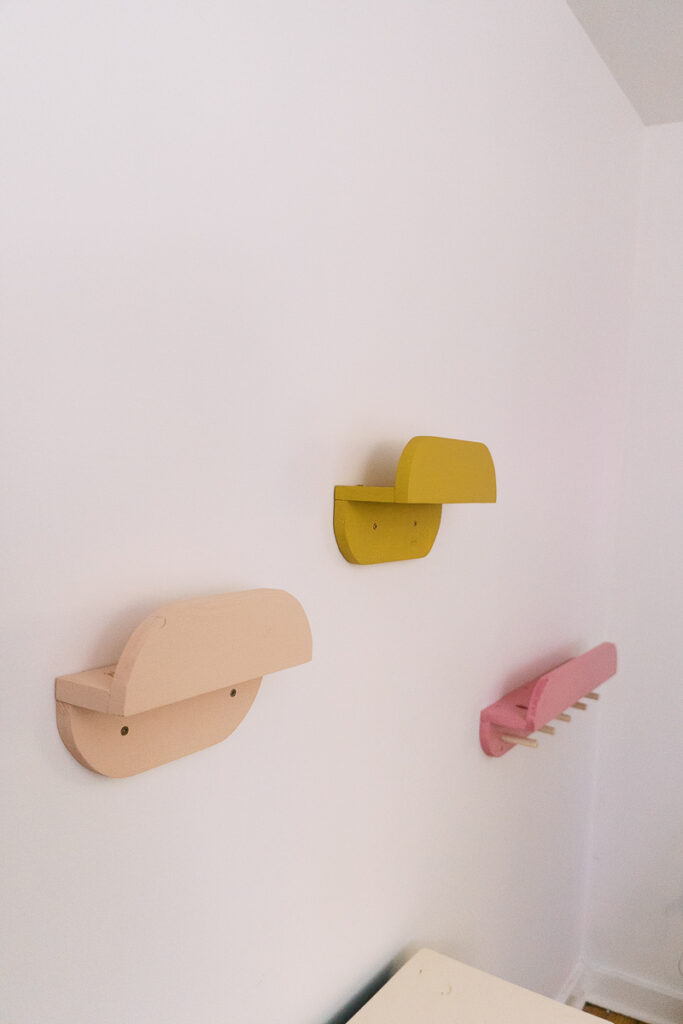
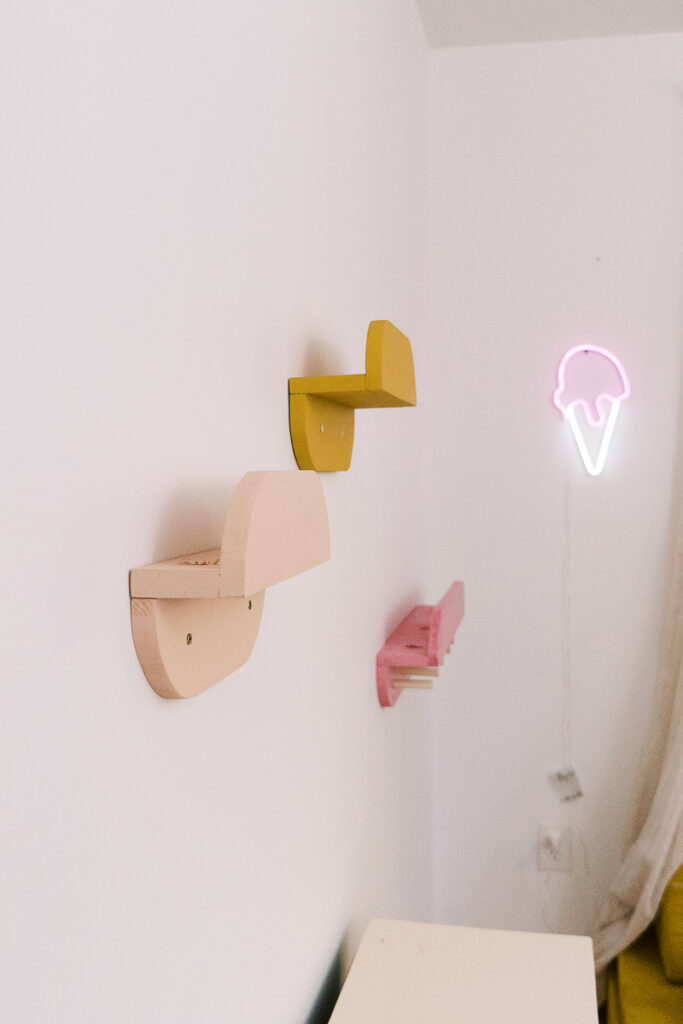
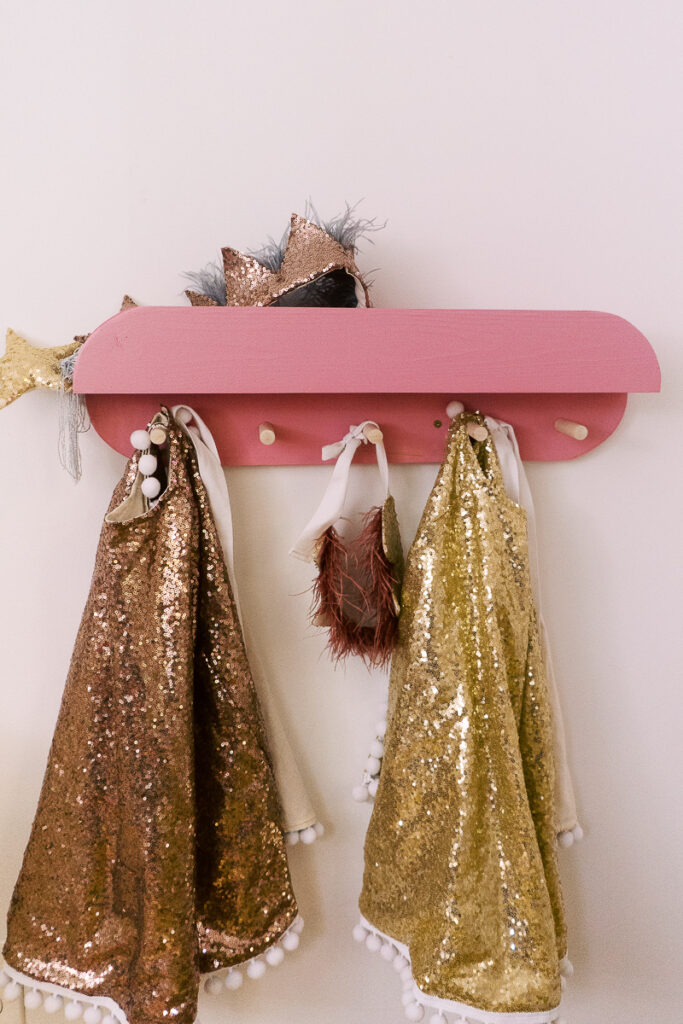
I made three shelves total - two simple shelves and one peg shelf. I figured the peg shelf could be used for all the costumes and play pretend dresses that kids have. And we could store their magic sticks and crowns on the top of the shelf.
The first shelf I made from 1x4s and the second has a 1x3" in the middle. I like the look of the second shelf but it's a personal preference.
Materials
- 1x4" board
- 1x3" board (optional)
- Wood filler (optional)
- wood glue
- 2 ½" screws
- 1 ¼" pocket hole screws
- Paint (optional)
- ⅝" dowel (for pegs)
- ⅝" drill bit (for pegs)
- Countersink bit
Tools
Instructions
Step 1 - cut wood to length
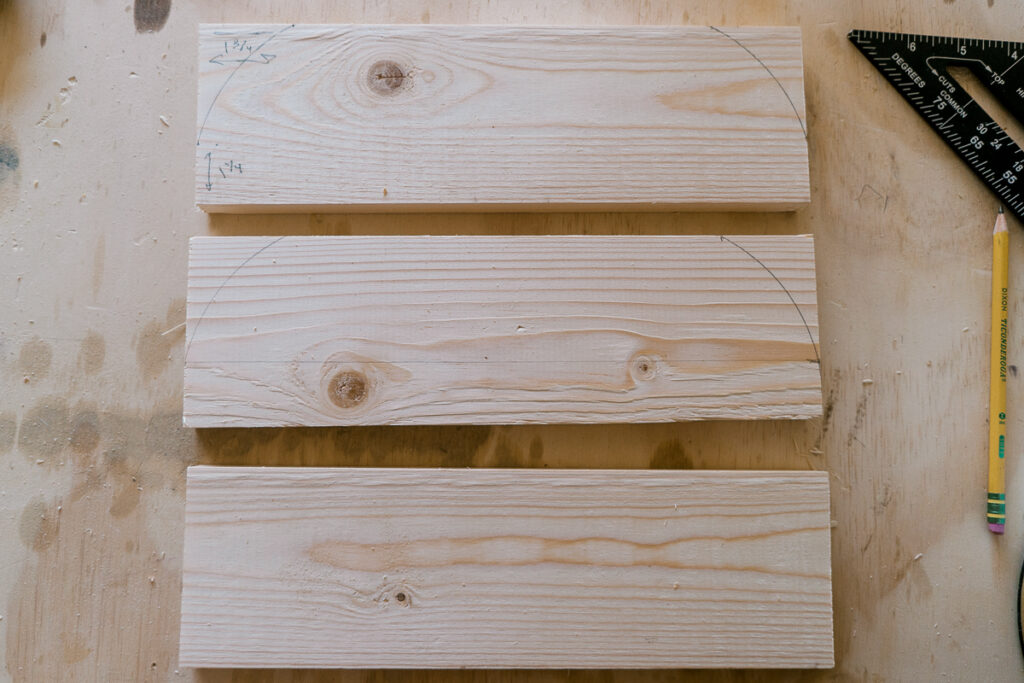
Determine the size of your shelves and cut wood to length.
The smaller shelves are around 12" long. The peg shelf is about 24" long.
Using the miter saw cut straight edges.
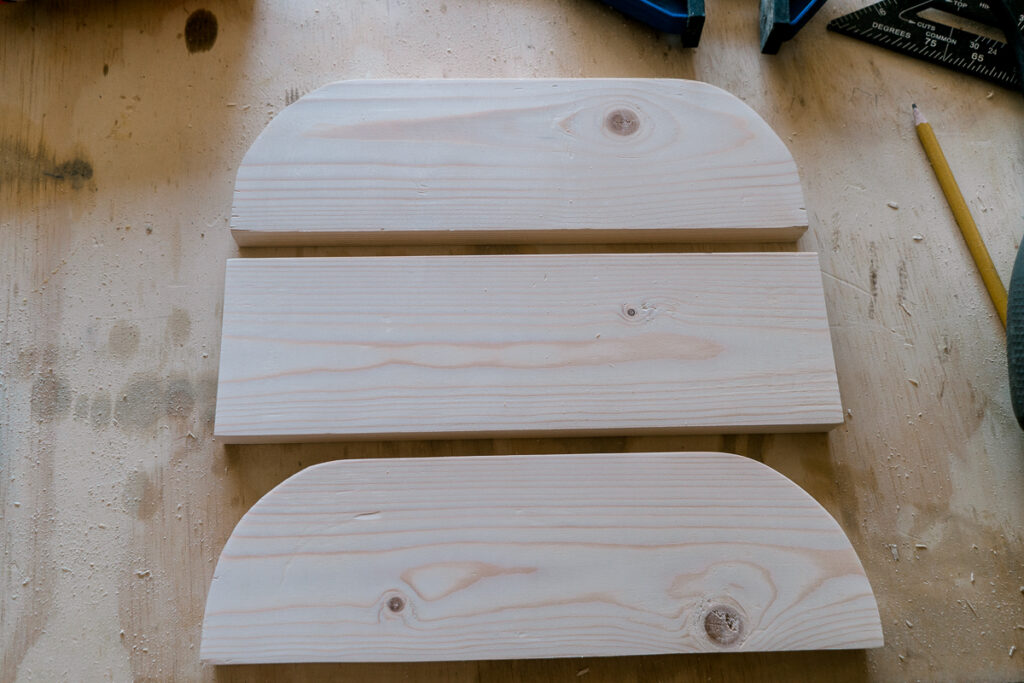
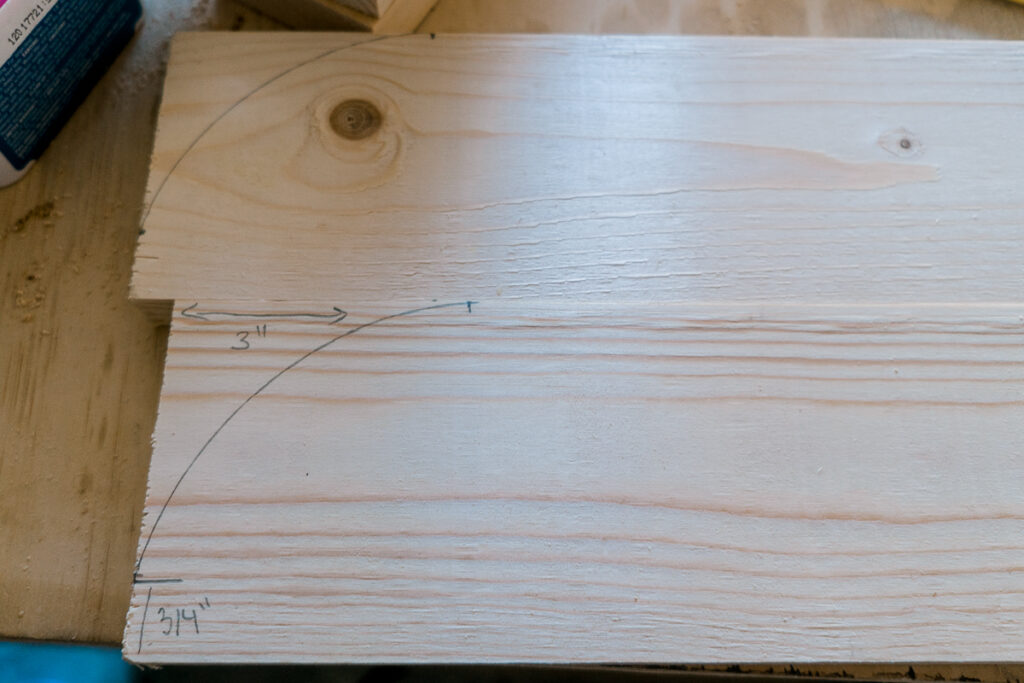
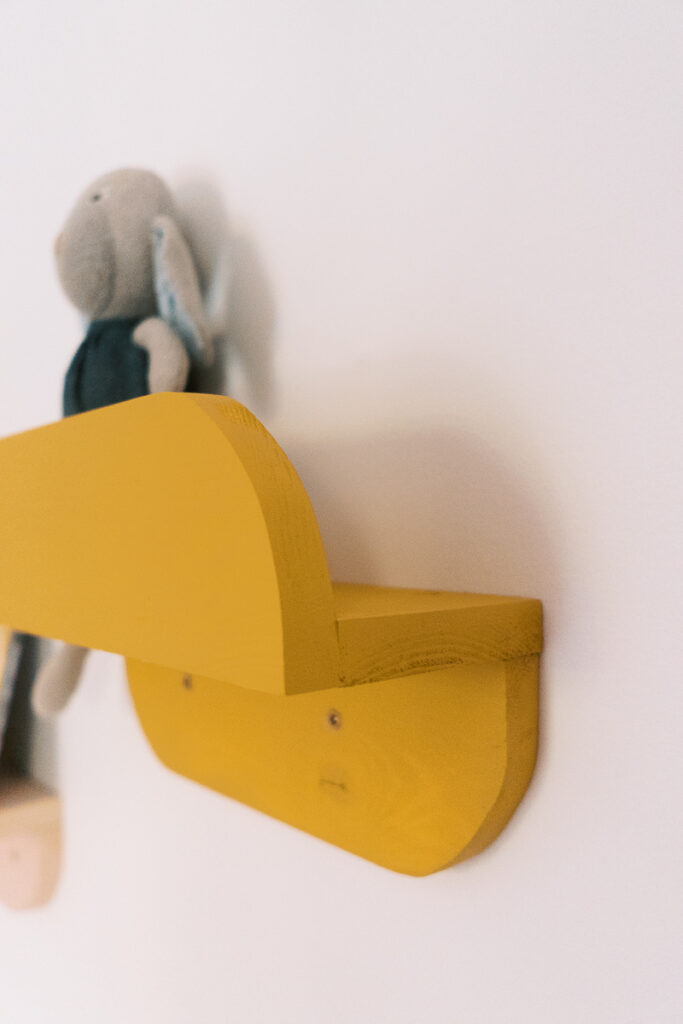
Step 2 - make rounded edges

To make rounded edges take something round to trace. I used a gallon bucket from paint to make a quarter of a circle. To make sure that both sides are even, measure the distance from the corner. And make sure that the other side has the same distance. Let me show you what measurements I used for my curve.
Cut off the edges using a jigsaw. Sand very smoothly.
PIN IT TO MAKE LATER
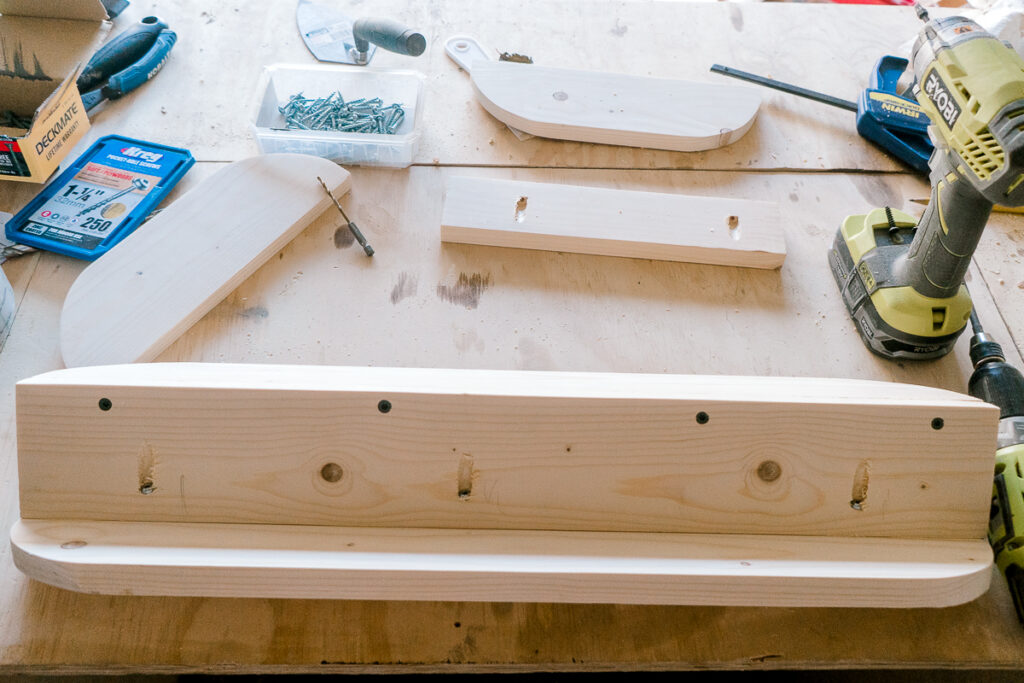
Step 3 - assemble shelf
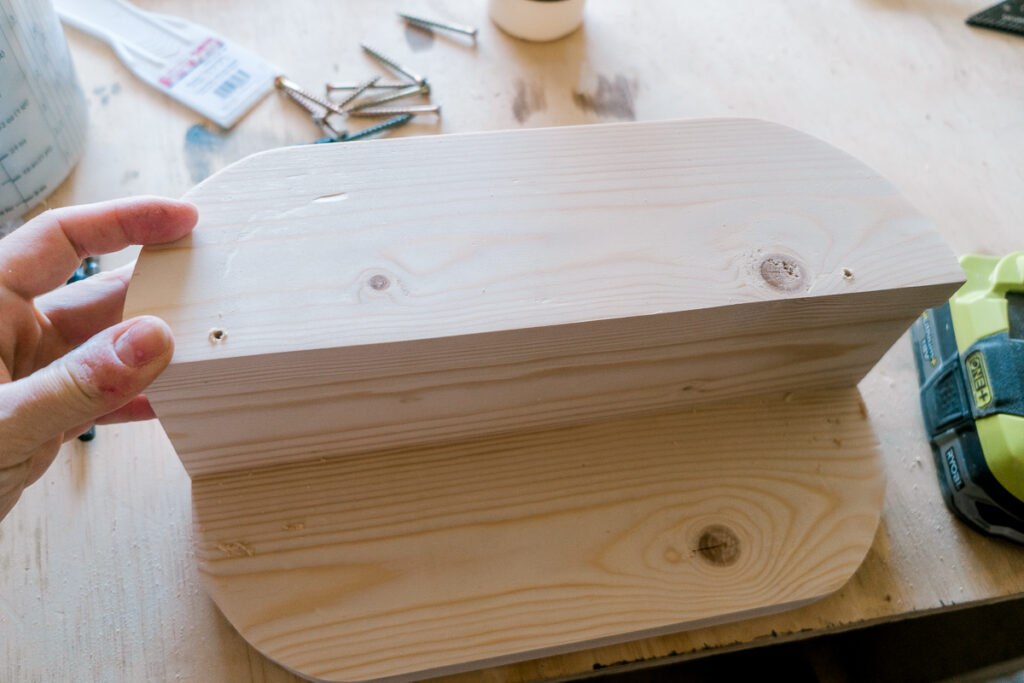
To assemble the shelf I used two methods.
For the first one, I drilled the holes on the front and used screws. Then I used wood filler to cover up the screws.
The second method, definitely the cleanest, is to use a Kreg jig and make pocket holes from the inside.
I prefer the Kreg jig method, even though I painted the wood filler and it wasn't obvious but it's up to you.
Assemble the shelf either using 2 ½" screws or pocket holes.
Step 4- add pegs (optional)
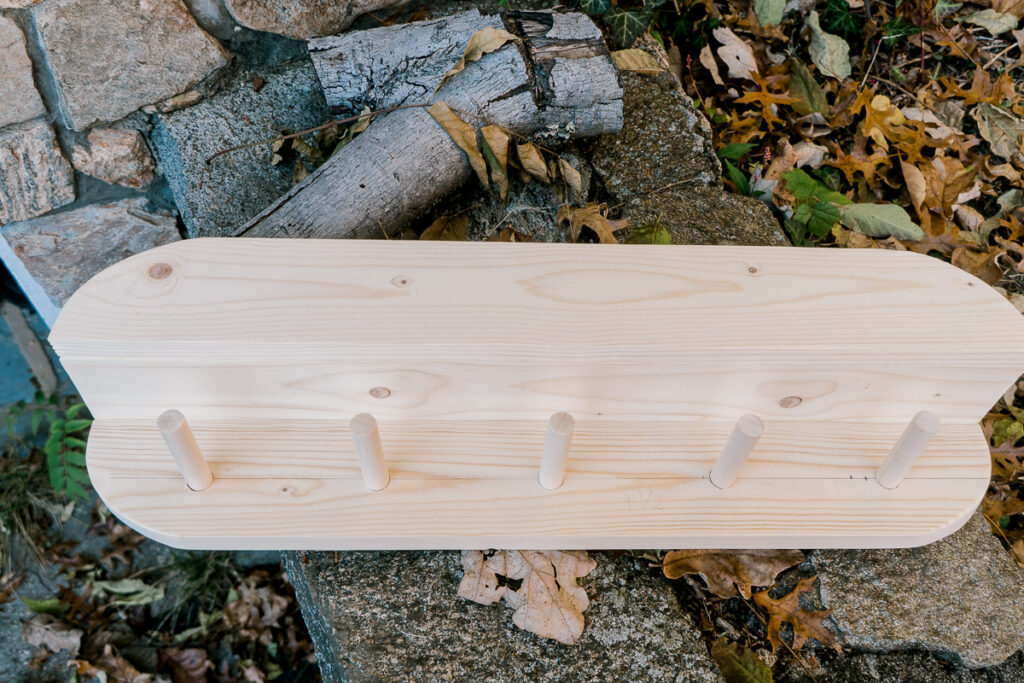
Adding pegs definitely elevated the whole look of the shelf.
To add pegs to the shelf you need to calculate how many you'd like to have and where you'd like to place them. Measure the distance to make sure it's even.
I used a ⅝" dowel. And the length of the pegs is about 3".
Cut the pegs to length. Using a ⅝" drill bit, make holes in the board. Try if it fits.
If you are leaving the shelf bare then you can glue the pegs at this point. If you decide to paint it and leave only pegs bare then it's easier to paint the shelf before gluing it up.
Step 5 - finish as desired
I was debating between leaving shelves bare or painting them in fun coordinating with playroom colors.
I asked my followers on Instagram what they'd perfect and went in a different direction haha
As much as I like the bare wood look, I thought fun colors would be more suitable in the playroom. But I might make another set of shelves and leave them bare.
Watch me make it on my YouTube channel
Do you see how easy it is to make these fun bubble shelves?
Next week I'll do a reveal of our retro-inspired playroom for kids. Stay tuned!
Xoxo,
April


Leave a Reply