
As the renovation of my kid's playroom was going strong, I was on the lookout for an apothecary dresser with a lot of drawers that I could use for all the toys my kids have. This old dresser was a perfect candidate for a job, but it desperately needed a facelift. And today I'll walk you through how to update an old dresser and make it look so fabulous that it might look like a brand new modern dresser when you finish. Keep on reading if you'd like to see an epic DIY dresser makeover.
Jump to:
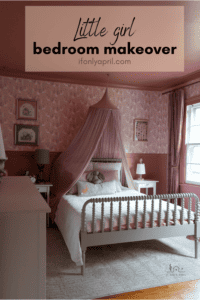
Pin it to get inspired later

Where to find cheap dressers?
Don't worry, to get a dresser you don't have to run to an overpriced store. There are plenty of places where you can find an old cheap dresser for a makeover.
My favorite place to start is Facebook Marketplace. In fact, I got this dresser with many drawers locally and scored it for $20. Whoot Whoot! Perfect for what I planned to do with it!
Another place to look would be a thrift store, like Goodwill. I found plenty of decent furniture there and it's usually very cheap.
Also, make sure you check your local flea markets. If you come later in the day, the sellers might even drop the price, especially on big pieces of furniture.
It's a great topic to elaborate and one day I'll write a post about where to find cheap furniture, but let's continue on this dresser makeover.
Design plans for this old dresser
There are so many incredible transformations of old dressers. You can paint it, stain it, put a design on it...
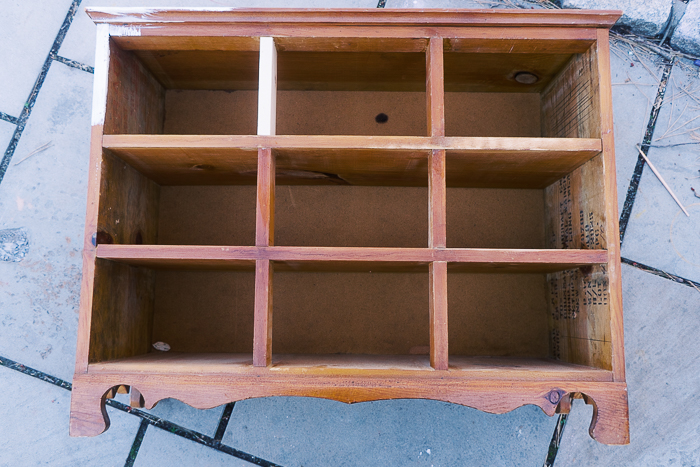
At first, I wanted to sand down the dresser and leave the wood grain visible. You see, when I looked closer at the dresser I realized it wasn't a factory-made dresser but rather handmade, which made it so much dearer to me!
It's someone else's legacy that I was about to change!
While I had this debate of mine about whether I should do changes to the style or not, I reached out to you, my readers, and posted a survey on Instagram. It clearly showed that you want to see a new version of the dresser and I should look at the dresser as a blank canvas rather than a piece of furniture.
After all, it already served a lot of generations and now it was time to update it. I think it was made in the 50s.
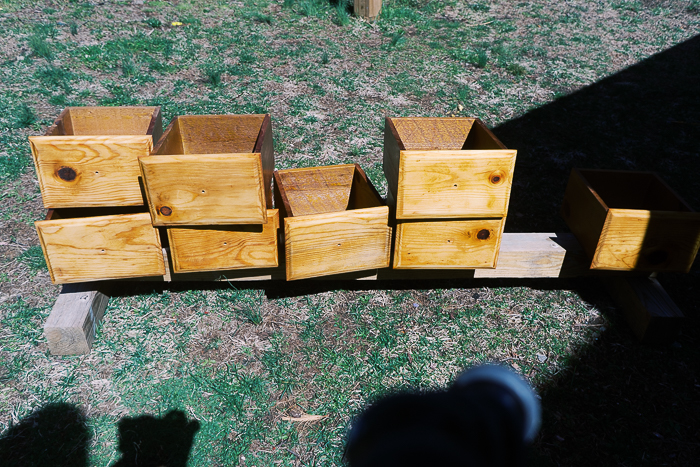
So that being said, I started sanding down the dresser. I found out that wood underneath, while beautiful, isn't worth my effort to sand the whole thing down!
You know how I feel about sanding - while it's absolutely necessary at times, I absolutely despise it 😆 here, I said it!
Painting it
Next idea was to paint the whole dresser in bright fun colors. I got the color ("Raspberry smoothie" by Behr). You can read more about the color picking process of this playroom in a design post here.
Related:
- IKEA hack toy shelf
- DIY bookcase
- DIY bookcase with reeded trim
- DIY kids desk with drawers
- DIY tassel chandelier
After I applied the color, I quickly realized that it was not going to work. The color was so much darker and brighter in real life than I anticipated.
Tip: when color dries on the surface it's darker than when it's wet.
This color was too much and wasn't the right color to paint the whole thing.
So I pivoted and changed the direction!
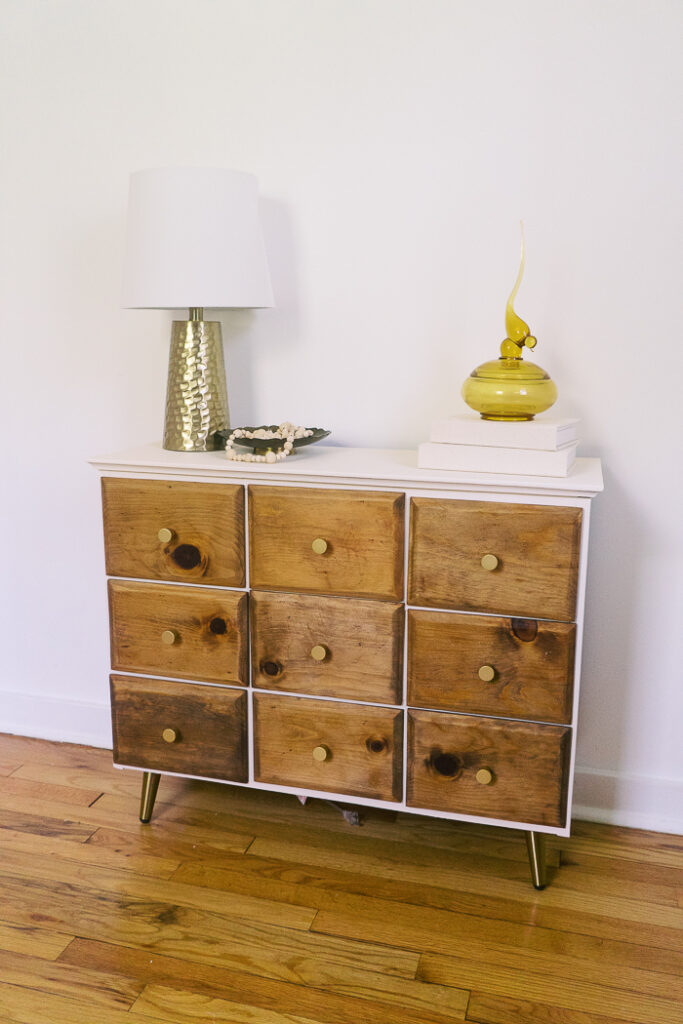
I decided to sand the front of the drawers and paint the rest.
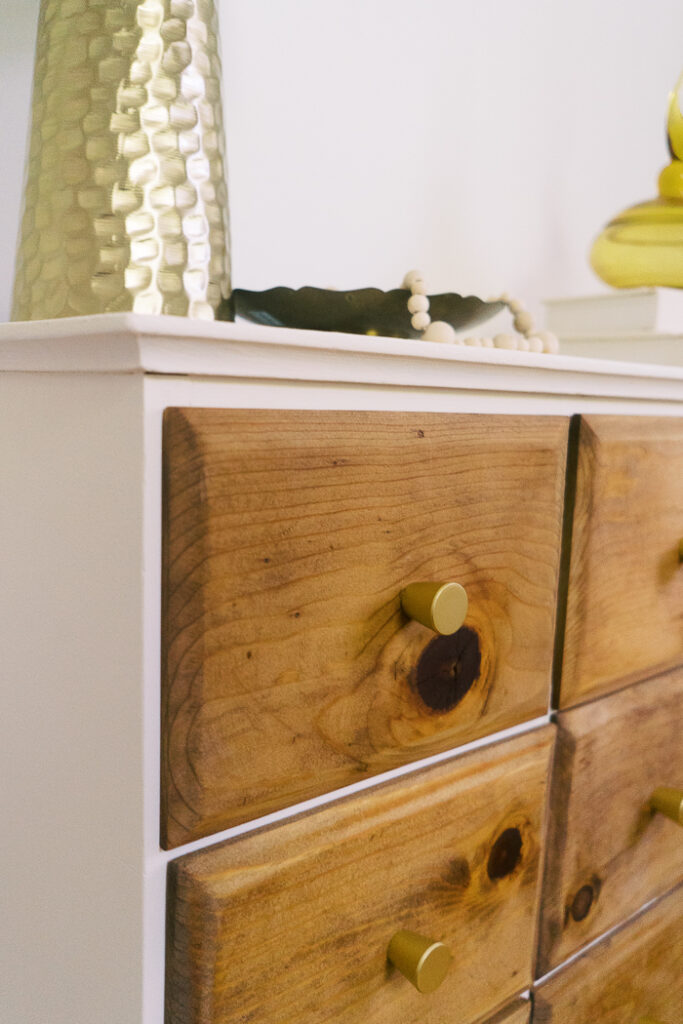
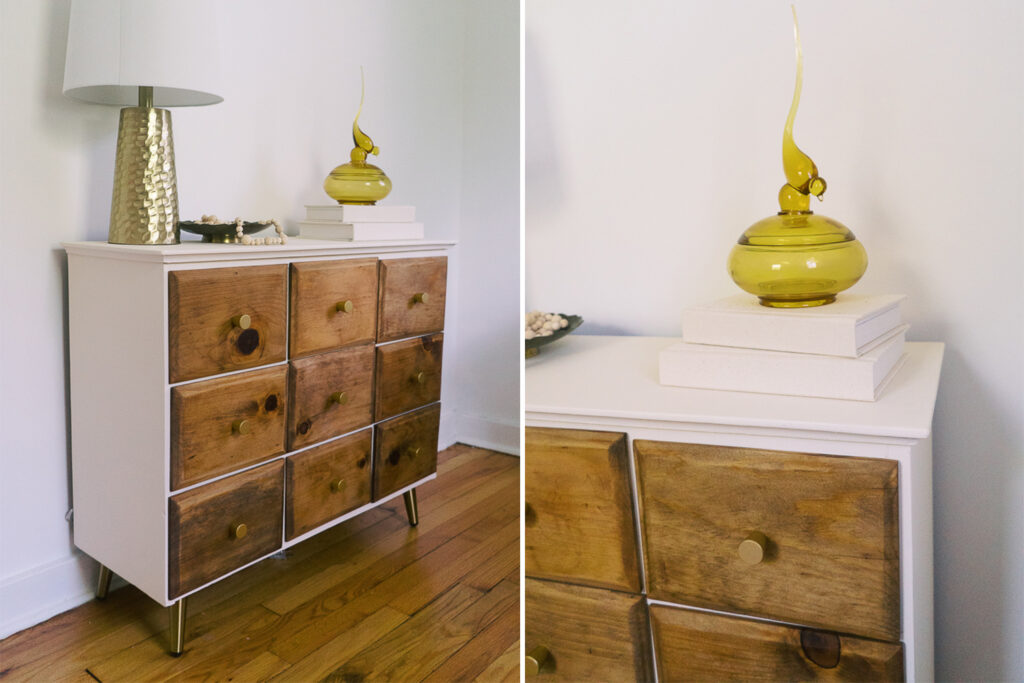
For this idea to look nice, I had to find something that would look good with bronze modern legs and bronze round dresser knobs.
I painted the top of the dresser with "vanilla paste" (the same color that I used for shelves in this arched book display) and stained drawer fronts with a mix of early American and weathered oak.
Materials
- Paint
- Dresser knobs
- Roller or quality paint brush
- Modern tapered legs
- Contact paper to cover inside the drawers
- Circular saw
- Sander
- Stain (I used a mix of early American followed by weathered oak)
How to DIY a modern dresser makeover?
1. Take off old hardware. You can decide later if you'd like to change it completely or just update a bit (with spray paint). Switching hardware can completely change the look of your furniture piece.
2. Sand with an orbital sander. Sanding furniture and taking off the top layer can make a huge difference.
Orbital sander is a great candidate for this job. Hand sanding block could also be an option if you are working with a small piece, but the electric tool is more ..
Important: when you sand any furniture piece, don't forget to wear a mask. There are plenty of toxic elements in old varnish, wood, etc. and you need to protect your airways from harm.
3. Get rid of an old lining. I removed it using a heat gun for scrapbooking (the embossing gun). When you remove the lining, make sure to heat it a bit in the corner and carefully pull it off. If you pull off too fast, it will break. You need to find the perfect balance of pulling it to nicely and efficiently remove all the lining. You could also scrape it off, but it will take way more time, and who has time these days.
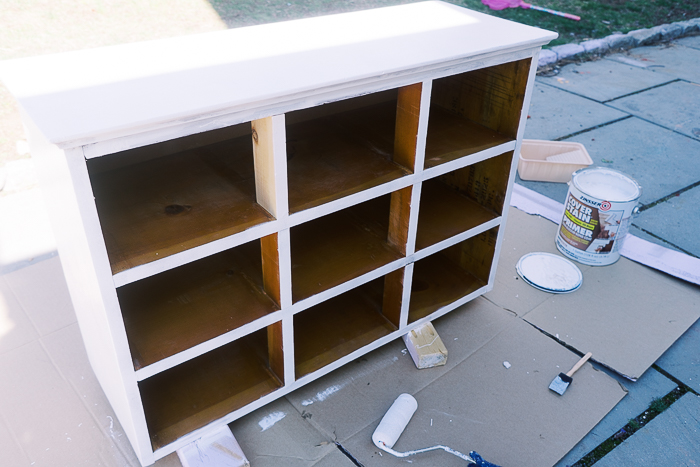
4. Cut off the bottom. In my case, I simply took a circular saw and cut off the ornamented bottom.
5. Decide on the finish. I primed the dresser first and then painted the top and sides in "vanilla paste" color by Behr, and simply stained the front of the old drawers with a new stain mix - provincial and weathered oak.
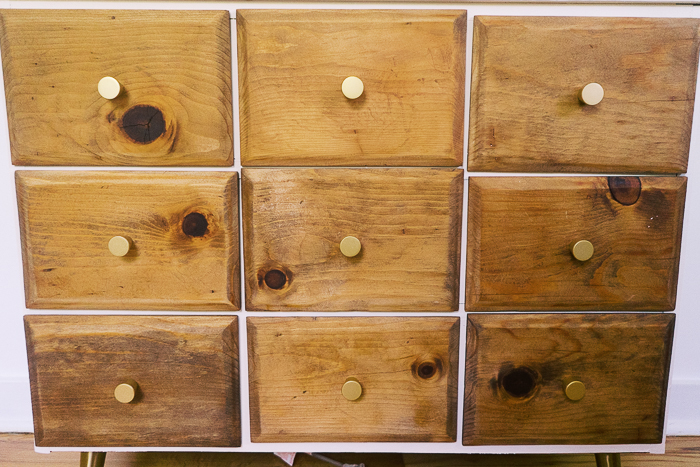
6. Line the inside of the drawers. I used this gorgeous damask shelving paper. It looks amazing with the round bronze knobs.
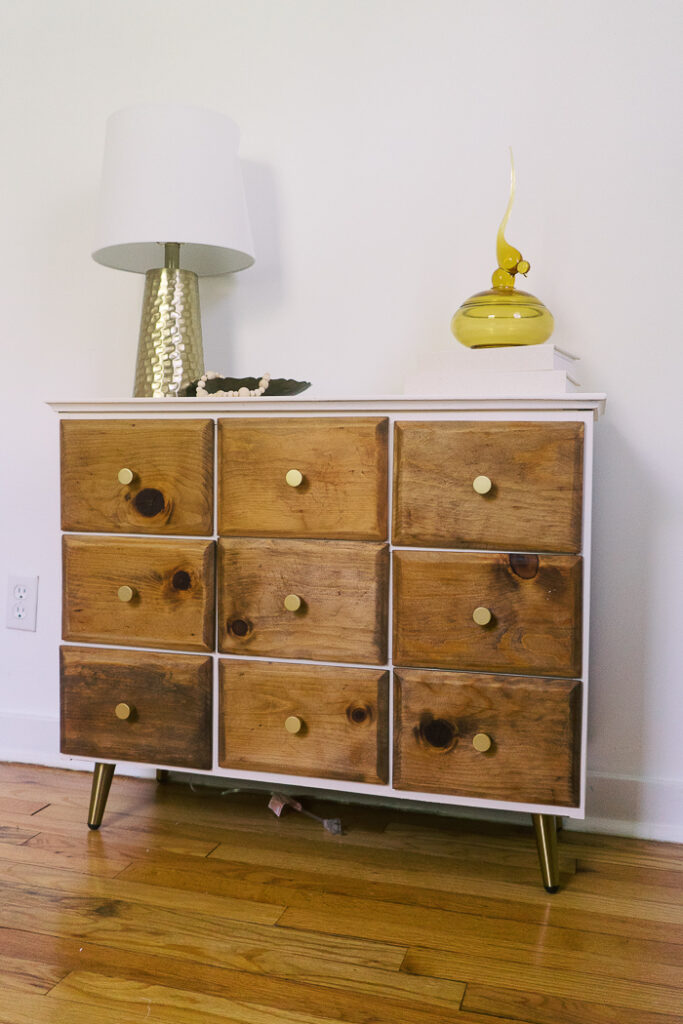
7. Attach new legs and you are done!
DIY dresser before and after
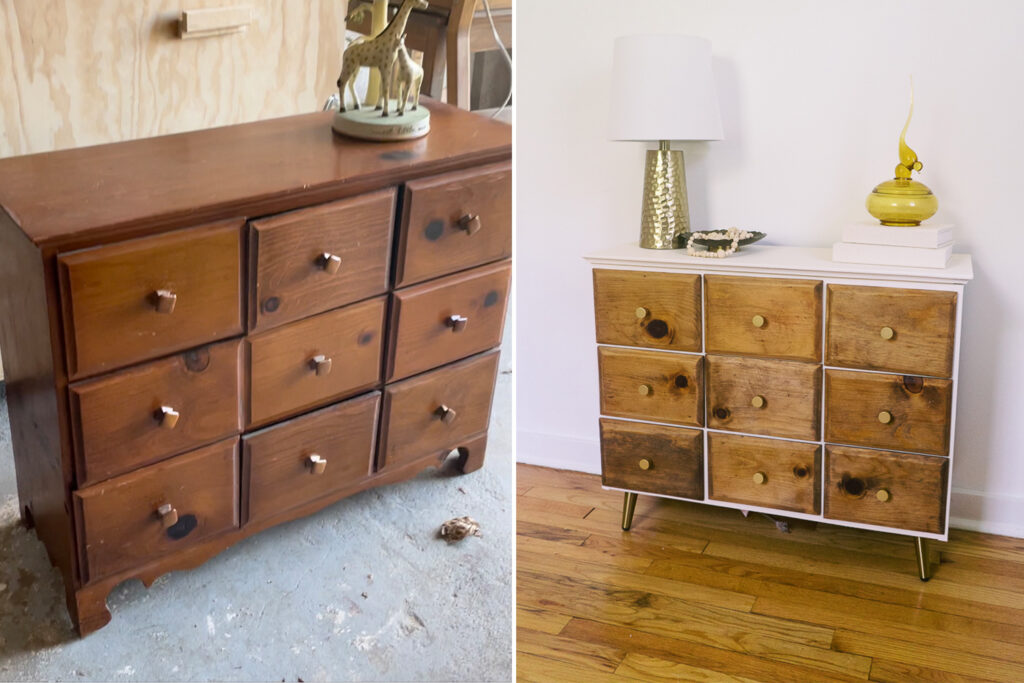
I absolutely love this DIY old dresser makeover. It's on the budget, quick, and completely transformed an old ugly dresser into modern heaven. It fits perfectly in my kid's playroom.

If you'd prefer a video version, watch it here

Do you have any fun DIY dresser ideas? I'd like to hear them all!
xoxo,
April


Leave a Reply