• Skip to primary navigation
  • Skip to main content
  • Skip to primary sidebar
If Only April
  • MEET APRIL
  • DIY PROJECTS
    • Kids projects
    • DIY furniture
    • Design plans
    • DIY holiday projects
    • Macrame
    • Transformations
    • Woodworking
  • VIDEOS
  • CONTACT
  • SHOP
    • Facebook
    • Instagram
    • Pinterest
    • YouTube
menu icon
go to homepage
search icon
Homepage link
  • MEET APRIL
  • DIY PROJECTS
    • Kids projects
    • DIY furniture
    • Design plans
    • DIY holiday projects
    • Macrame
    • Transformations
    • Woodworking
  • VIDEOS
  • CONTACT
  • SHOP
ร—

Beautiful DIY jewelry holder with a crescent moon

Please note, that some of the links below are affiliate links and I will earn a commission if you purchase through those links (at no additional cost to you). Thanks for your support this way.

FacebookPinPrintEmail

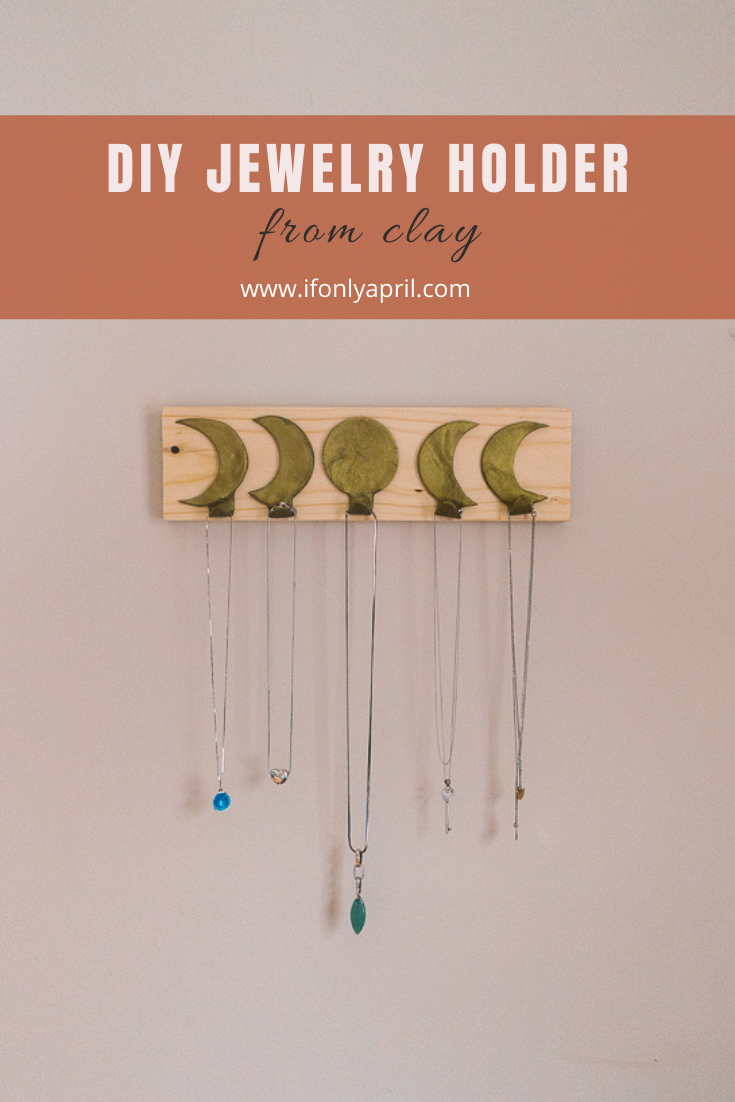
Christmas is just around the corner, and what a year has it been! You are probably thinking of what to get your loved one for Christmas. If you are a DIY enthusiast, you can make this adorable DIY  jewelry holder from clay for your jewelry-loving friend!

I love how it turned out so much and will be making a few more for my friends who have tons of jewelry and never know how to organize it. This is a great solution for keeping all the chains detangled.

It also looks so bohemian chic that could fit with any bohemian decor. I made a while back bohemian moon phases wall decor from clay. I think I might be a little bit obsessed with the crescent moons! They look so adorable!

The process of making it is super easy, and I'll share with you my tips and tricks on how to make your clay jewelry holder outstanding. It took me about an hour, including the baking time, to make it, so you could easily make this last minute for a gift or yourself ๐Ÿ™‚

Few words about what clay to use for this project.

I've got antique bronze clay from Sculpey.

As much as I love the color and effect of metal, I think the air-drying clay might be a better choice.

Let me explain. When I shaped the clay and put it in the oven, because of heat, the hooks started slowly unfolding. Perhaps, I should've wrapped it around something to keep the shape intact, but I didn't find anything of that size that would be over-proof.

Now, while I'm writing this, I think perhaps I could've wrapped it around a spoon or somethingโ€”food for thought.

Anyway, if you use an air-drying clay, it gives you more flexibility to adjust, and I assume the hooks wouldn't move that much.

And you could always paint it over with gold leaf paint to get the effect of metal!

Cost: $5

Time: 1 hour (including baking)

Level: easy

Materials:

  • Clay (link to Amazon, but it's cheaper on their website)
  • Clay cutting tools
  • 1x4x12" board
  • E6000 Glue

Instructions to make this jewelry holder:

1. Choose your clay. I got Sculpey Premo in Antique gold color.

2. Roll it out using a rolling pin. Make it about โ…›" thick. You could go thicker, but I felt it should look delicate next to the jewelry, so I went for a thinner layer.

3. At first, I took a round cookie cutter, 2.5" in diameter, and used that to shape the moon in the middle. But the edges were too even (haha if that could be a problem), so I decided to free shape it to give edges a bit of a rough and live edge.

4. Take a small piece of clay, make a sausage out of it and roll it out. Then attach it to the circle from the bottom. Smooth out the connection point and make fold the clay to create a hook.

4. Roll out clay again and shape a crescent moon. Once again, I felt that it should have a more live edge, so it's by design! Make 4 crescent moons and add hooks to them too.

5. Bake per instructions on the package.

I left it at 275 degrees for 30 minutes.

PIN IT TO MAKE IT LATER>>>>


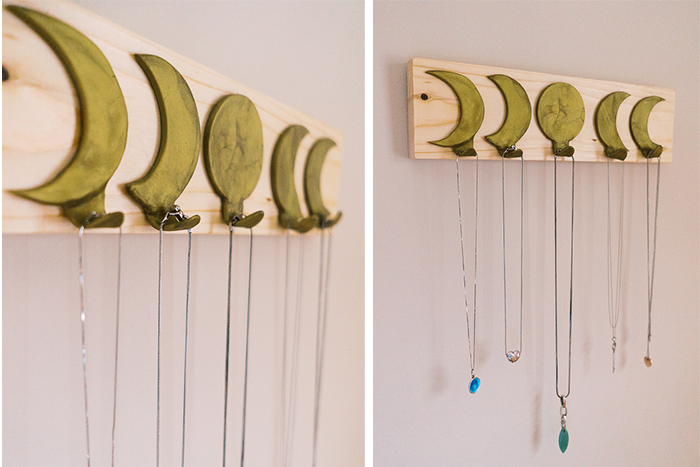
Here is where things started getting funky. When I opened the oven in the middle of the process, I saw that the hooks are turning out and going towards being flat. I tried to fix it, but the clay was already hard to mold.

So I left the process to take over and see what's going to happen. It didn't become flat all the way down, and I like this look.

6. Let your crescent moons cool down and cut and sand your wood for the shelf while at it.

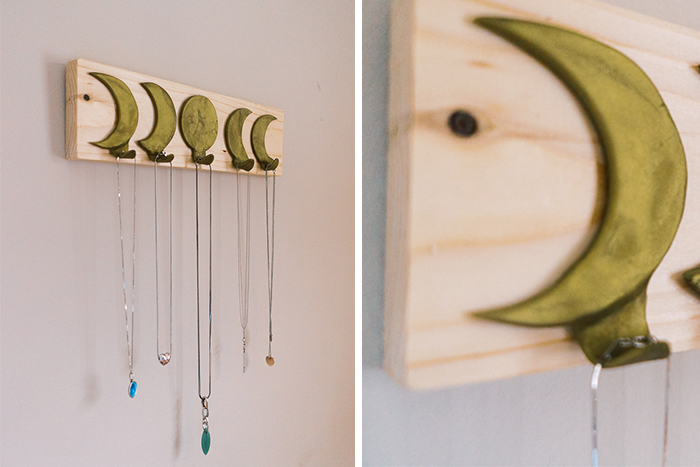
7. Take a strong glue. I used E6000 and glue moons to the shelf. Boom! You are done! This beautiful crescent moon Clay jewelry holder is done!

You can add a rope to hang it, but I felt that a clean look is probably a better idea and added a little picture hook on the back.

Isn't it lovely? It will be a Christmas gift for my friend who loves jewelry very much! I love the simple bohemian look of it! Perfect for a Bohemian room decor!

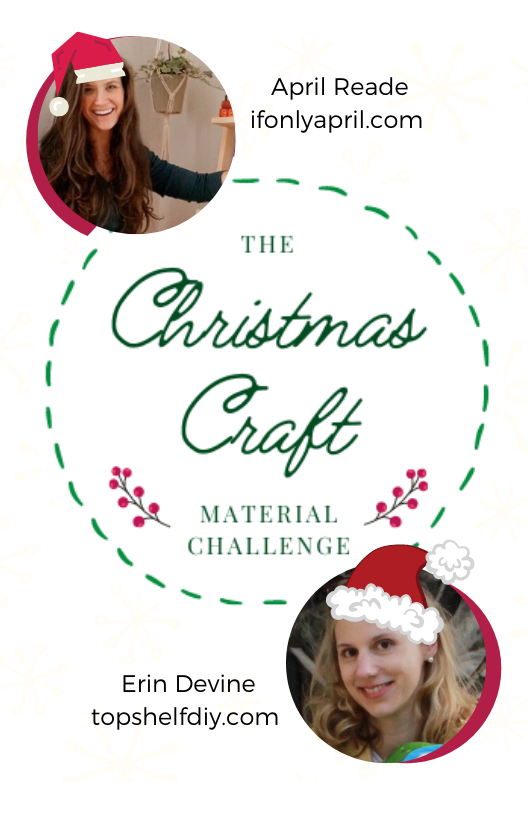
This project is part of the series "The Christmas Craft. Material challenge". I partnered up with Top Shelf DIY to make projects from different craft mediums (felt, chalkboard, etc.) every week leading up to Christmas.

Go to see what a beautiful magnolia and other simple clay projects that Erin made this week!

Stay tuned for next week. We will be making macrame!

How exciting is that?:)

What presents are you planning to https://topshelfdiy.com/three-simple-clay-projects-to-try-this-christmas/make for your loved ones this Christmas?

WE THOUGHT YOU MIGHT ALSO LIKE:

This unique lazy Susan pencil holder

Anthropologie-inspired tassel chandelier

Literary prescriptions for book lovers (gift a book in a unique way)

Macrame wall hanging (step by step tutorial)

Happy Holidays!

xoxo,

April

« Learn how to make this DIY advent village from cardboard with your kids
How to make an aesthetic advent calendar with macrame moon »
FacebookPinPrintEmail

Reader Interactions

Trackbacks

  1. Three Simple Clay Projects to Try This Christmas - Top Shelf DIY says:
    November 13, 2020 at 1:31 pm

    […] for more clay craft ideas? Head on over to If Only April and check out the beautiful DIY Clay Jewelry Holders she made this week for our […]

    Reply

Leave a Reply Cancel reply

Your email address will not be published. Required fields are marked *

Primary Sidebar

Hi, I'm April! I love woodworking and making things! I hope you will stay for a while and get inspired to make something!

More about me โ†’

Popular

  • I Want To Paint Our Library Moody Dark Blue
  • How to build a brick hearth for a wood stove
  • Home Improvement Projects I'd Like To Finish In 2022
  • Looking for a house as a first time home buyer

ifonlyapril

DIY Lifestyle Mom | ๐Ÿ“CT
It's not perfect but I wouldn't love it any other It's not perfect but I wouldn't love it any other way ๐Ÿค—

Phase 1 of an unexpected renovation that I had to complete in 2 weeks is under my belt ๐Ÿ’๐Ÿปโ€โ™€๏ธ

This brick hearth was such a challenge and oh boy, how much I've learnt from it! Will I look at bricks any time soon? Probably not ๐Ÿ˜… 
now I need to decide if I want to white wash this hearth (probably yess since I messed up with mortar cracks) and what to do with the back wall. Any ideas?๐Ÿค”

Full blog with all details is available at www.ifonlyapril.com (type in search brick hearth) and a video will be on YouTube tomorrow! 

#diyhomedecor #diylife #diybrickhearth #ifonlyapril_diy #oldhouse #oldhousenewhome #
New week, new build๐Ÿ˜Š I was so excited to replic New week, new build๐Ÿ˜Š I was so excited to replicate my first build ever that I made 3 years ago for one wonderful girl this week.

Plans are available on my blog ๐Ÿ˜Š
#ifonlyapril_diy #diyfloorbed
A friend of mine today told me that as a "not a DI A friend of mine today told me that as a "not a DIYer" she can't fully appreciate what I did to this closet. To her it doesn't feel like this transformation is so magical. 

So my DIYer friends, let's take a moment and appreciate what I did with this closet!! 
Swipe to see the "before"๐Ÿ™ˆ
#diymakeover #diyclosetmakeover #ifonlyapril_diy #diyyoutuber
Christmas decor video is live on YouTube ๐ŸŽ„ Swi Christmas decor video is live on YouTube ๐ŸŽ„

Swipe to see my almost successful experiment with epoxy and wooden rounds๐Ÿ˜„ watch the video to see what went wrong and how I think you could fix it. 
Details are on the blog and YouTube.
#diychristmas #diychristmaswreath #diychristmasdecor #christmaswithapril
This year I decided to update our stocking holder This year I decided to update our stocking holder and create this beautiful village.

The problem occurred when I couldn't decide how to finish it - to leave the wood as is or paint cute details in traditional Christmas colors.

So I made both ๐Ÿ˜
Which one would you choose?

Find full tutorial on the blog and YouTube.

#diychristmasdecor #diychristmas #diyyoutuber #christmaswithapril
Guess what?๐Ÿ˜๐Ÿ”ฅ It only took me about 6 month Guess what?๐Ÿ˜๐Ÿ”ฅ

It only took me about 6 months but I finished the playroom! ๐ŸŽ‰๐ŸŽ‰๐ŸŽ‰

EVERY piece of furniture is made by me over the course of last 6 months๐Ÿ˜ and decor tooโ˜บ๏ธ are you excited to see it?

I'm so excited! There are no words to describe it! 
The reveal will be on YouTube tomorrow at 10am est. Subscribe and turn on notifications to not miss it!!! It's epic!๐Ÿ˜๐Ÿ”ฅ 
#diymakeover #playroommakeover #ifonlyapril_makeover
NEW video is live on YouTube ๐ŸŽ‰ Last week I mad NEW video is live on YouTube ๐ŸŽ‰

Last week I made this Pottery Barn inspired bulletin board and I'm in love๐Ÿ˜ it turned out so much better than I imagined๐Ÿ˜
Read about all the details and material list on the blog.

And now to the real question - should I put it in the kids playroom (as intended) or keep it to myself?๐Ÿ˜๐Ÿค”

#ifonlyapril_diy #makersgonnamake #makersofinstagram #diyhomedecor
Witch wears Louboutin ๐Ÿ˜‚๐Ÿ‘ป @louboutinworld #d Witch wears Louboutin ๐Ÿ˜‚๐Ÿ‘ป

@louboutinworld #diyhalloweendecor #diyhomedecor #diyhalloween
Load More... Follow on Instagram

Footer

โ†‘ back to top

About

  • Disclaimer

Newsletter

  • Sign Up! for emails and updates

Contact

  • Contact
  • Media Kit

As an Amazon Associate, I earn from qualifying purchases.

Copyright ยฉ IfOnlyApril 2022

Share this ArticleLike this article? Email it to a friend!

Email sent!