• Skip to primary navigation
  • Skip to main content
  • Skip to primary sidebar
If Only April
  • MEET APRIL
  • DIY PROJECTS
    • Kids projects
    • DIY furniture
    • Design plans
    • DIY holiday projects
    • Macrame
    • Transformations
    • Woodworking
  • Home improvement
  • VIDEOS
  • CONTACT
  • SHOP
    • Amazon
    • Etsy
    • Facebook
    • Instagram
    • Pinterest
    • YouTube
menu icon
go to homepage
search icon
Homepage link
  • MEET APRIL
  • DIY PROJECTS
    • Kids projects
    • DIY furniture
    • Design plans
    • DIY holiday projects
    • Macrame
    • Transformations
    • Woodworking
  • Home improvement
  • VIDEOS
  • CONTACT
  • SHOP
    • Amazon
    • Etsy
    • Facebook
    • Instagram
    • Pinterest
    • YouTube
×
Home » WOODEN HOUSE STOCKING HOLDERS {IN 30 MINUTES }

WOODEN HOUSE STOCKING HOLDERS {IN 30 MINUTES }

Please note, that some of the links below are affiliate links and I will earn a commission if you purchase through those links (at no additional cost to you). Thanks for your support this way.

FacebookPinPrintEmail

The idea to make wooden house stocking holders was with me for a while now. Originally, I planned to make a paper village, but it would require a Cricut machine. Since I don’t have one yet, I turned to my favorite material to work with - wood. 

I think these DIY wooden house stocking holders turned out more than lovely and let me show you how so you could make it yourself too!


If you want to see a video version of this tutorial, you can find it HERE

Subscribe to get notifications!


Time: 30 minuts
Cost: $4
Difficulty: Easy


Disclaimer: Please note, that some of the links below are affiliate links and I will earn a commission if you purchase through those links (at no additional cost to you). Thanks for your support this way. 


MATERIALS:

  • 4x4 - 4ft 
  • White acrylic paint (love this set)
  • Brush
  • Decorative hooks x4

STEP BY STEP HOW TO MAKE WOODEN HOUSE STOCKING HOLDER:

  1. Cut your wood to the desired height.  Using a miter saw, cut a “roof” at a 45-degree angle. Boom! 10 minutes and you are done.
  2. At this point, you can stop and have a bare looking wood (which is also very pretty). I couldn’t leave it bare since it had a greenish color in a couple of places. I also didn’t want to paint it over completely and lose the feeling of the grain. So I painted the houses with somewhat called “whitewash”, where you mix acrylic paint with water in a ratio of 2 to 1 and paint it away. Water thins the paint and it turns into this beautiful finish where you get a touch of white but still sees your wood grain.
  3. When the paint dries, add a hook with a nail from the package. And it’s ready! 
  4. As an alternative, you can add a plank underneath and attach your wooden house stocking holders to it. That was my original plan, but my miter saw broke and I had to stop the project as it is. I still love the way it looks and it’s more mobile in case I want to use it for something else in the future. Or add an extra one if I need to.

That’s it! Super simple and can be done in less than an hour. You can add DIY stockings to it. Find here how to make these snowy white felt Christmas stockings. If you are more into the rustic feel of Christmas, check out these no-sew Christmas stockings from a few years back.

IF YOU LIKE THIS YOU MIGHT ALSO LIKE:

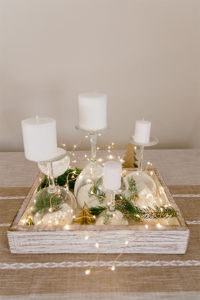
WINE GLASS CANDLE HOLDERS

NATURAL CHRISTMAS WREATH TUTORIAL

ADVENT CALENDAR FOR ADULTS

ADVENT CALENDAR FOR TODDLERS

I hope you like this wooden house stocking holders and will make it yourself! If you do, share it with me, I'd love to see what you create! Follow me on Instagram @ifonlyapril. I try to post stories behind the scenes for my projects.

FIND A VIDEO VERSION FOR THIS PROJECT ON MY YOUTUBE CHANNEL!

Till next time!

xoxo,

April

Share this:

  • Tweet
  • Print

More DIY Holiday projects

  • DIY asymmetrical Christmas wreath with wooden houses
  • How to make an epoxy Christmas tree with wooden circles
  • DIY affordable Christmas decorations ideas for your home
  • An ultimate guide to kid-friendly Christmas ornaments
FacebookPinPrintEmail

Reader Interactions

Leave a Reply Cancel reply

Your email address will not be published. Required fields are marked *

Primary Sidebar

Hi, I'm April! I love woodworking and making things! I hope you will stay and get inspired to create something!

More about me →

Popular

  • Sasha's Fabulous Bedroom Makeover Revealed! (+ budget breakdown)
  • Kid's play office mood board
  • How to make an Anthropologie "Enchanted" dresser dupe
  • How to shop an online auction successfully

Footer

↑ back to top

About

  • Disclaimer

Newsletter

  • Sign Up! for emails and updates

Contact

  • Contact
  • Media Kit

As an Amazon Associate, I earn from qualifying purchases.

Copyright © IfOnlyApril 2024